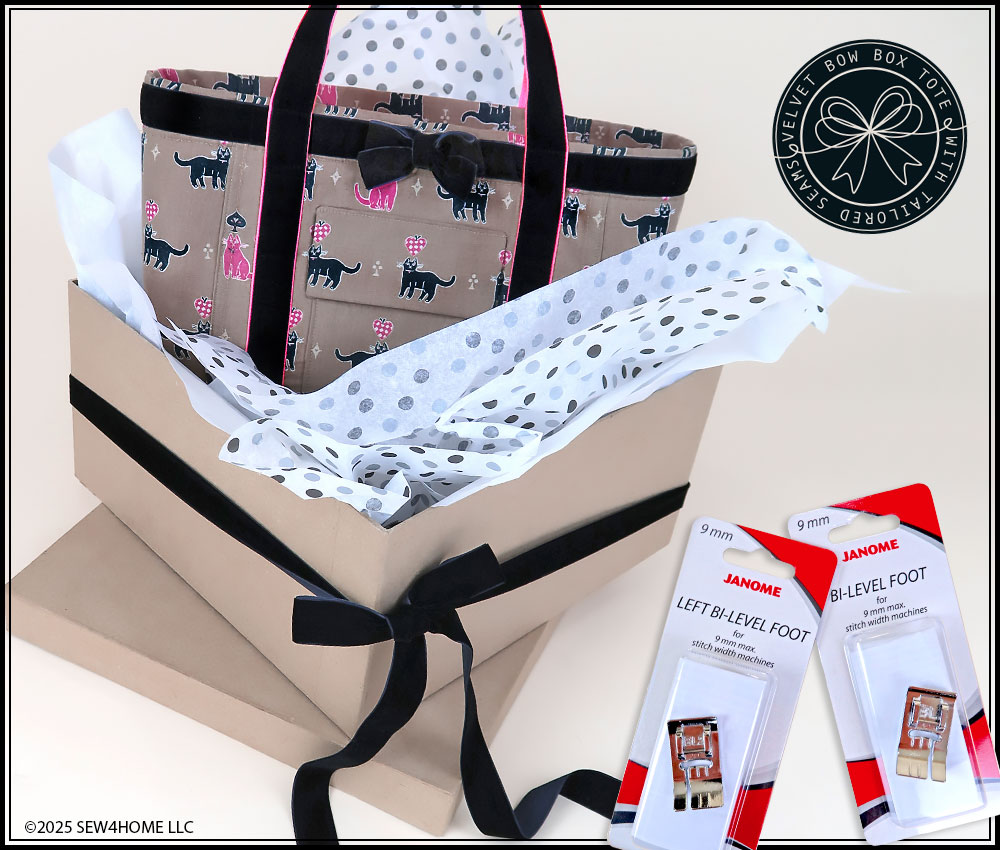
Our favorite foot for this adorable box tote is actually two feet: the Left and Right Janome Bi-Level feet. These specialty feet are precisely engineered into two slightly different levels to accommodate the multiple fabric layers created by a seam, an overlaid element, like ribbon or webbing; and it also perfect for finishing non-seamed edges, such as around the top of a tote. By placing the foot along a seam (the slightly lower side against the edge), the split levels guide the foot along the seam, creating a consistent line of edgestitching or topstitching. When the Bi-Level foot first came on the scene in 2022, it was only available with the split level guide on the right side of the foot. Now, because Janome engineers listen to what their customers want, there is a left side version of the foot. We used both to complete this tote.
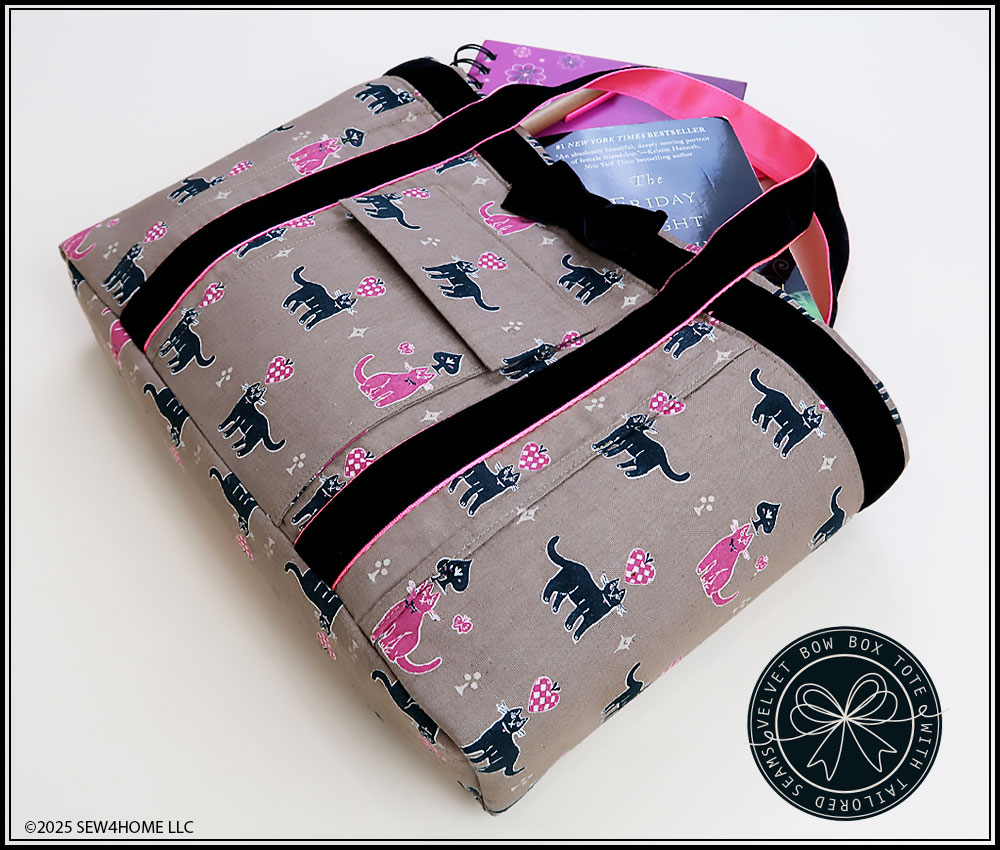
People often complain about wrinkling or “bubbling” when they layer items – especially if those layers are smaller and/or narrower as is the case on this project with its compact front pocket and flap as well as the layered webbing and ribbon handles. One of the best ways to combat this is to stitch in the same direction along both sides of the item. For example, if you’re going down one side then simply flipping and going up the opposite side, the two sides have a tendency to want to fight against themselves, pulling in opposite directions. Having both Left and Right options of the Janome Bi-Level foot makes it fast and easy to stitch both sides in the same direction. Smoother. Better.

We worked hard to put together a logical construction process that allows you to work with flat layers the majority of the time. Because of this, even with all its tailored accents, this tote is doable for all levels of sewing enthusiasts. Our top tips for success: 1) Read through the instructions a couple times prior to starting in order to “make it in your head.” 2) Practice unfamiliar techniques with scraps before cutting into your final fabric. 3) Collect all your thread, wind all your bobbins, pull out all the recommended specialty feet. 4) Be kind to yourself; we all turn to our seam ripper now and then.
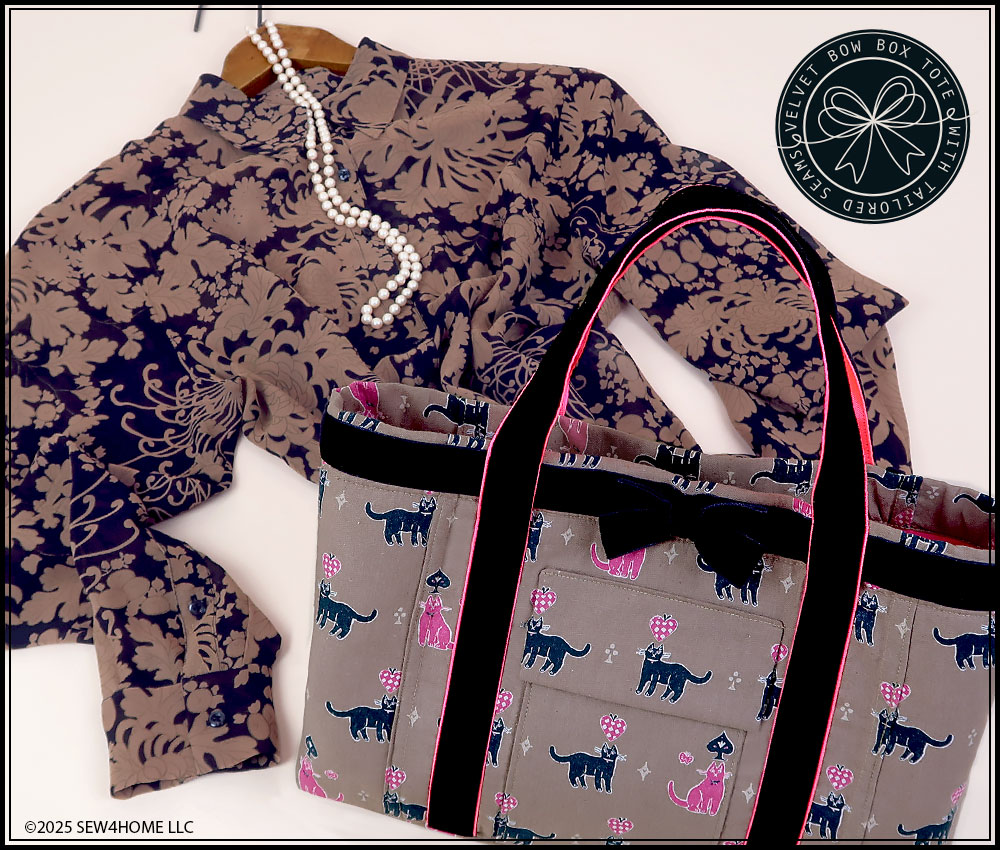
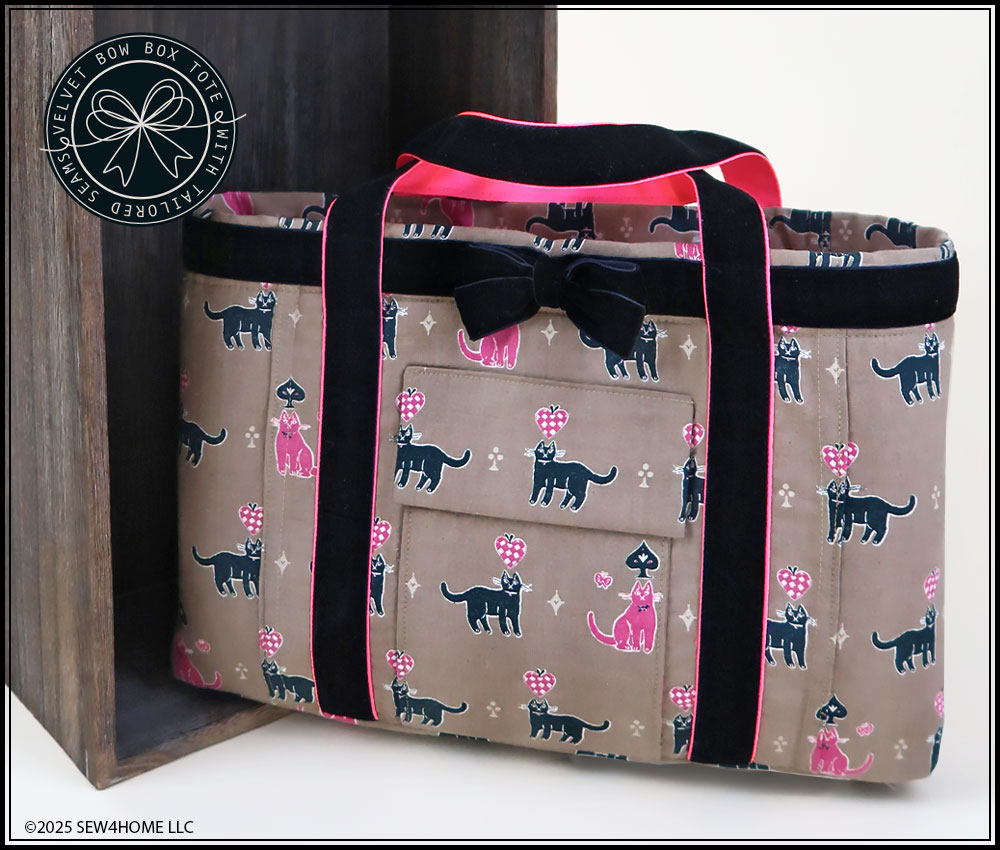
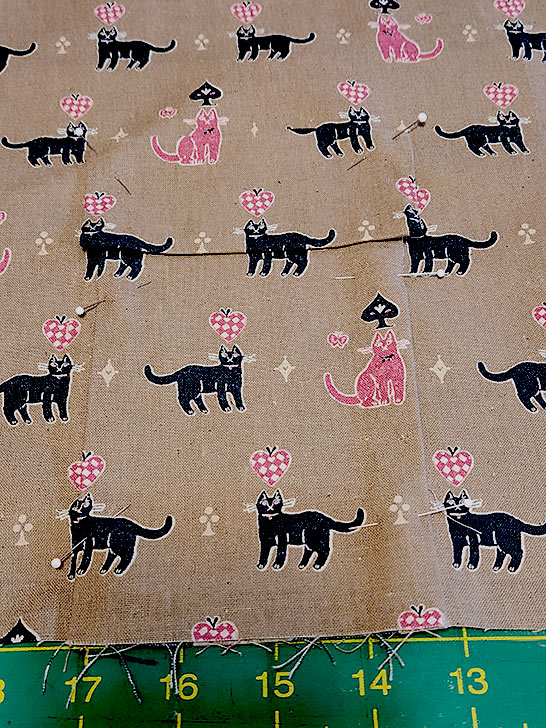
If you’re a S4H regular, you know another of our rooftop-shouting-mottos is, “We love to fussy cut!” This tote is no exception. We show how we pattern-matched our pocket and flap to the background panel and kept our cute kitties all in a row. It’s never mandatory (most design choices in sewing are never mandatory), but fussy cutting always kicks things up a notch. There are also links included below to full on-site tutorials for these techniques and several others as well as links to video summaries on our YouTube channel,
Our thanks go out to Janome America for sponsoring this fun project and for providing us with the coolest presser feet and accessories to play with and present to you. If you’re looking for your next machine, we invite you to visit a local Janome dealer for an in-person test stitch on the models we consider to be the best in the industry. To find out more before you go, visit the Janome website and follow them on social media.
Sewing Tools You Need

- Sewing Machine and standard presser foot
- Satin Stitch foot; optional, we liked being able to have a transparent foot for the some of the precise stitching
- Zipper foot
- Bi Level foot – we used both the Right and Left versions of the foot
NOTE: As mentioned above, one of our main goals with this project was to show the Janome Bi-Level feet in action, proving once again that using the correct foot for the job always makes the process easier and the finish better. - Topstitch Needle – 80/12
Fabric and Other Supplies
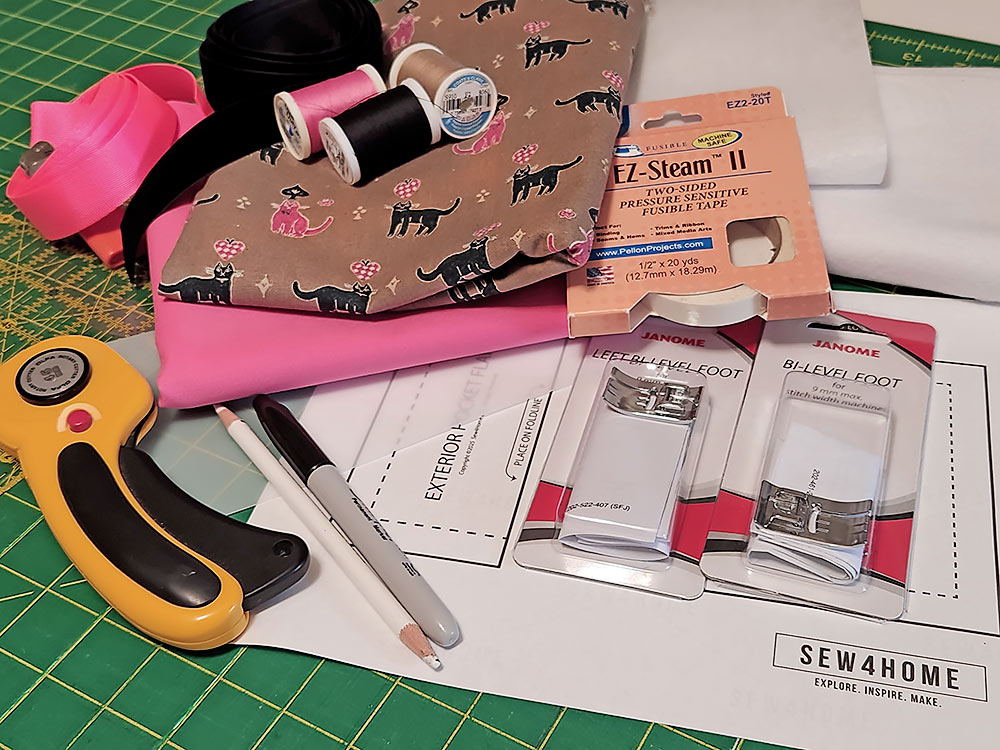
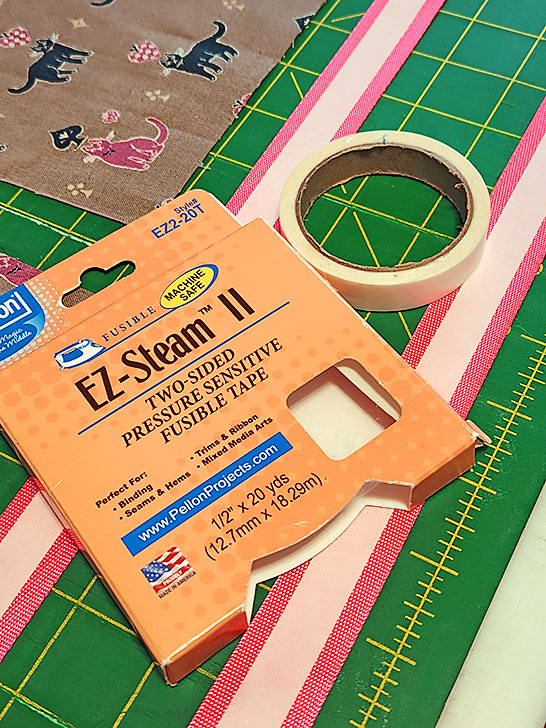
- ¾ – 1 yard * of 44”+ wide mid-weight fabric for the exterior; we used Cats in Red by Sanae Sugimoto for Kokka Co Ltd, a mid-weight cotton-linen sheeting
NOTE: *We recommend starting with at least a ¾ yard cut, going up to a full yard if you want to follow the same kind of fancy fussy cutting and pocket-to-panel matching we did with our horizontal kitty print. - ¾ yard of 44”+ wide quilting weight fabric for the lining elements – we suggest a color to coordinate with your handle webbing; we used Kona Cotton in Camilla from Robert Kaufman Fabrics
NOTE: If you can find an appropriate match to your lining fabric in a pre-packaged extra wide double fold bias binding, feel free to use this option instead of creating your own binding from the lining fabric. If you decide to go this way, you can likely get away with just ½ yard of lining fabric. - ½ yard of 45″+ wide fusible fleece; we used Pellon Thermolam Plus
- ½ yard of 45″+ wide mid-weight fusible interfacing; we used Pellon Décor Bond
- 3 yards of ⅞” wide velvet ribbon or similar for the handle accent and the top-of-bag accent – this amount includes extra to allow you to create a pretty bow for the front of the bag; we used a single face black velvet
- 2 yards of 1” wide flexible webbing for the base of the handles – we suggest a bright color selected from within your fabric’s motif; we used hot pink nylon webbing – look for webbing indicated as good for leashes, backpacks or seatbelts; you want a flexible webbing that will curve nicely, not a stiff polypropylene
- All purpose thread to match fabrics and ribbon for construction
- All purpose thread in a color slightly lighter than your exterior fabric for the topstitching detail
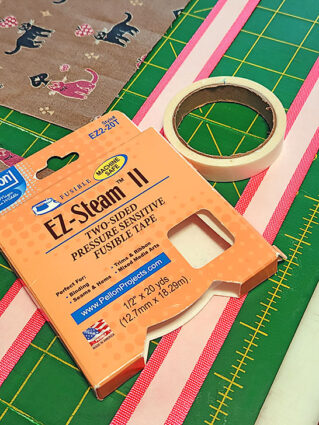
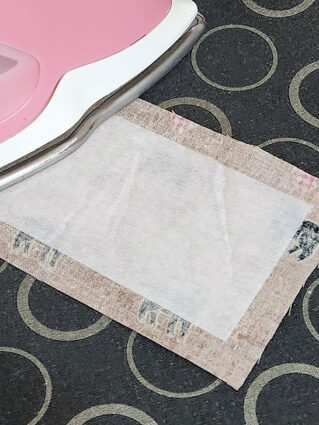
- ½” wide fusible seam tape; optional but our recommendation for holding the webbing and velvet layers together during construction
- See-through ruler
- Tape measure
- Fabric pen or pencil
- Seam gauge
- Seam ripper
- Scissors
- Small sharp scissors or appliqué (duckbill) scissors; optional for flat felled seams
- Rotary cutter and mat
- Iron and ironing board
- Pressing cloth to protect the ribbon and webbing
- Straight pins
- Hand sewing needle
Getting Started and Pattern Download
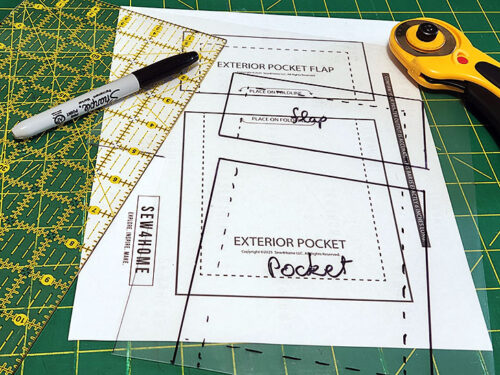
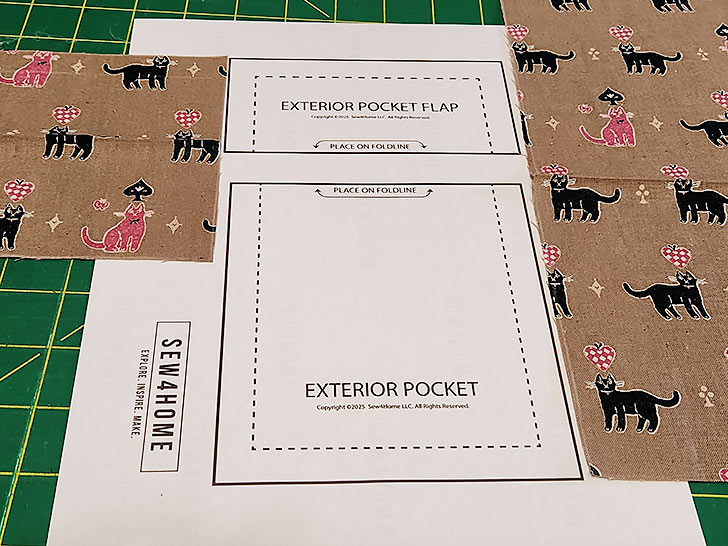
- Download and print out our ONE pattern sheet that includes the pattern pieces or the front pocket and the front pocket flap.
IMPORTANT: This pattern page is ONE 8½” x 11″ sheet. You must print the PDF file at 100%. DO NOT SCALE to fit the page. There is a guide rule on the page so you can confirm your final printout is to scale. Print horizontally (landscape).

- Cut out each pattern piece along the solid line. Notice each pattern piece is designed to be cut on the fold. This is done to make fussy cutting for a perfect pocket-to-panel match easier.
- From the exterior fabric, fussy cut the following:
TWO 7¾” wide x 10¼” high rectangles for the side panels
TWO 9¼” wide x 10¼” high rectangles for the main front and back panels
NOTE: If you have a strong horizontal motif as we did with our rows o’ kitties, fussy cut your panels in a line across your fabric so when all the panels are seamed together, the rows will align.
ONE 13” wide x 3½” high rectangle for the base
Using the pocket and flap patterns, and cutting on the fold, cut ONE of each — if fussy cutting and pattern-matching follow the steps below to cut the pocket and flap.
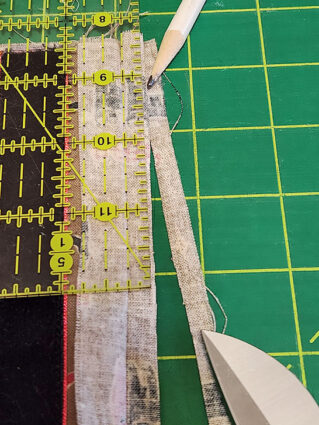
CUTTING AND MATCHING A POCKET TO A BACKGROUND PANEL
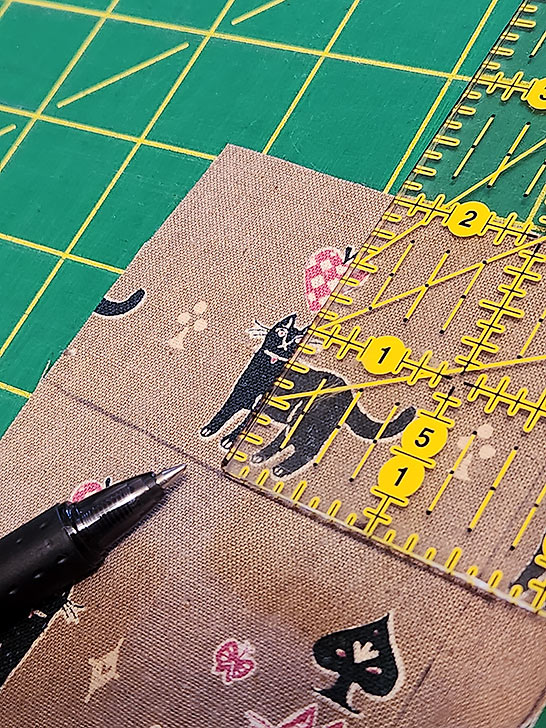
We’ve outlined some of our matching process here, but for even more detail, take a look at our full step-by-step tutorial on matching a pocket to a background panel. We also have a YouTube video you can review. This pattern matching is not mandatory, but it does add a professional finish.
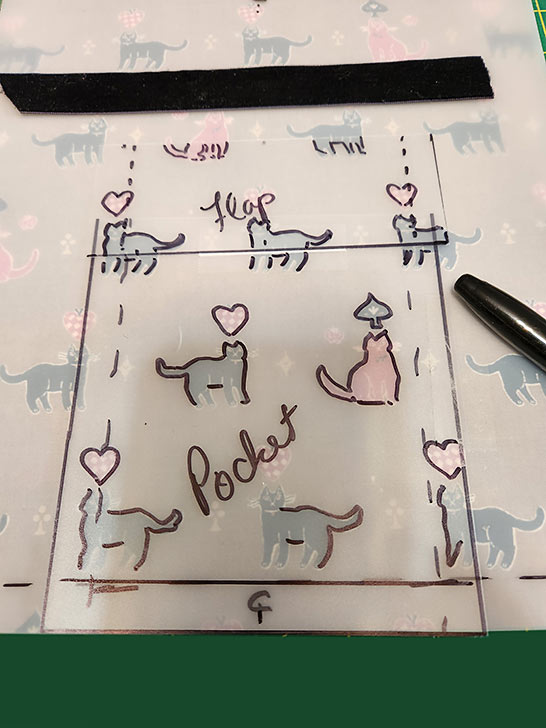
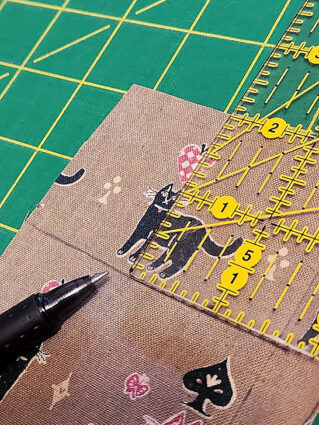
- The key is to first trace the pocket and flap patterns onto see-though paper or plastic.
- Cut your main front panel, centering your fabric’s motif side to side and top to bottom. With our cute kitty print, we worked to balance the number of of black and pink kitties and made sure our horizontal rows of kitties were perfectly straight. We also kept in mind that there will be eventually be a ribbon across the top.

- Place your transparent pocket and flap templates into position (centered) onto the main front panel and trace several bits of the motif onto the template.

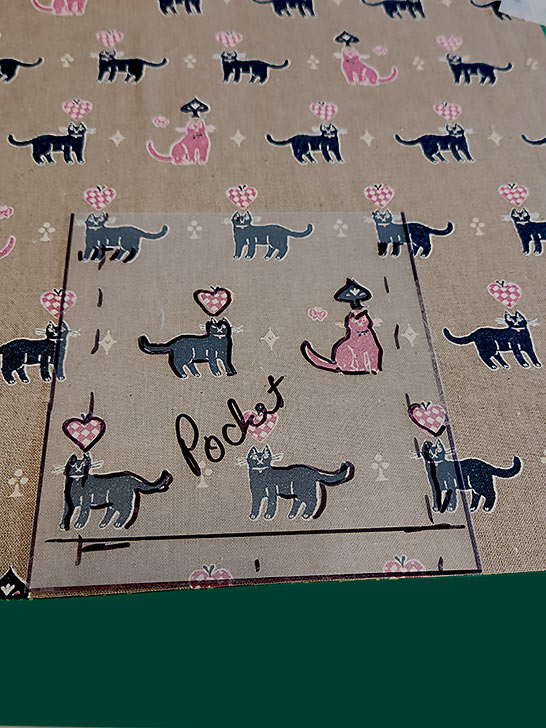
- Starting first with the pocket, bring the traced template to the remaining fabric, moving the template around until you have a perfect match of your traced elements with the real elements on the fabric.

- Secure the template, and stop… this pattern is designed to be “cut on the fold.” This means you need to extend upwards in order to create the full cut. You can confirm this “upper half” with the original paper pattern or by simply measuring your base and extending by the same amount.
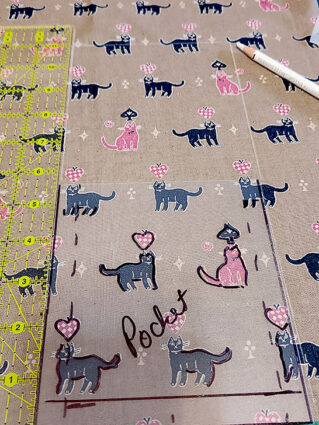
- Cut out the final full pocket panel.
- Repeat to create the flap in the same manner. In the photo below, you can see our fussy cut, pattern-matched pieces with their center folds aligned to the original paper pattern.

NOTE: Pattern matching is a great skill that adds a professional finish to all kinds of projects. It just takes a little extra fabric, a little extra patience, and those tracing skills you learned back in kindergarten. Remember to review our site tutorial or YouTube video if you are brand new to the technique.


BACK TO STANDARD CUTTING
- From the lining fabric, cut the following:
TWO 15½” wide x 8½” high rectangles
ONE 13” wide x 3½” high rectangle for the base
ONE 9” x 9” square for the lining pocket
ONE 2” x 30” strip – on the bias – for the the interior seam binding around the base panel
NOTE: As noted above, if you can find an appropriate match to your lining fabric in a packaged bias binding, feel free to use this option instead. If you decide to go this way, you can likely get away with just ½ yard of lining fabric. - From the fusible fleece, cut the following:
TWO 6¾” x 8” rectangles for the exterior side panels
TWO 8” x 8” rectangles for the main front and back panels; this slightly narrower than normal cut insures the fleece stays out of the wider flat felled seams
ONE 12” x 2½” rectangle for the base - From the mid-weight fusible interfacing, cut the following:
TWO 14½” x 7½” rectangles
ONE 12” x 2½” rectangle for the base
ONE 8” x 4” rectangle for the lining pocket
Using the pocket and flap patterns, but cutting on the dotted seam line rather than the solid outer line, cut ONE of each - From the velvet ribbon, cut THREE 30” lengths: two for the handles and one for the top accent. The remainder will be used for the final 3” bow.
- From the webbing, cut TWO 30” lengths.
At Your Sewing Machine & Ironing Board
Make the exterior pocket and pocket flap
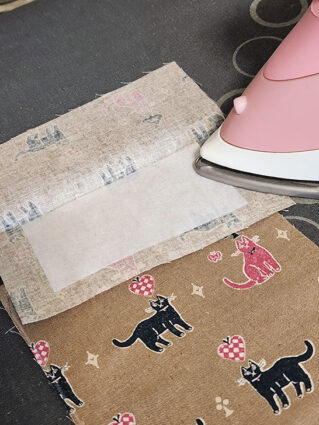
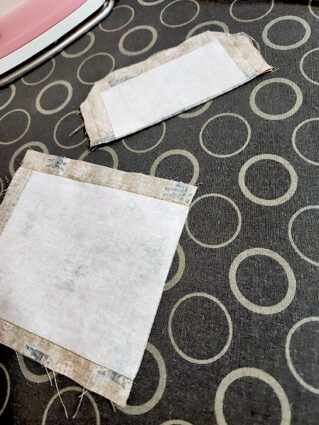
- Find the pocket and its appropriate interfacing piece.
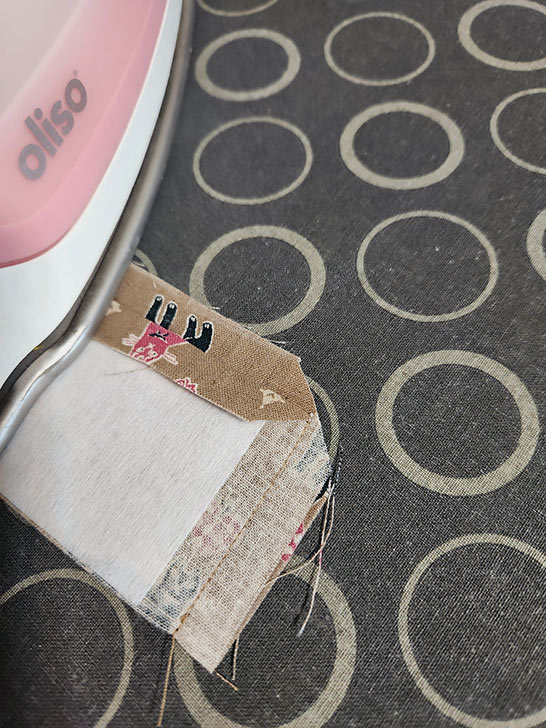
- Apply interfacing to one half of the pocket. The interfacing should go against the half of the pocket that will be the front (the side facing out). The interfacing is placed along the center fold so there is ½” of fabric showing beyond the interfacing along the three outer sides.
- Following manufacturer’s instructions, fuse in place.

- Find the flap and its appropriate interfacing piece. Repeat to apply its interfacing in the same manner.
- Fold the pocket in half, right sides together, and pin along both sides. The folded edge is the top of the pocket and the bottom is open; it will be caught in the base seam.
- Fold the flap in half, right sides together, and pin along both sides and across the top, leaving a 1-2” gap at the center of the top that will be used to turn the flap right side out. The folded edge is the bottom of the flap.
- Using a ½” seam allowance, stitch both side seams on the pocket.
- Using a ½” seam allowance, stitch along both sides and across the top of the flap, sharply pivoting at the corners and locking your seam at either side of the 1-2” opening.
- On both sewn pieces, clip the corners, being careful to not cut into the seam. Press open the seam allowances.
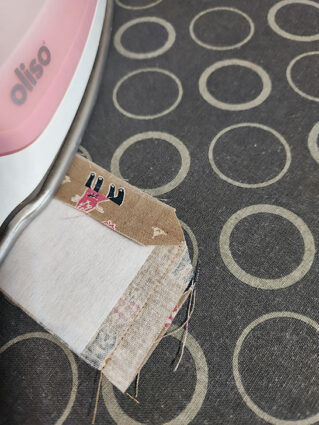
- Turn the pocket right side out through the bottom opening. Gently push out the upper corners so they are nice and sharp – a knitting needle, chopstick or point turner works well for this. Press flat.
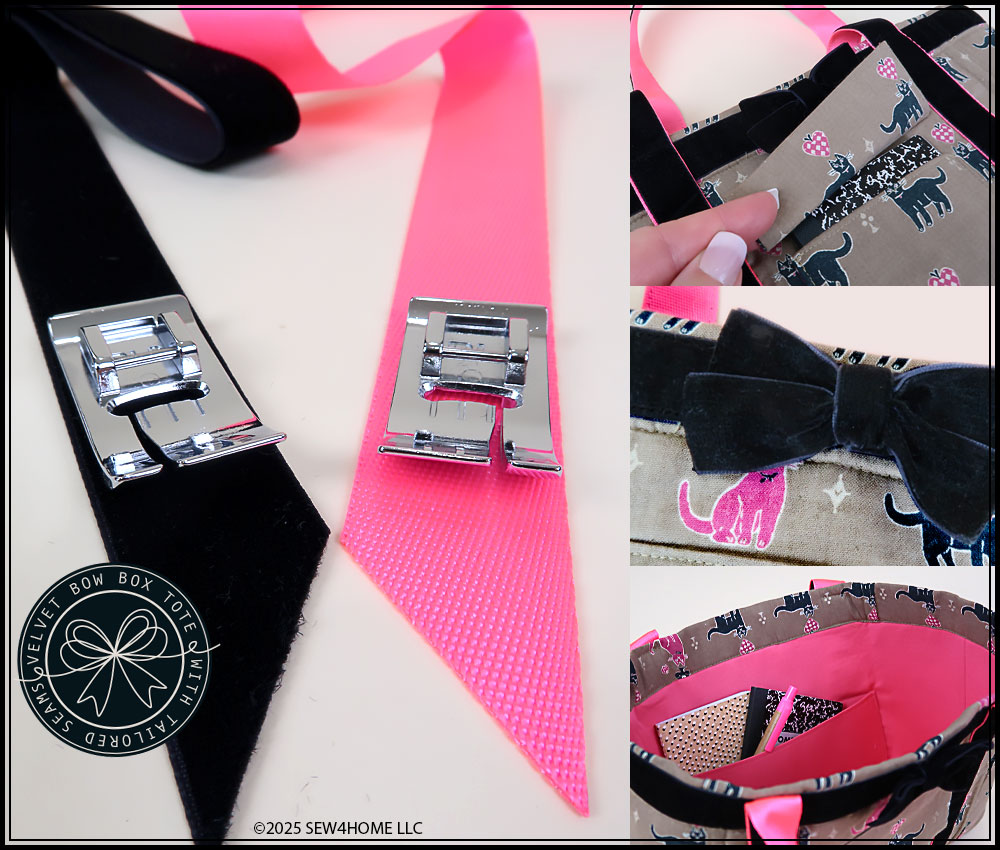
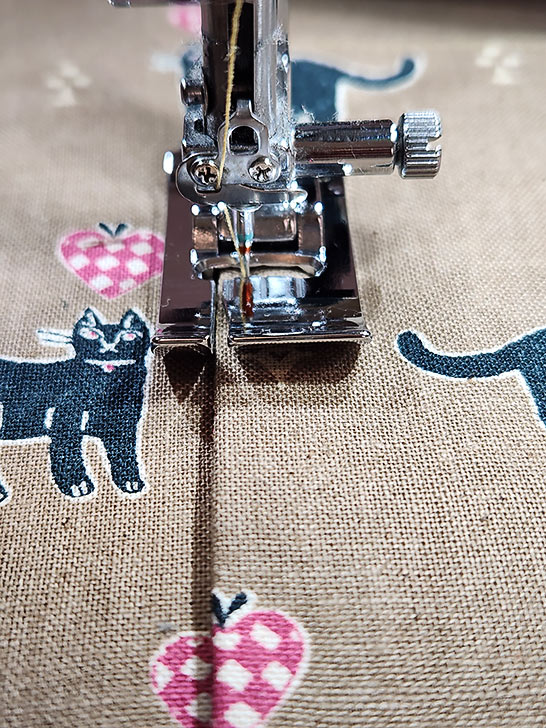
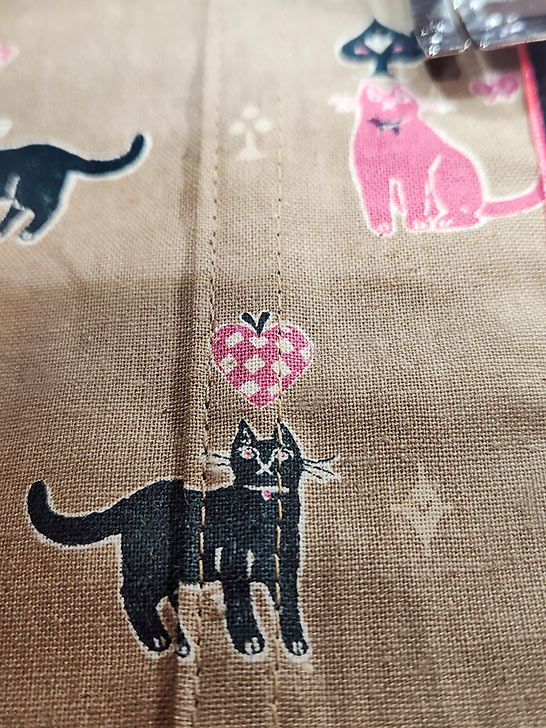
NOTE: We opted to edgestitch across the top folded edge of the pocket. This is a nice finish that will match the edgestitching you’ll use below to stitch the pocket in place, it will also help give the pocket top a bit of extra stabilization. The photo below is a close-up of this edgestitching on the finished bag.

- Turn the flap right side out through the upper turn gap. Gently push out the corners so they are nice and sharp. Press flat, pressing in the raw edges along the turn gap so they are flush with the sewn seam.


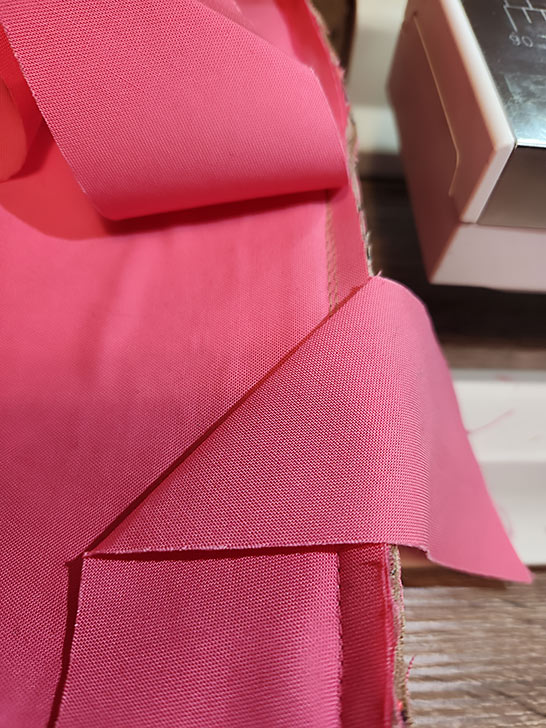
Place the pocket and flap on the front panel – using the Bi-Level feet
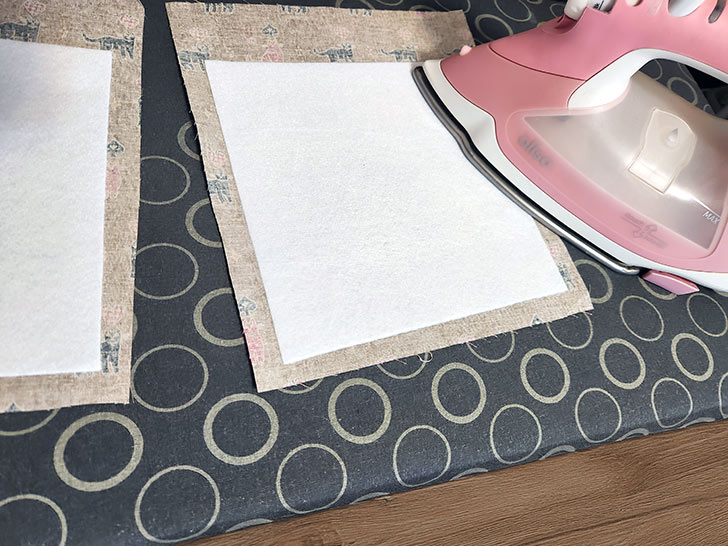
- Find the two 9¼” x 10¼” front and back exterior panels and the two 8” x 8” rectangles of fusible fleece.
- On each piece, center the fleece side to side on the wrong side of the fabric, leaving ⅝” of fabric showing beyond the interfacing along both sides and ½” showing across the bottom. This means the top of the fusible fleece sits 1¾” down from the top raw edge of the panel. Following manufacturer’s instructions, fuse in place.
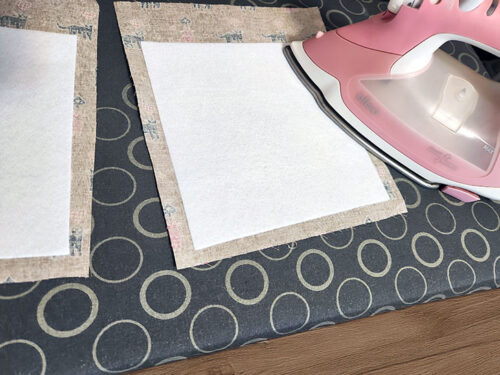
NOTE: Since you are placing and ironing already, now is also a good time to also add the fusible fleece to the exterior side panels. It is centered in the same manner as the front and back main panels. Simply set aside the side panels when done. - Find the front exterior panel. If you followed our fussy cutting and pocket-to-panel-matching steps, you have a definite front panel to match your pocket. If you did not, simply choose one of the 9¼” x 10¼” panels to be the front.
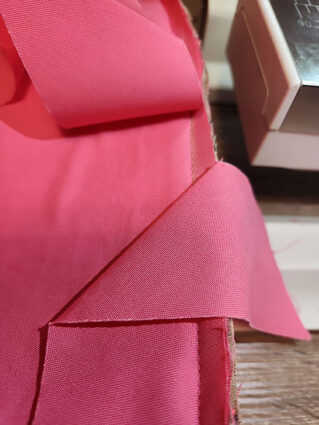
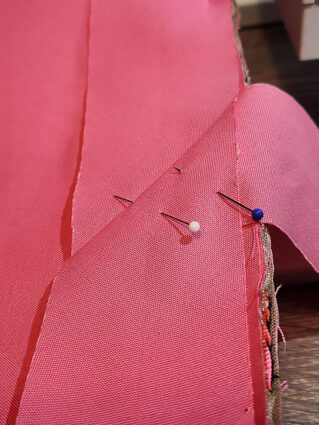
- Flip over the front panel so it is right side up and flat on your work surface. Find the completed pocket and flap and place them into position on the front panel.
- The pocket itself should be centered side to side and its bottom raw edges should be flush with the bottom raw edge of the panel. If you pattern-matched, the bottom edges are still flush but you are also aligning your fussy-cut motifs. Pin in place.

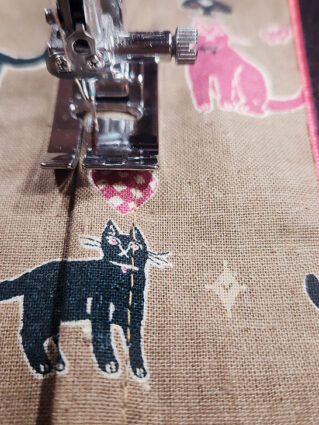
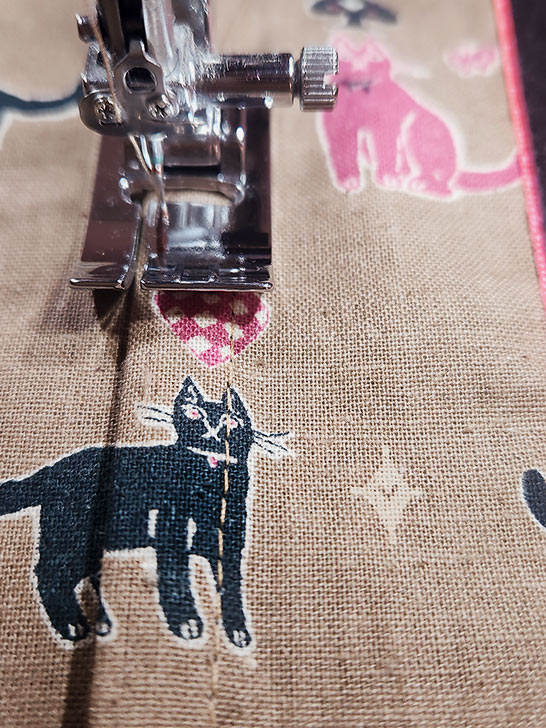
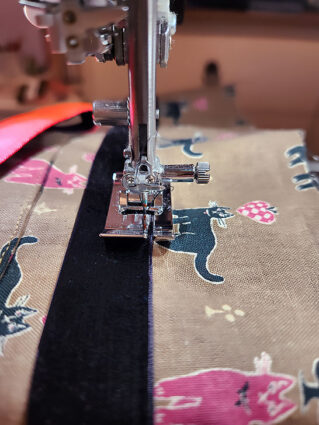
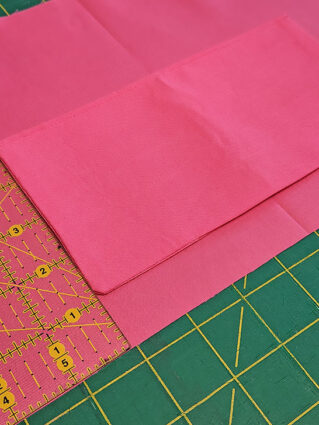
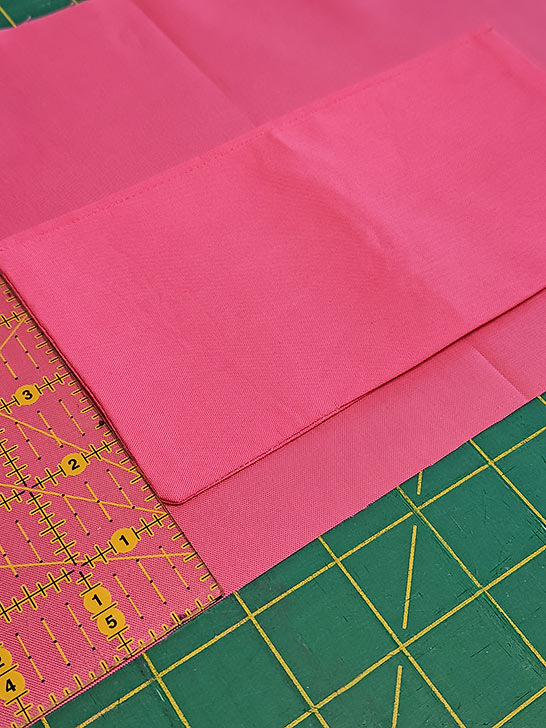
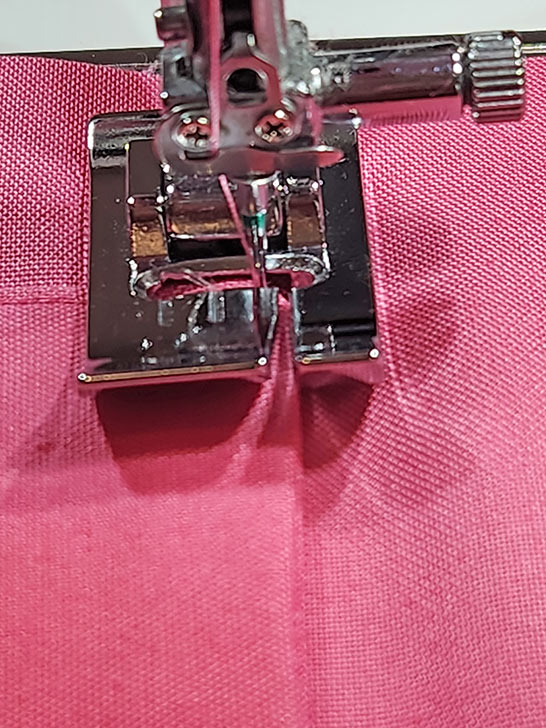
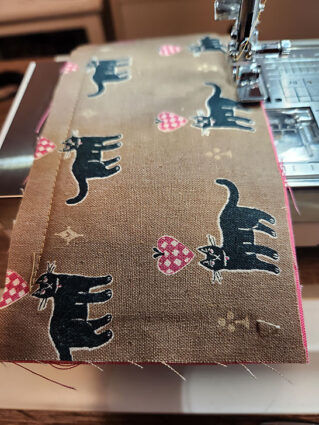
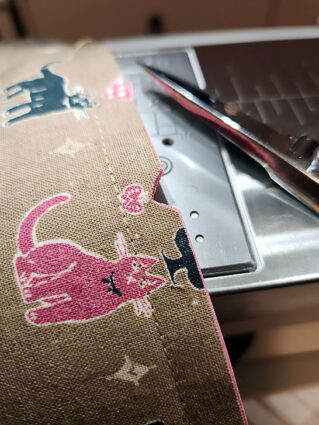
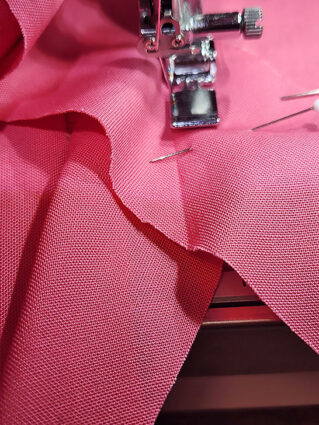
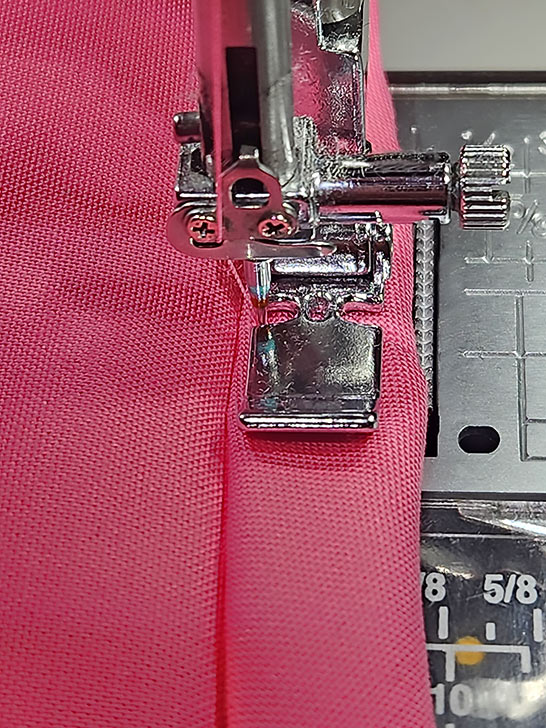
- If possible, now is the time to attach the amazing Janome Bi-Level foot to edgestitch the pocket to the base panel along both sides (the bottom raw edges of the pocket remain unsewn).
NOTE: As mentioned, using this foot is optional. That said, adding specialty presser feet to your sewing toolbox is one of the top ways to make your sewing easier and your finishes more professional. - We also slightly lengthened our stitch and threaded the machine with our “contrasting” topstitching thread in the top and bobbin. Un-pin the flap for the best access to the sides of the pocket.
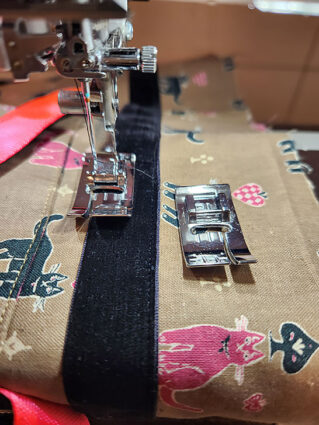
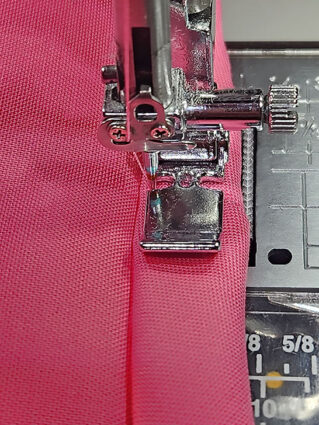
- We attached the Left Bi-Level foot, adjusting the needle position for a tight edgestitch and stitched the left side of the pocket.
- We then popped off the Left Bi-Level foot and snapped on the Right Bi-Level foot to edgestitch the right side of the pocket. These are snap-on feet so they are super easy to switch out.
- For the best look, use a lock stitch at the pocket top. You can use the same at the bottom of the seam or a simple back tack. If you do not have a lock stitch function, you can very carefully back tack at the pocket top or you could leave your thread tails long, pull them through to the back with a hand sewing needle, and hand knot to secure.
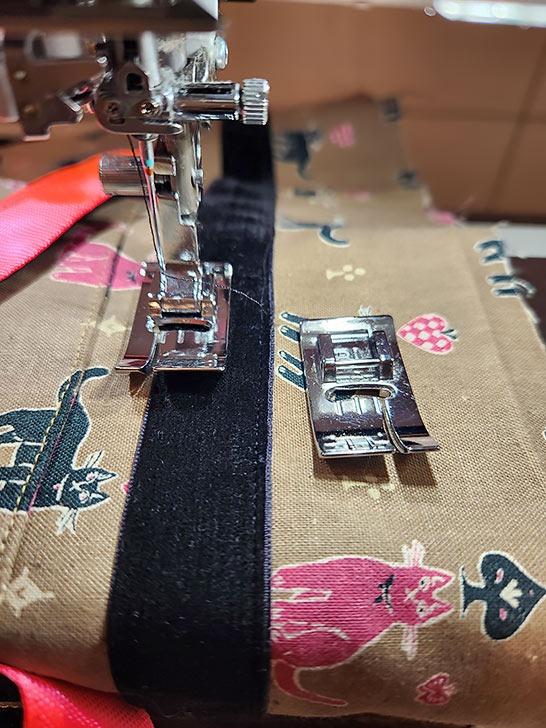
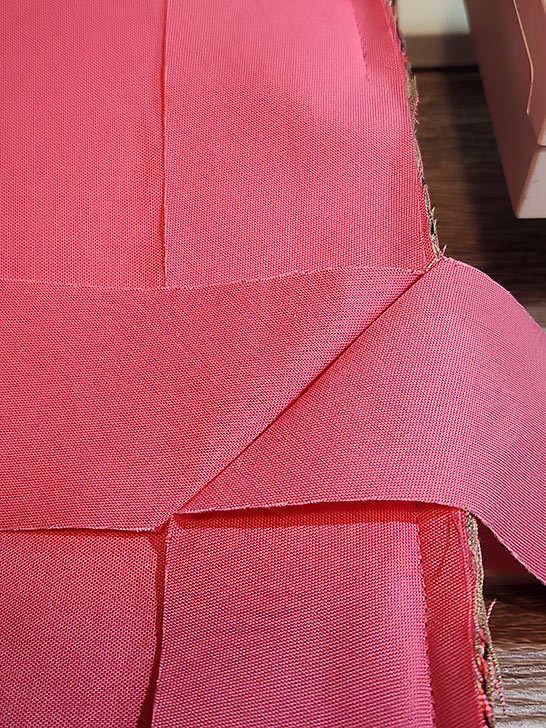
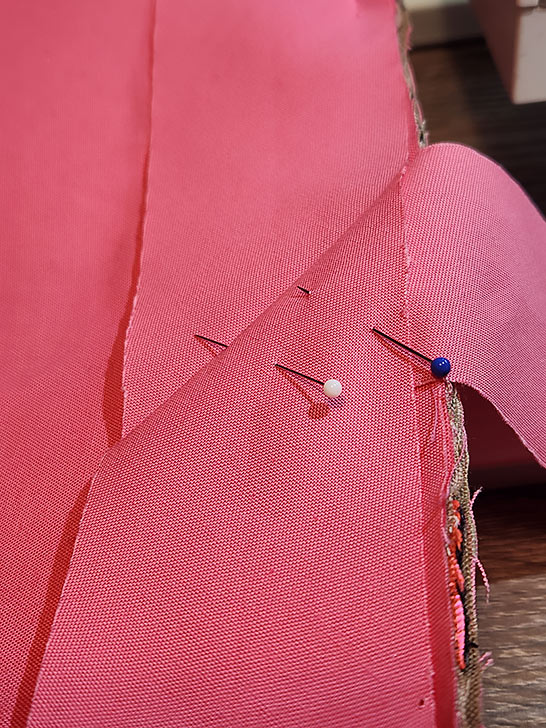
- Re-pin the flap back into position. It should be centered over the pocket with a 1” overlap. This means the top of the flap sits 3¾” down from the top raw edge of the panel. Again, if you pattern-matched, you are also aligning your fussy-cut motifs to the pocket and the panel. Pin in place.
- Still using a Right Bi-Level foot and the contrasting thread, edgestitch across just the top of the flap. This single seam also seals the opening used for turning.
NOTE: You’ll see several notes about stitching in the same direction along both sides of an item. We explain the benefits along the way, and there are more tips, hows, and whys in the introduction above.
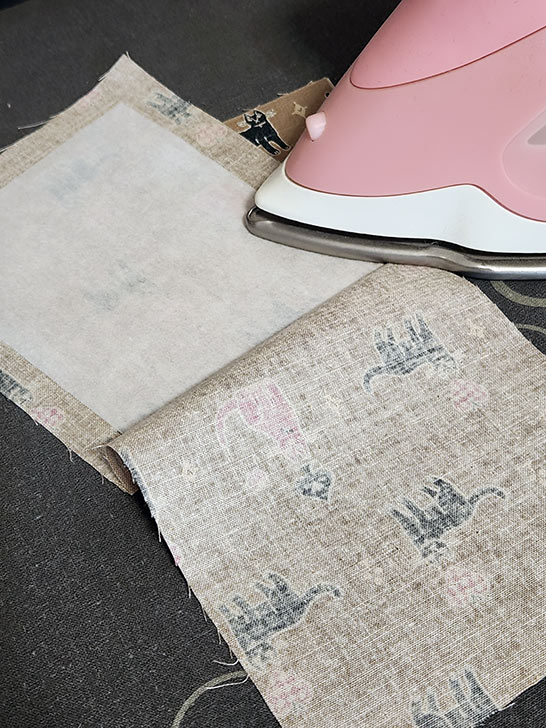
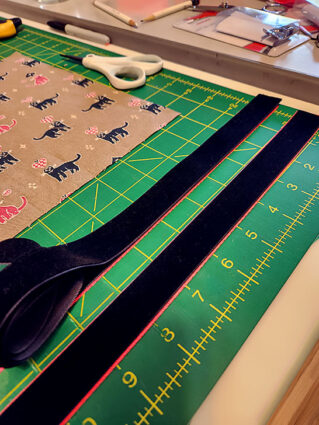
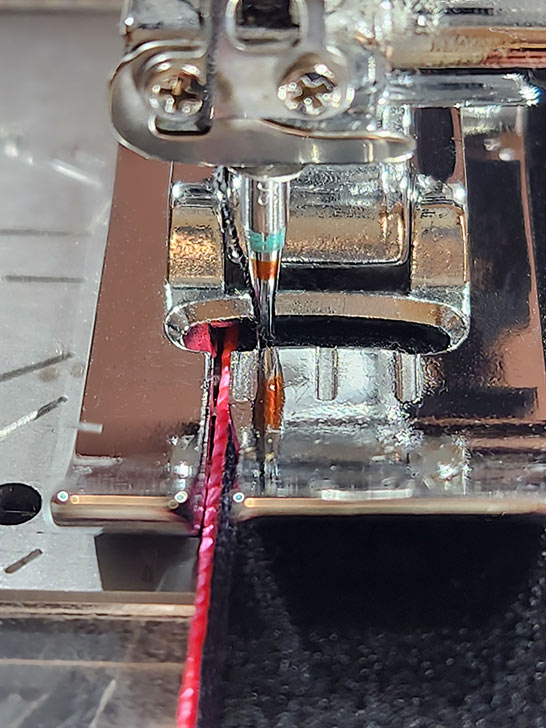
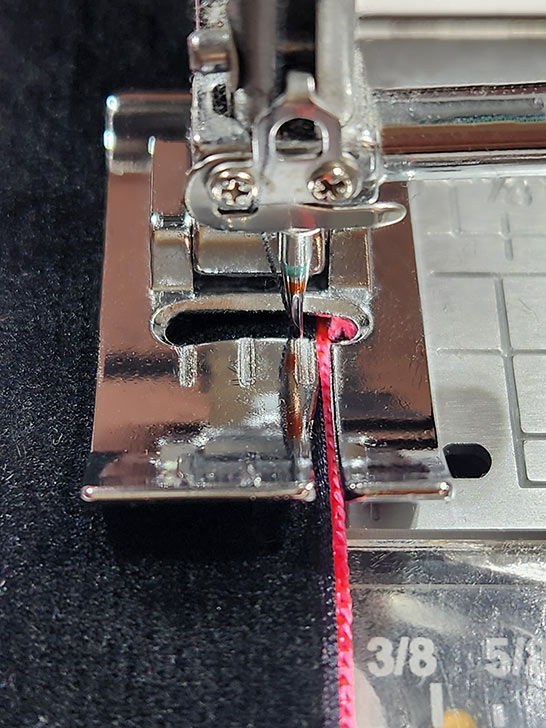
Create the two layer handles
- Find the two 30” lengths of webbing and the two 30” lengths of ribbon.
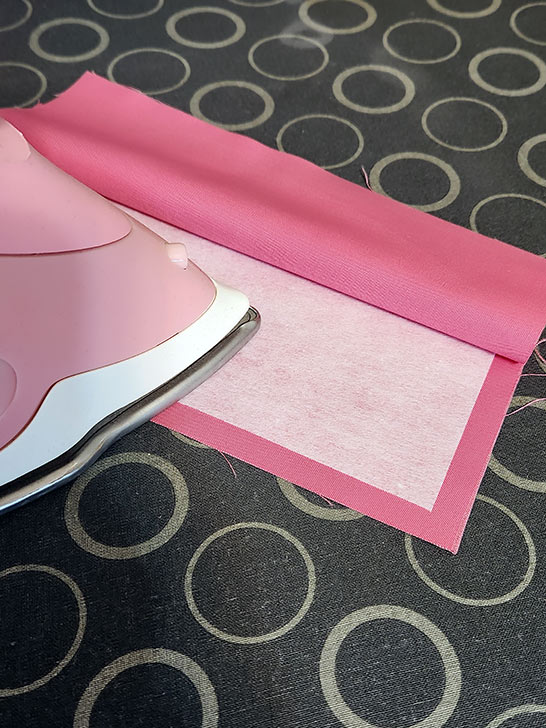
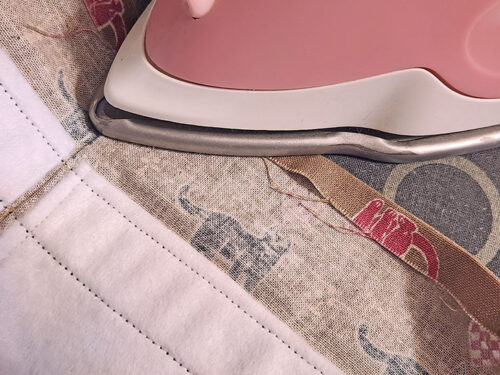
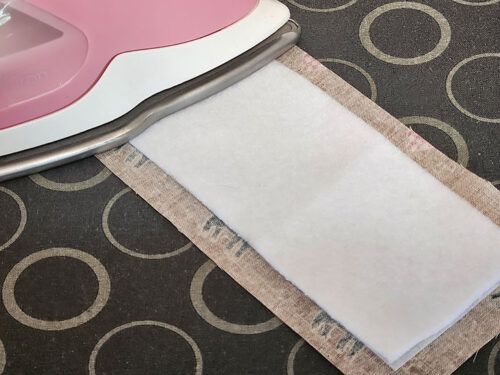
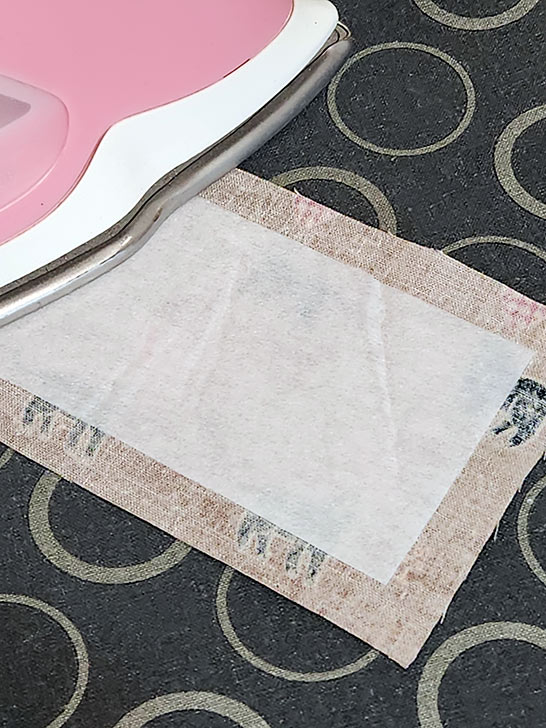
- We recommend using a fusible seam tape between the webbing and the ribbon to help the two layers stay centered.
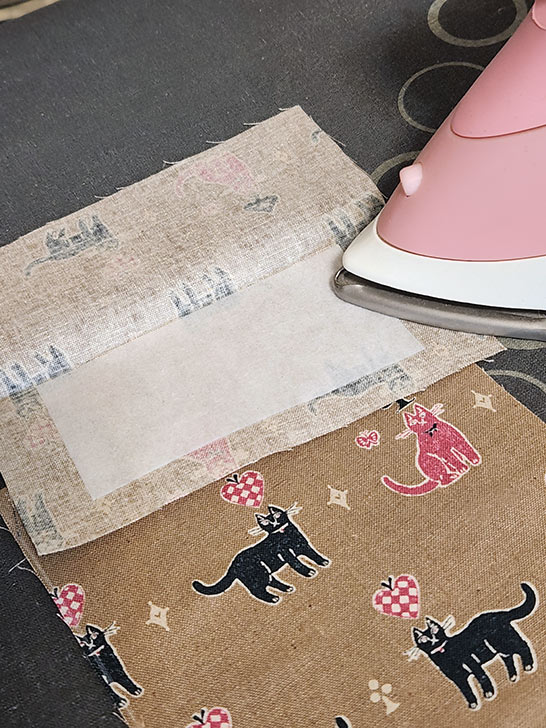
- If possible, set up on a flat work surface that is at least 30” wide so you can stretch out and keep everything flat. Apply the fusible seam tape to the webbing.
- Center the ribbon on top of the webbing. We used a ⅞” ribbon and a 1” webbing (standard widths for these items), which means there is only a sixteenth inch of webbing showing to either side of the ribbon – just a highlight line against the body of the bag, but the webbing shows up as a wonderfully bright pop of color against the back of the upper handle loops. Fuse together the layers, using a pressing cloth to protect the ribbon and velvet from the heat of the iron.
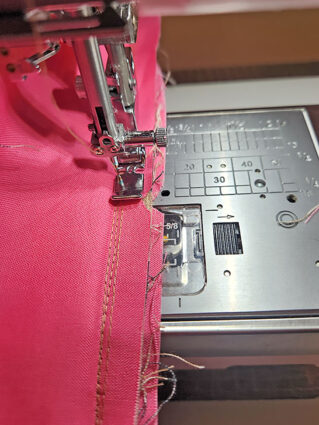
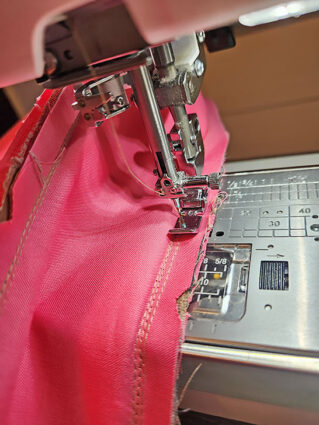
- Sewing together the layers is another great opportunity for the two Bi-Level feet.
- Thread the machine with thread to best match the ribbon in the top and to best match the webbing in the bobbin. Slightly lengthen the stitch.
- Attach the Left Bi-Level foot, positioning the opening so the edge of the webbing is flush with the inner edge of the lower side of the foot. Adjust the needle position to the left so it drops along the edge of the ribbon – you do not want to stitch on the webbing – just the ribbon.
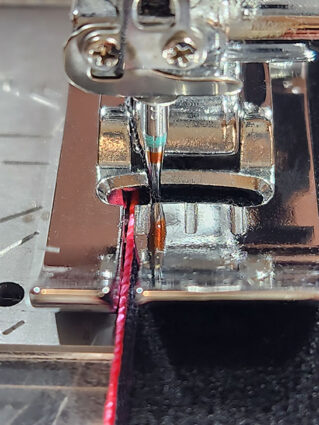
- Stitch the length of the strap along the left side.

- Switch to the Right Bi-Level foot and stitch the full length of the right side in the same manner.


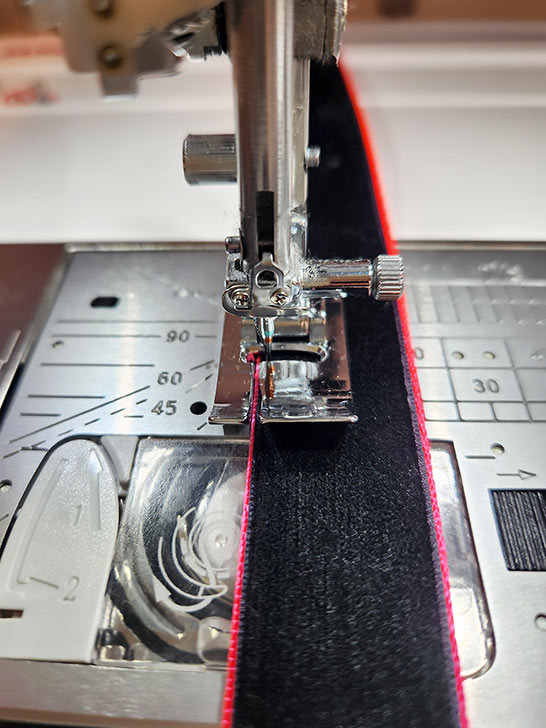
Attach the handles to the front and back panels
- Find the front panel, which should have its pocket in place, and the plain back panel. Both panels should also already have fusible fleece adhered.
- Start with the front panel. Lay the handle loop in place so the ends are flush with the bottom raw edge of the panel and inner edges of the webbing are ½” from the pocket.
- Pin the handle in place along both sides from the bottom up, stopping 3½” from the top raw edge of the panel.

- The machine should still be threaded with thread to best match the ribbon in the top. You could leave the thread that matched the webbing in the bobbin or switch to a bobbin full of thread that matches the exterior panel. It doesn’t really matter as the bobbin thread will be hidden by the lining. Keep the slightly lengthened stitch.
- We again used the Bi-Level feet, stitching down one side with the Right Bi-Level foot. You are carefully stitching directly on top of the previous seam you made to secure the layers.
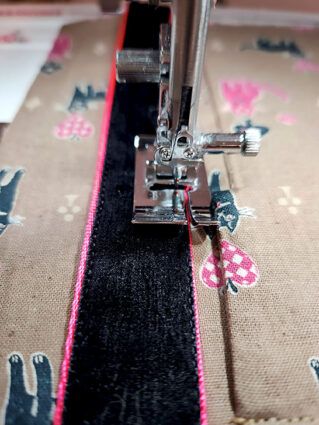
- Then switching to stitch down the opposite side with the Left Bi-Level foot. Remember our note above about how important it is to stitch in the same direction along both sides.
- When done with both sides, return to your 3½” stop point and stitch across, being careful to start and stop this seam within the ribbon; you don’t want to stitch onto the webbing or the panel itself.
- Repeat on the opposite “leg” of the handle loop.
- With the front panel complete, use it as a template to place the handle on the plain back panel and stitch the remaining handle loop in place so it is a perfect match to the front panel.


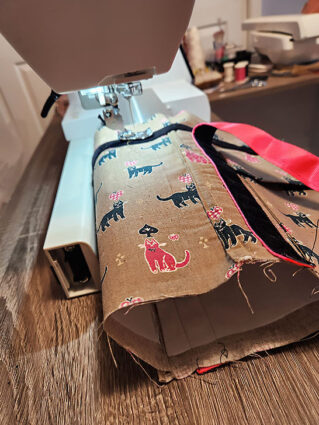
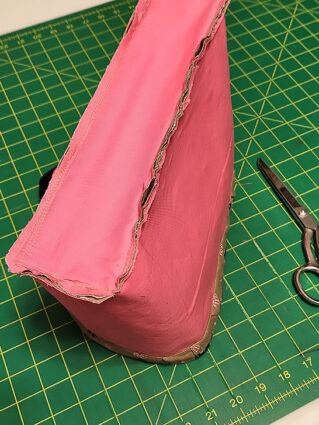
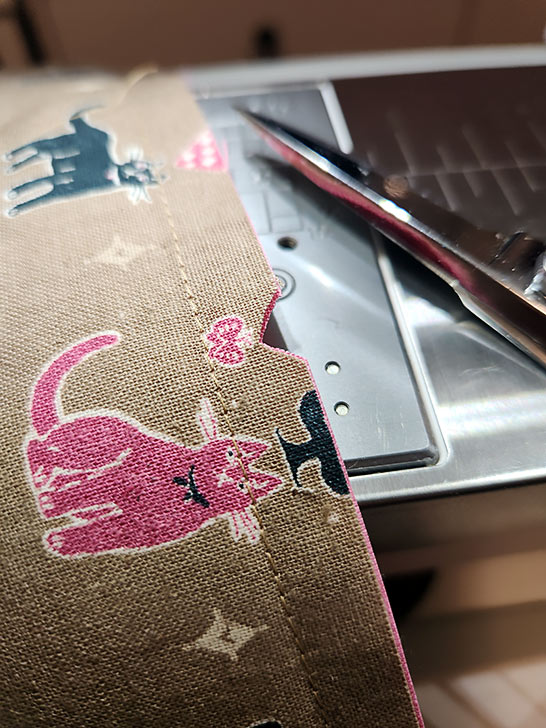
Add the side panels with flat felled seams
- The side panels wraparound, attaching to the front and back panels with outside flat felled seams. We have summarized our steps here, but if you are new to this type of seam, we have a step-by-step tutorial you can review prior to starting.
- The order of the seams is important so you can work with flat panels for three of the four seams – yay for flat!
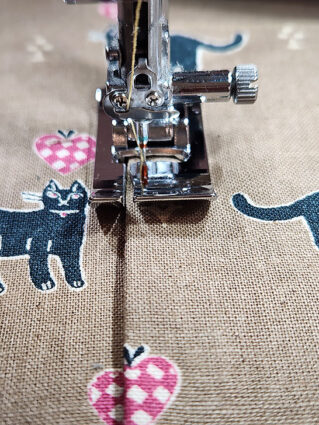
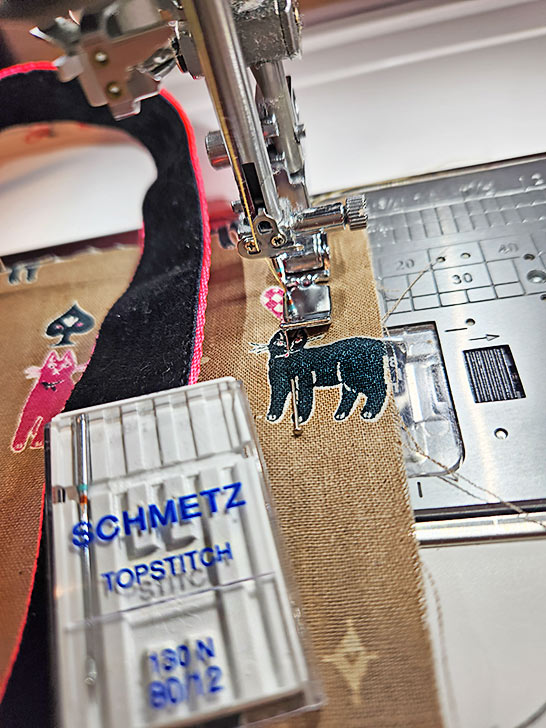
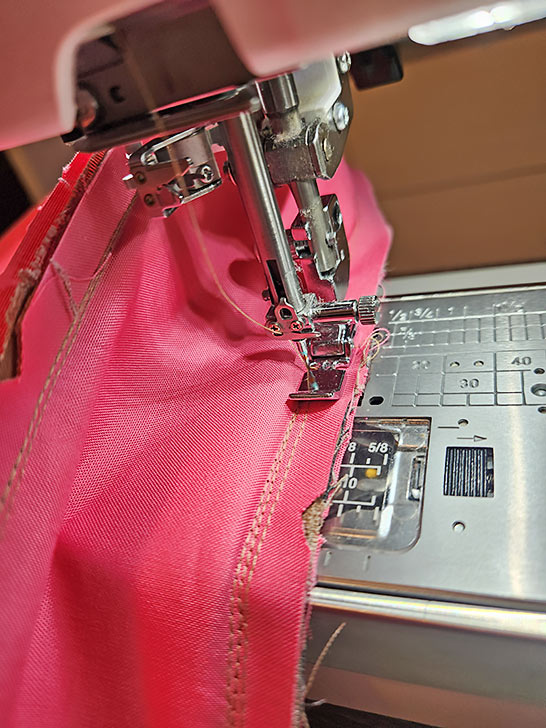
- Change out to a topstitch needle (80/12) and re-thread with the slightly contrasting thread you chose for topstitching in both the top and bobbin. The sharper point of the topstitching needle will help with penetration through the thick layers of the flat felled seams.
- We attached a Zipper foot, liking its narrow profile; you could also use a standard presser foot.
- Start with the back panel and one side panel. Set up for a standard straight stitch. Place the two panels wrong sides together and using a ⅝” seam allowance, stitch this one side seam.
NOTE: As mentioned above, you should have already applied the fusible fleece to the side panels.

- Open up the seam allowance and trim back the side panel half of the seam allowance to ¼”.
- Open up the full sewn panel right side up and fold the longer side of the seam allowance over the shorter side. You are folding towards the side panel – away from the main back panel.
- Make a second fold, coming all the way over and enclosing the raw edges. Again, you are folding towards the side panel – away from the main back panel. This fold reveals the inner topstitched seam line.

- We again switched to our Left Bi-Level foot to stitch the final seam. Slightly lengthen your straight stitch. This seam in an edgestitch along the fold.
- The result is the classic two-seam finish for an outside flat felled seam.

- Repeat the steps for the remaining three seams in this order: align the remaining raw edge of the first side panel with the first side of the front panel. Next, find the remaining side panel and create a flat felled seam on the opposite side of the front panel. The fourth and final flat felled seam creates a tube, which means it will be a little harder to manipulate, but – good news – the top and bottom of the tube are still open so it is easier to flatten, and if the bed of your machine is deep enough, you could even use your free arm.
NOTE: Don’t forget to review our full tutorial if you need additional help with this seam technique. It shows steps for both an outside and an inside flat felled seam.

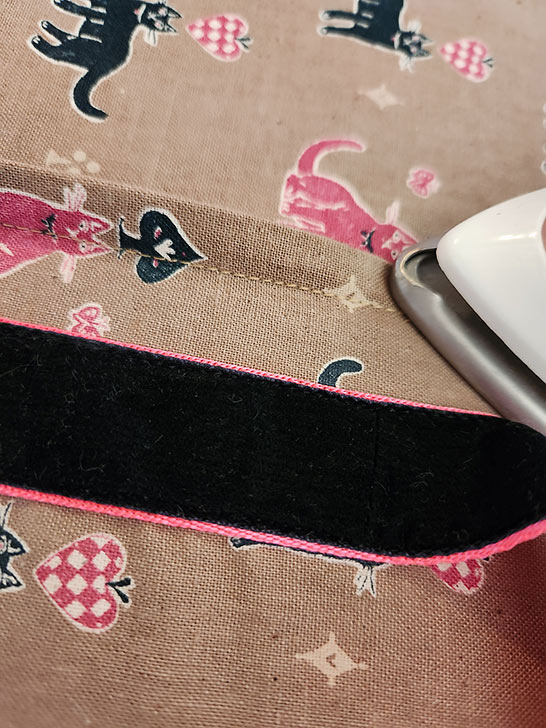
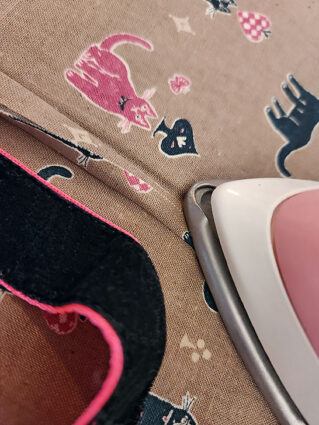
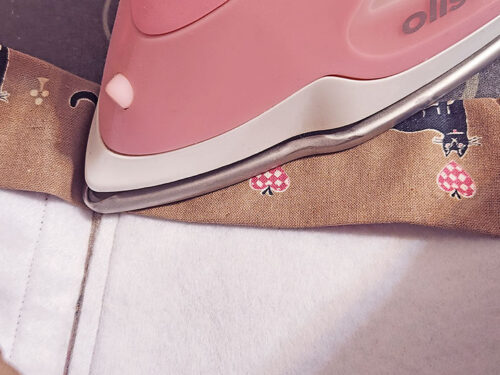
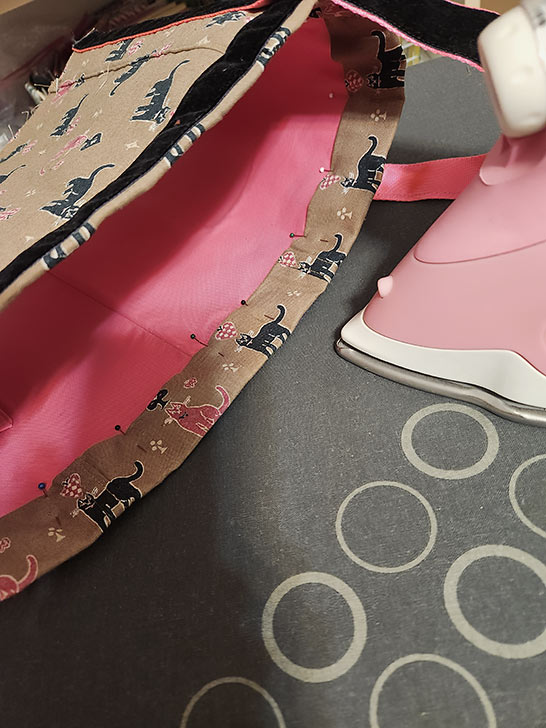
Apply the accent ribbon around the top
- Measure 2” down from the top raw edge of the tube and mark a line all the way around.
NOTE: Remember, anytime you are working on the right side of your fabric, make sure your marking tool is one that will easily wipe away or will vanish with exposure to the air or the heat of an iron.
- Find the remaining 30” length of ribbon.
- Align the top edge of the ribbon with your marked line. The ends of the ribbon can simply be a tiny overlap, however, make sure your start/end points (the overlap) is positioned to be hidden behind one of the handles at the back of the bag.
- You can pin the the ribbon in place or once again use a fusible seam tape.
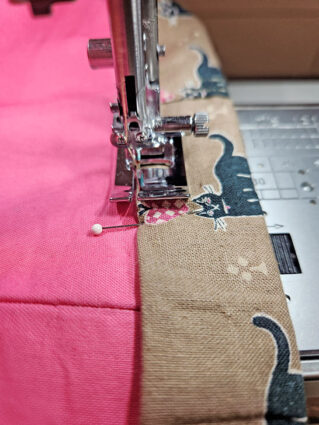
- Now is also a good time to use your free arm in order to keep all the layers as flat as possible as you “stitch in the round.”
- Re-thread the machine with thread to best match the ribbon in the top and bobbin. Keep a slightly lengthened stitch.
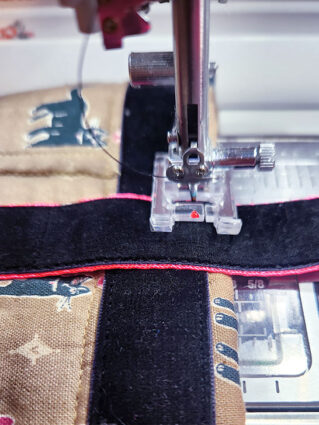
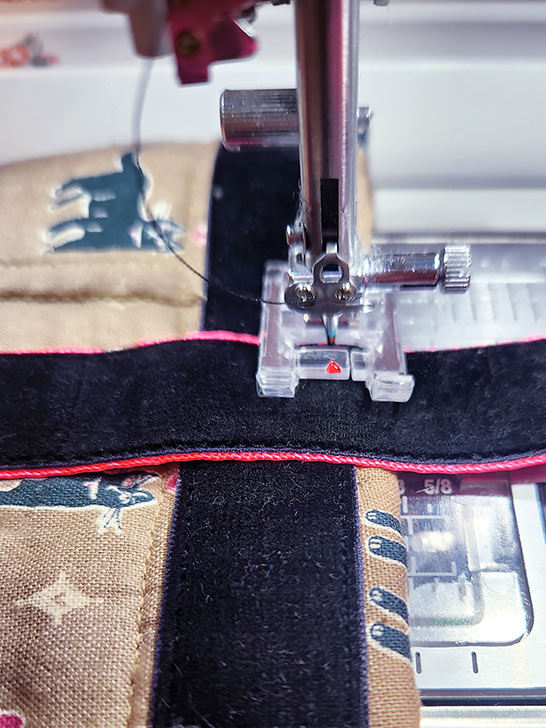
NOTE: We opted to keep the Topstitching needle in place throughout the remainder of construction since we are continuing to work with thicker layers and with additional topstitching and edgestitching seams. - We once again turned to the two Janome Bi-Level feet to stitch the ribbon in pace. Stitching around the top of the ribbon first with the Right Bi-Level foot.
- Then, switching out to the Left Bi-Level foot to go back around, in the same direction, along the bottom of the ribbon.


Create the lining with its pocket
- Find the lining panels and their matching panels of mid-weight fusible interfacing.
- Center a main interfacing panel on each fabric panel so there is ½” of fabric showing beyond the interfacing on all sides. Following manufacturer’s instructions, fuse in place.
- Fold the pocket panel in half right sides together so it is now 9” x 4½” and press to set a center crease.
- Unfold and slip in the interfacing so it aligns along that center crease with ½” of fabric showing beyond the interfacing on the outer three sides. Following manufacturer’s instructions, fuse in place. The side of the pocket with the interfacing is the front of the pocket – the side facing out.

- Fold the pocket in half again, this time right sides together, and pin along both sides and across the bottom, leaving a 2-3” gap at the center of the bottom that will be used to turn the pocket right side out. The folded edge is the top of the pocket.
- Re-thread the machine with thread to best match the lining in the top and bobbin. Re-set for a standard straight stitch.
- Using a ½” seam allowance, stitch along both sides and across the bottom, sharply pivoting at the corners and locking your seam at either side of the 2-3” opening.
- Clip the corners and press open the seam allowance.

- Turn the pocket right side out through the bottom opening. Gently push out the corners with a long blunt tool and press flat, pressing in the raw edges of the opening so they are flush with the sewn seam. As we did with the exterior pocket, we returned to the slightly lengthened stitch and added a line of edgestitching along the top folded edge of the pocket for stability. This is optional.
- Find one of the two main lining panels. Place it right side up and flat on your work surface. Place the pocket right side up (interfaced side up) on the panel. Center the pocket side to side and 1” up from the bottom raw edge of the panel. Pin in place.
- Edgestitch the pocket in place along both sides and across the bottom, closing the original turn gap. Remember to sharply pivot at both bottom corners. We used our Right Bi-Level foot for this entire seam.

- This panel with its pocket is the back lining panel. Layer it right sides together with the plain lining panel and pin along both sides.
- Switch back to a regular presser foot. Re-set for a standard straight stitch. Using a ½” seam allowance, stitch both side seams, creating a tube. Press open the seam allowances.
Assemble exterior and lining and fold down the top “faux facing”
- Find the exterior tube. It should be right side out.
- Turn down the top raw edge ½” and press.
- Turn down an addition 1¼” and press again. This forms the bag’s top faux facing. Check from the front to be sure there is an even ¼” of fabric showing above the ribbon all around the top of the bag. Adjust your facing folds if you see any uneven parts then press well again. This bottom fold should cover both ribbon seams, covering the bottom ribbon seam by just over ¼”.
- Find the lining tube. Turn it wrong side out.
- Slip the lining into the exterior so the two layers are now wrong sides together. Make sure the lining’s side seams are at the exact center of each exterior side panel and the lining’s pocket sits against the plain back panel of the exterior.
- With both layers smooth and flat against one another, slip the top raw edge of the lining under the exterior faux facing; it should sit up against the top fold of the faux facing. Pin in place all around through all the layers.

- Re-thread the machine with the contrasting topstitching thread in the top and bobbin. Re-set for the slightly lengthened straight stitch.
- Time once again for our trusty Bi-Level foot. We snapped on the Left Bi-Level foot, using it to run along the inner fold of the faux facing. It is very important this seam falls as close to the fold as possible in order to insure the front seam is an even ¼” below the bottom edge of the ribbon around the top of the bag.


Create and insert the base panel
- The bottom of the bag in an inset base panel created with flat layers that result in a visible seam allowance on the inside of the bag – no worries, we’ve going to finish that seam allowance with a pretty binding. But first… let’s make the base panel.
- Find the base panel in the exterior fabric and the lining fabric along with the matching fusible fleece panel and mid-weight interfacing panel.
- To give the base extra stability, it has two layers of stabilization. Find the exterior base panel and place it wrong side up and flat on your work surface. Center the mid-weight interfacing on the panel so there is ½” of fabric showing beyond the interfacing on all sides. Following manufacturer’s instructions, fuse in place.
- Place the fusible fleece directly on top of the mid-weight fusible. Following manufacturer’s instructions, fuse it in place.
- Place the fused exterior panel wrong sides together with the lining panel and, using a ½” seam allowance, machine baste around all four sides. You are stitching along the edge of the interfacing layers, which you can “feel” through the fabric layers. We used our Zipper foot.
- Make a small snip or notch at the exact center of each side of the sewn base panel.
- You also need these center points/quadrant points along the bottom of the bag; they are like the 12:00, 3:00, 6:00, and 9:00 points on the face of a clock.. You can use the lining side seams as the 3:00 and 9:00 points. To find the two others, align these two side seams, flattening the bag in the opposite direction. The two new outer folds will be the center points along the front and back of the bag: the 12:00 and 6:00 quadrant points. You could also measure with a ruler to find the center. Make a small snip or notch at these points. Turn the main body of the bag lining side out. Set it upside down on your work surface.
- Set the base panel into the “tube” of the bag so the base panel and the bag are right sides together. It’s a bit like placing a lid upside down into a box.
- Using the notches and lining side seams, align the base with the bag. Pin at the marked points first, then fill in all around.
- We continued to use our Zipper foot, along with tan construction thread in the top and bobbin, and a standard straight stitch.
- Start in one corner, dropping your needle ½” in from the actual corner of the fabric. Using a ½” seam allowance, stitch along the first side.
- Stop the seam at the opposite corner ½” in from the edge of the fabric panel.
- Remove the project from the machine. Turn the corner and pin along the next side of the bag.
- Stitch each side in the same manner.
NOTE: These steps are summarized a bit here. If you are brand new, check out our full tutorial: How to Insert a Rectangular Base into a Tube. - For extra security and a super smooth finish, we recommend going around the base a second or even a third time, pivoting at each corner.
- Prior to binding, trim back the seam allowance to ¼”, and if you have a particular heavy exterior fabric, you can also grade the seam.


Bind the base panel’s interior seam allowance
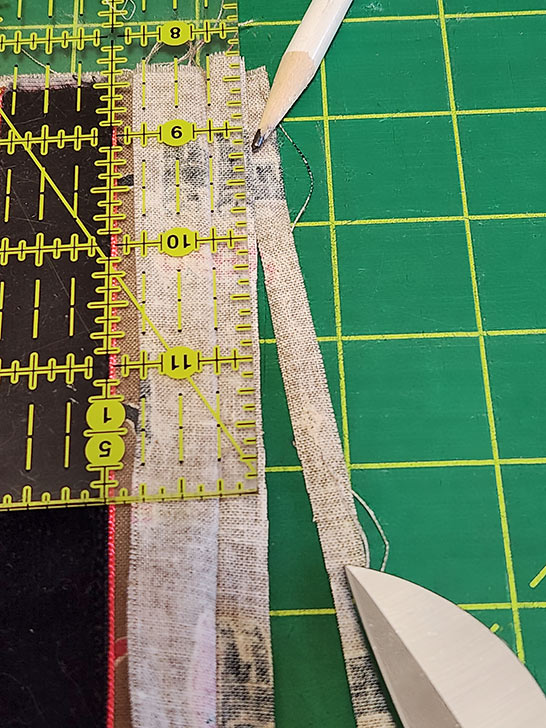
- Find the 2” x 30” bias strip. If you had to cut more than one 2” strip to get to the full length, seam them together now to equal the 30”.
- The bag should still be wrong side out with it nicely trimmed seam allowance showing.
- Leaving several inches loose at the head, place the bias strip against the seam allowance, aligning one side of the bias strip with the trimmed edges of the seam allowance. Pin in place. Remember… you are only working with the seam allowance; do not pin or stitch into the body of the bag.
- Re-thread the machine with thread to best match the lining in the top and bobbin.
- Using a Zipper foot, stitch all the way around the base panel, staying close to the original seam line. And, we’re reminding you again because it’s important: you are stitching through the binding strip and the seam allowance only – do not stitch into the body of the bag.
- When you get all the way around and are approaching your starting point, stop several inches before that point and lock your seam. As above at the head of the strip, you are leaving these several inches loose in order to join the ends.
- Fold the loose end at the head of the bias strip at a 90˚angle to the right.
- Fold the loose end at the tail of the strip at a 90˚ angle to the left aligning the two folds at a diagonal.

- Pin through the two layers.
- Open and stitch along the fold line and trim away the excess to ¼”.
- Place the binding back against the seam allowance and complete that last little bit of seam in line with your previous stitching.
- Fold under the raw edge of the binding ½” and wrap this folded edge around the seam allowance, encasing the edges to create your beautiful bound finish.
- Stitch in place through all the layers to secure the binding. This in another good opportunity to use your free arm.
NOTE: As mentioned in our supply list, if you can find an excellent match to your lining fabric with a pre-packaged extra wide double fold bias binding, you can use this rather than making your own binding.


Tack the handles
- Bring the handles up into their full upright position (yep… just like your tray table prior to takeoff).
- Pin in place.
- Re-thread the machine with thread to best match the ribbon in the top and to best match the exterior fabric in the bobbin.
- We switched to our transparent Satin Stitch foot so we could see through to the ribbon.
- Stitch across each “leg” of each handle, running this short seam in line with the top of the accent ribbon. As before, make sure to keep all your stitching within the ribbon; you don’t want any black stitching to show against the webbing.
Create a bow and hand stitch in place
- Find the leftover velvet ribbon and tie it into a pretty bow. The width of the bow should be about 3” with matching tails. The velvet is a polyester so you can lightly heat seal the cut ends of the tails.
- Hand stitch the bow at the exact center of the front panel on top of the accent ribbon. Keep your stitching through the knot of the bow and the accent ribbon; you don’t want your hand stitching to show on the facing at the inside.
Project Design: Anne Adams
Sample Creation: Kathy Andrews, What Sew Ever