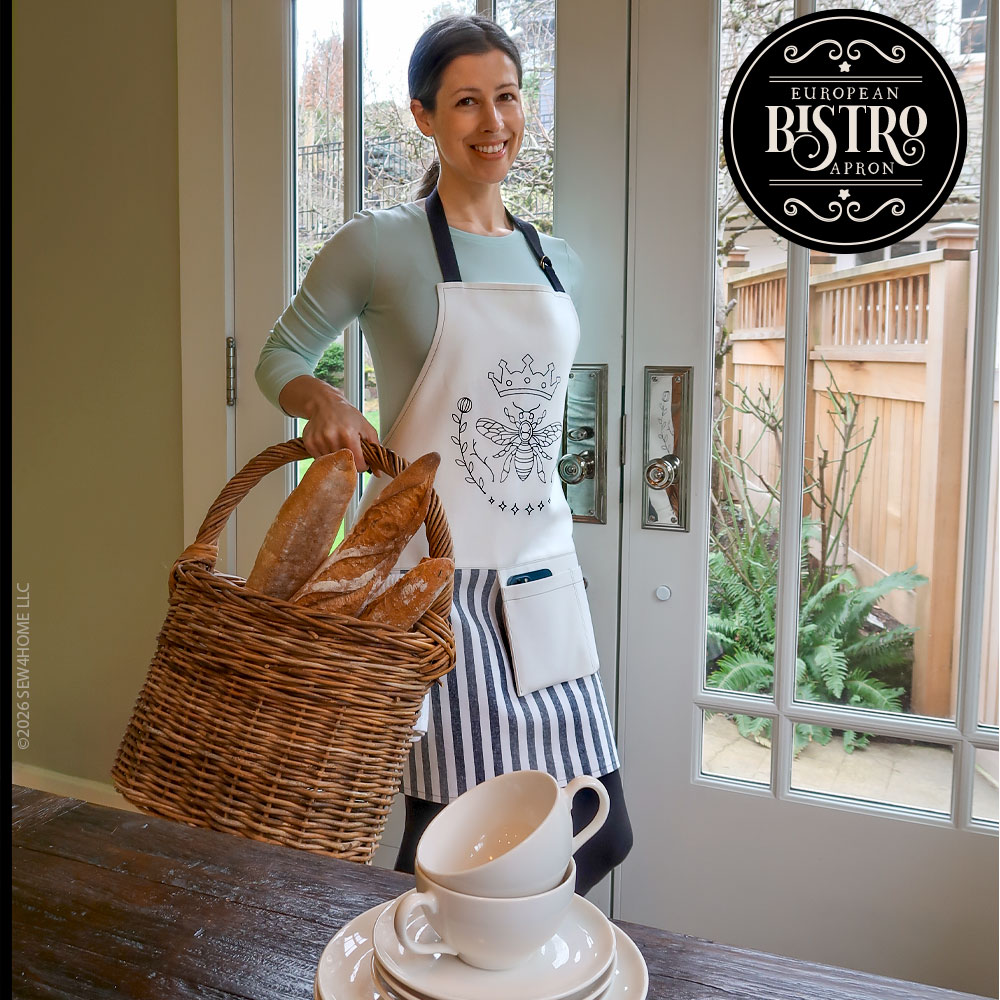
It’s daydream time. Lean back and picture a sunny sidewalk cafe along cobblestone streets with the gothic spires of a cathedral just visible in the distance. You’re brought a strong cappuccino or perhaps a fragrant tea along with sweet biscuits by a server wearing a classic long white apron. Relaxed? Then you’re ready to make your own beautiful European Bistro Apron and set up your own idyllic cafe moment.
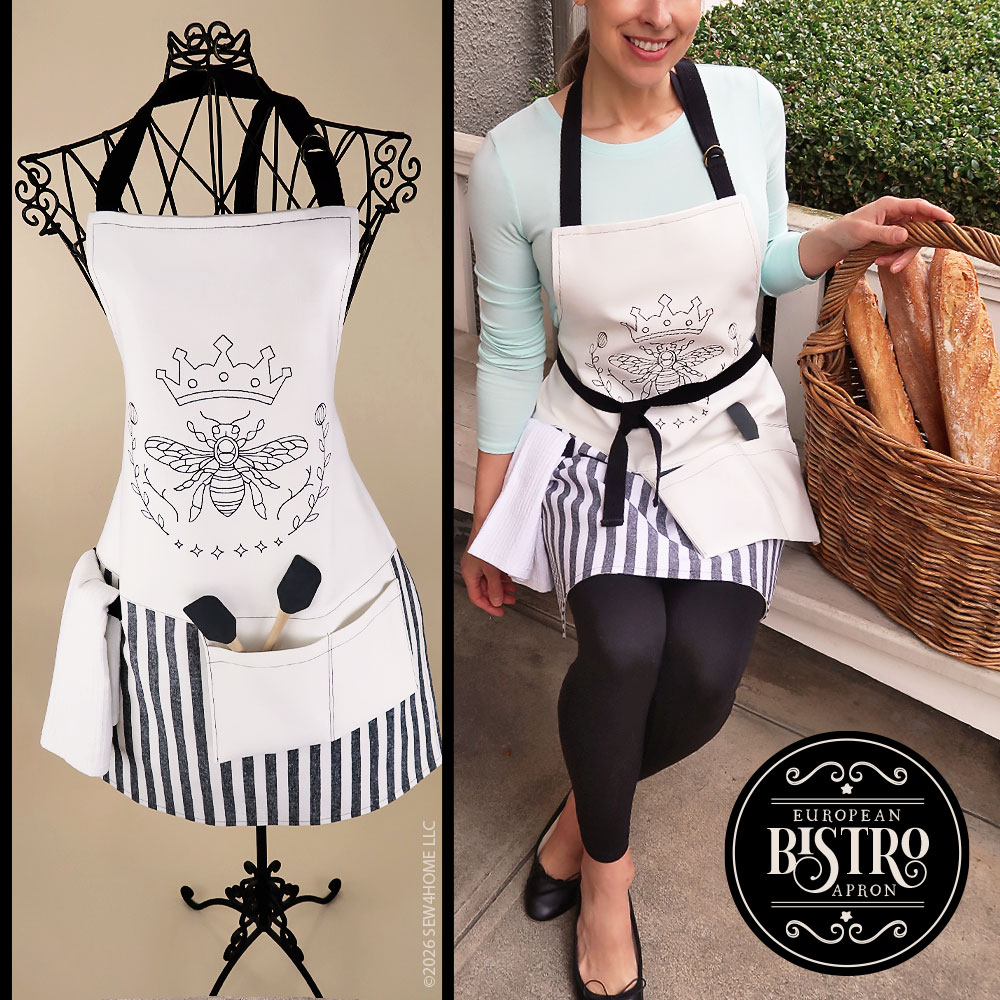
Sleek and simple with clean lines in neutral tones, this full-coverage apron is flattering for all body types and works well for men and women.
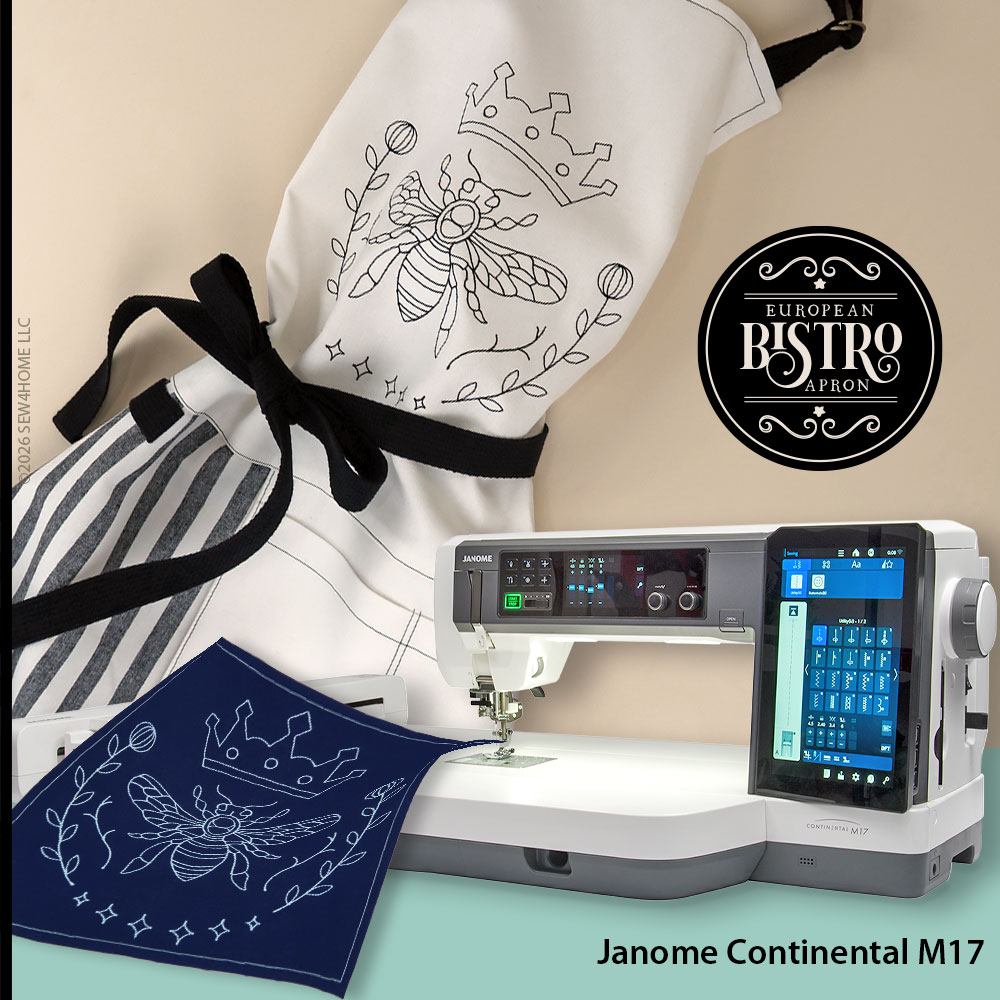
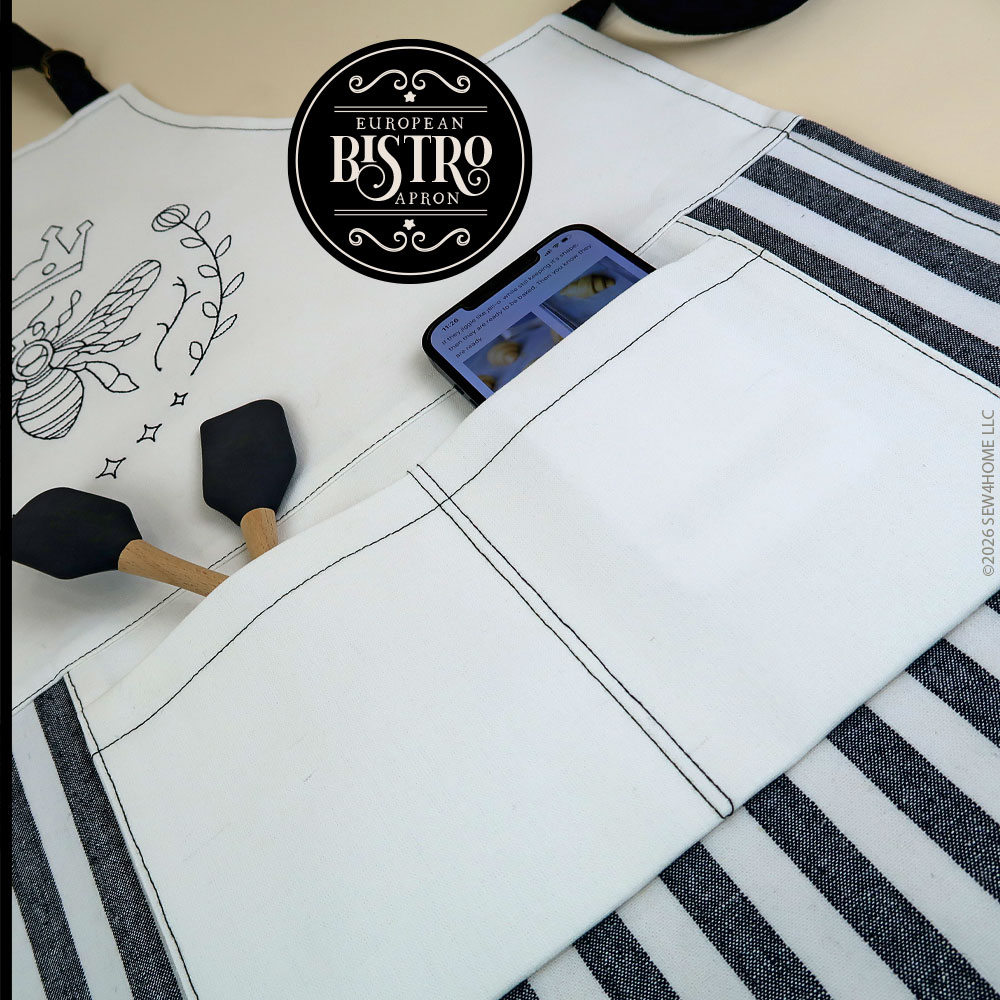
We added a single color, pen and ink style embroidery design to the bib as a unique accent. This is a custom design available in our S4H Etsy Shop. Regular followers may recognize the Queen Bee design from our popular Five Pocket Half Apron. We re-digitized the design as a single unit in a larger size and made it available in the Shop for just $3.95 in six popular machine embroidery file formats.
Thanks to our long time partnership with Janome America, we love blending sewing and embroidery in projects. We used the top-of-the-line Janome Continental M17 for our sample, but any embroidery model with a larger hoop would be applicable. The Queen Bee design finishes at 8¾” wide x 9” high.
We also relied on Janome’s famous stitch precision for the apron’s prominent topstitching. When you use a dark thread on a light fabric, you have to be able to rely on your machine’s stitching prowess. Janome wins every time – even over thick layers, like we have on the hanging pocket or around the sweeping curves of the apron’s arm hole cut outs.
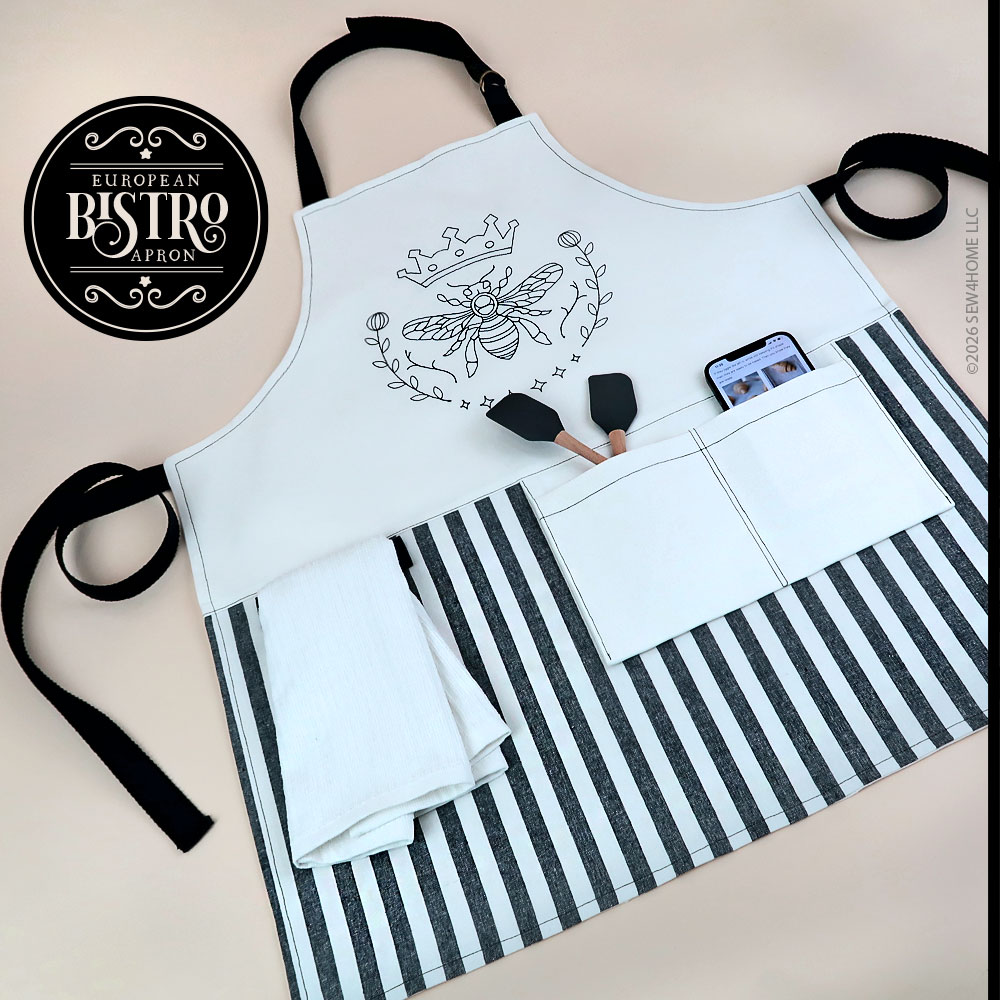
Take a look at that unique pocket. By designing it to hang from the bib/skirt seam, it allows the pocket to move with you as you bend and turn. So in your imaginary bistro, when you bend to serve a hot espresso or chilled rosé, the pocket stays vertical so the contents are unlikely to tumble out. We used a twin needle to divide the pocket into two sections.
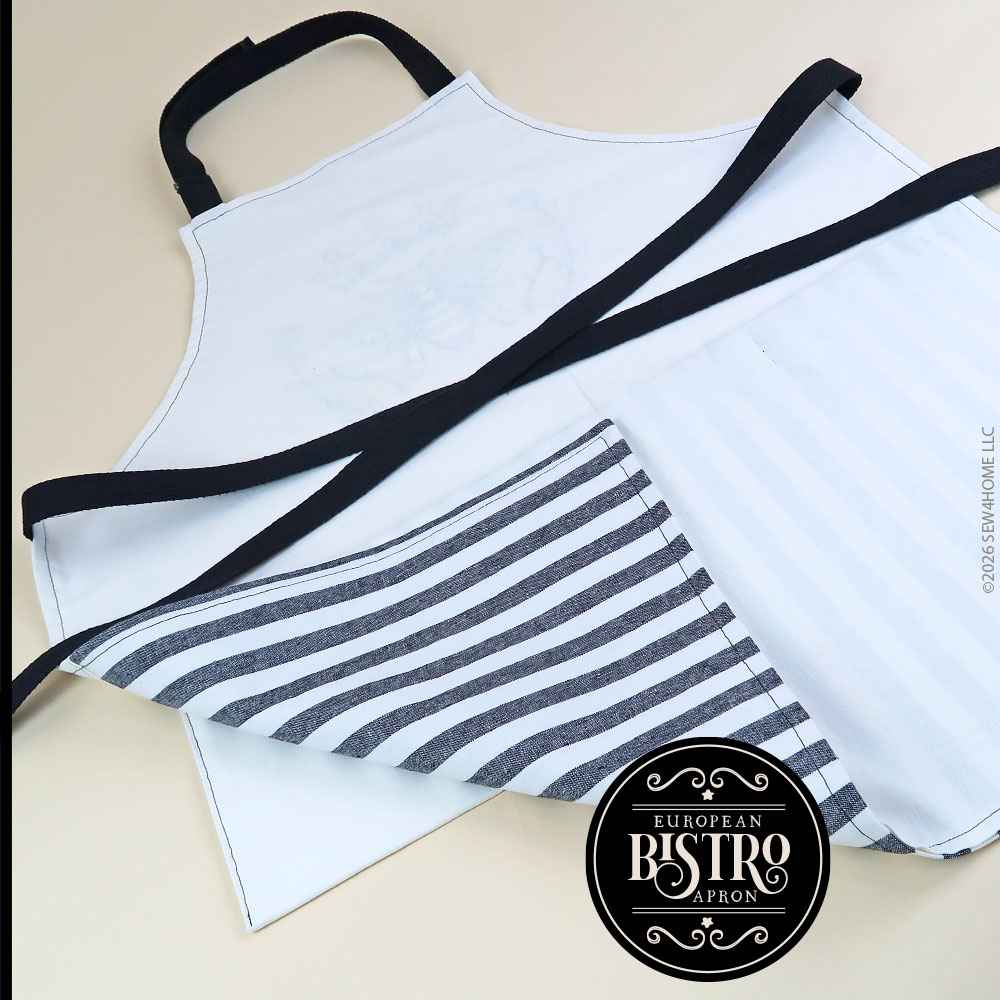
There’s also a towel loop next to pocket. We’ve added this option to a number of our aprons, because it’s always nice to have a towel right at hand for any sudden spills. The towel loop as well as the waist and neck ties are all done in cotton webbing. This type of webbing is wonderfully soft, but can be a bit thick when layering or adding a narrow hem. Time for another reason we love our Janome machines: their ability to stitch through thick layers like a hot knife through Irish butter. It’s a combination of the mechanical precision, an all metal interior frame that minimizes vibration, and unparalleled needle penetration power.
As mentioned, our Queen Bee embroidery is available for purchase in our S4H Etsy Shop, but adding it to your apron is optional. You could certainly choose your own embroidery design, substitute appliqué for embroidery or even use a iron-on transfer. If simplicity is your go-to, you can leave off embellishment entirely. Although we’re always very proud of the fabric and trim selections we use to create our samples, at the end of the day, the final creative selections are up to you. That’s one of the greatest things about sewing… making it your own!
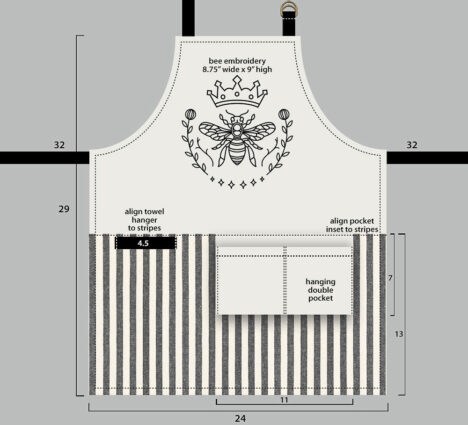
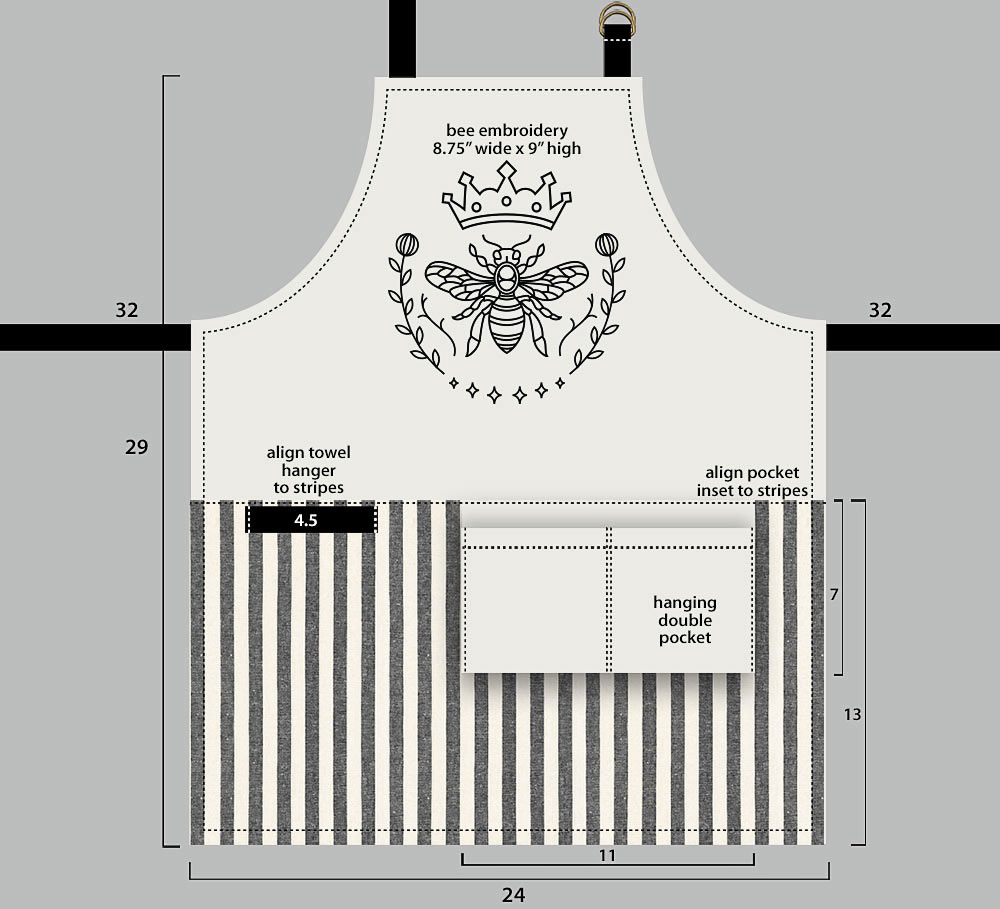
As with store-bought aprons, our design is meant to be one-size-fits-most. However, we realize you may still wish to make yours smaller or larger. As a reference, this half apron finishes at approximately 24” wide across the main panel, 16” high through the center of the bib with a 13” skirt section for a total top to bottom of 29”. The two wraparound ties are each about 32” – long enough to tie at the back with a bow or wrap around to the front and knot. The hanging pocket in divided into two sections that are 6” deep.
Our thanks again to all our friends at Janome America for their support of this project and many of the other most popular projects across the S4H site. To understand first-hand why we are a Janome Exclusive Studio, we invite you to visit a local Janome dealer for an in-person test stitch on the machines we consider to be the best in the industry. To find out more before you go, visit the Janome website and follow them on social media.
Sewing Tools You Need

- Sewing machine and standard presser foot
- Twin Needle 4.0mm; optional for the division on the front pocket
Fabric and Other Supplies
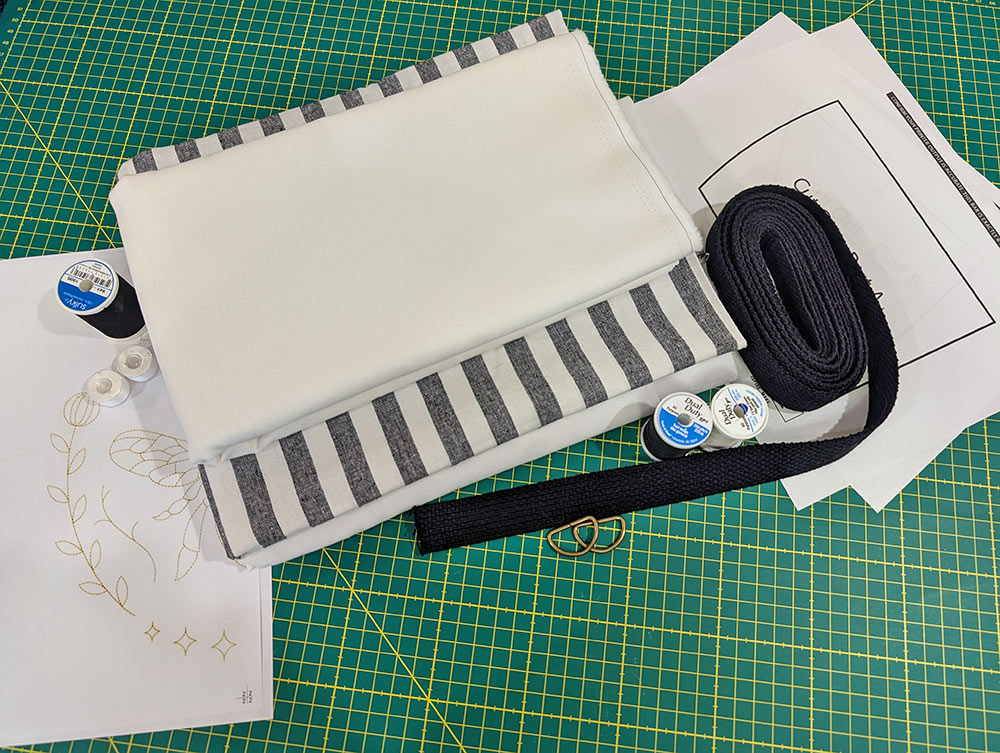
- 1½ yards of 44″+ wide quilting weight cotton for the front bib, hanging pocket, and lining; we used Off White from the Bella Solids collection by Moda Fabrics
- ½ yard of 44″+ wide quilting weight cotton, linen or linen blend for the front skirt; we used Yarn Dyed Stripe in Black from the Essex Classic Wovens collection by Robert Kaufman Fabrics
- 2½ yards of 20″+ wide lightweight fusible interfacing; we recommend a woven interfacing and used Pellon Shape-Flex
- 3 yards of 1” wide webbing to coordinate with the darker fabric color – we recommend a soft cotton webbing rather than the stiffer polyester types; we used black
- Two 1” D-rings; we used antique brass
- All-purpose thread to match fabrics; we used black and natural
NOTE: You will need two spools of the darker thread used for all the topstitching (the black in our sample) if using a twin needle. - An apx. 9” x 9” machine embroidery design (stated width is the best fit to fill the bib); optional – click to purchase our custom Queen Bee design (which is 8¾” x 9”)
- 40wt rayon embroidery thread to match embellishment design; for the optional embroidery – we used black
- Bobbin thread; for the optional embroidery – in color to match design – we used black
- 20”+ wide tear away stabilizer; for the optional embroidery
- See-through ruler
- Fabric pen or pencil
- Iron and ironing board
- Scissors or rotary cutter and mat
- Seam gauge
- Seam ripper
- Straight pins
- Seam sealant
- Hand sewing needle
Getting Started and Pattern Download
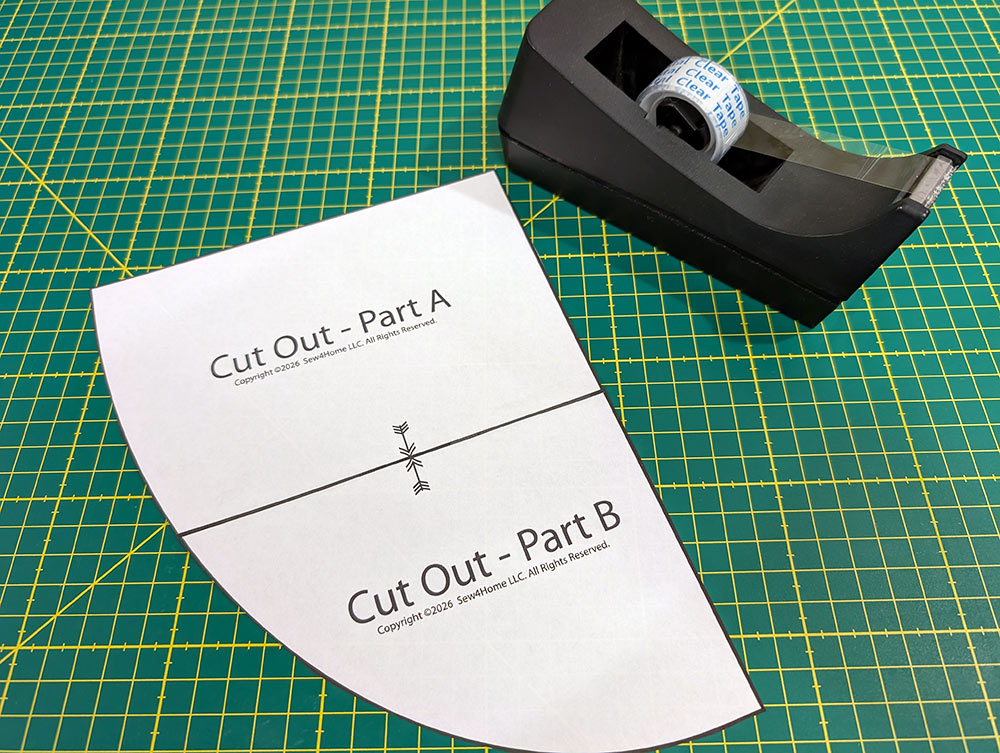
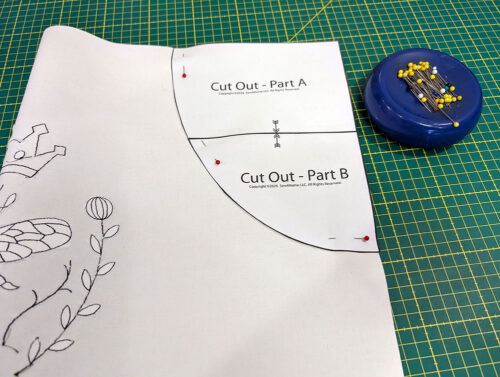
- DOWNLOAD AND PRINT OUT our two patterns sheets: Cut Out Part A and Cut Out Part B, which have been bundled into ONE PDF to make the download easier.

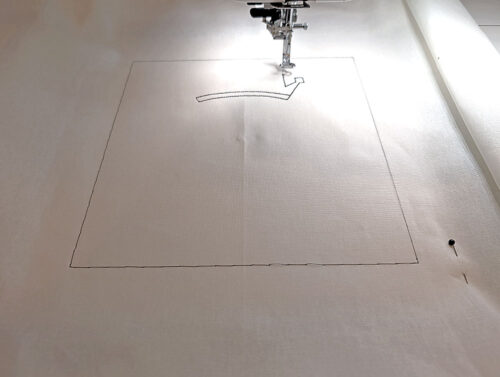
IMPORTANT: Each page of the PDF is ONE 8½” x 11″ sheet. You must print the PDF file at 100%. DO NOT SCALE to fit the page. There is a guide rule on each page to confirm your printout is to size. Print horizontally (landscape).
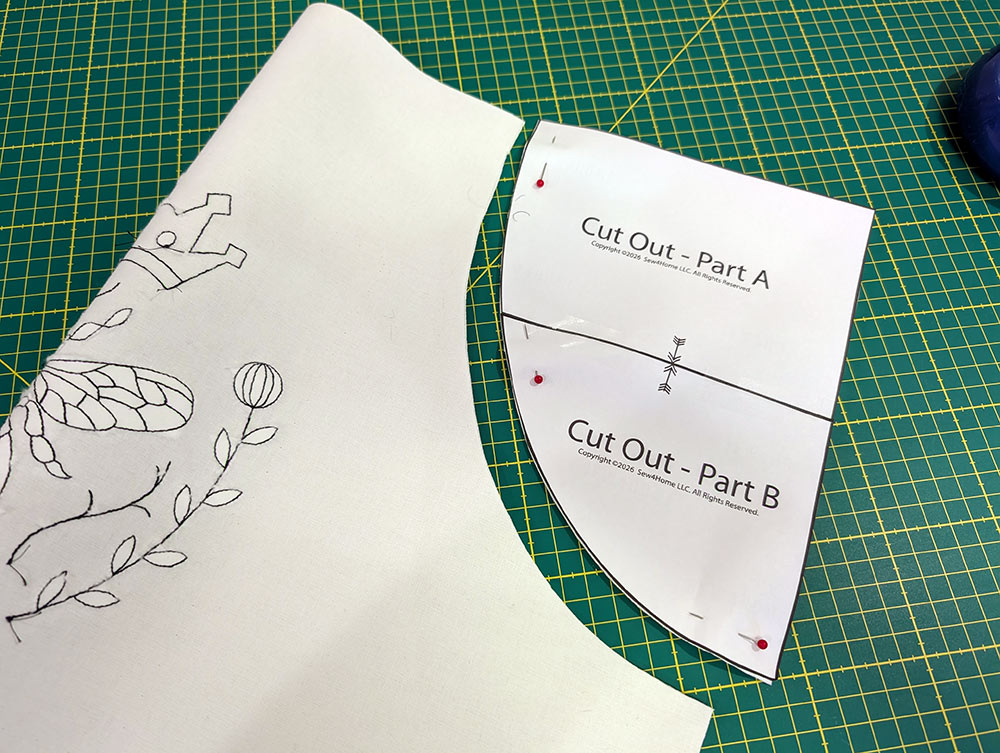
Cut out the pattern pieces along the solid lines. Butt together the pieces at the arrows as indicated on the pattern pieces. Do not overlap. Tape together to form the complete pattern.

- From the fabric for the front bib, hanging pocket, and lining (off white cotton in our sample), cut the following:
ONE 25” wide x 30” high panel for the lining
ONE 12” wide x 27” high panel for the hanging pocket
If NOT embroidering, cut ONE 25” wide x 17” high panel
If embroidering, cut ONE 26” wide x 18” high panel; this is a slightly larger than necessary cut to account for shrinkage that naturally occurs with machine embroidery - From the fabric for the front skirt (the black and white stripe in our sample), cut ONE 25” wide x 14” high panel.
- From the lightweight interfacing, cut lengths to cover the front bib, lining, and hanging pocket.
NOTE: It is best with the narrower 20” width this type of interfacing traditionally comes in to cut lengths to fit horizontally across each panel, with the 20” width of the interfacing becoming the “height” needed to fully cover each piece, varying the length as needed. - From the webbing, cut the following:
TWO 32” lengths for the waist ties
ONE 28” length for the long neck tie
ONE 5” length for the short neck tie
ONE 6” length for the towel loop
At Your Sewing Machine & Ironing Board
Optional Embroidery
As mentioned above in the introduction, we created a custom 9” Queen Bee embroidery design as a perfect embellishment for our European Bistro Apron. This design is available in our S4H Etsy Shop for just $3.95 in six different file formats. Click for details and to purchase.
This exact embroidery is optional. You could certainly choose a different embroidery design of your choice, an appliquéd design or even an iron-on transfer. Of course, you could also opt for no embellishment at all on the bib. That’s one of the things we love about sewing – the final choices are always up to you.
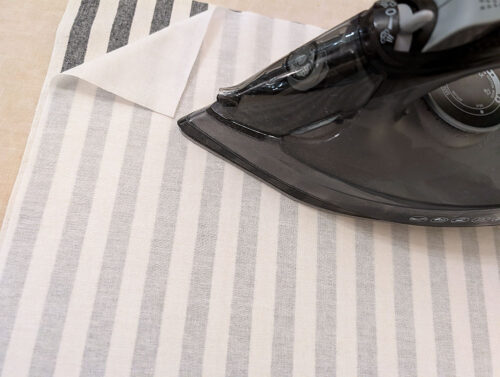
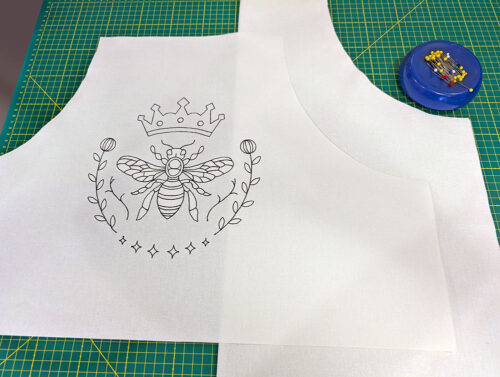
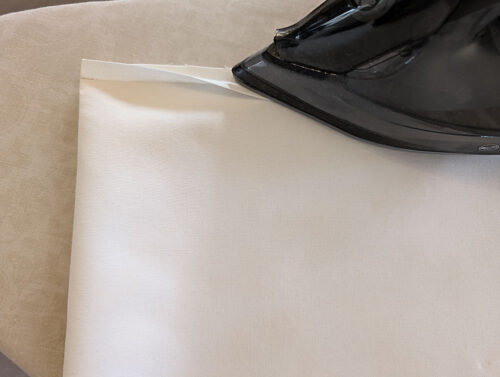
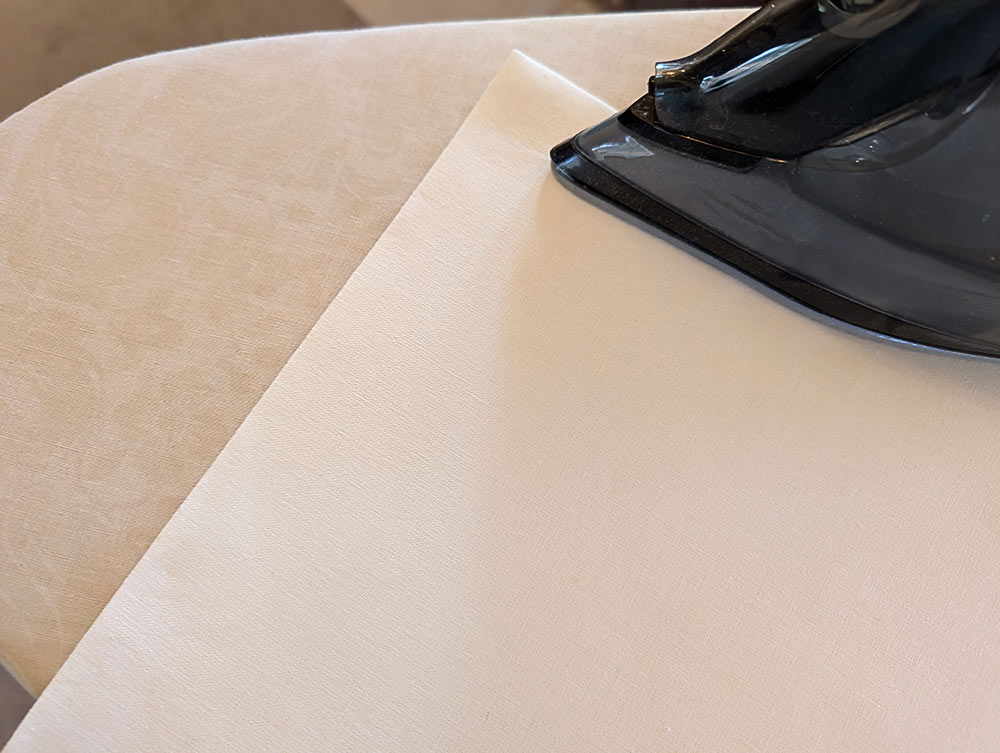
- Layer interfacing on the wrong side of the 26” x 18” panel, which will become the front bib. As mentioned above, if you cut the 20” interfacing lengths as indicated, you should have one length that will cover this 26” x 18” panel. All edges of the interfacing should be flush with the raw edges of the fabric panel. Following manufacturer’s instructions, fuse in place.
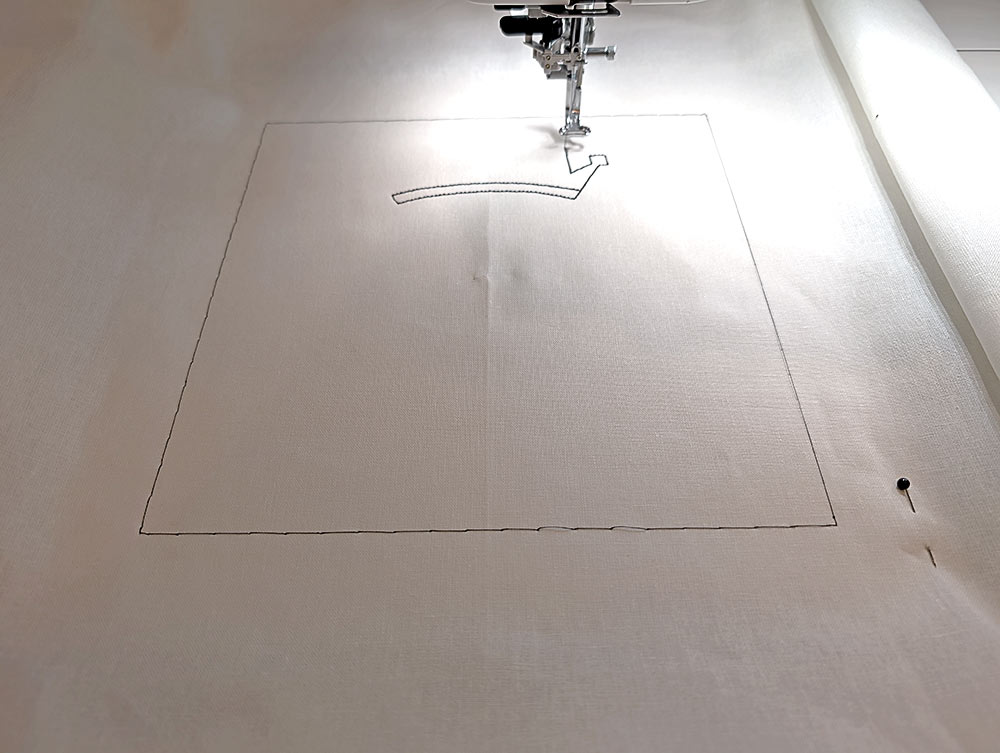
- Mark placement for the embroidery, which should be centered side to side and with the top of the embroidery 5” down from the upper raw edge of the panel.
NOTE: Our custom Queen Bee embroidery design has an included template to print out for easy placement. - Thread the machine with 40wt embroidery thread and bobbin thread in a color to match your top thread. We used black Sulky embroidery thread in the top of the machine and black Janome pre-wound bobbin thread in the bobbin case.
- Hoop two layers of tear away stabilizer. Our Queen Bee design fit the large SQ28 Hoop for the Janome Continental M17. You do need a larger hoop for this design, which finishes at 8¾” wide x 9” high.
- Open the embroidery design on your machine and place the hoop on the machine.
- Center the placement mark, then use the Baste function to secure the fabric to the hoop.
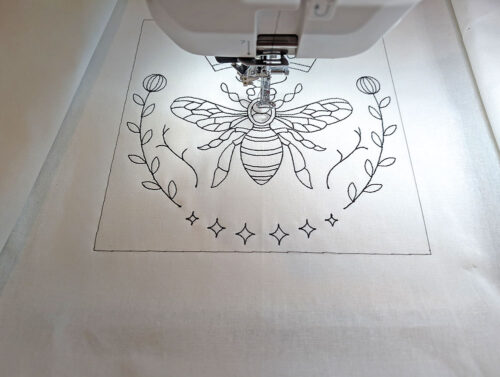
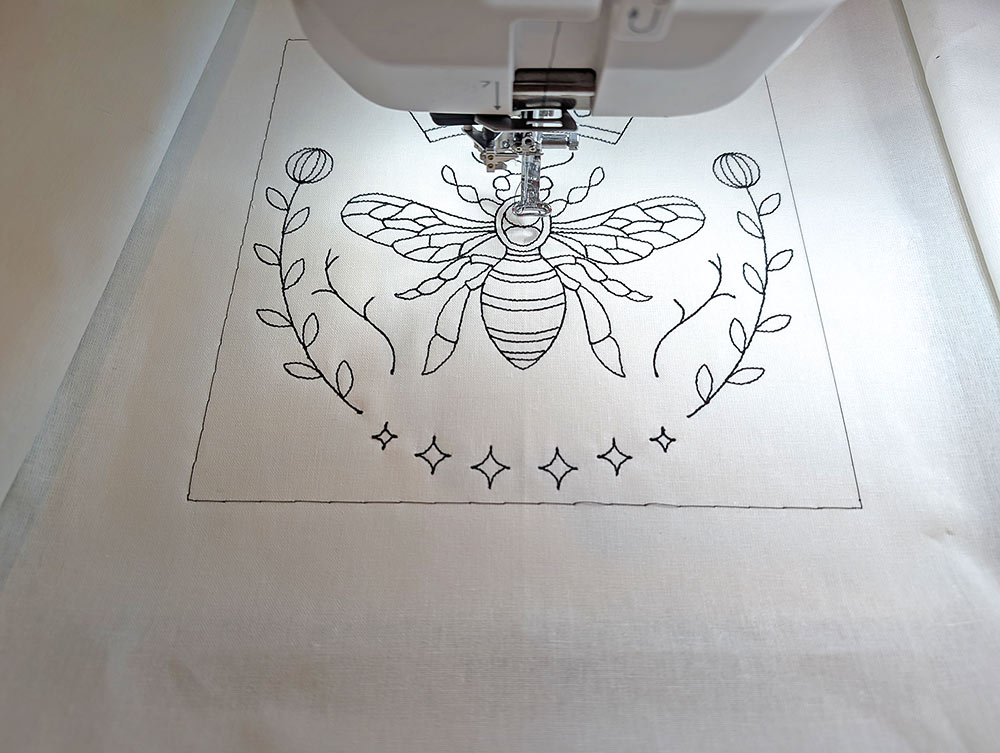
- Embroider the design.
NOTE: As you can see in our beauty images above, our design is open, simple, and in a single color; which is the optimum style for this bistro style apron. However, the final embellishment choices are always up to you.
- When complete, remove the hoop from the machine and remove the fabric from the hoop. Tear away the excess stabilizer and press the embroidered panel from the wrong side.
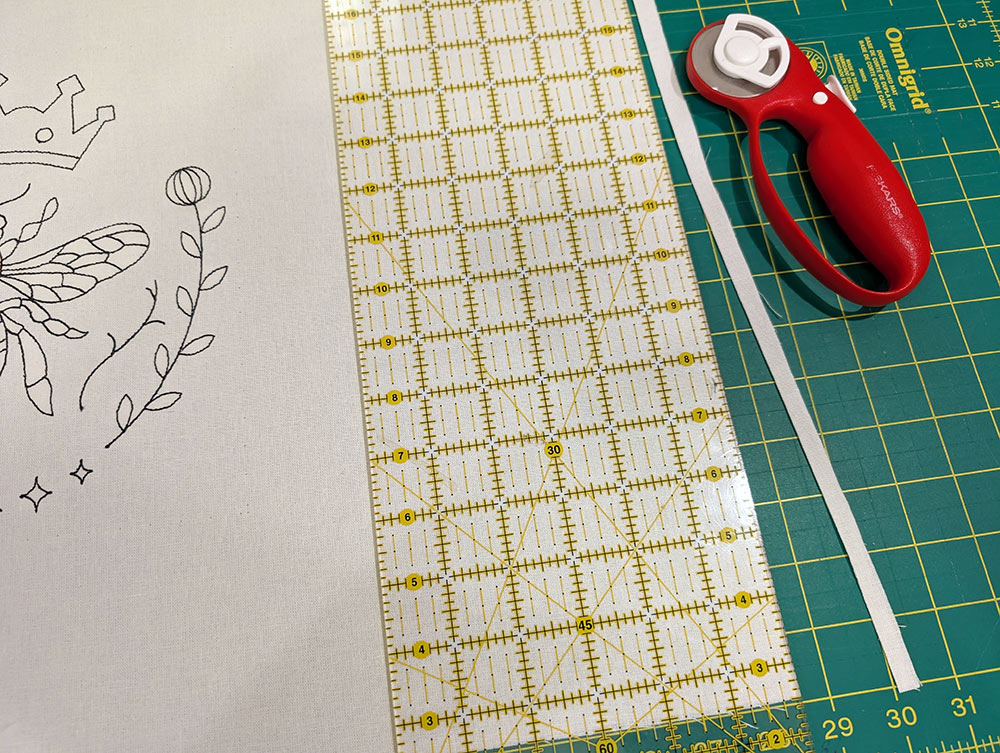
- Keeping the embroidery centered…
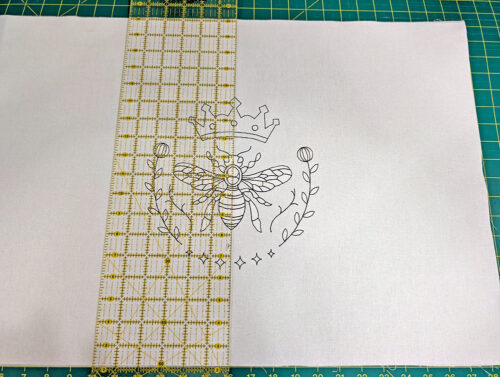
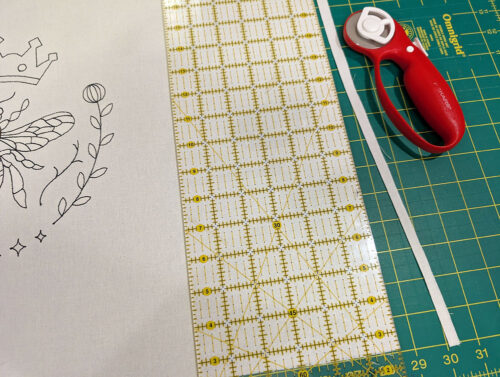
- … trim the panel to 25” wide x 17” high.

Apron Contruction
Interface
- Find the remaining interfacing panels and apply them to the skirt panel and the hanging pocket panel. In each case, the edges of the interfacing should be flush with the raw edges of the panels.

Create the arm hole cut outs
- Find the assembled paper arm hole cut out pattern.
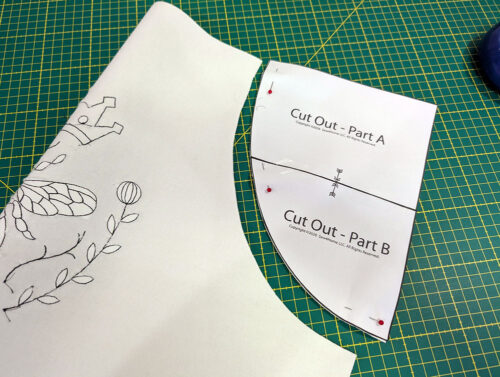
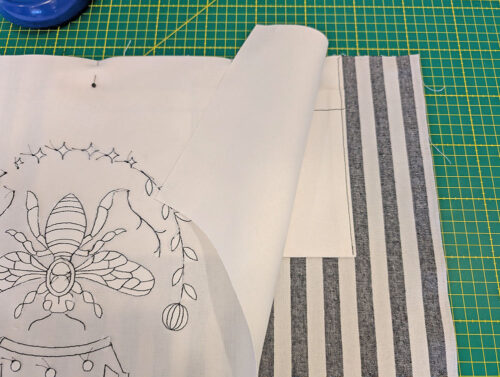
- Fold the bib panel in half, wrong sides together, so it is now 12½” x 17”.
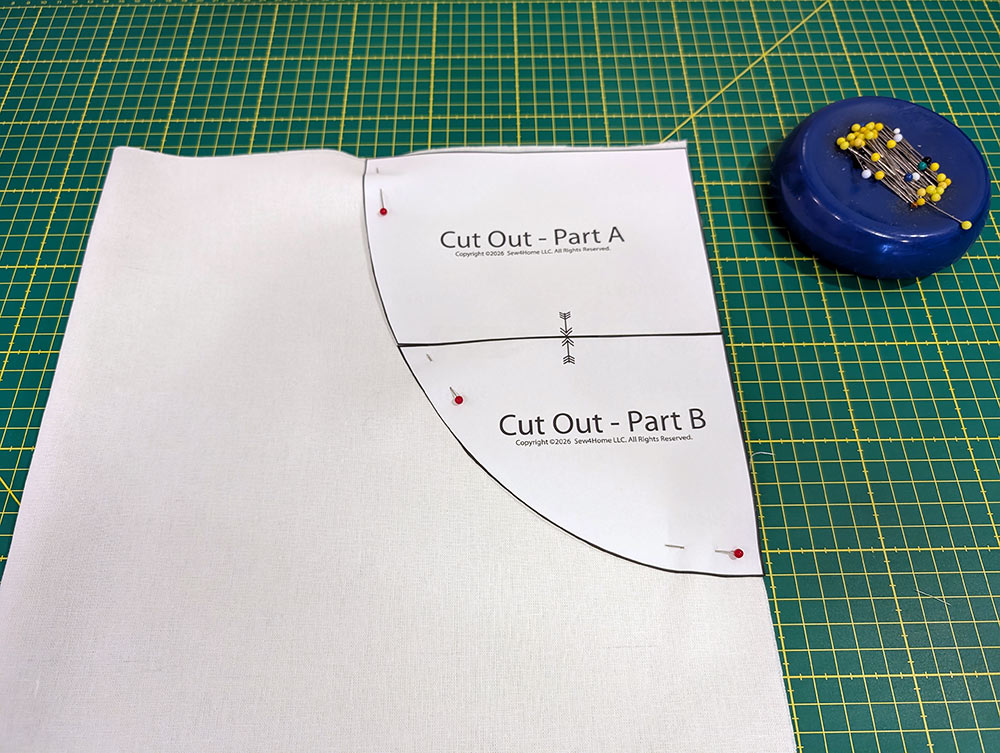
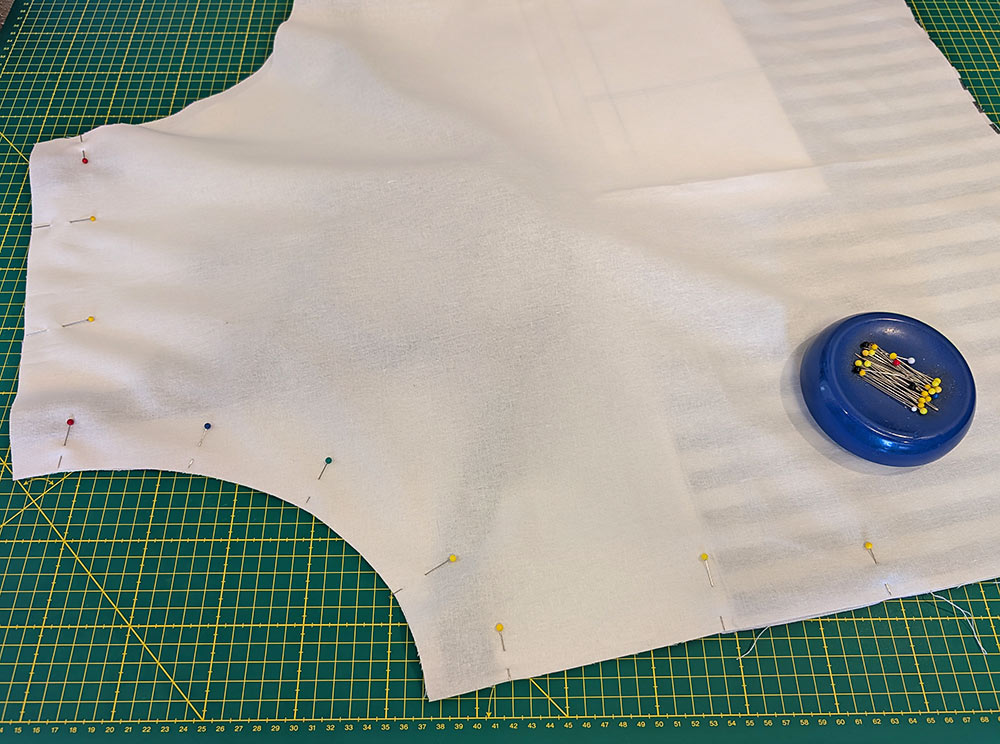
- Place the paper pattern in the upper right corner (the raw edged corner not the folded corner) and pin it in place with the straight edges of the pattern flush with the top and side edges of the fabric panel.
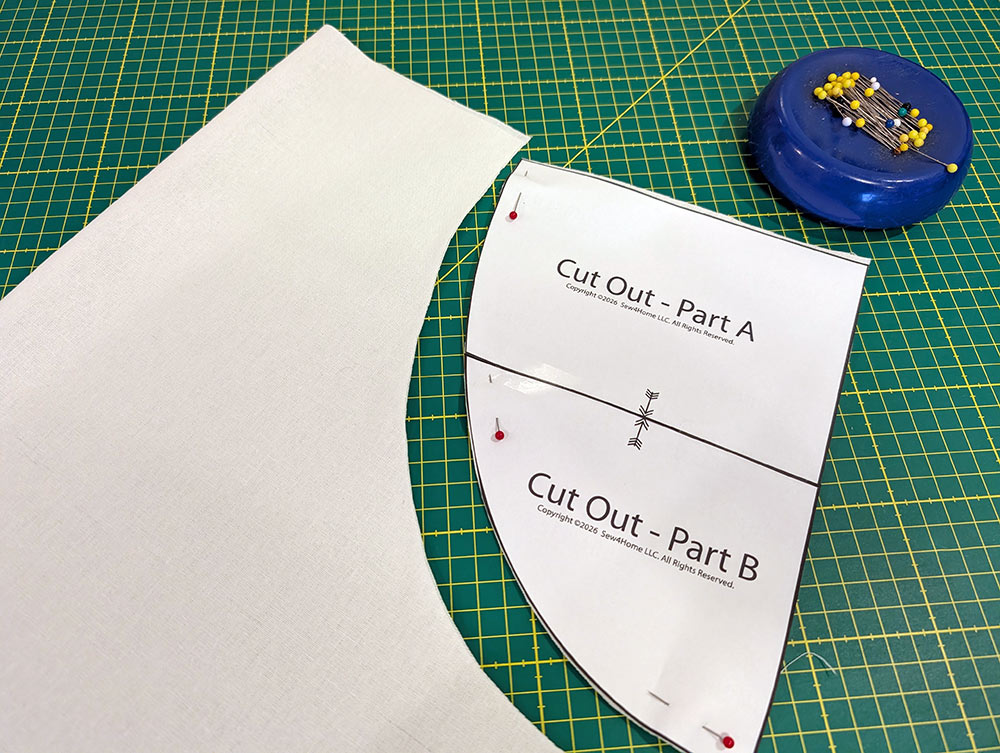
- Cut out along the inside curve to create the shape along the sides of the bib.
- Repeat for the apron lining, first folding the panel in half, wrong sides together, so it is now 12½” x 30”).
- Place the pattern in the upper right corner (the raw edged corner not the folded corner) and pin it in place with the straight edges of the pattern flush with the top and side edges of the fabric panel.
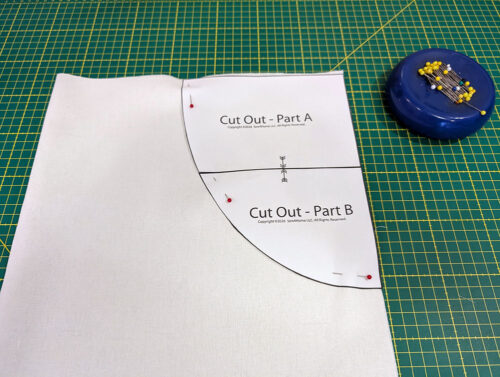
- Cut out along the inside curve to create the shape along the sides of the lining.

- Set aside the two completed panels.


Create the hanging pocket
- Find the 12” x 27” panel for the hanging pocket, which should already have its interfacing fused in place.
- Thread the machine with thread to best match the fabric (off white in our sample) in the top and bobbin. Attach a standard foot and set for a standard straight stitch.
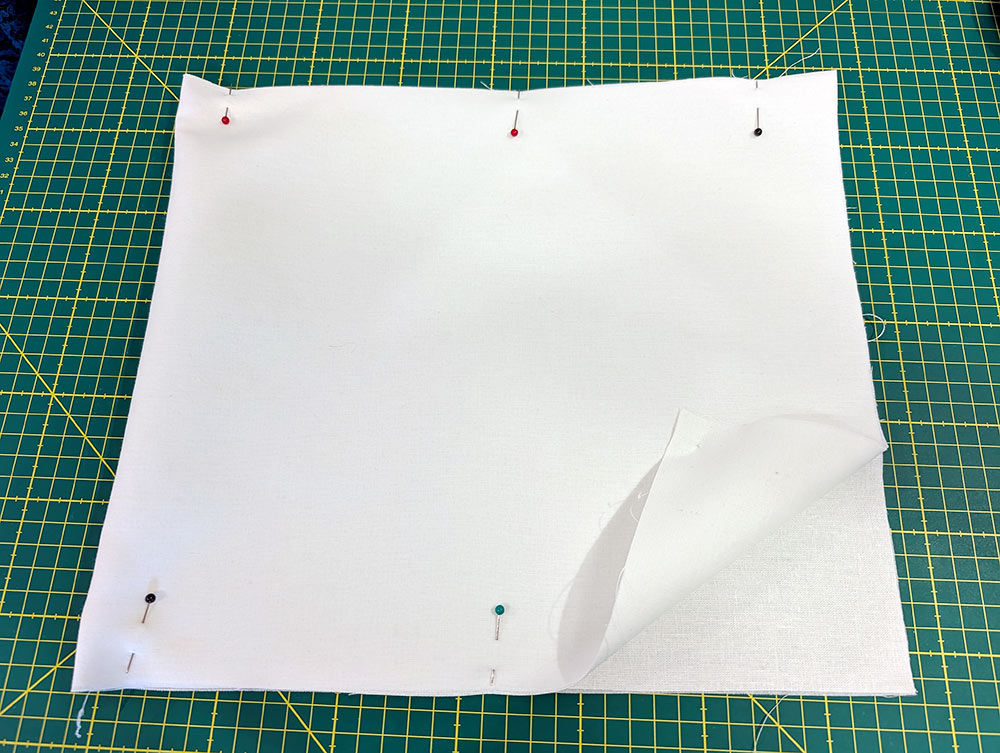
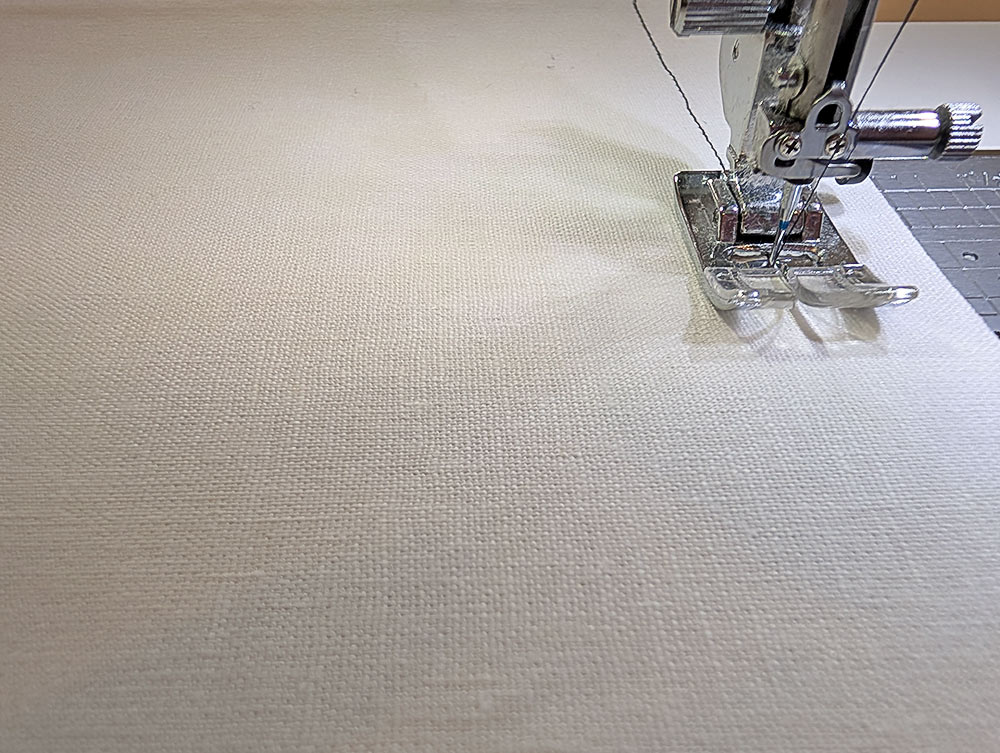
- Fold the panel in half, right sides together, so it is now 12” x 13½”. Pin each side (the 13½” sides).
- Using a ½” seam allowance, stitch each side.

- Press open each seam allowance.
- Turn the pocket right side out through the open top, push out the corners with a blunt tool (a long knitting needle, chopstick or point turner all work well), and press well.

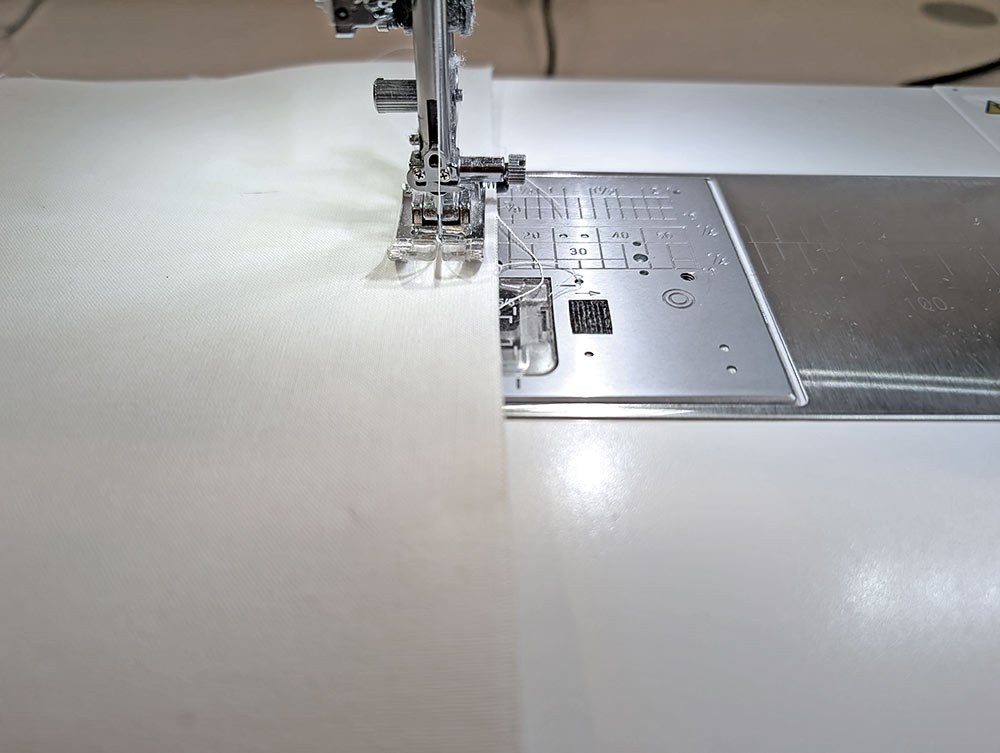
- Rethread with the darker thread of your combination (black in our sample) in both the top and bobbin. Re-set for a slightly lengthened straight stitch.
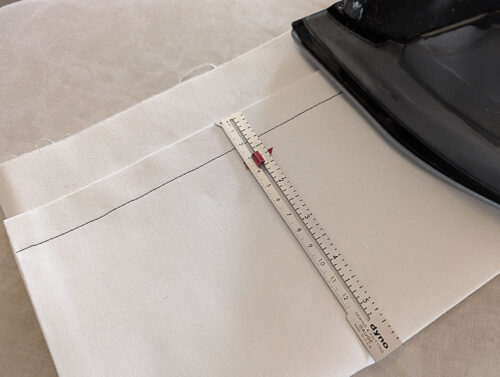
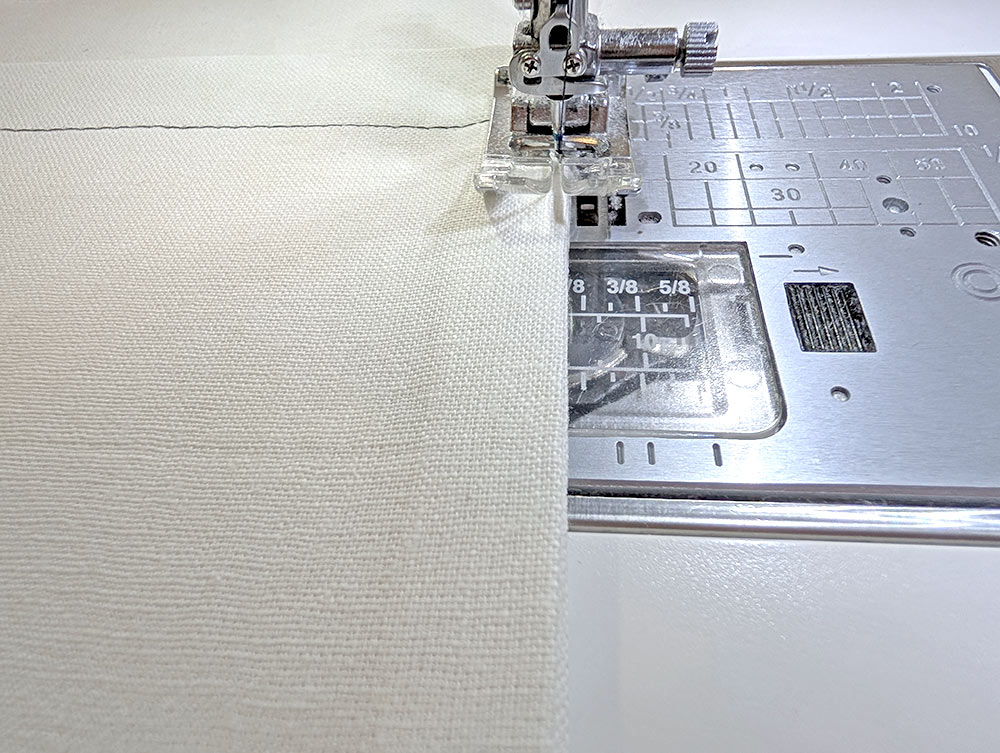
- Topstitch along the folded end, ¾” in from the fold, to create a faux hemline.

- Bring up this folded edge 6”, which means the folded edge is now 1½” down from the top raw edges of the panel. Press then lightly pin in place.
- Edgestitch along each side of the pocket, removing the pins as you go.
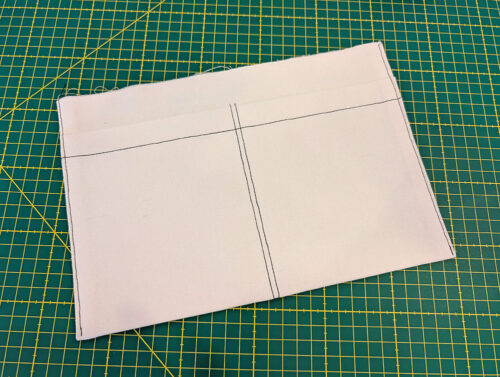
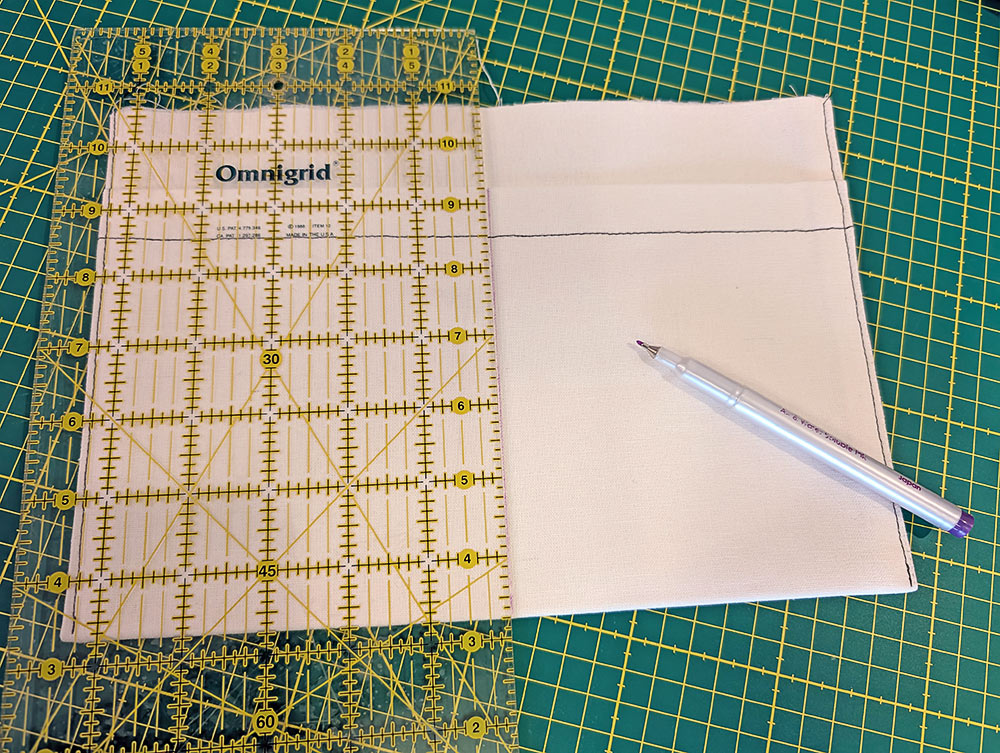
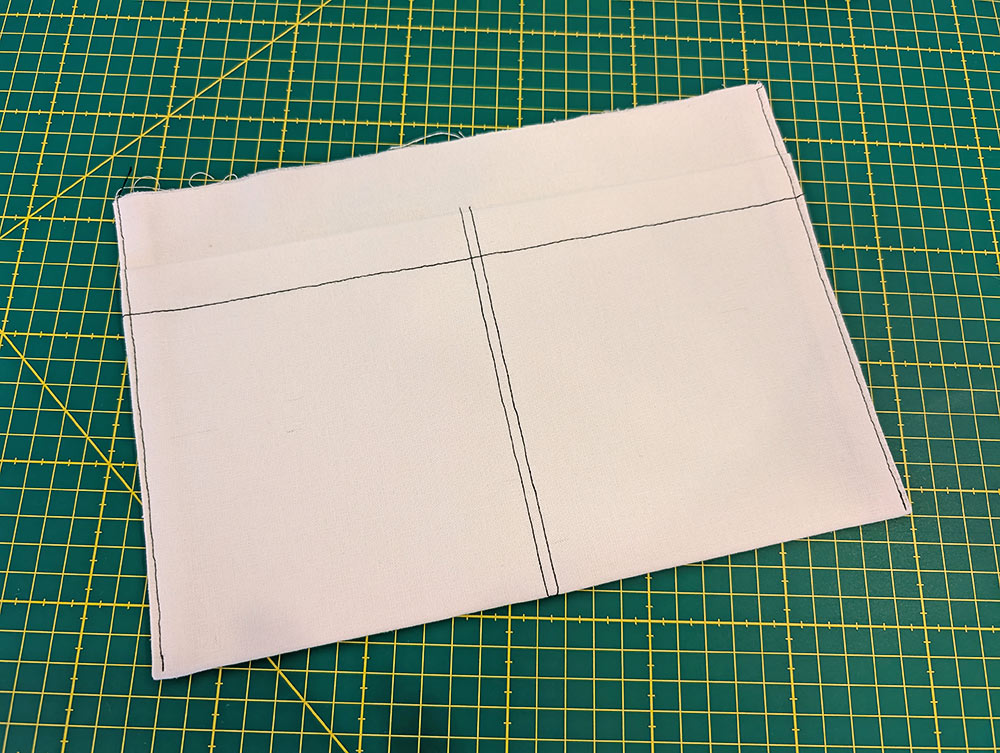
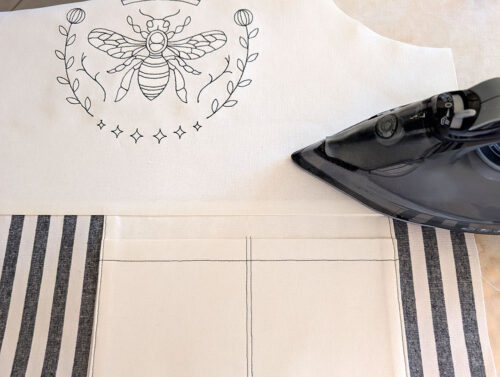
- Measure to find the exact center of the pocket, which should be 5½” from each side edge.
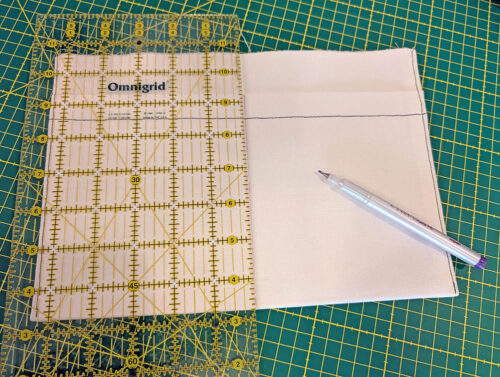
- Using a fabric pen or pencil, draw in a vertical line at this measurement, dividing the pocket into two halves. Remember, whenever you are working on the right side of your fabric, make sure your marking tool is one that will easily wipe away or vanish with exposure to the air or the heat of an iron.
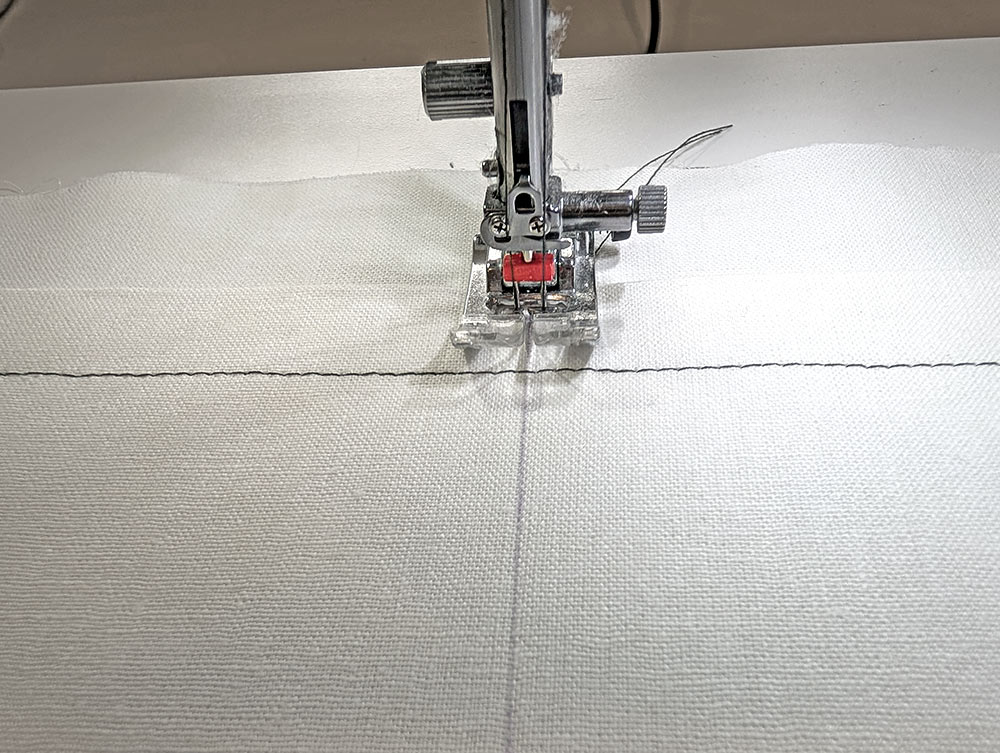
- Change to a twin needle, and adjust your threading using two spools of your darker thread – one for each of the twin needles. You are still using the slightly lengthened straight stitch.
- Start a line of twin needle stitching at the folded edge, and following the drawn line, stitch down to the bottom of the pocket. If available on your machine, use a lock stitch to both start and end this seam or very carefully backstitch to lock your seam. Or, leave your thread tails long at the start and finish, then pull them through to the back with a hand sewing needle and hand knot to secure.
- Your hanging pocket is done.
NOTE: Using a twin needle is optional. You could also choose to simply stitch two close parallel lines or use a single line to divide the pocket in two.


Place the pocket on the skirt panel
- Find the skirt panel, which should already have its interfacing fused in place.
- Place the panel right side up and flat on your work surface.
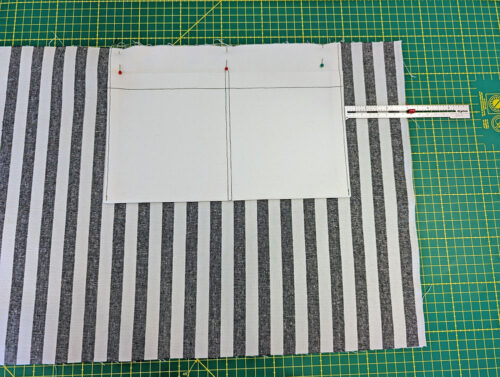
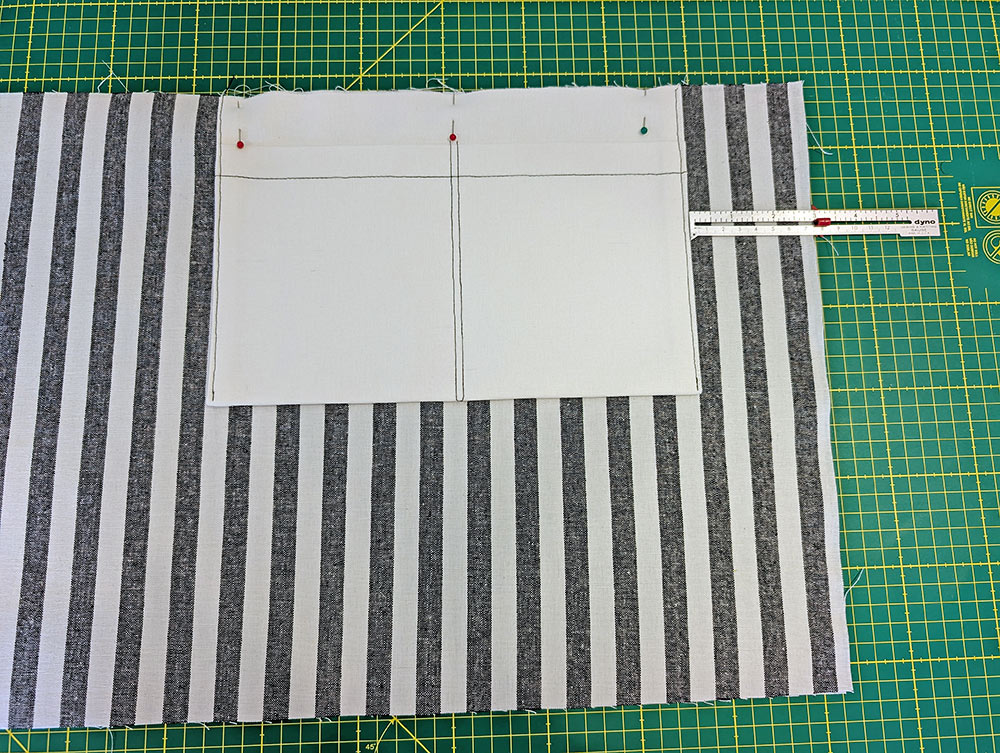
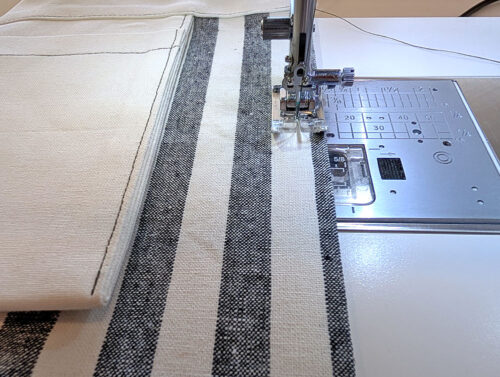
- Put the finished pocket on the skirt panel, right side up, with the upper raw edge of the pocket flush with the upper raw edge of the fabric panel. For our sample, the pocket is 3” in from the right side of our striped panel. This is the approximate position; if using a stripe as we did, you can adjust the placement slightly so the pocket is centered along a stripe at this approximate distance from the raw side edge. Pin in place.
Stitch the bib to the skirt to complete the front panel
- Place the finished bib right sides together with the skirt, sandwiching the pocket between the layers. You are aligning the lower edge of the bib with the upper edge of the skirt. Pin in place.
- Rethread with thread to best match the solid fabric (off white in our sample) in the top and bobbin. Re-set for a standard straight stitch.
- Using a ½” seam seam allowance, stitch horizontally across the front panel through all the layers.

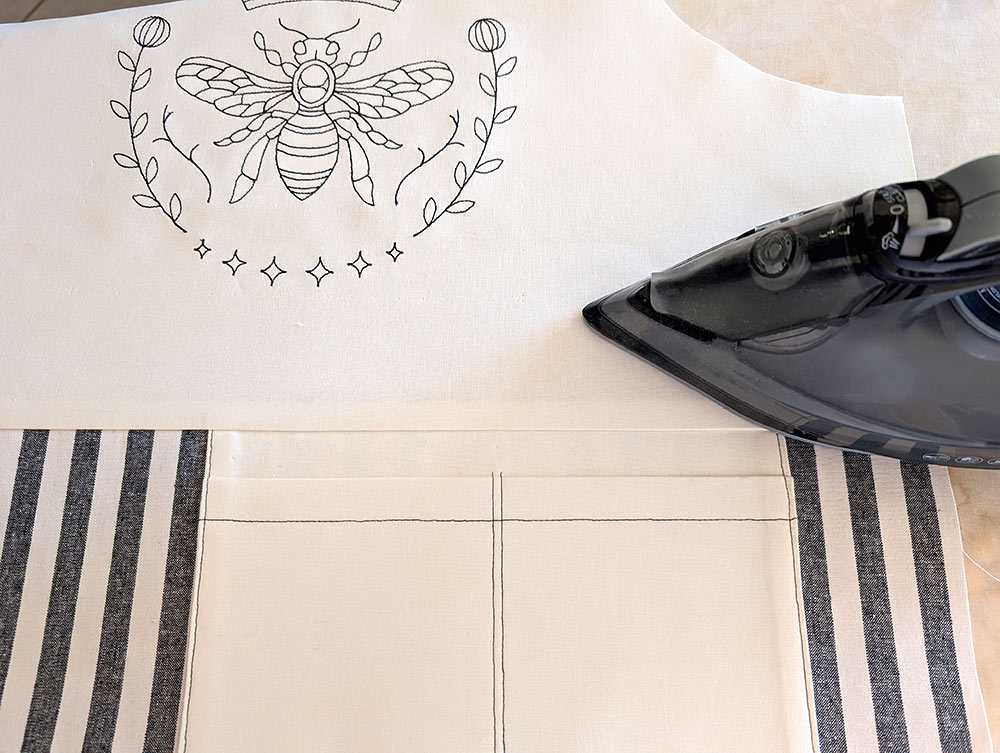
- Press the seam allowance up toward the bib, with the pocket positioned flat against the skirt.
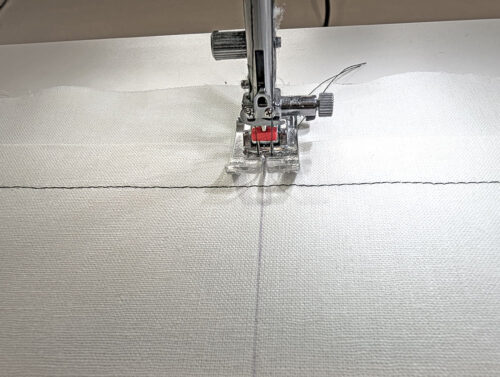
- Rethread with the darker thread (black in our sample) in the top and bobbin. Re-set for the slightly lengthened straight stitch.
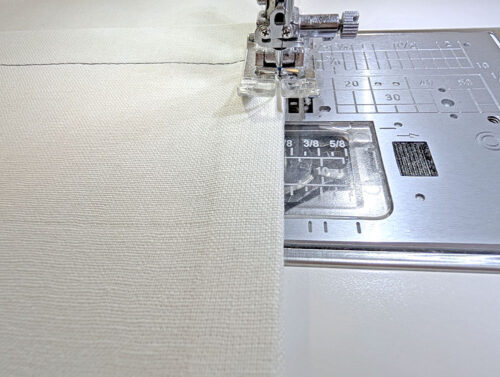
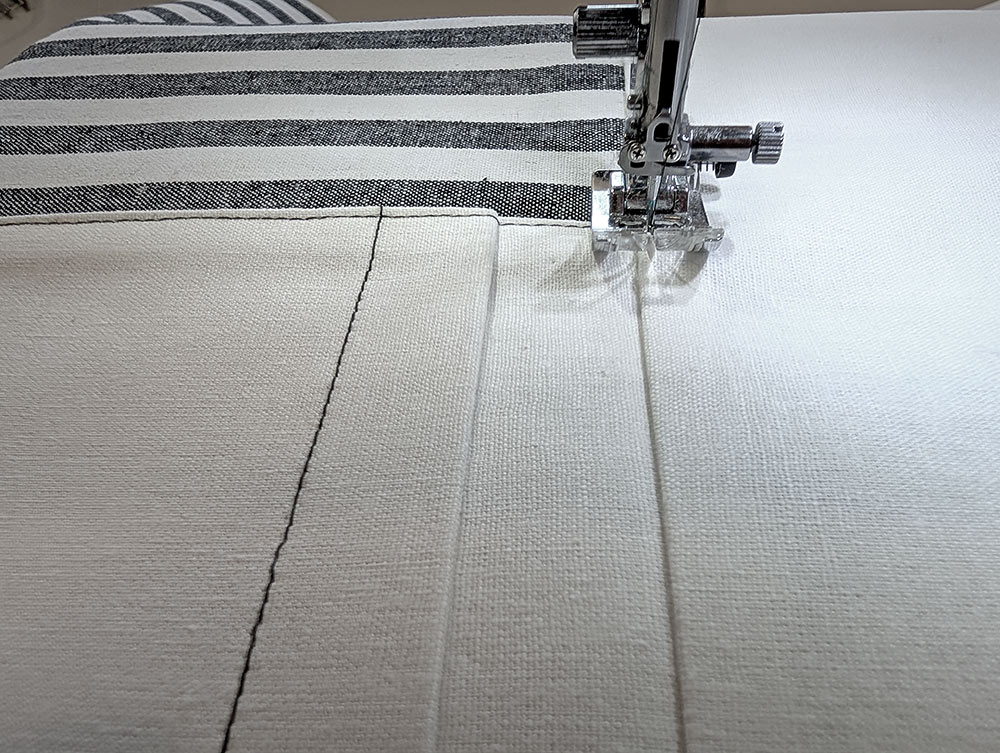
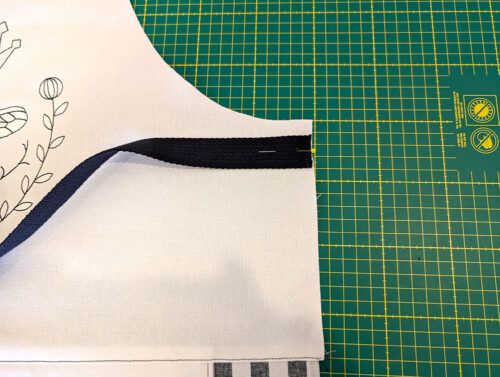
- Topstitch across the apron staying close to the bib/skirt seam. This adds a topstitching accent and holds the seam allowance flat.


Finish the ends of the webbing and place waist + neck ties
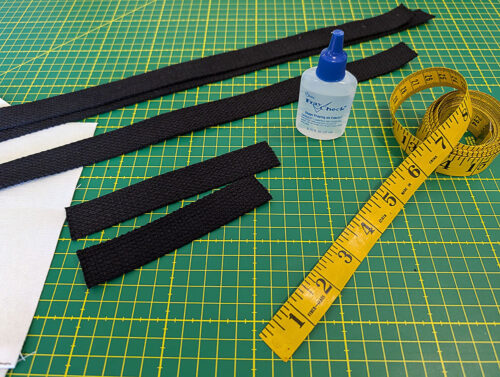
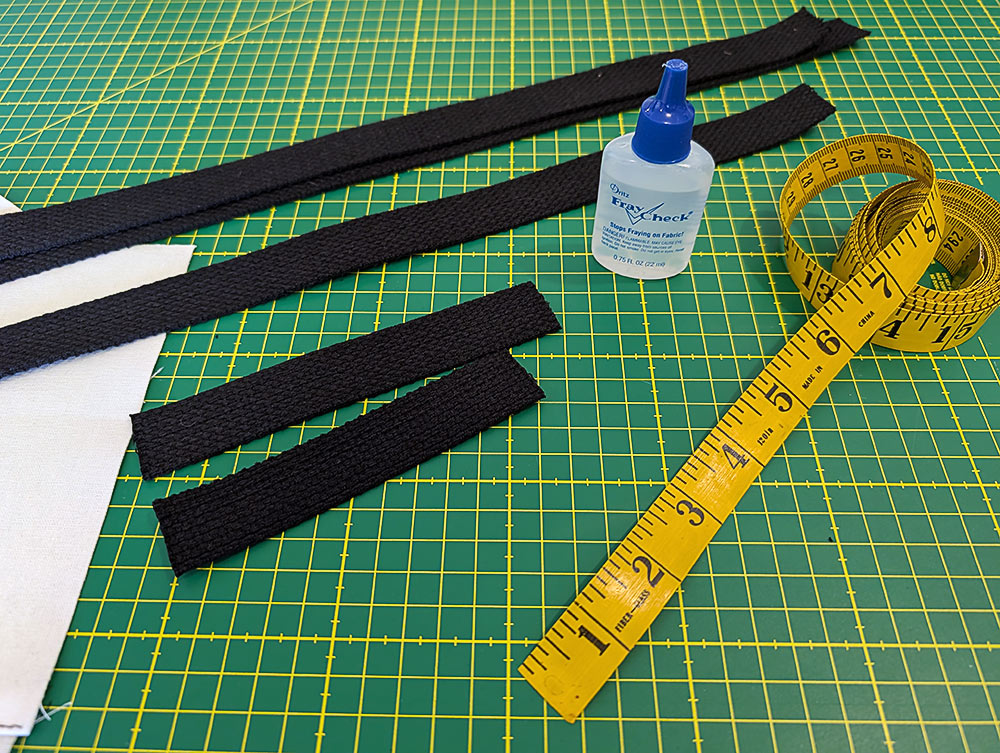
- Find all five lengths of webbing: the two 32” lengths for the waist ties, the 28” length for the long neck tie, the 5” length for the short looped neck tie, and the 6” length for the towel loop.
- If using a cotton webbing as we did, and as we recommend, use a line of seam seal sealant along each end of each length. Make sure the sealant covers each end from both sides.
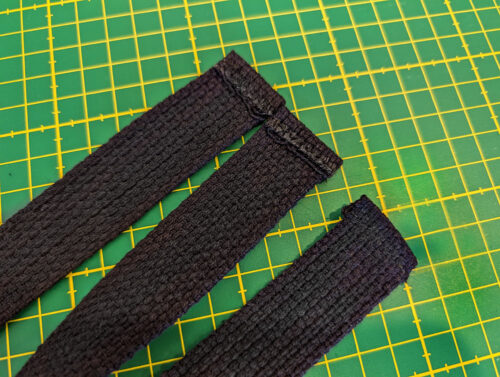
- Once the sealant dries, make ¼” hems as follows:
On ONE end of each 32” waist tie.
On ONE end of the 28” long neck tie.
On BOTH ends of the 6” towel loop.
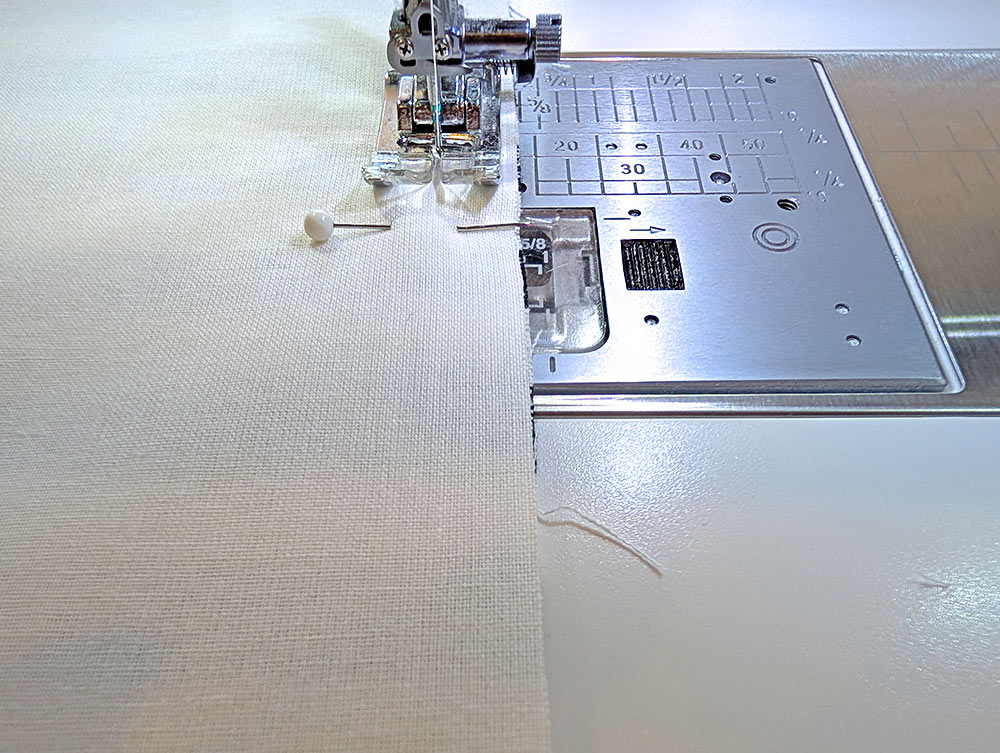
NO hems on the 5” short looped neck tie. - The machine should still be threaded with the darker thread. Re-set for a standard straight stitch.
- Simply fold back each end as listed above and stitch across. Thanks to the needle penetration power of our Janome studio machines, we had no problem stitching through these thicker layers. If you are unsure of your machine (get a Janome or), stitch one tie at a time and go very slowly, even hand cranking the hand wheel to start and finish the seams.
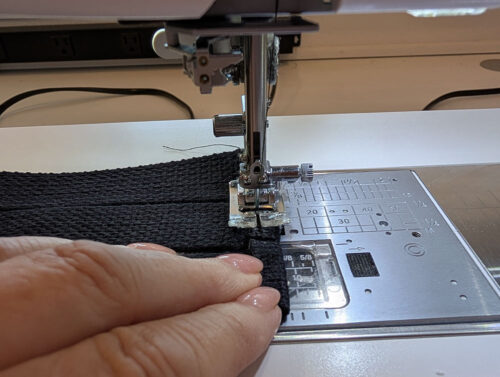
- We did two lengths at once and used a straight stitch. You could also do one tie at a time and use a small zig zag stitch.
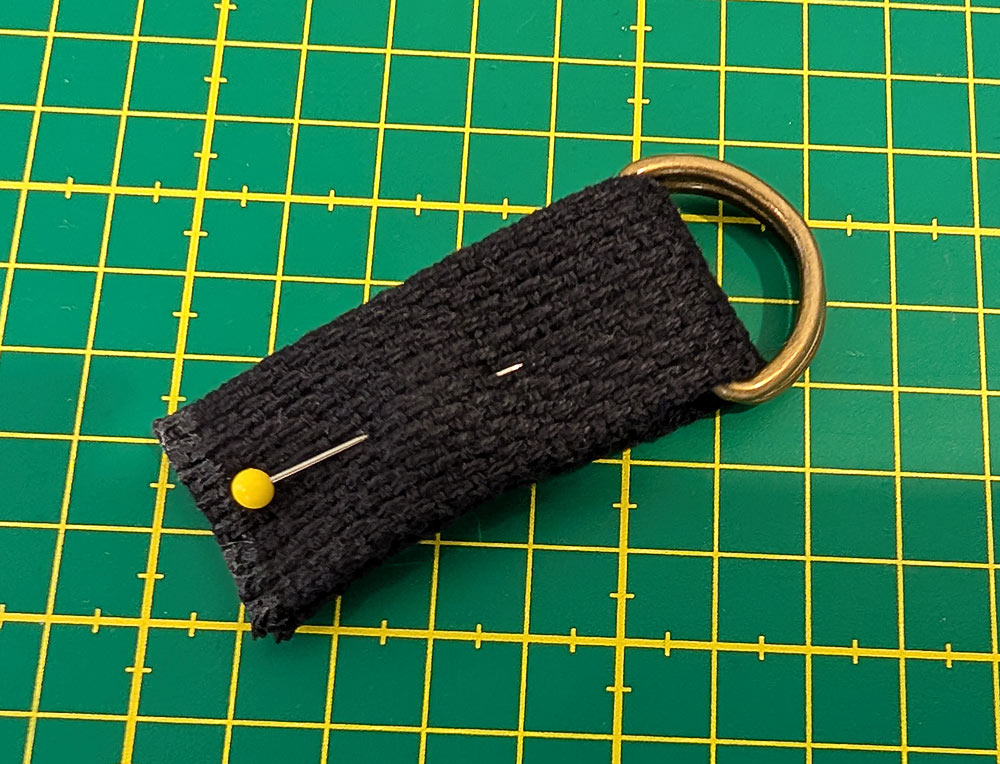
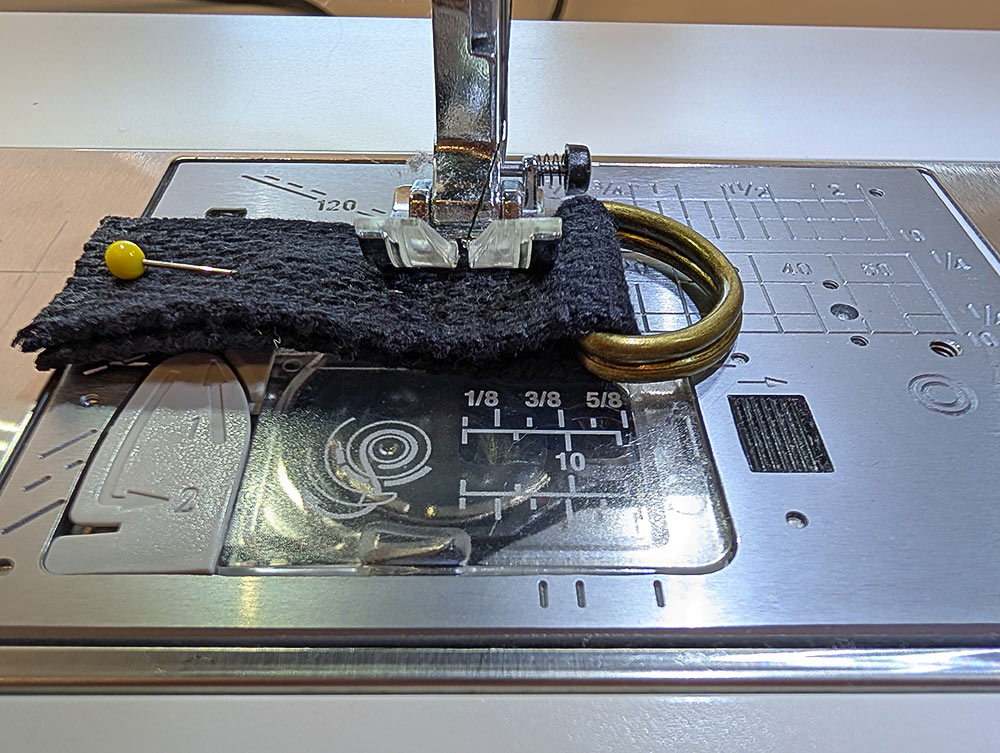
- Find the two D-rings and the 5” length of webbing. Thread the webbing through the two D-ring, bringing it through until the ends match. Pin in place.

- Stitch the two layers together, running this short seam as close as possible to the D-rings.

- Find the apron front and place it right side up and flat on your work surface.
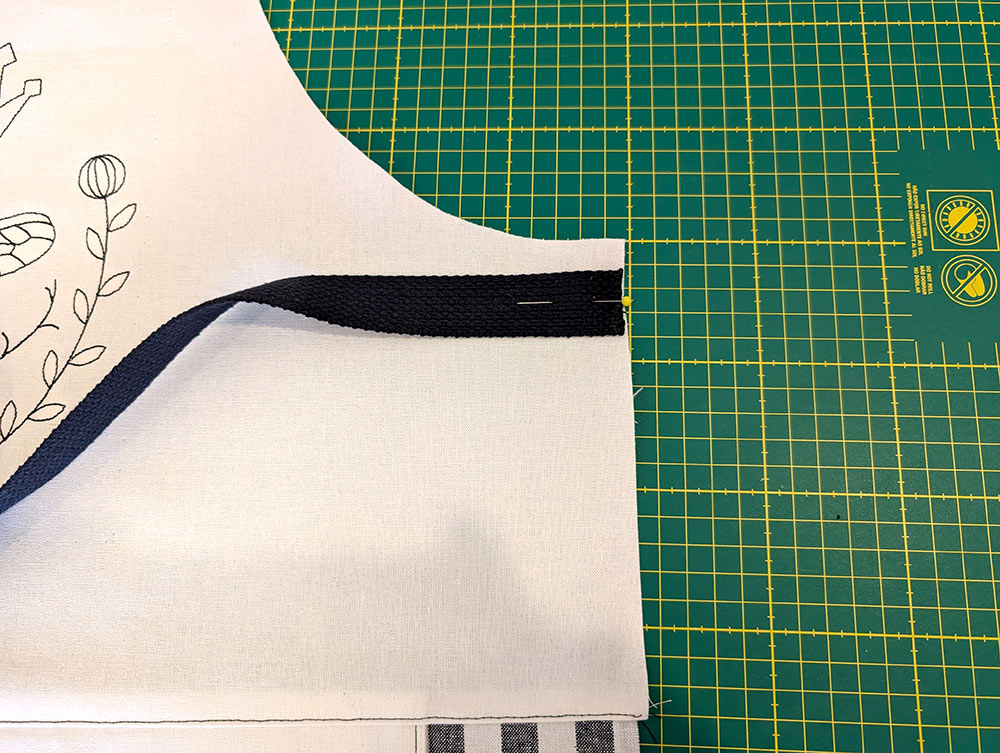
- Place one waist tie at each side of the apron bib, ½” down from the bottom corner of the arm hole cut out. You are aligning the raw end of each tie with each raw side edge of the apron. When pinned in place, the waist ties should be wrong side up – hem showing. This way, when pulled out into position after the final perimeter seam is sewn, the hems will be facing to the inside.
NOTE: It’s a bit hard to see in the photo, but to help prevent the dark webbing from showing through the light fabric, position the ends so they are ⅛” in from from the raw edge of the fabric. Since the seam allowances are ½”, this will hide the ends of the webbing within the seam.
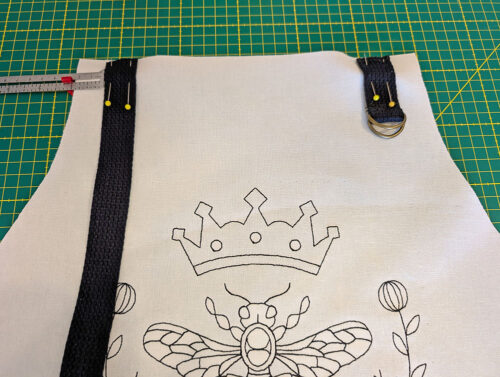
- Place the longer neck tie on the upper left, 1 “ in from the left side edge. Position the shorter tie with the D rings on the right, 1” in from the right side edge. For the longer tie, when pinned in place, it should be placed with the hem right side up – hem hidden. This is because the longer tie feeds backwards on itself when it threads through the D-rings. This positioning will allow the hem to be facing correctly after it threads through.
- Pinning the ties in place is fine, but if you want more security, you could machine baste them in place staying close to the raw edges.


Assemble front and lining + topstitch the perimeter
- Re-thread with the lighter thread (off white in our sample). Keep a standard stitch setting.
- Place your apron front right side up and flat on your work surface. You can pin or tape the ends of the waist ties at the center of the apron panel to insure they stay out of the perimeter seam.
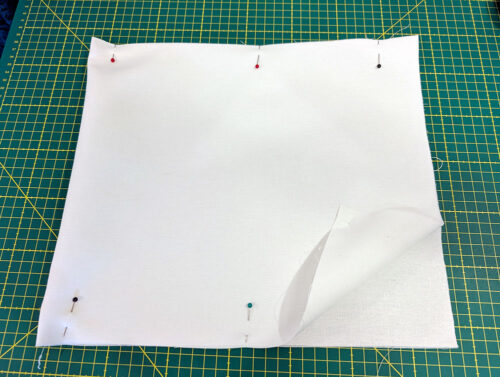
- Place the apron lining right side down on top of the apron front. All raw edges of both layers should be flush all around. Leave an approximate 6” opening along the bottom edge for turning.

- Using a ½” seam allowance, stitch the lining to the front. Go slowly to insure your seam stays even, especially over the ends of the ties. You can even opt to back stitch over each tie end for additional security. Remember to pivot at all the corners and to stop and lock your seam at either side of the 6” opening for turning.
- Clip the corners and turn right side out through the bottom opening.
- Once right side out, reach in with a long blunt tool, such as a knitting needle, chopstick or point turner, and gently push out the corners so they are nice and sharp.
- Press well, folding in the raw edges along the opening so they are flush with the sewn seam.
- Rethread with the darker thread in the top and bobbin. Re-set for the slightly lengthened straight stitch.
- Topstitch around the entire perimeter of the apron. This completely secures the ends of the ties and closes the opening used for turning.
NOTE: We used the width of the presser foot as the gauge for our topstitching, which yielded a nice ⅜” width. Start your stitching at one end of the bib/skirt seam, leaving long thread tails. Finish at the same point with the same long thread tails. By doing this there will be no overlap of stitches. Instead, the thread tails can be pulled through to the back with a hand needle and knotted off to secure, burying the stitches in the seam.

Add the towel loop
- Find the remaining webbing length, which should be hemmed on each end. We are adding the towel loop last in order to more securely stitch it through both layers of the apron.
- As shown in the drawing above, pin the loop just below the bib/skirt seam and 1½” in from the left side of the apron. As you did with the hanging pocket, if using a striped fabric, do your best to center the loop along the stripes.
- Keep the dark thread in the top, but replace the bobbin with the lighter thread. Re-set for a standard straight stitch. This color combination helps keep the stitching nearly invisible on the lining side of the apron.
- Stitch along each end of the towel loop with a short vertical seam. Use a lock stitch to start and end or very carefully back stitch.
Project Design: Anne Adams
Sample Creation and Embroidery Design: Michele Mishler