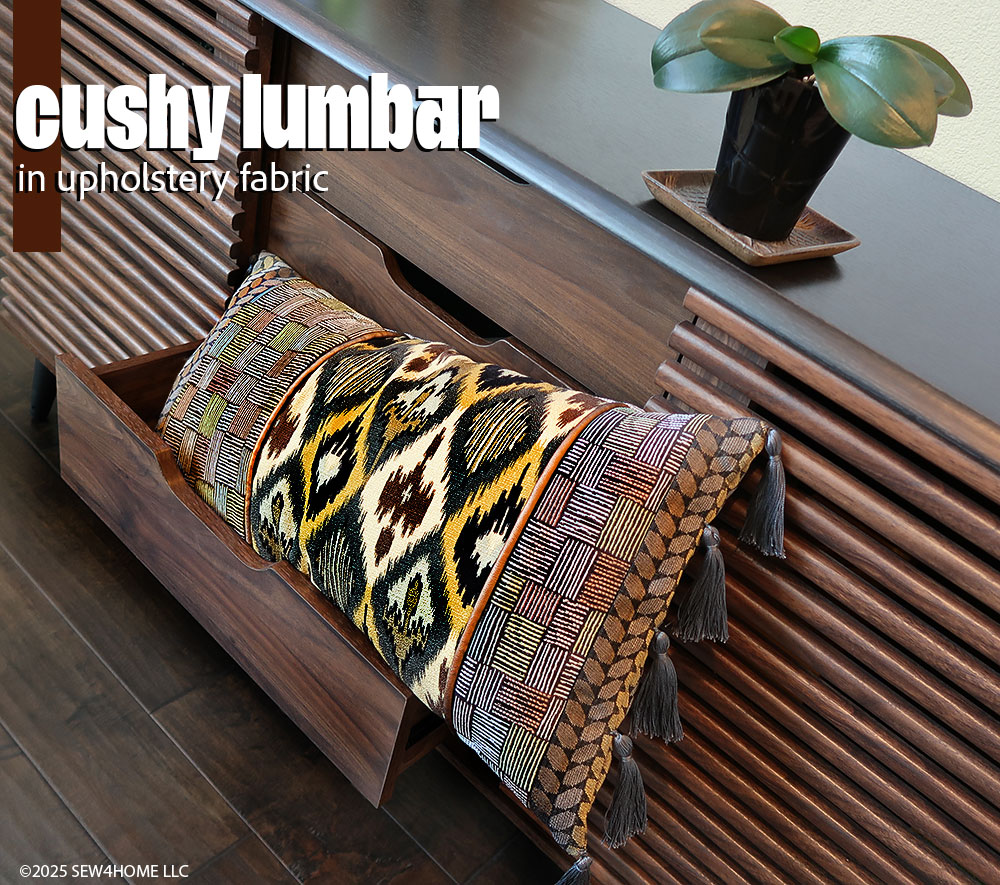
With sponsorship help from our friends at Janome America, we designed a striking lumbar pillow that allows you to bring together a beautiful blend of upholstery fabrics with classic home décor finishes, like tassels, piping, and button closures. For this project: go ahead… mx it up!

- Keep your presser foot level.
- Make sure your needle is sharp.
- Slightly lengthen the stitch.
The machine operator (that would be you) is just as important. Don’t forget to:
- Go slowly and carefully.
- Let the machine do the majority of the work – don’t aggressively push or pull the fabric.
- Practice on layers of scraps first to confirm stitch settings are correct for the situation.

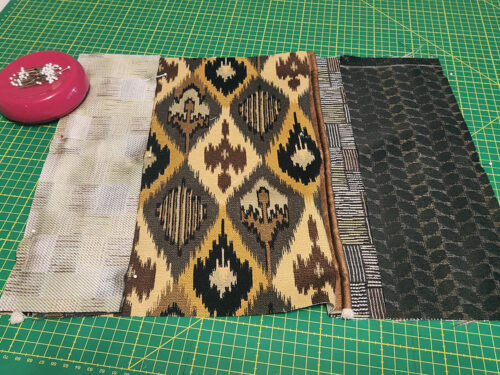
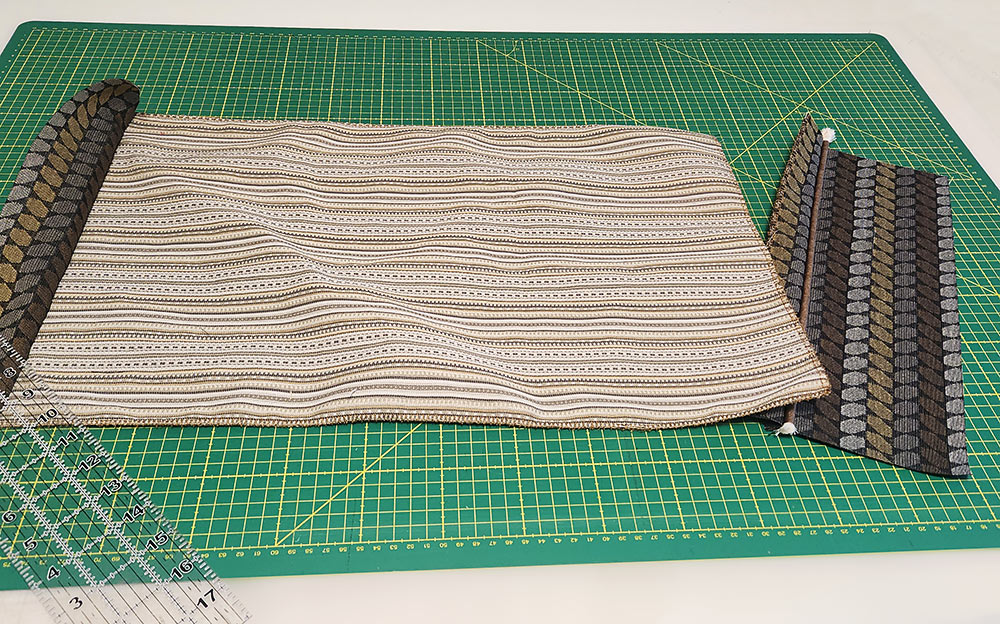
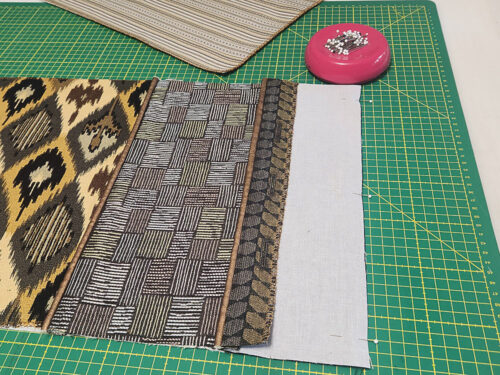
The pillow finishes at 12” x 26” and the cuts we recommend for the front and back are small enough to qualify as scraps. There might be something hiding in your specialty stash. If you’re shopping in-store, look for remnants or even ask about their out-of-stock upholstery sample books, which often feature quite large pieces. We ended up purchasing ½ yard cuts of all our fabric choices because we love fussy cutting and that always takes a bit more fabric. We used four upholstery cuts and one faux leather cut.
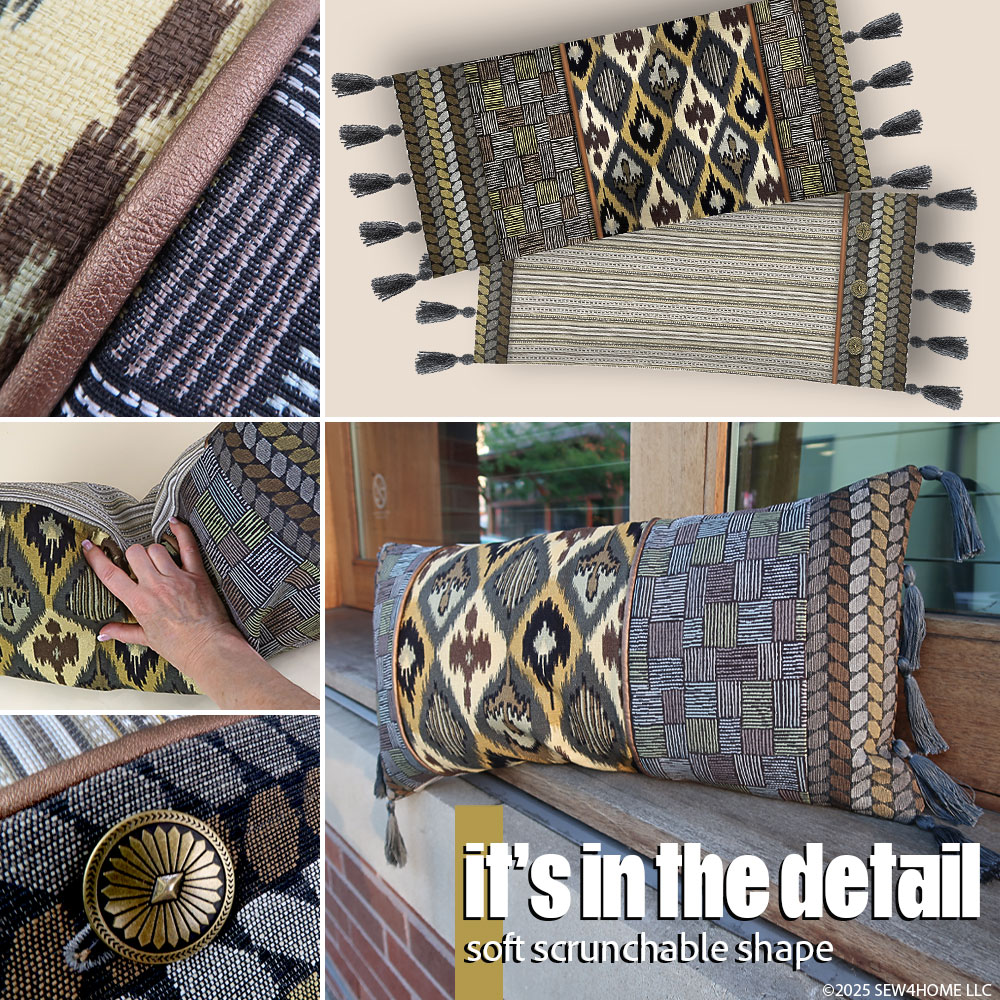
As mentioned above, we used a faux leather for our piping, which added lovely copper accents to the front and back. As always, you get to choose your fabrics, but we do strongly recommend making your own piping rather than using packaged options that tend to be too thin. Of course, we have steps below to take you through the process as well as a link to our full piping tutorial.

If you’re finding your current machine is struggling to stitch through thicker layers, as a Janome exclusive studio, we always suggest taking a look at their machine line-up. There are some excellent new models debuting this Fall as well as full line of classic favorites. From the entry level machines to their top-of-the-line powerhouses, Janome offers what we consider to be the best machines on the market. Our thanks again to Janome America for their support of this project and many of our other most popular projects. To find out more about the amazing Janome machines, visit their website, follow them on social media, and – best of all – visit a local dealer for an in-person test stitch.
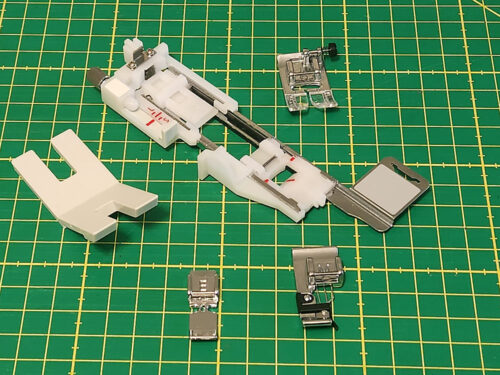
Sewing Tools You Need

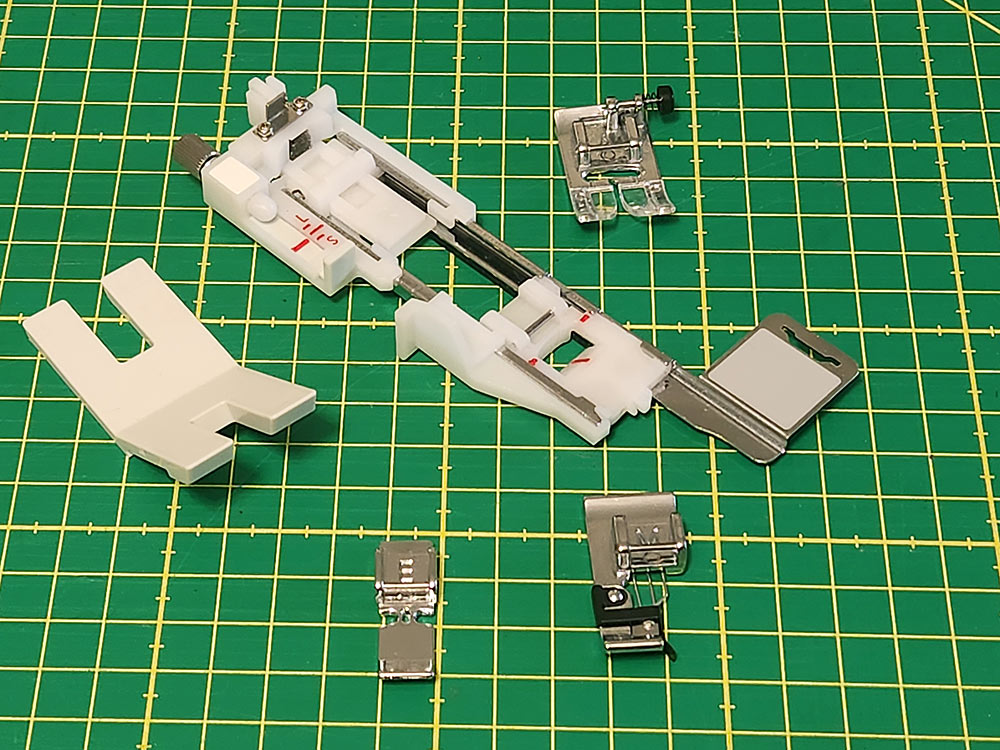
- Sewing Machine and standard presser foot
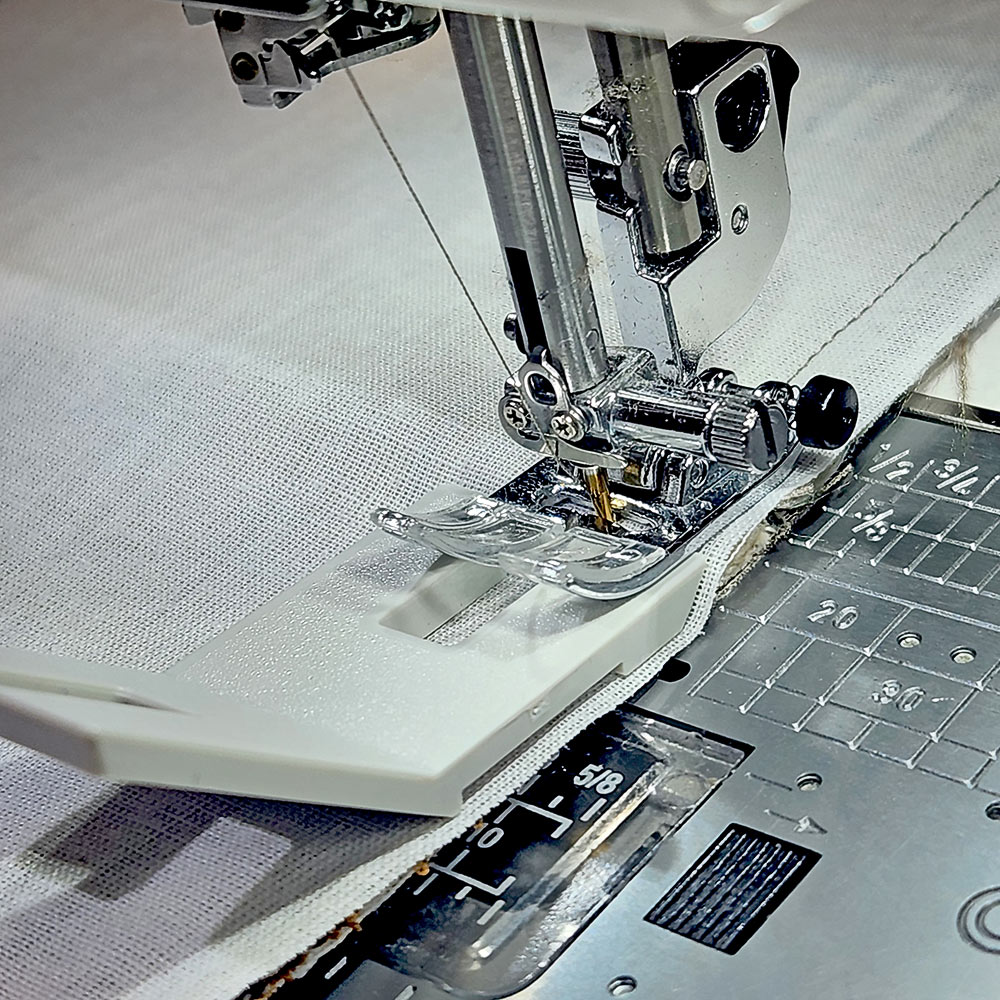
- Automatic Buttonhole foot; best for getting the precise size of buttonhole for your button – we used the Janome Stabilizer plate along with our Automatic Buttonhole foot – another helpful accessory when working with thick layers
- Overcast foot; optional but excellent for finishing the raw edges of thicker fabrics
- Zipper foot; for making and attaching the piping
- Button Shank Plate; also known as a “hump jumper” – helpful for leveling the presser foot over particularly thick seams
Fabric and Other Supplies
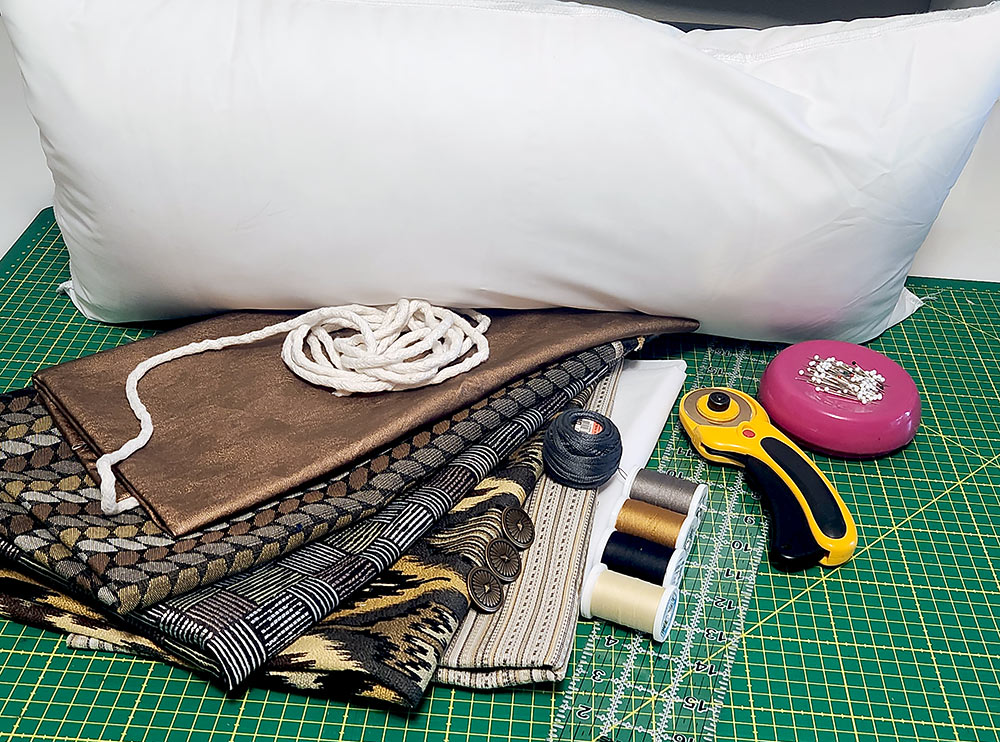
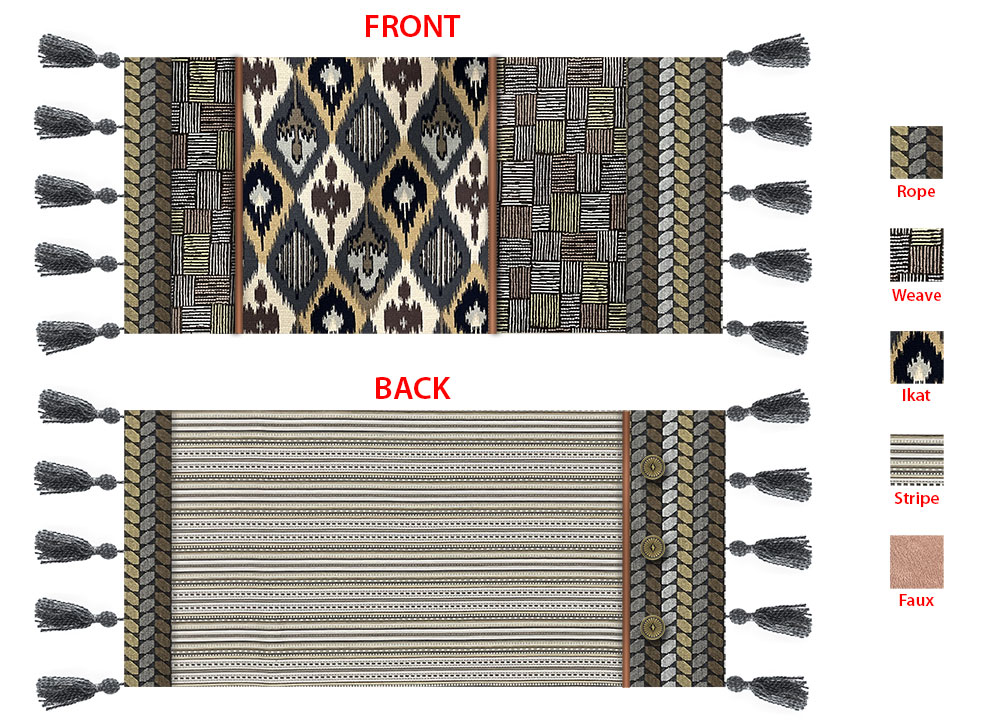
NOTE: As mentioned above, we started with a ½ yard of all our upholstery fabrics in order to get the best fussy cuts. You may be able to get away with smaller cuts, remnants or scraps, but do keep in mind the height of each main cut is 14”. Widths should not be a problem as home décor and upholstery fabrics are traditionally 50”+ wide. We’ve included a fabric key below so you can follow which fabric we are referring to on our sample.
- ½ yard EACH of FOUR 45″+ wide home décor or upholstery weight fabrics
- ½ yard of 44” + wide faux leather or similar for the piping; you may not need nearly this much as you will only cut three 2” x 14” strips, however, faux leather stretches in a distinct way so ½ yard does insure you could cut vertically if need be. If not necessary, you can get away with ¼ yard
- 1½ yards of 20”+ wide lightweight fusible interfacing; we used Pellon Shape-Flex
- 1¼ yards of 3/16” piping cord
- TWO spools (apx. 200 yards) of pearl cotton floss in a color to best coordinate with your fabrics; we used a dark charcoal gray
- THREE 1” – 1½” buttons for the back closure; we recommend shank buttons when working with thicker fabrics – ours were 1” metal shank buttons
- ONE 26” x 12” pillow form; we suggest a down or down alternative for a softer/flatter finish
- All-purpose thread to match fabric
- See-through ruler
- Fabric pen or pencil
- Iron and ironing board
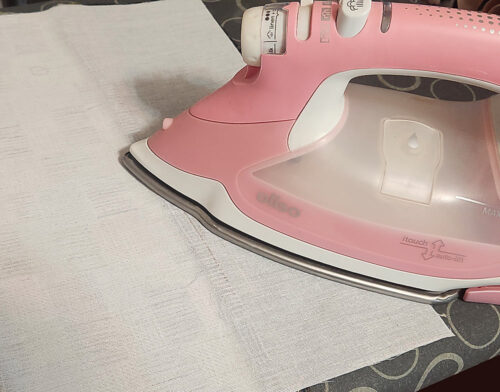
- Pressing cloth; best when working with faux leather
- Scissors
- Rotary cutter and mat
- Seam gauge
- Seam ripper
- Straight pins
- Small piece of cardboard or similar to help create the tassels; ours was 2” x 3½”
- Standard hand sewing needle for sewing buttons
- Yarn darner or upholstery needle for attaching tassels
- Cellophane/Magic tape; we show below how we used this when creating the faux leather piping
Getting Started
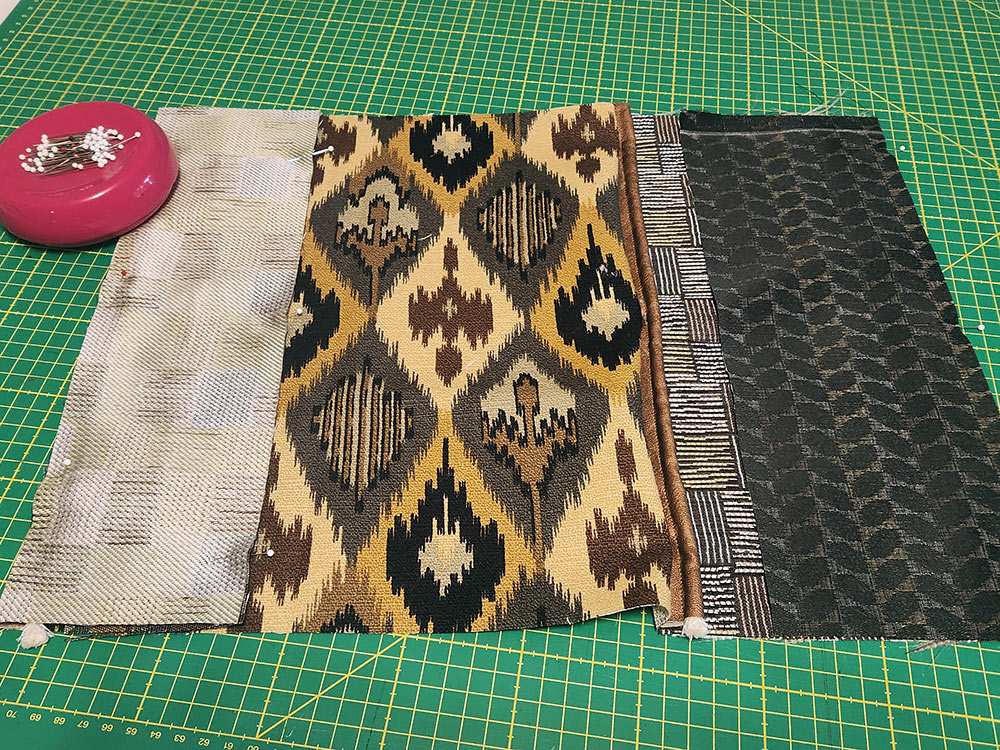
- From the fabric for the main front “center” panel (Ikat in our sample), cut ONE 12” wide x 14” high rectangle.
- From the fabric for the smaller front panels to either side of the “center” panel (Weave in our sample), cut the following:
ONE 4” wide x 14” high rectangle
ONE 7” wide x 14” high rectangle - From the fabric for the front end panels, the back end panel, and the back button overlap panel and its facing (Rope in our sample), cut the following:
TWO 3” x 14” rectangles (front and back narrow end panels)
TWO 5” x 14” rectangles (front wide end panel + back button overlap panel)
ONE 2” x 14” rectangle (back button overlap panel facing) - From the fabric for the main back panel (Stripe in our sample), cut ONE 22½ x 14” rectangle.
- From the fabric for the piping (Faux Leather in our sample), cut THREE 2” x 14” strips.
- From the lightweight fusible interfacing, cut the following:
ONE 26” x 14” rectangle for the main front panel
ONE 24½” x 14” rectangle for the main back panel
ONE 4½” x 14” rectangle for the back button overlap panel - Cut the piping cord into THREE 15” lengths.
At Your Sewing Machine & Ironing Board
Make the three piping strips
- Find the three fabric strips and three piping cord lengths.
- Place a length of cord in the center of a strip.
NOTE: The cord will extend beyond the fabric at either end. This is correct; you’ll trim it flush when done stitching. - Firmly wrap the fabric around the cord. Match the raw edges of the fabric to create a lip or flange. Pin in place.
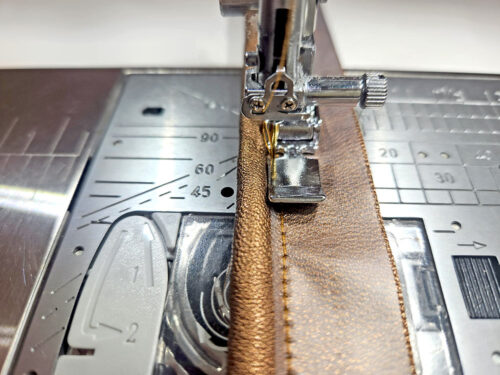
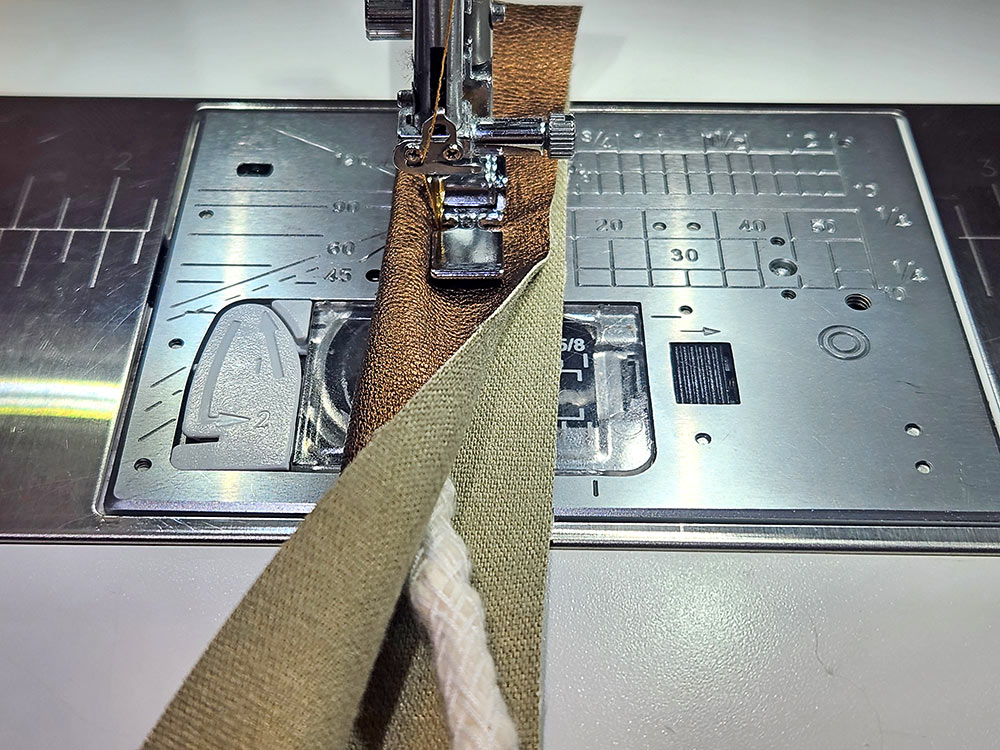
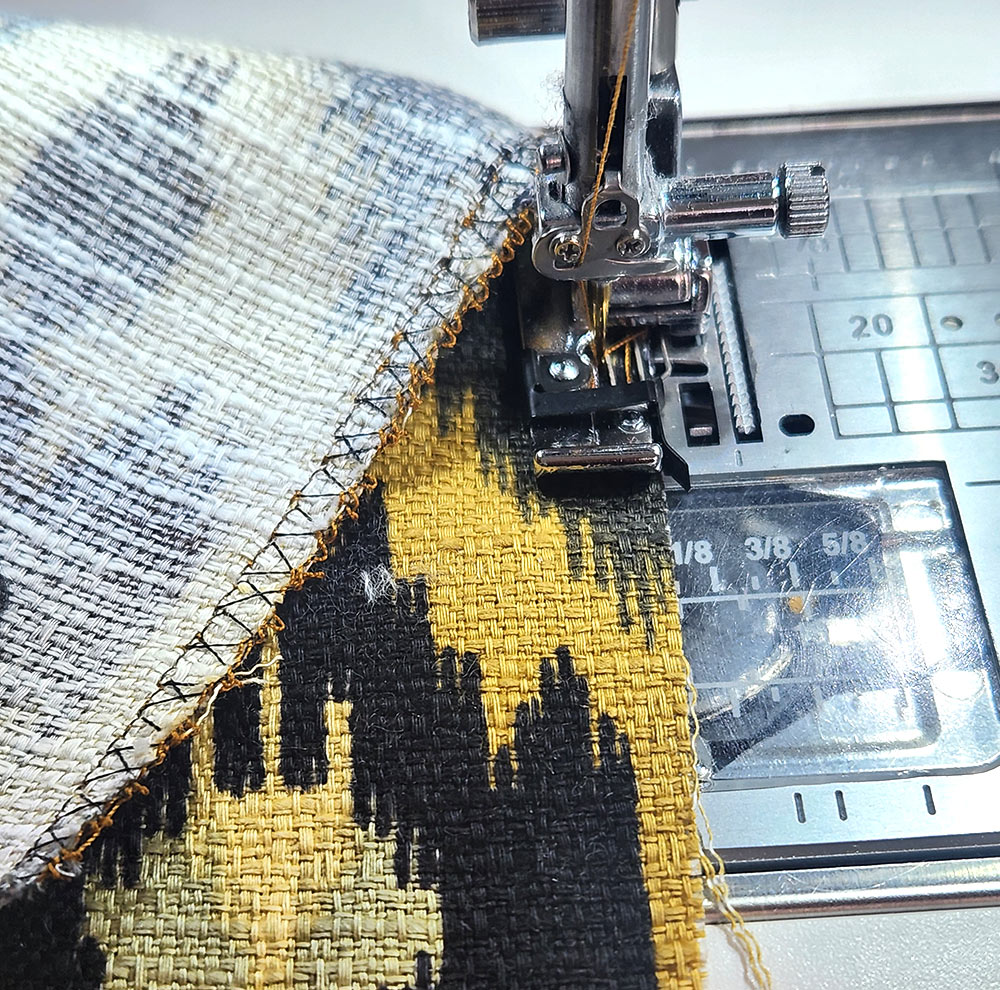
- Attach a Zipper foot and thread the machine with thread to best match the piping fabric in the top and bobbin. Set for a slightly lengthened stitch.
- Place the piping under the foot with the cording portion to the left of the needle, the flange portion to the right.
- Baste the length of the strip. Your stitching should run as close to the cording as possible but not on the cording.

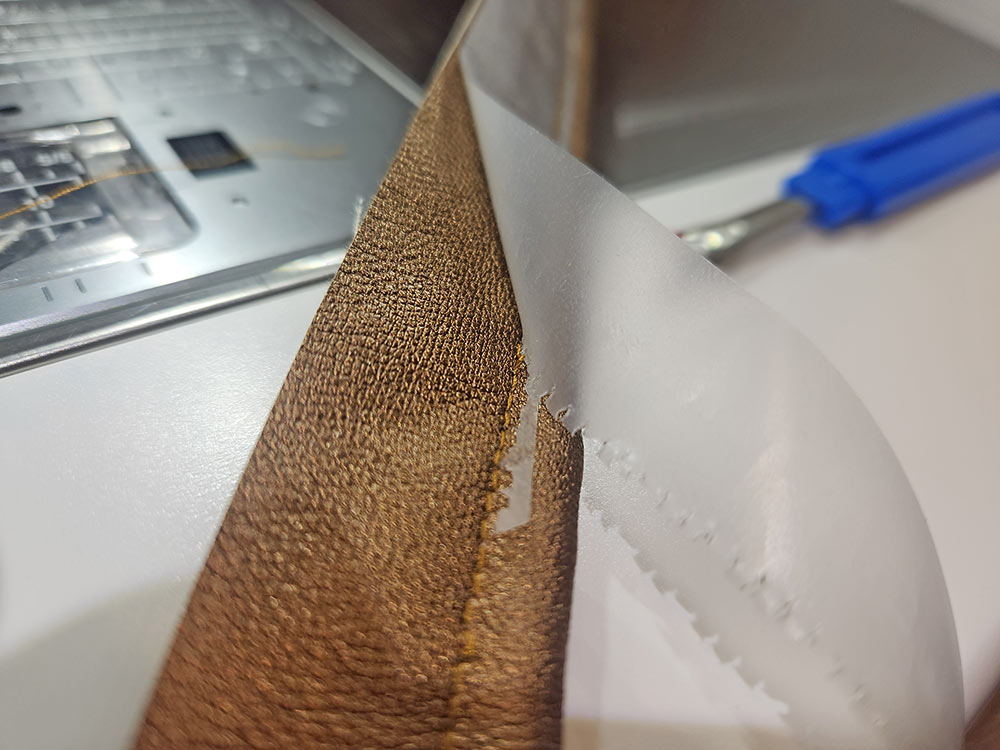
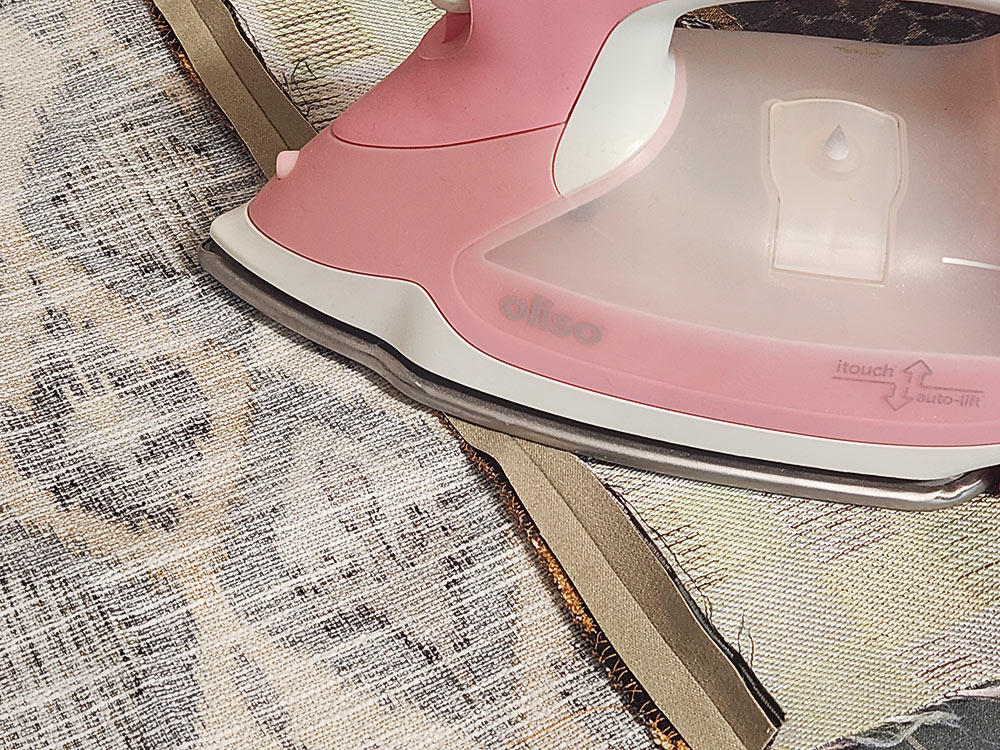
- If using faux leather as we did, it may want to stick to the presser foot. We often opt for the Janome Ultra Glide foot when working with sticky fabrics, but that is not available in a Zipper foot option. Instead, you can place cellophane/magic tape the length the flange. Its surface will allow the presser foot to move smoothly.
- When done, simply tear away the tape, picking out any remnants with a straight pin.

NOTE: If you are a Janome sewer and have the Ultra Glide Needle plate, this is a good opportunity to use it to give you extra smooth feeding underneath the flange. - When all three lengths of piping have be sewn, trim back the flange to ½” – measured from the seam line to the raw edge. Also, trim the ends of the piping cord flush with the fabric.
- As an added help to minimize bulk, we often also suggest using your seam ripper to open up about ½” of the fabric at each end of the piping. Clip off about ½” of the piping cord itself from both ends. Removing that little bit of cord helps flatten the ends of the piping within the seam allowance making it easier to stitch.
NOTE: If you are brand new to making custom piping, you can check out our full tutorial before starting.

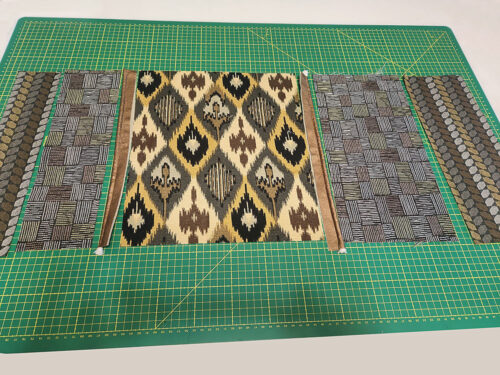
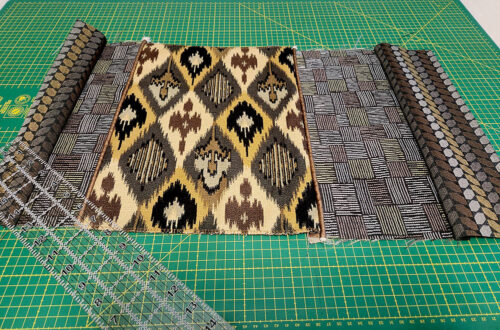
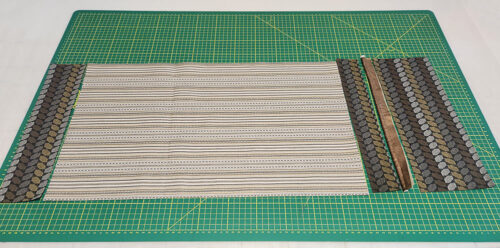
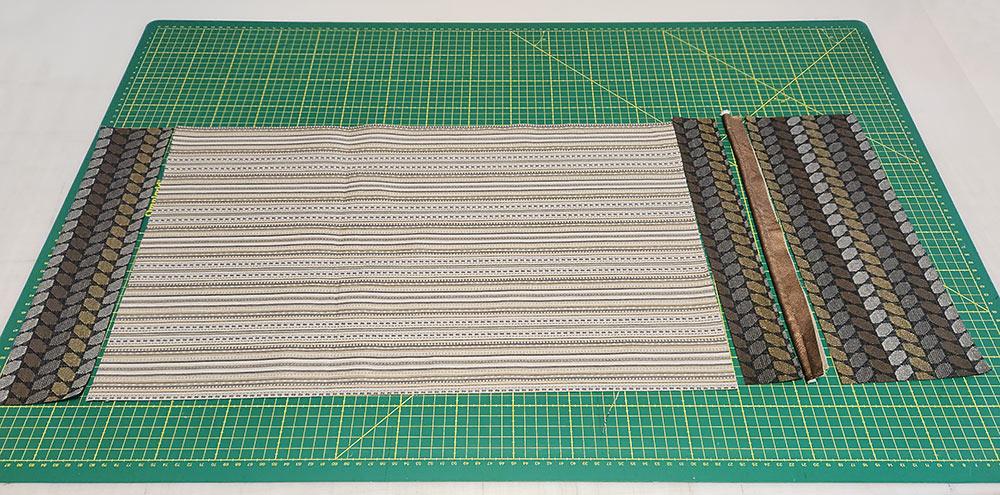
Assemble the front panel
- Gather all the elements for the pillow’s front panel: two end panels, two side panels, one center panel, and two piping strips.
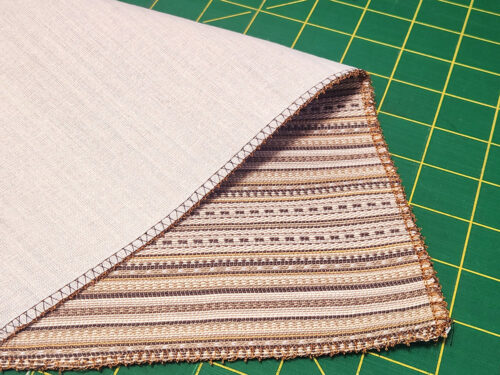
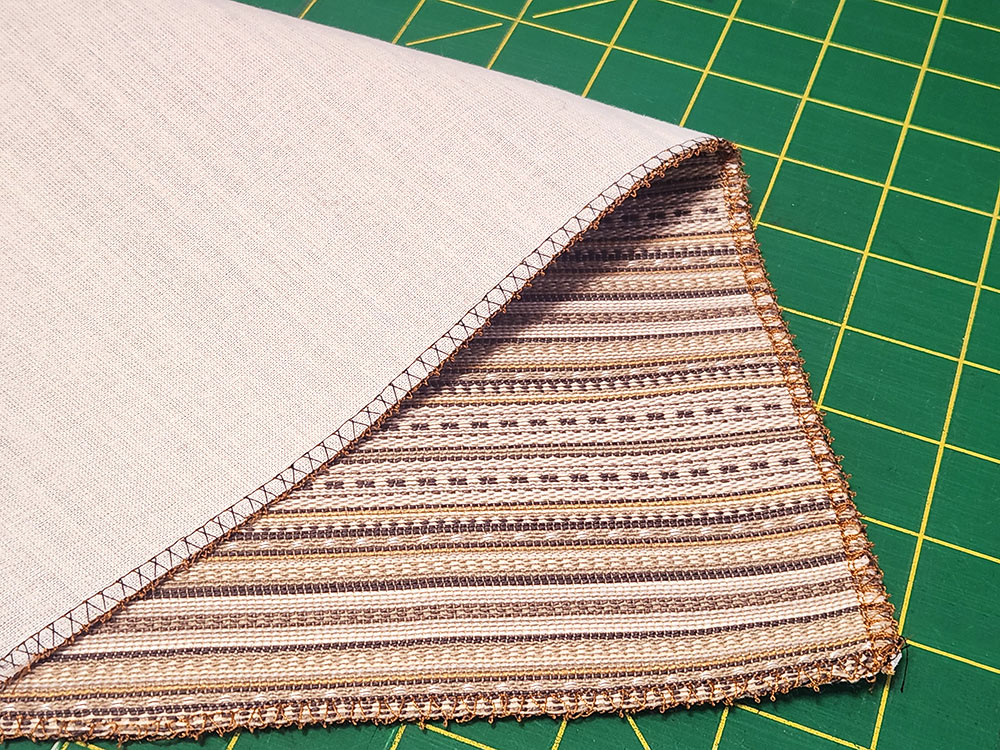
- Home décor and upholstery fabrics can be more prone to raveling than other substrates. If this is the case for any of your panels, now is an excellent time to finish the edges prior to assembly.
- We used the Janome Overcast foot on the edges of our panels.

- It really is a quick and easy bit of security, thanks to the Overcast foot.
- Attach a standard presser foot and re-set for a slightly lengthened straight stitch. Thread the machine with thread to best blend with the fabrics in the top and bobbin.
- Working from the outside into the center, pin the panels right sides together along their 14” inner sides. In other words, each end panel right sides together with a side panel and each side panel rights sides together with the center panel – sandwiching the piping between the layers to either side of the center panel.
NOTE: Because you trimmed the piping flange to ½”, you can sandwich it between the layers with all raw edges flush. - You can use a standard presser foot for all the outer seams, but we do recommend switching back to your Zipper foot for the two inner seams in order to get nice and close to the piping cord – just as you did when creating the piping.
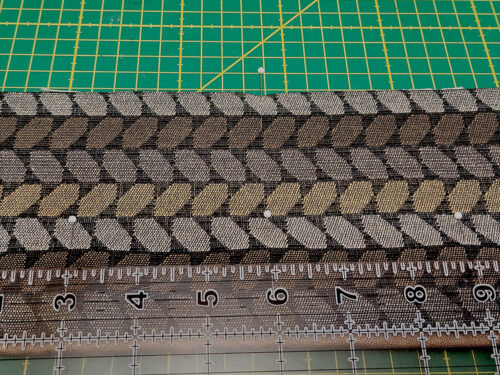
- When done, your top and bottom raw edges may be slightly uneven; this is common when seaming together several panels and especially common when working with a variety of substrates and/or thicker layers. Using a see-through ruler and rotary cutter, even up the top and bottom of the panel. Just slice the smallest amount; you don’t want to adversely affect the height of the panel.
- Carefully press all the seam allowances open and flat.
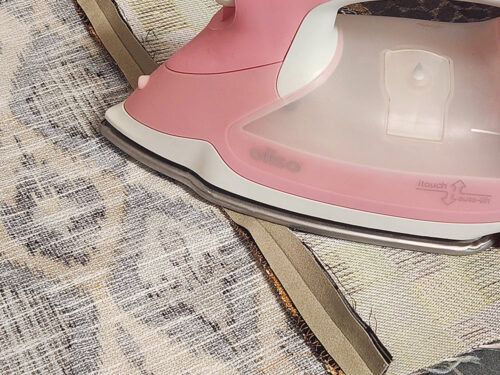
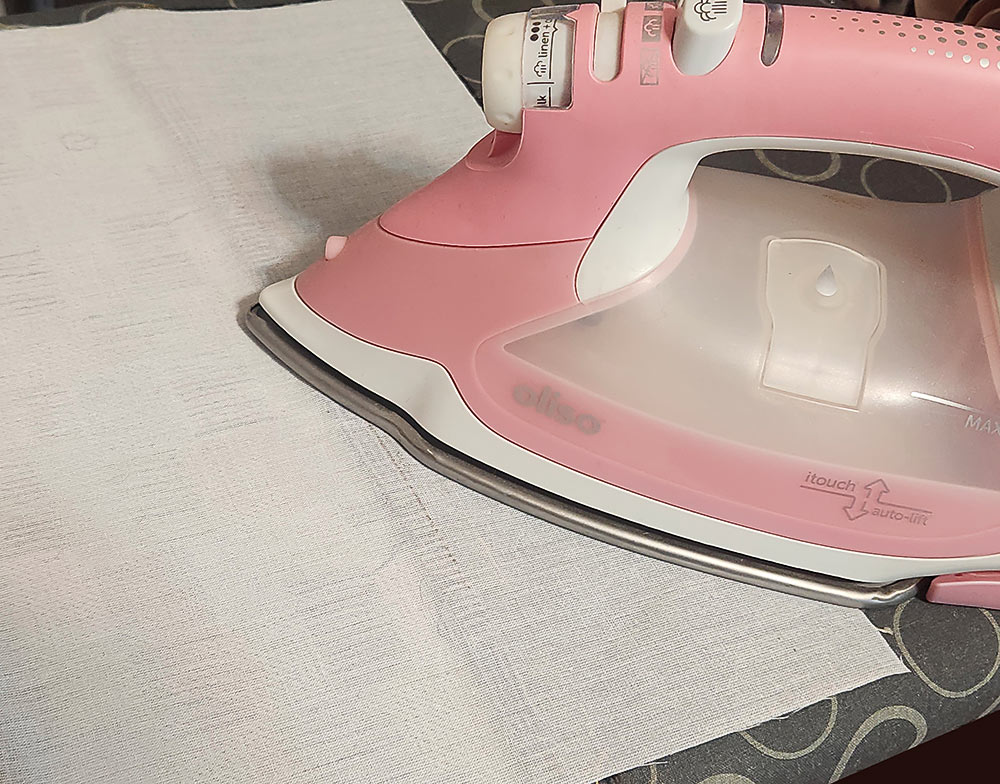
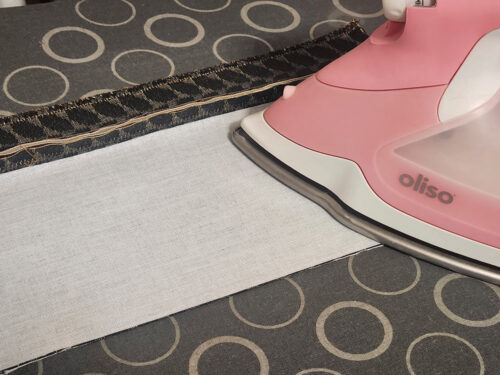
- Find the 26” x 14” rectangle of lightweight fusible interfacing and center it on the wrong side of the assembled front panel; all raw edges should be flush. Following manufacturer’s instructions, fuse in place. This helps insure the seam allowances stay nice and flat, which can sometimes be more challenging with thicker fabrics.
- Set aside the front panel.


Create the back panel sections
- Gather all the elements for the pillow’s back panel sections: one end panel and the main center panel is the first section – the button overlap panel, its facing, and one piping strip make up the second section.
- Seam together the two sections in the same manner as you did for the front panel.

- Find the 24½” x 14” rectangle of lightweight fusible interfacing and center it on the wrong side of the assembled first section of the back panel – the larger section. As above, following manufacturer’s instructions, fuse in place.
Create the button overlap panel
- Flip over the second section of the back panel (the button overlap panel) so it is now wrong side up. Find the 4½” x 14” rectangle of lightweight fusible interfacing. Center it on the larger of these two sewn panels. The three outer edges of the interfacing should be flush with this larger half of the section as shown in the photo below. Following manufacturer’s instructions, fuse in place.
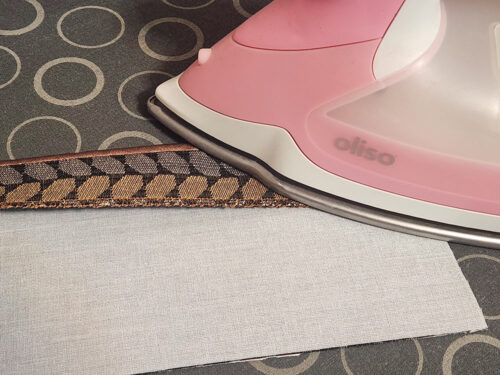
- Fold the facing to the back so the piping is revealed. It should be one even line from top to bottom. Press carefully to hold this fold. We are not showing a pressing cloth in this photo, but you may want to consider it when working with faux leather.


Add the buttonholes
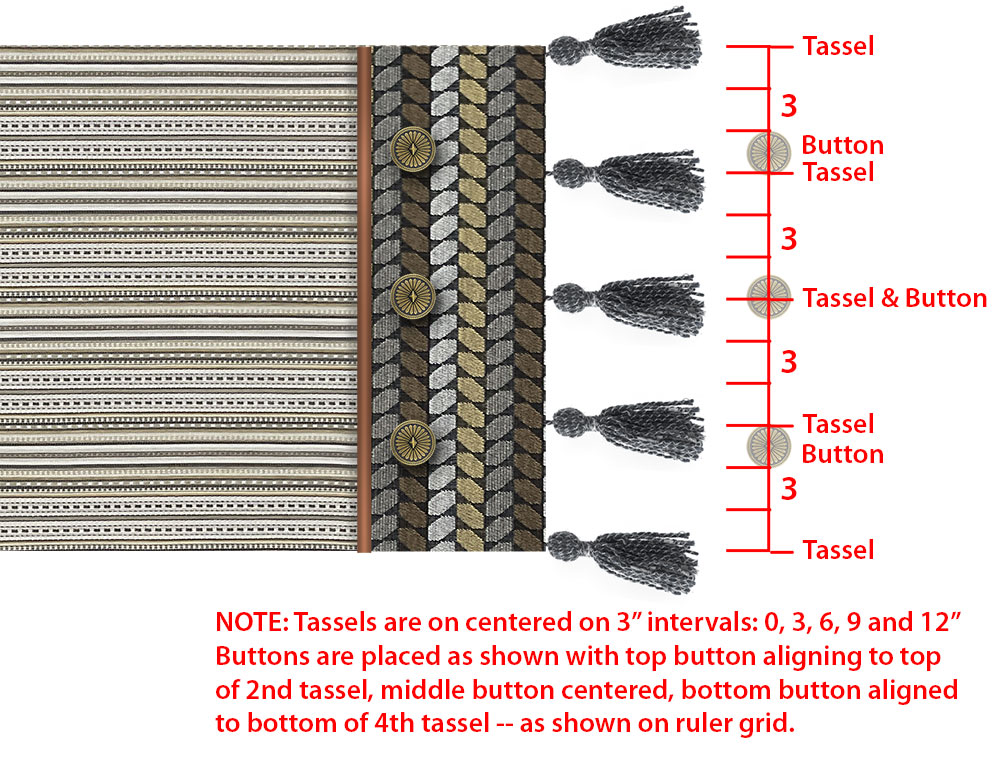
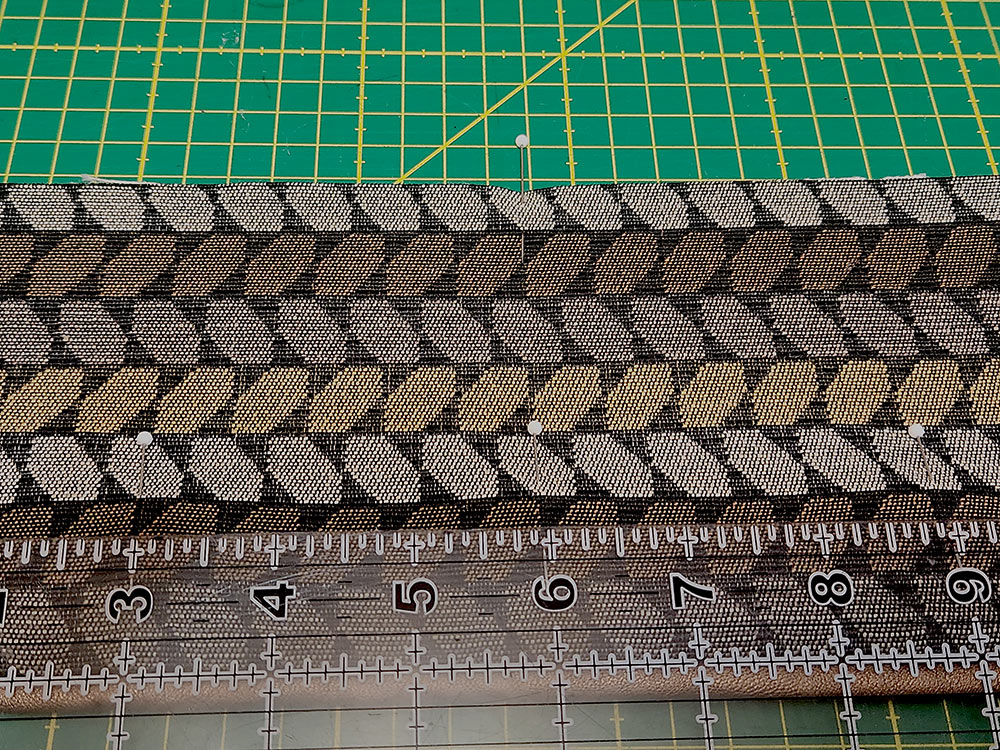
- Our steps show placement for our 1” buttons. Your placement may vary slightly based on the buttons you select. No matter the size, start by finding the center of your panel, top to bottom. Mark this point first, then mark evenly spaced points to the left and right of center. Ours were 3” to the left and 3” to the right.
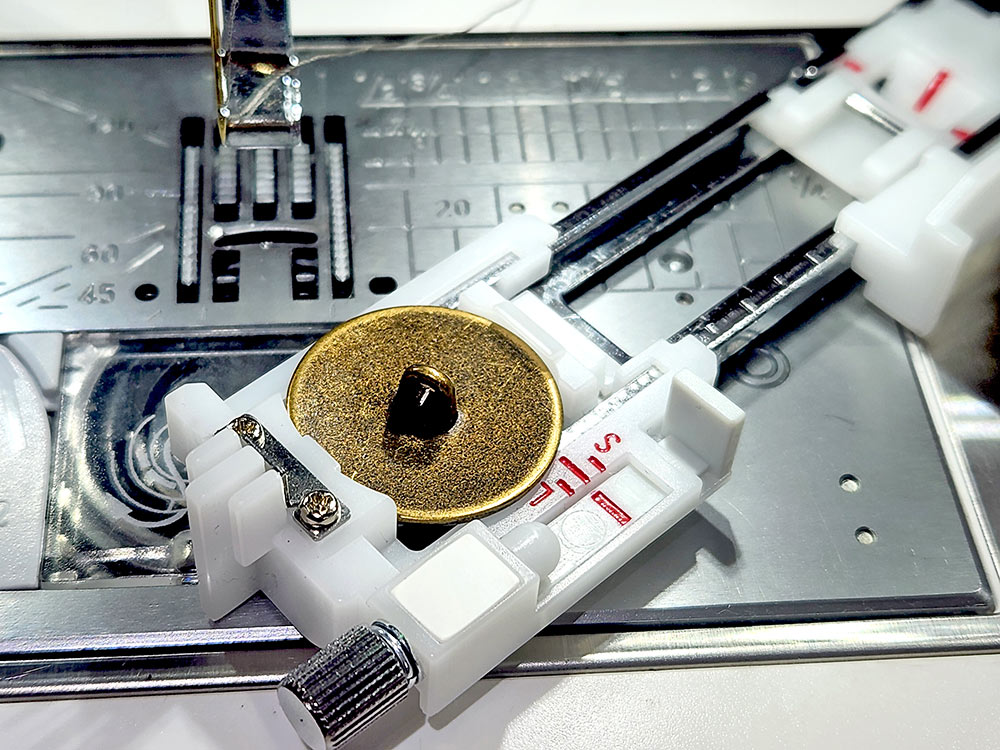
- We used the Janome Automatic Buttonhole foot. When using a shank button with this foot, simply set it into the back of the carriage upside down.
- Re-thread the machine if necessary with the thread color that best matches this panel’s fabric in the top and bobbin.

- When set up correctly, this Janome foot will automatically choose the proper size for your buttonhole, so in many cases you can simply position your panel and you’re good to go.

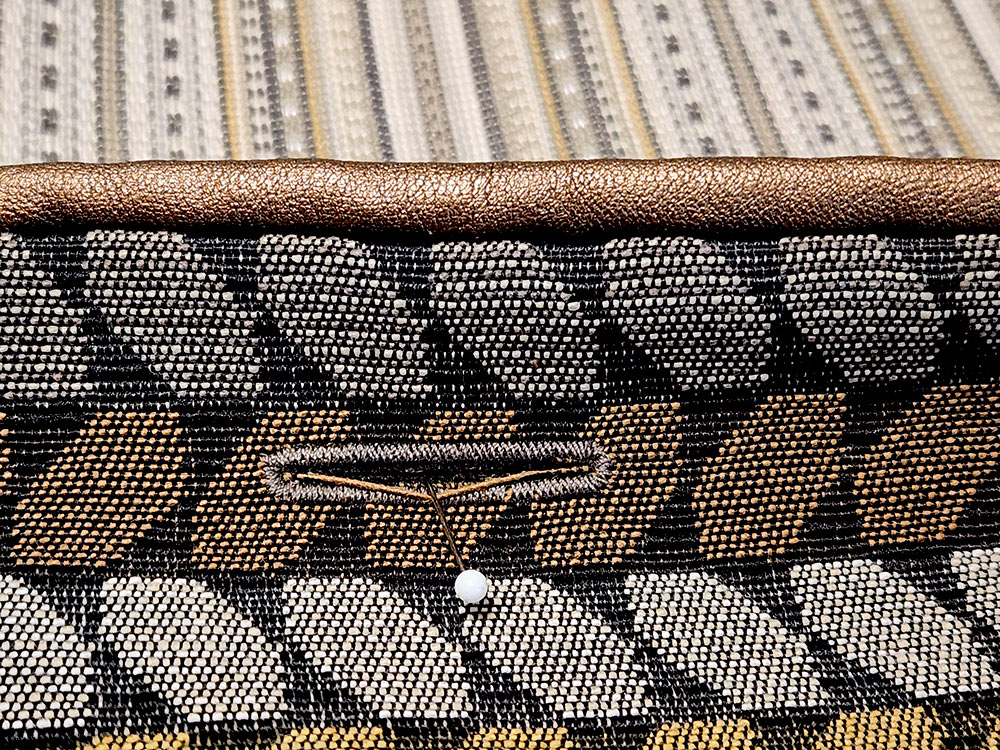
- However, we wanted our vertical buttonholes to be centered within a particular stripe within our Rope fabric, so we stitched out a sample buttonhole on scrap fabric and used this to set a few additional pin marks to get the perfect position we were looking for.
- Make your three identical vertical buttonholes. Remember, you are stitching through two layers: the interfaced buttonhole panel and its facing.
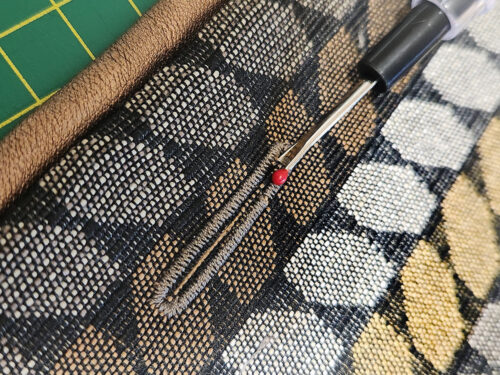
- Using your seam ripper, carefully cut open each of the buttonholes.


Assemble the front and back panels
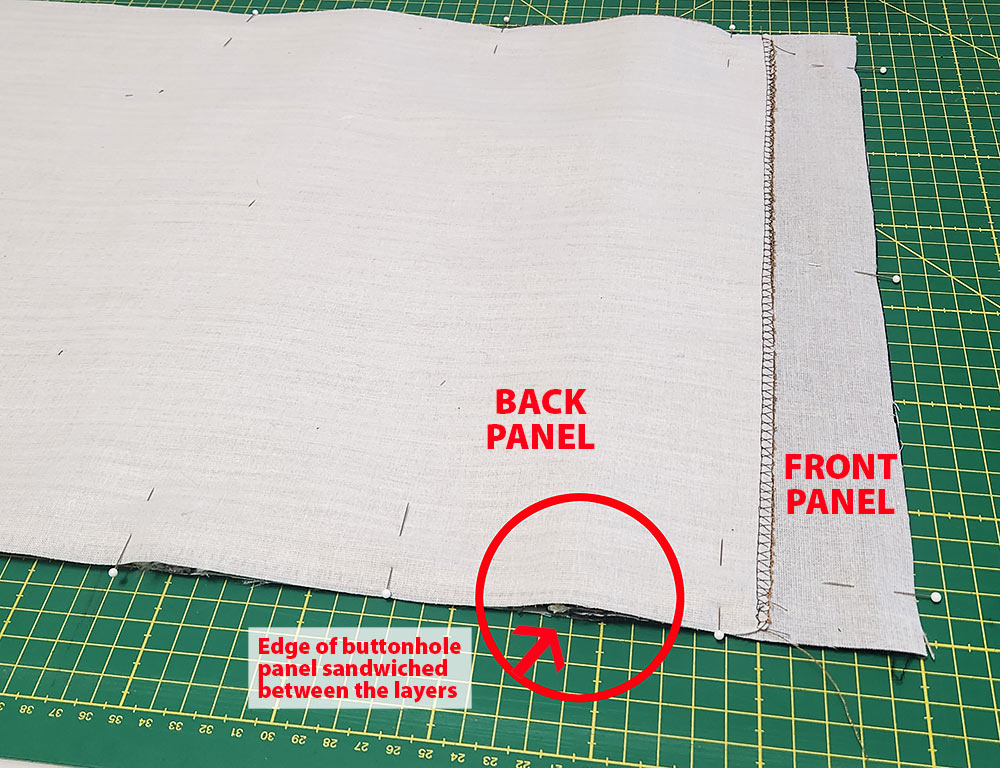
- Find the front panel and the back buttonhole panel. Place the front panel right side up and flat on your work surface. Make sure your panel is correctly positioned. When looking down at the right-side-up panel, the wide end panel is on the right and the narrow end panel is on the left.
- Place the buttonhole panel into position, right side down on the right side of the main panel. As shown in the photo below, the raw edge of the buttonhole panel is flush with the raw edge of the main panel and the piped edge is facing in towards the center. Pin in place along the right side.
- Find the main back panel section. Place it right side down on top of the front panel (right sides together). The left raw edges and the top and bottom raw edges of the two panels should be flush, but the inner edge of the back panel ends approximately 1¾” from the right raw edge. This is correct and is what will create the overlap opening.

NOTE: You’ll notice the inner edge of the buttonhole facing as well as the inner edge of main back panel are NOT hemmed; they are simply overcast to finish their raw edges. This is a good choice when working with thick fabrics if the edge(s) in question will be hidden inside. A standard hem can create a bulky lump that could show through to the front… and who wants that?! - Re-attach a standard presser foot and re-set for a slightly lengthened straight stitch. Re-thread if necessary to best match your fabrics – if you made a distinct change for your buttonhole thread color.
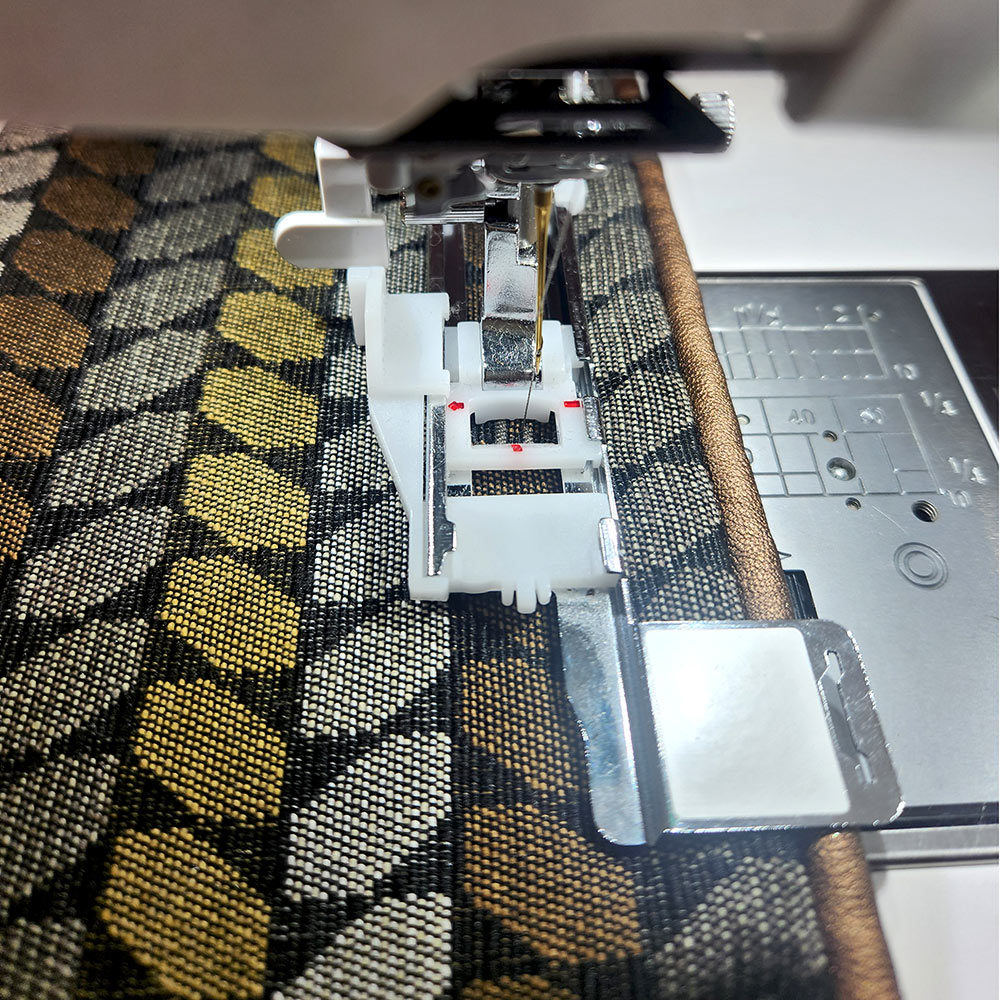
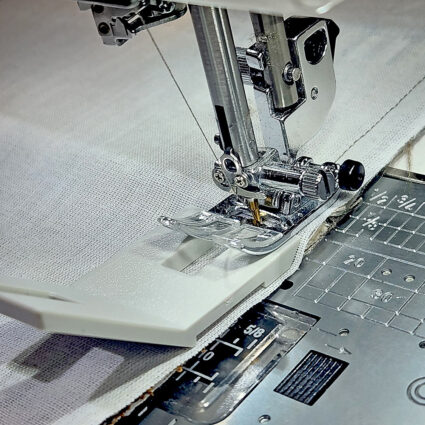
- Using a ½” seam allowance stitch around the entire perimeter of the layers, pivoting at all four corners.
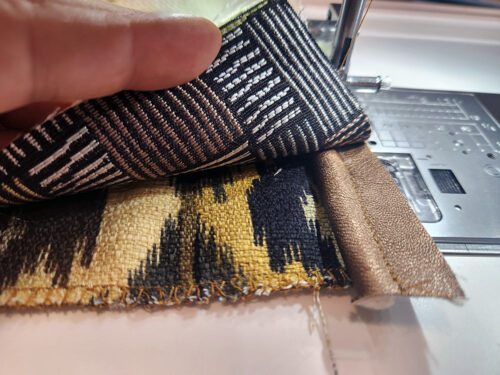
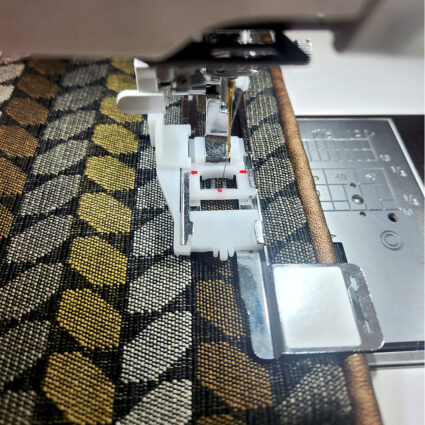
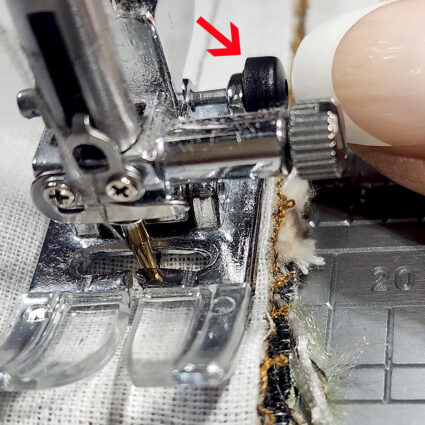
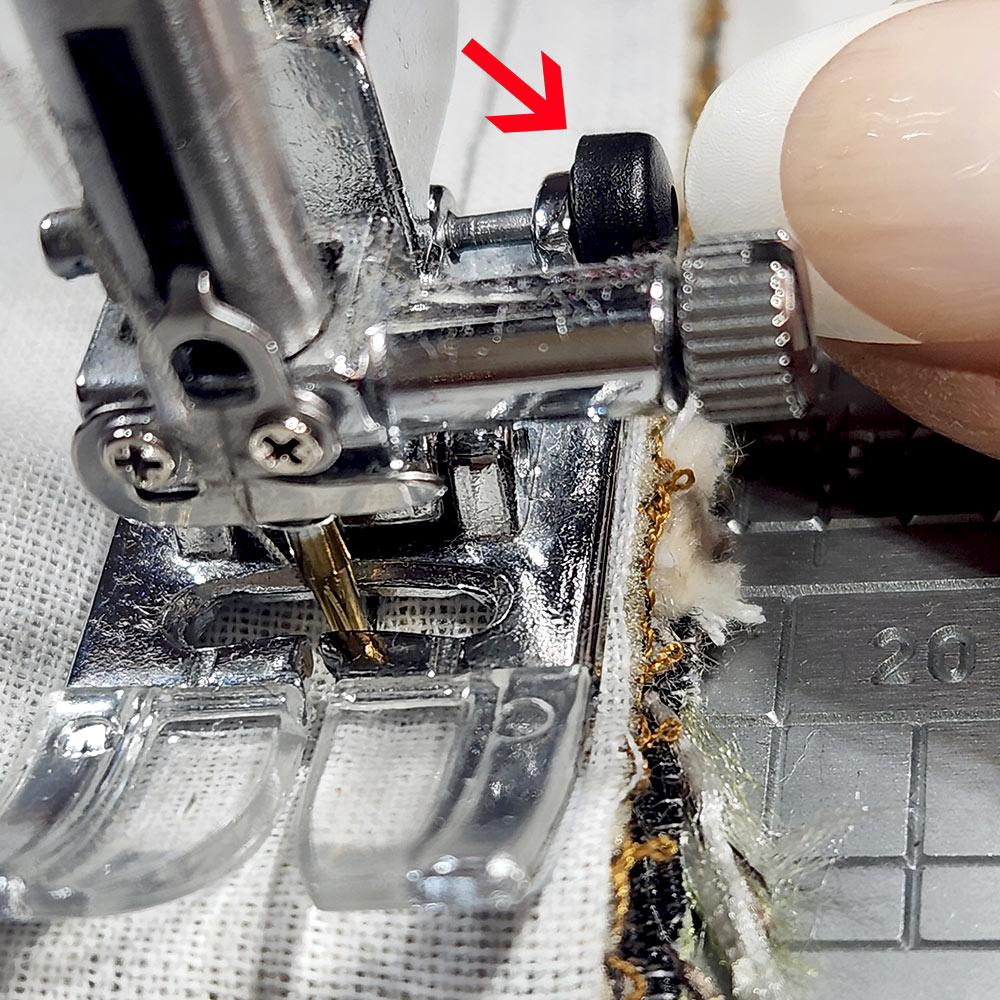
- Because you are sewing with thicker layers, especially as you cross over the piped edge of the buttonhole panel, you may want to use a couple special tools to help keep your presser foot flat. This is key to keeping your layers feeding smoothly and evenly!
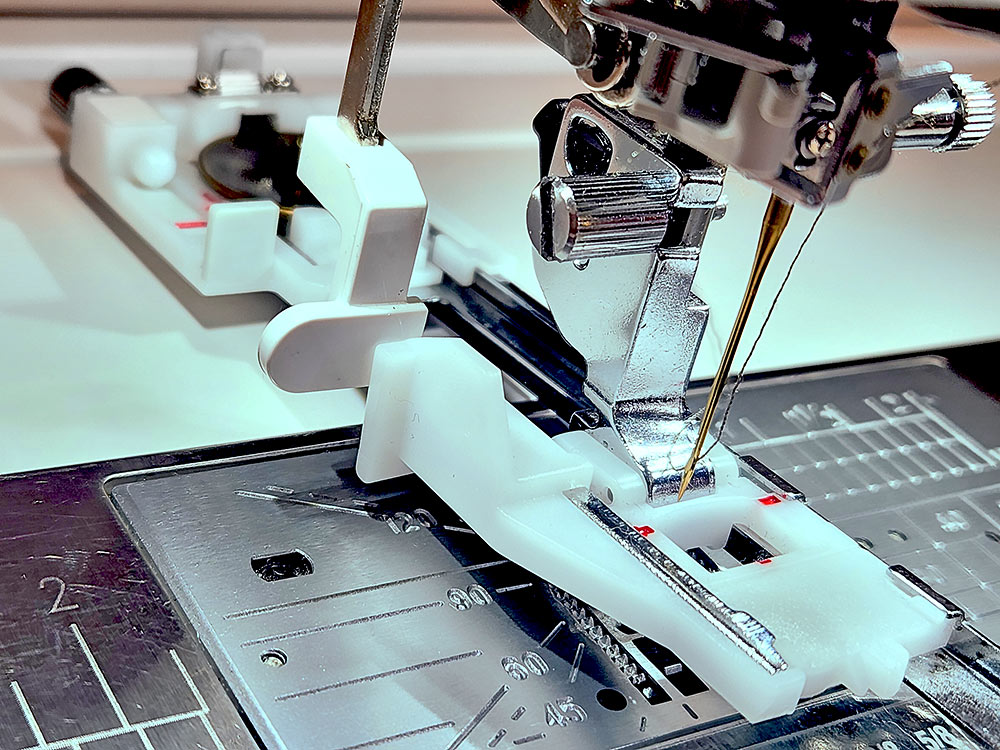
- The first option is for Janome sewers. Janome machines come with a standard presser foot (the A foot) that has a little black button on the side. This easily overlooked feature is designed to keep the foot level at the start of a bulky seam. To use the button, place your layers of fabric under the foot. Push and hold the little black button and lower the foot. This action locks the foot parallel to the bed of the machine as the foot is lowered. Once stitching is started, the button will pop out again.
- The second option is to use the Button Shank Plate also known throughout the industry as a “hump jumper.” It looks a little like the letter “L.” L is for level! It has a slot for the needle in the center and a choice of two thicknesses to level the foot. You can insert it behind the presser foot to start your approach and then move to the front to keep the foot level as you move over thick layers or a bulky seam.
NOTE: If you want more tips and tricks, check out our full tutorial on Sewing Thick Layers. - Depending on the “ravel-ness” of your fabrics, you can choose to trim back your sewn seam allowance around all four sides and once again use an Overcast foot to help seal all the seams.

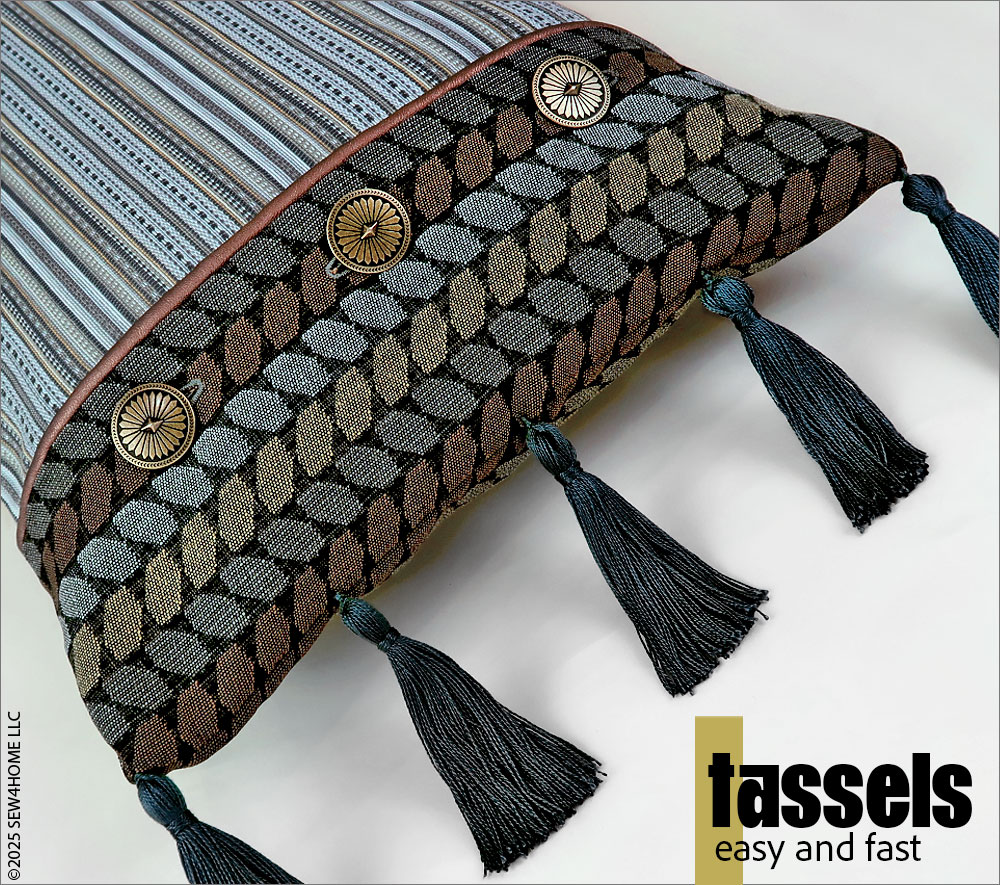
Buttons and tassels
- Turn the pillow cover right side out through the overlap opening. With thick layers, it can take a bit more work to turn things right side out. Just go slowly and carefully and use a long, blunt tool to help you gently push out the four corner points. A chopstick, knitting needle or point turner are all good options.
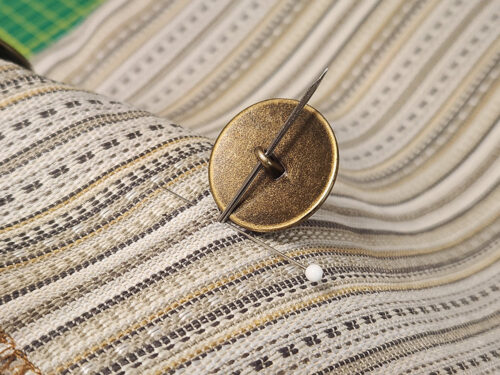
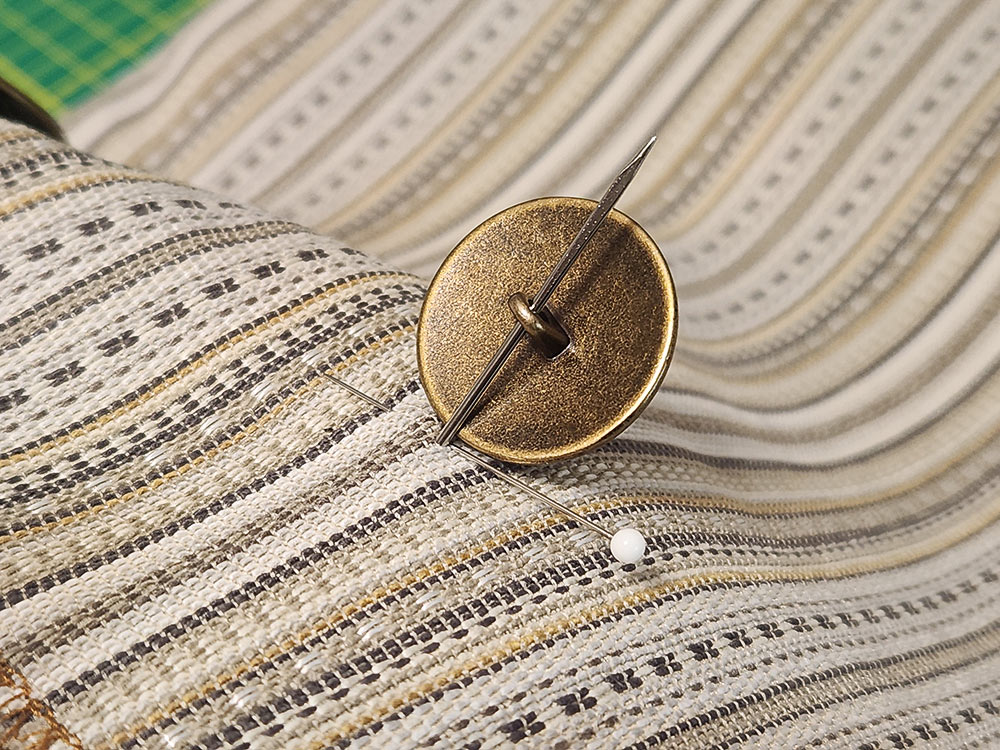
- With the cover right side out and flat, flip over the cover so the buttonhole panel is facing up. Insert a pin through the center of each buttonhole to mark the position of the button on the underlap back panel.

- Pull out the underlap panel and securely hand stitch each shank button in place. An overlap closure such as this can be subject to a fair amount of tugging, so don’t be afraid to use a doubled strand of thread, lots of loops through the shank, and a strong double or triple knot at the back to secure.
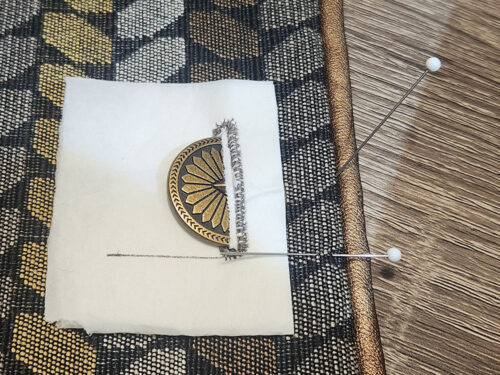
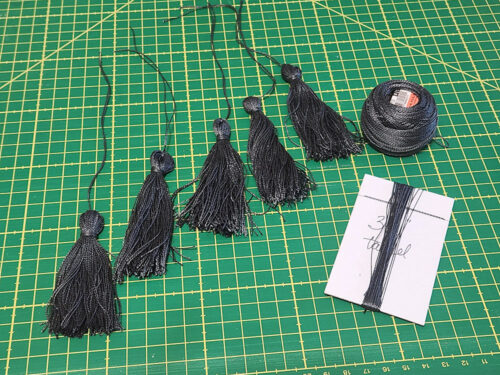
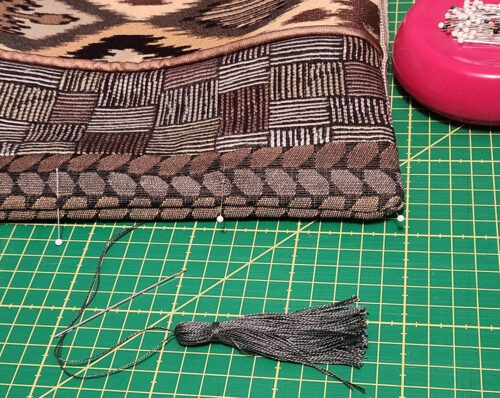
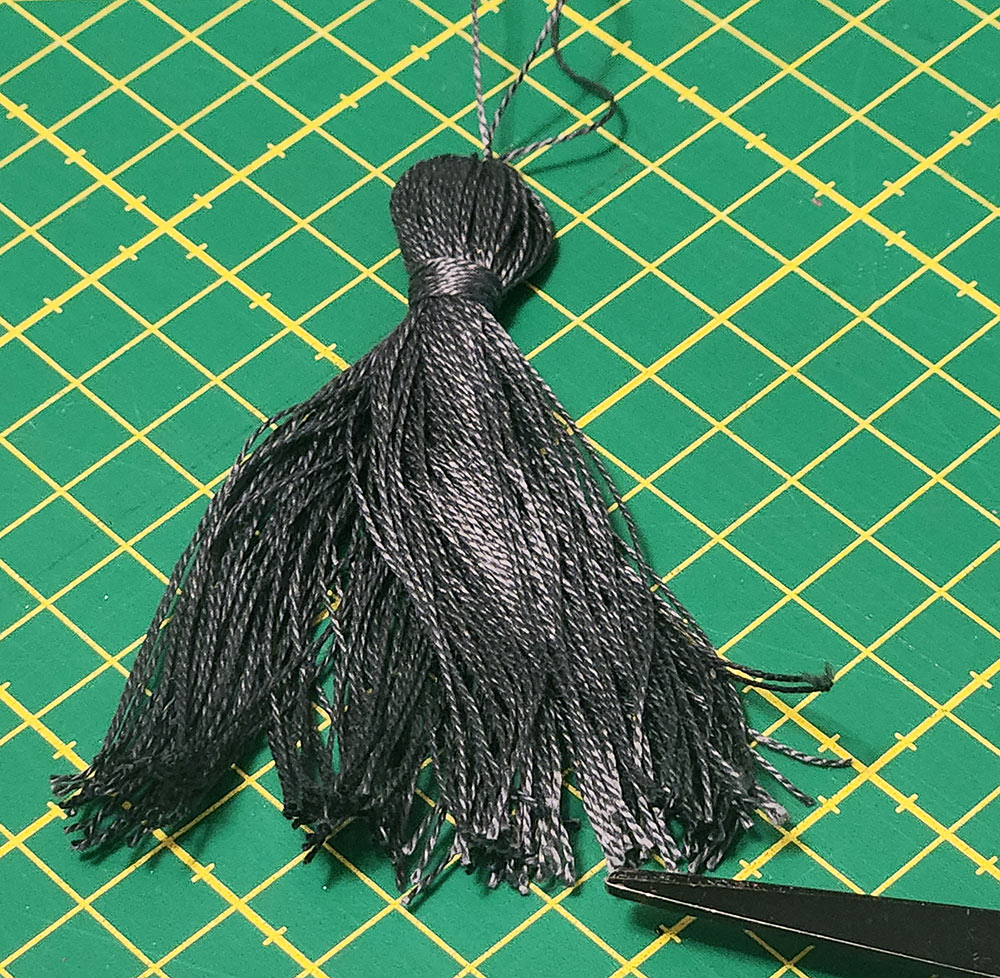
- Find the pearl cotton and the tassel wrapping template. As mentioned above, our tassels were designed to be long and elegant at 3½” in length, so our cardboard template was 2” x 3 ½”. You can certainly choose to make your tassels shorter or longer, simply adjust the height of your template. Each of our tassels was made with 80 wraps.
- Our pillow has five evenly spaced tassels along each side. You can refer to the drawing above at the beginning of the buttonhole section to see our exact placement plan. You want a tassel at each corner with the remaining tassels evenly spaced between.
- If you are brand new to making your own tassels, we have a full step-by-step tutorial you can review. It really is quite easy: just wrap, tie off the top, wrap to create the “neck,” cut the bottom loops apart, and trim the ends.

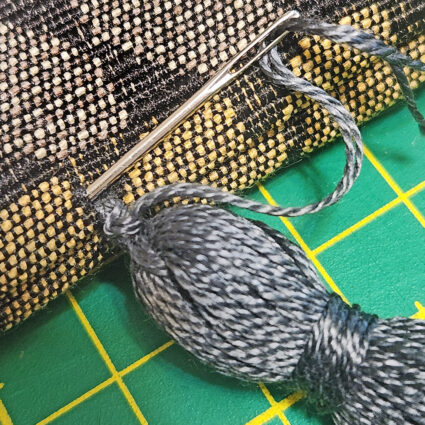
- The single strand tie at the top of each tassel should be at least 12” in length in order to most easily sew the tassels along the seam. After stitching in place and knotting to secure, send the needle and remaining thread down through the center of the tassel to hide the thread within the body of the tassel. Remove the needle and trim the thread tails to match the tassel.
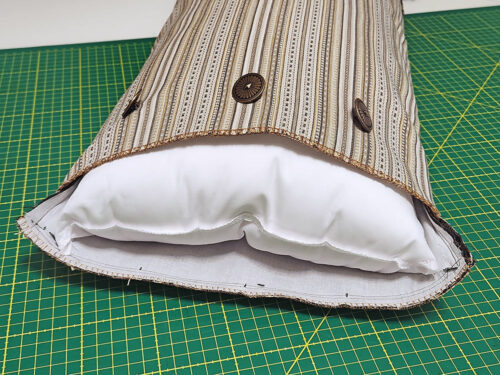
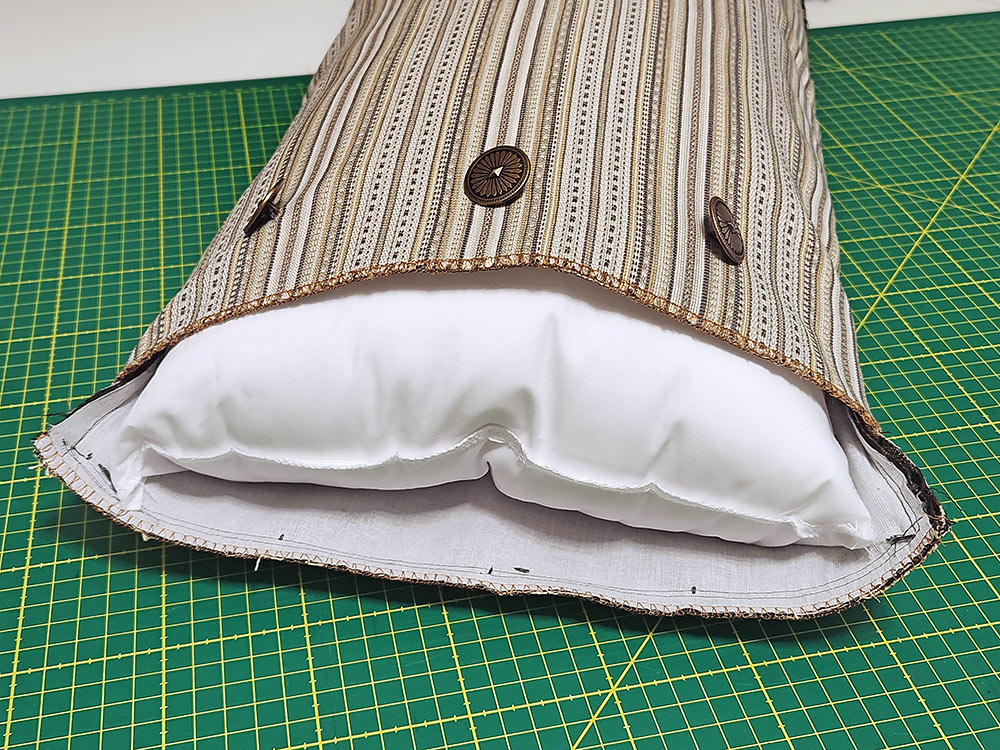
- When everything is complete, open up the overlap all the way, folding it back in order to create the widest possible opening for you to more easily slip in the pillow form.
NOTE: Also, this type of pillow looks best when slightly flat rather than super puffy. Many pillow forms these days tend to be on the “puffy” side. If that is the case with your form, open up one of its seams and pull out the stuffing until you get a nicer “fluff level.” Then simply hand sew the opening closed prior to inserting into the pillow cover.


Project Design: Anne Adams
Sample Creation: Kathy Andrews, What Sew Ever
Creo que podrías hacer algunas fotos para transmitir el mensaje un poco.
We’ve included quite a few photos within the instructions. If you’re having trouble, sometimes reading through the project two or three times can help you better understand prior to starting.
Solo quiero decir que tu artículo es sorprendente.
Thank you!