If you are new to sewing, some of the terminology can be confusing. Doesn’t “bolt” mean to run away? Cutting something on the “bias” just sounds offensive. And, “feed dogs” seems more like a command than a sewing machine part. Trying to understand exactly what the various terms mean, how they work, and especially when to use them may seem daunting. But, as you learn each one, they’ll become commonplace, and soon “nap” will mean more than dropping off for a little snooze. Today, we meet: understitching, which is not a seam done in a sneaky or under-handed manner and/or by Underdog. Read on to find out what it really is.
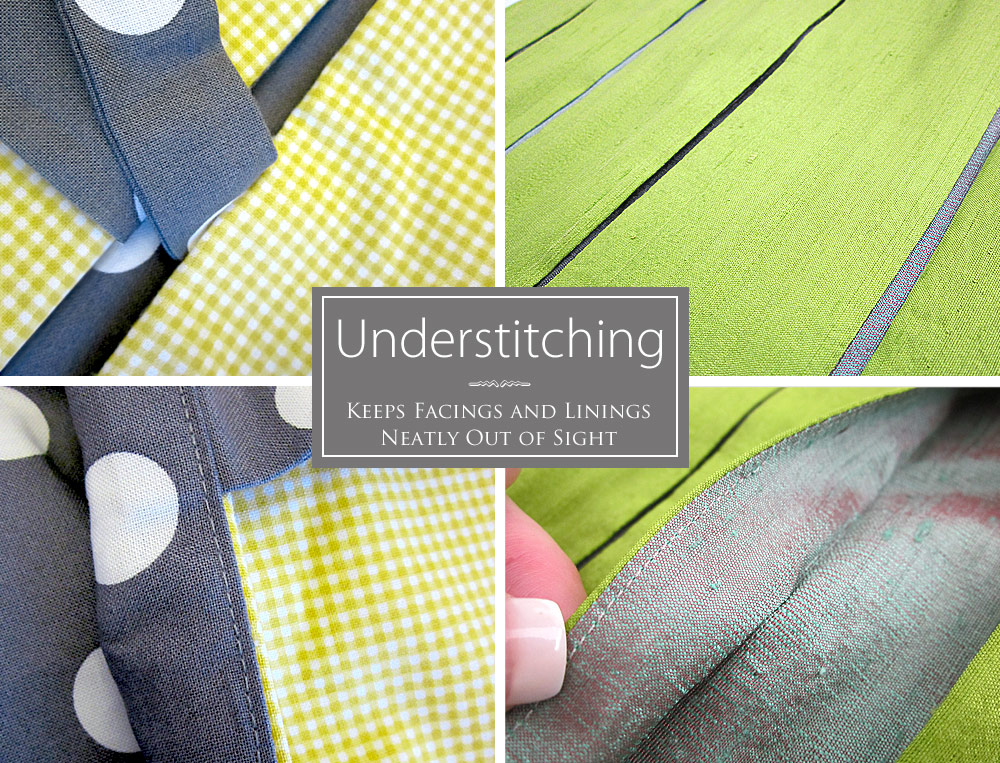
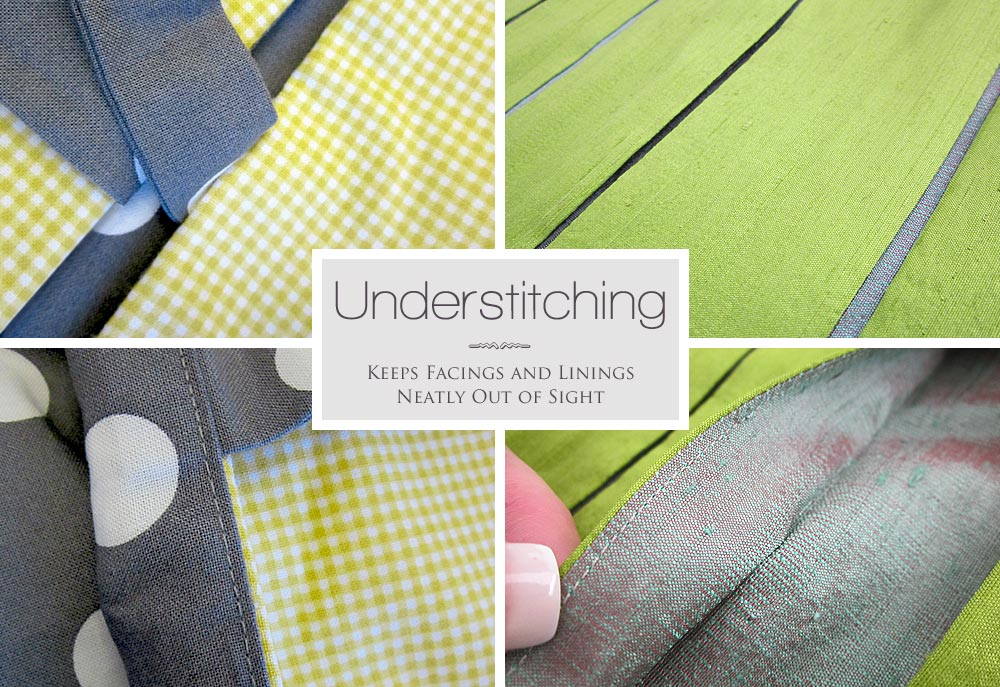
By definition, understitching is a line of straight stitching sewn just beyond the seam line of two pieces that have been sewn together to create a seam along an edge. One of the pieces is the outside of your project, the other is the inside. In order to keep that seamed edge sharp and clean, you understitch the inside piece onto the seam allowance so it won’t roll to the outside along the edge seam and look all messy and unprofessional.
Understitching is referred to a lot in garment construction, especially around necklines and armholes with facings. For example, when a facing is sewn to the edge of a scooped neckline, you don’t want to see the facing rolling out around the neckline when you wear the garment. You understitch the facing to the seam allowance so the facing stays hidden in place. You might also see understitching around the waist of a lined skirt – the style without a waistband.
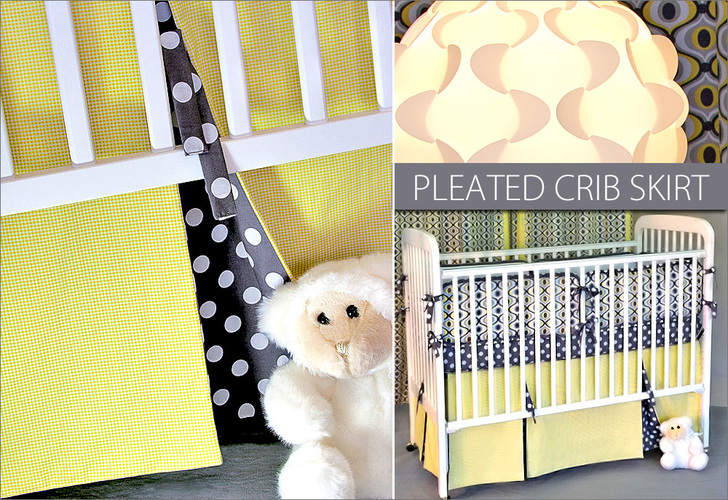
Although possibly more common in garments, we’ve found plenty of uses for understitching in home décor sewing. For example, on our Pleated Crib Skirt (shown below) and our Tiger Eye Box Pleat Pillows (shown above), understitching helps keep the pleats razor sharp along their edges.
Next time you’re out shopping for ready made items (a rare excursion for you since finding S4H, right?!), look at the inside to see how things are made. You’ll notice how often understitching is used to create a professional finish.
How to Understitch
- As with the majority of our technique tutorials, we’ve used non-traditional fabric and thread combinations so you can clearly see how to execute this technique successfully. In this sample, we selected a light fabric for the inside and a dark fabric for the outside with a bright thread. In your projects, you would use the fabric of your choice (which may or may not be the same for the inside and outside pieces) and thread to coordinate with your selected fabric(s).
- If you’re sewing a project with instructions provided, such as an off-the-rack pattern or following a downloaded tutorial, there are likely to be references to understitching where appropriate. If you’re creating an original, you’ll begin to quickly spot where you need to understitch in order to avoid that “inside-rolling-to-the-outside” thing happening along a seamed edge. In our example, we will refer to the “inside” as a lining and the “outside” as the right side.
- Set up your sewing machine for regular sewing with a straight stitch.
- With right sides together and using the appropriate seam allowance, sew the right side piece to the lining piece. Remember, in our sample, the dark fabric is our outside fabric and the light fabric is our lining.
- Grade the seam allowance to eliminate excess bulk in the seam. This means you trim one seam allowance edge narrower than the other.
NOTE: Grading is optional, you may not use it every time and it will likely depend on the thickness of the fabric.
- Flatten the two pieces and press the seam allowance toward the lining.

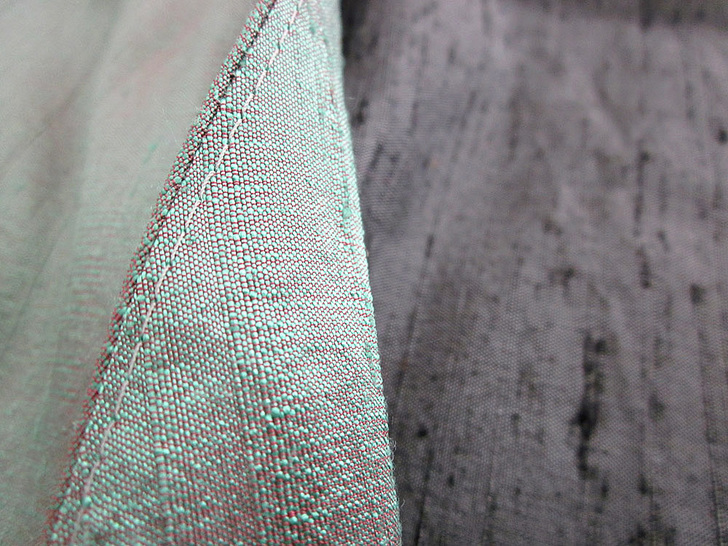
- Flip the sewn panel right side up and keep it flat. The lining portion should be to the right and the right side portion to the left. The seam allowance should still be laying to the right underneath the lining… since you just pressed it that way.
- Place the lining/seam allowance side under the machine’s presser foot. The original seam line should be just to the left of the needle, approximately ⅛”. You are preparing to stitch on the lining side.
NOTE: We’re using a Janome Open Toe Satin Stitch foot so you can see exactly where to stitch. You would use a standard presser foot on your machine and a thread color to match your fabric.

- Sew a straight line of stitching through the lining and the seam allowance underneath. This line of stitching should be as long as the edge seam you want to keep from rolling.

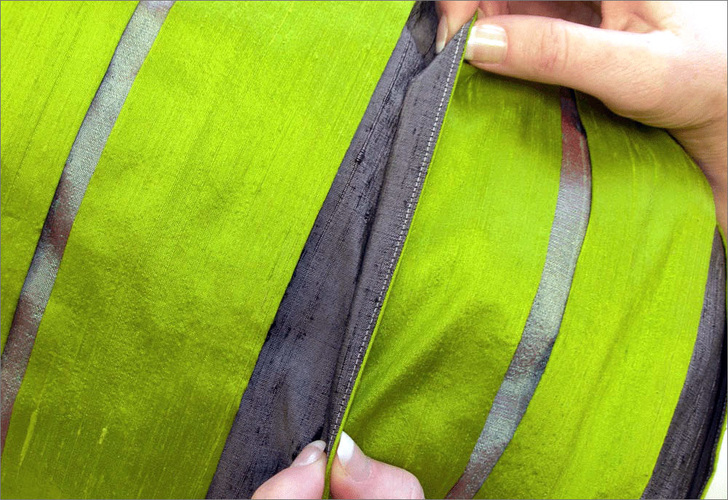
- Fold the two pieces back together along seam line (ie. wrong sides together) and press for a sharp edge. Here it is from the back.

- From the front, your seam edge should look straight and clean, just like the photo below. I can’t see the lining, can you?

- In case you’re wondering what our sewn piece would look like without the necessary understitching… here’s a second sample we made. It is identical is all ways except for the understitching. And there’s that lining, rolling into view where we don’t want it.


Sample Creation and Instructional Outline: Jodi Kelly
Maybe you could include a link on detailed seam grading. Not everyone knows how to do it properly.
Hi Dale — Excellent thought, and we did include a link to our tutorial on seam grading above – it’s a simple hyperlink under the phrase – but here is a direct link as well:
https://sew4homestg.tnotw.com/grading-seam-allowances-how-and-why/
Hi! I love understitching and use a compensating foot to do the stitching. It makes it so easy. Thanks for sharing your great info for sewing and crafts.
Thank you, Sada for sharing your extra tip. It is certainly a technique that can be used on so many projects!
great way to have a stable seam without having everyone see my inconsistent top stitching. love it! will be looking foreword to your next tutorial. thank you
Thanks, Kit – you can always browse our full Techniques category using the link in the upper black navigation bar on all the pages. Enjoy!
I’ve sewn for about 70 years…this is the first time I saw this technique! It taught me something new. Thanks for this wonderful tip!
Hi Lois — that is amazing news, but I’m also going to bet you know at least 50 things I know nothing about. Isn’t learning new stuff the best?!
Hi there, I just wanted to say thank you for a lovely clear article on understitching. It has really helped to make things a lot clearer for a newbie sewer. I’m a 66 year old who has only just taken up sewing, and a lot of articles on other sites just leave me feeling more confused, so really thank you x
Hi Lin – you are so welcome! And – congratulations on starting on your sewing journey. We hope you’ll come back often for more tips and projects.