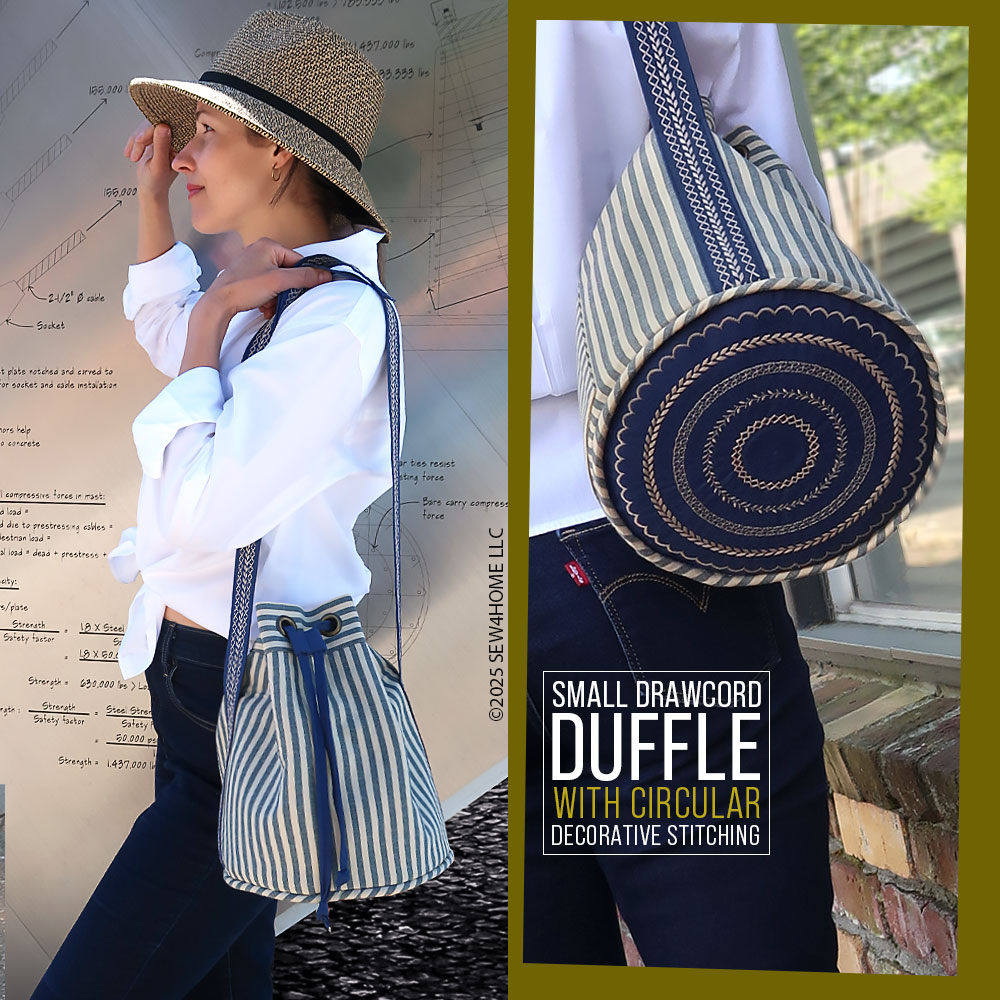
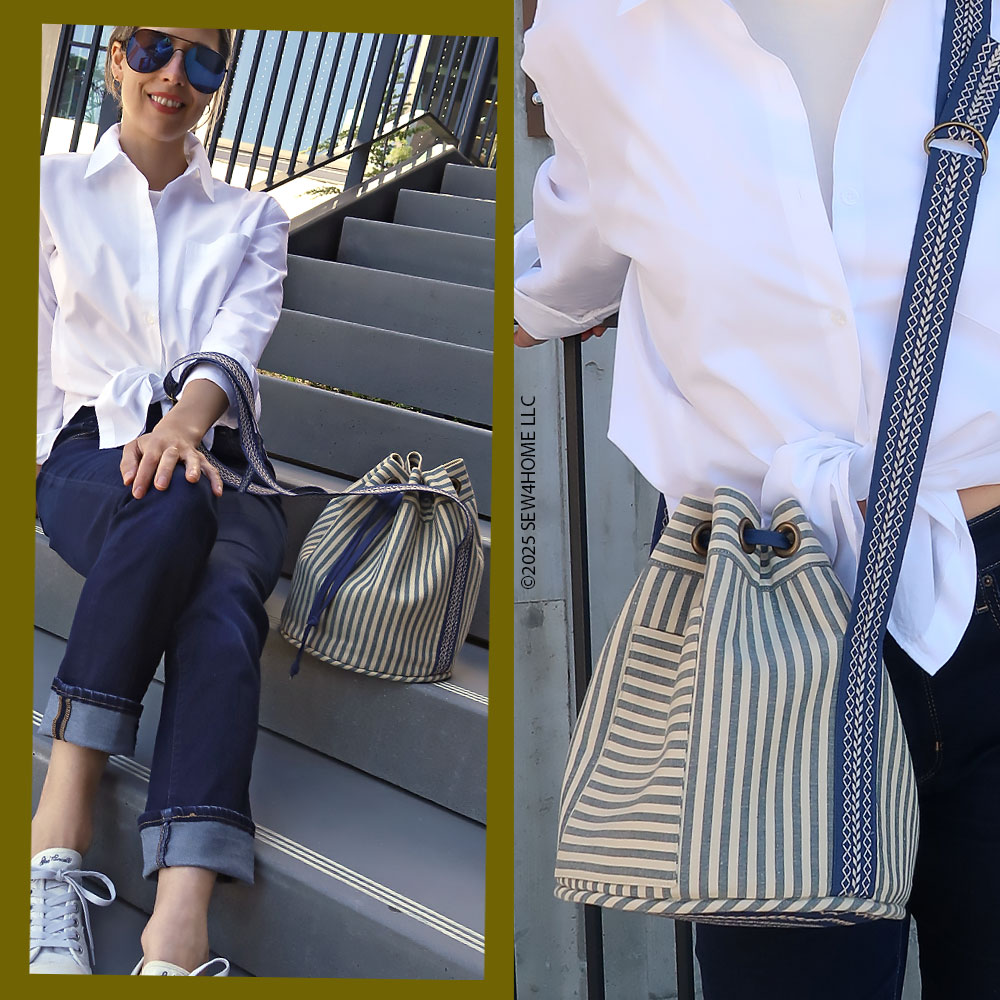
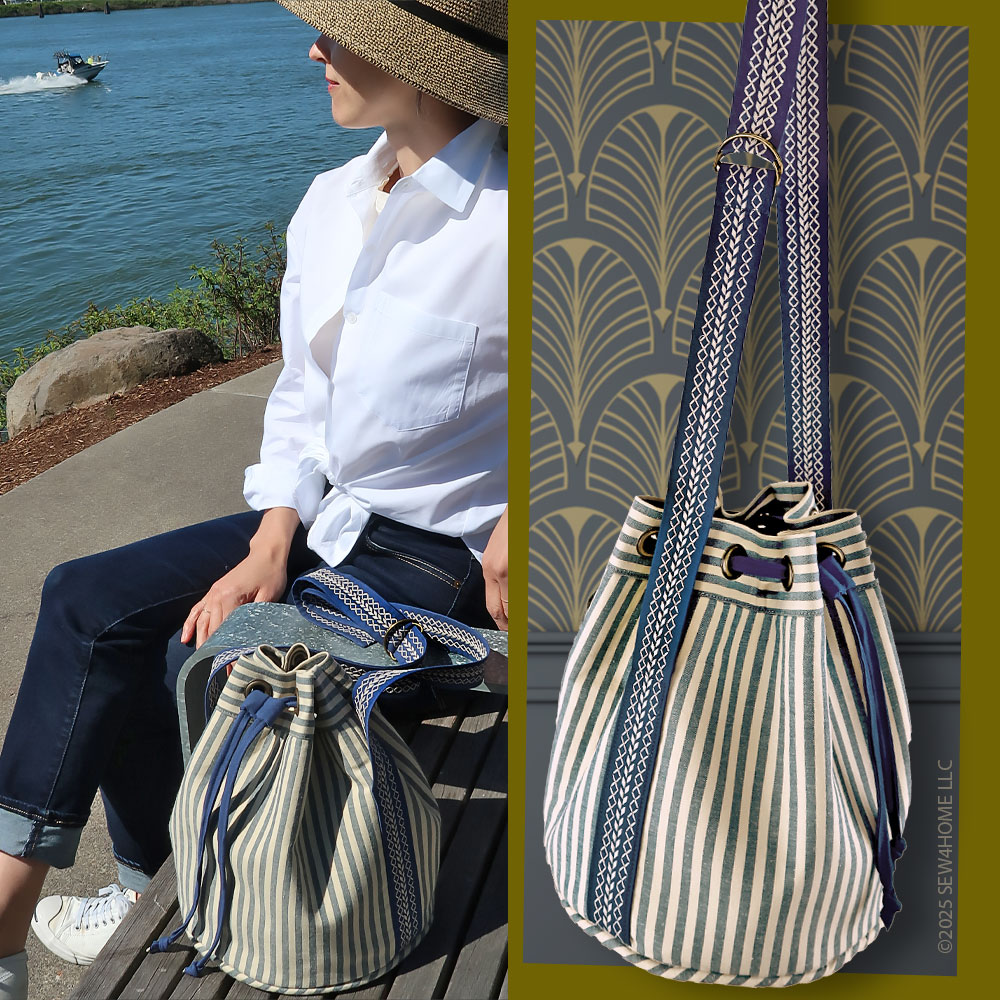
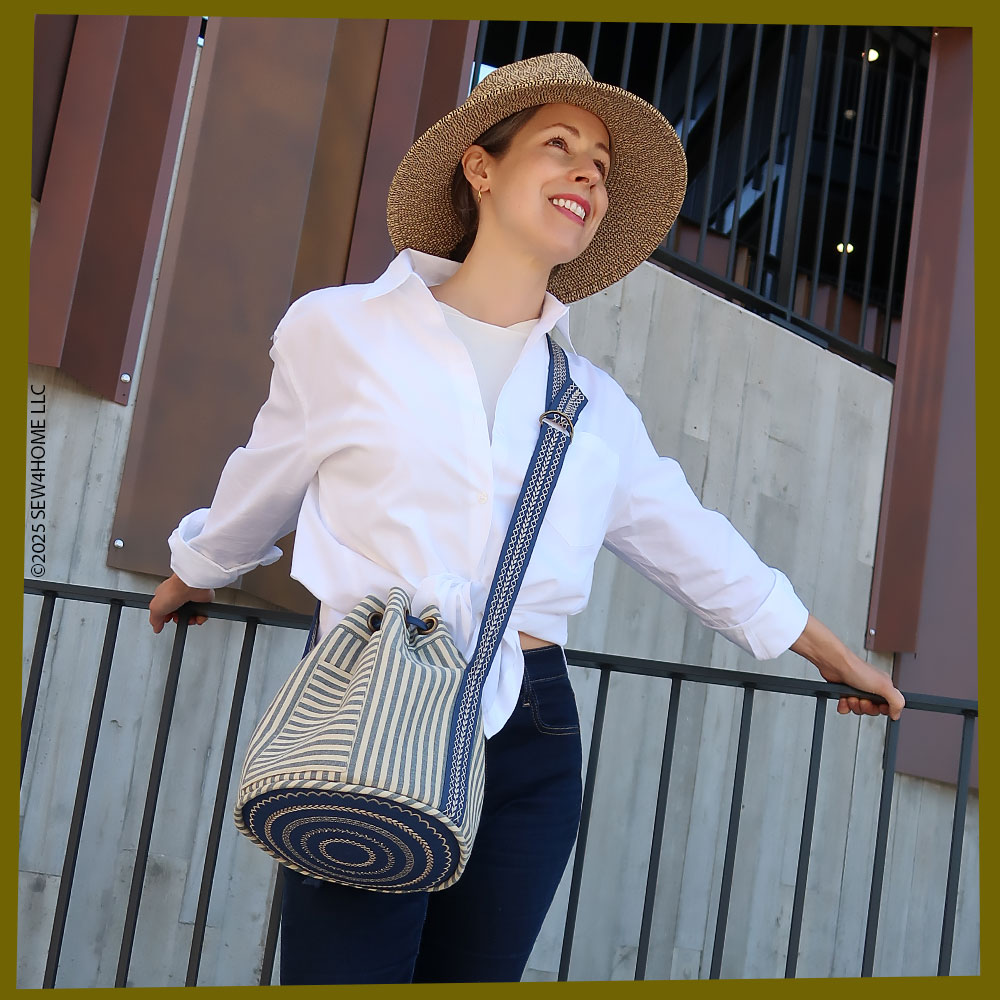
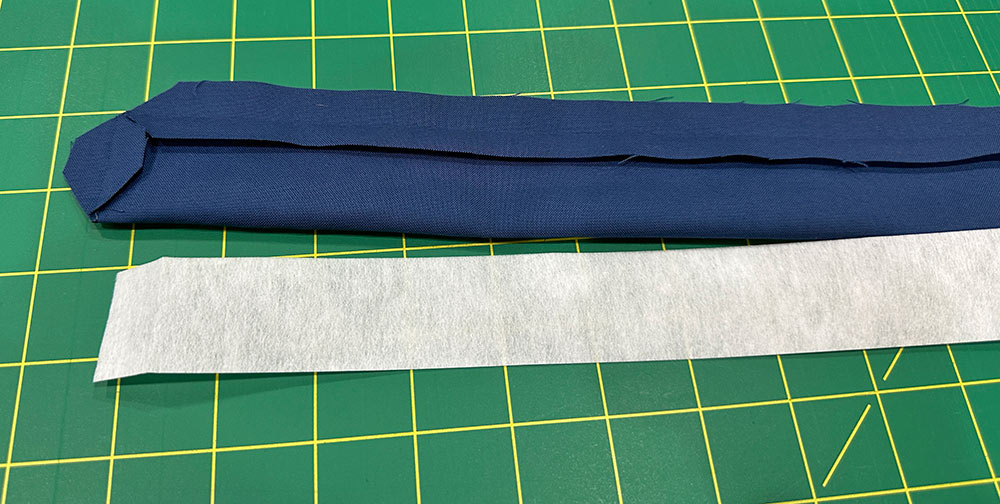
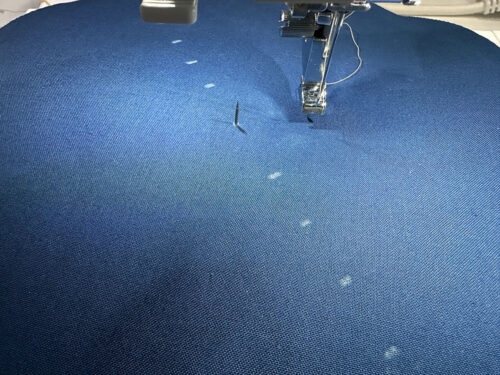
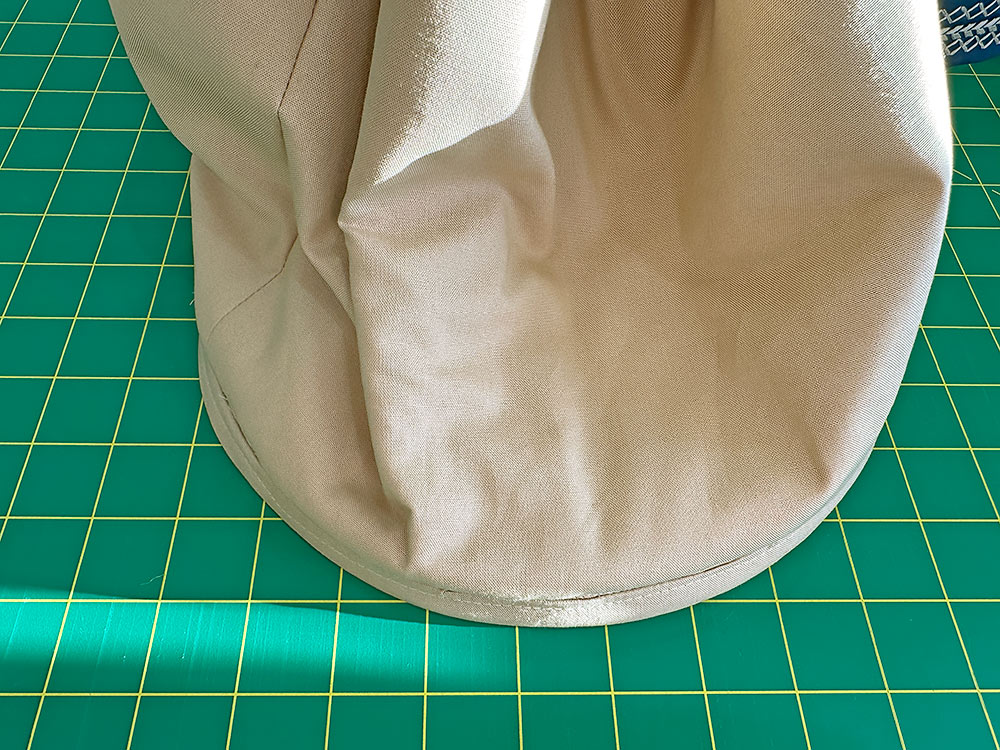
Grab and go! This duffle has the smaller size and softer structure to make it the carryall you reach for first when heading out the door. Not too big; but the drawcord top opens wide so you can load in lots. Not too stiff; it’s lightweight and extra comfy to sling over your shoulder. Not too conventional; check out the bold decorative stitching along the strap and the surprise circular stitching on the base!
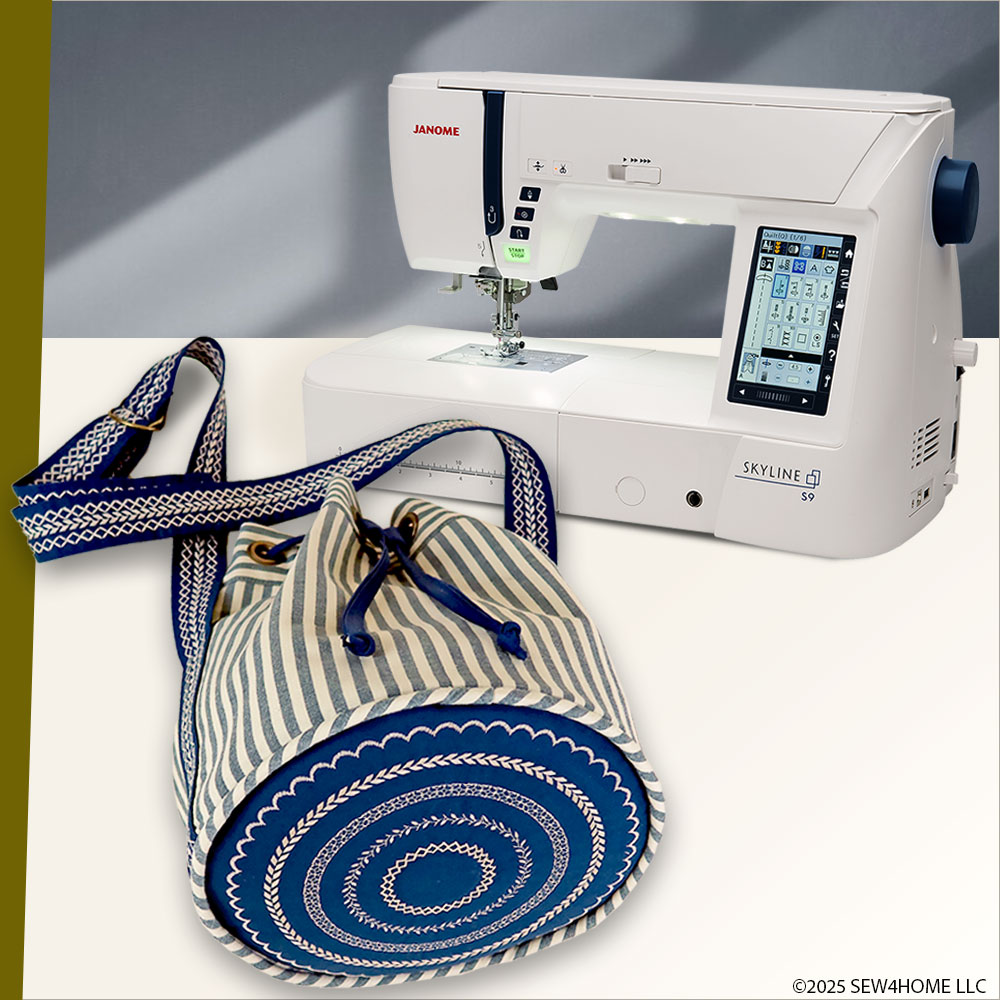
Our friends at Janome America selected a range of accessories to feature this year in order to bring attention to standard and optional tools that can help make your sewing easier, more precise, and often – more fun! One of our mottos here at S4H has always been, “Use the right tool for the job!” That’s really the rule for any hobby – from cooking to woodworking. In sewing, it makes the difference between a finish that is “just okay” and one that makes you want to jump up and down in delight. Our special tool of choice for this project: the Janome Circular Sewing Attachment
This unique attachment locks into position on your machine and works like a compass to sew a perfect circle every time. We especially love how easy it is to create concentric circles, which is what we did on the base of our duffle. It is very easy to use. We summarize the steps below and link to our full tutorial for even more detail.
We used five different decorative stitches on the base, repeating two of them in straight lines along the two-part strap. Although we often go colorful with our decorative stitching, for this bag, we felt a single color was actually more dramatic than multi-color. A light tan thread on the dark blue of the accent fabric really pops.
Our striped fabric gave us the opportunity to cut the various pieces that make up the bag in a variety of directions: vertical for the main body, horizontal for the pocket and the grommet panel, and diagonal (on the bias) for the accent piping. The finished duffle has a feel that would be right at home on the boardwalks of Nantucket — both its classic navy and tan palette as well as the sleek yet sporty style… in case you are planning a vacation at the Cape!
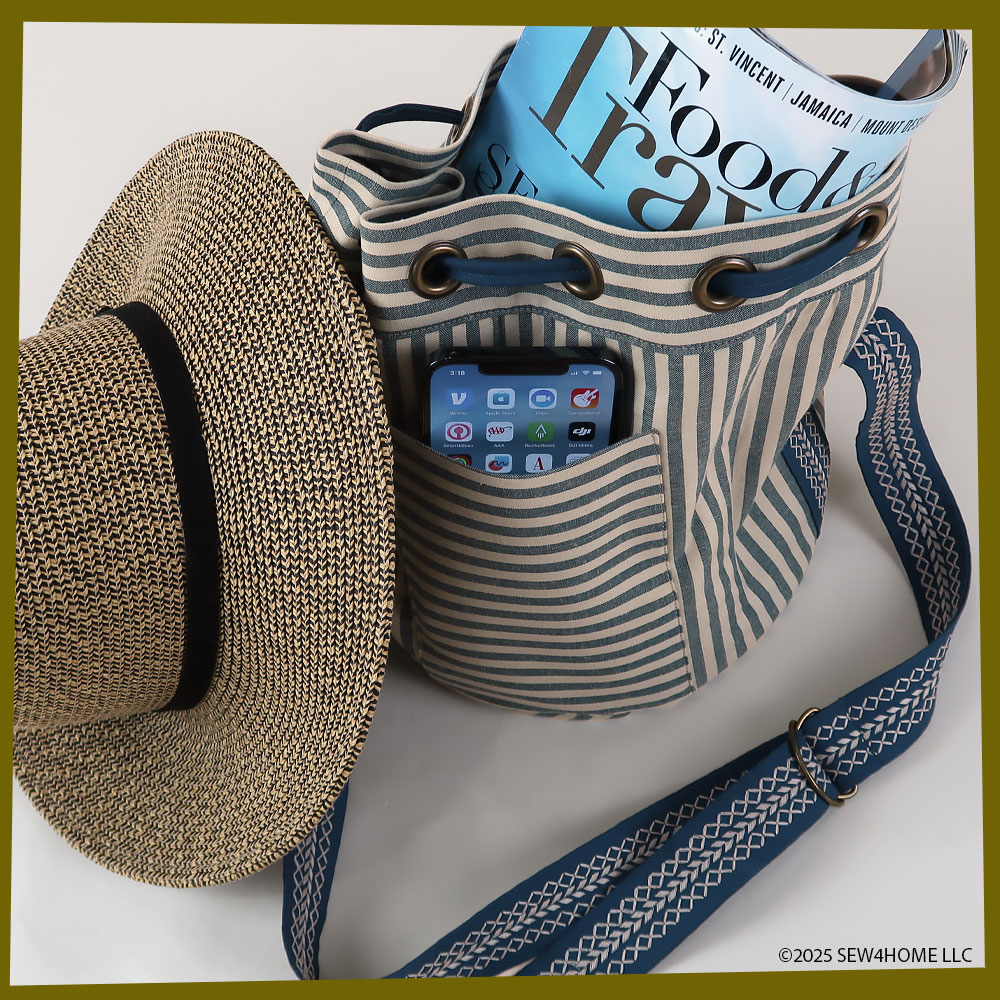
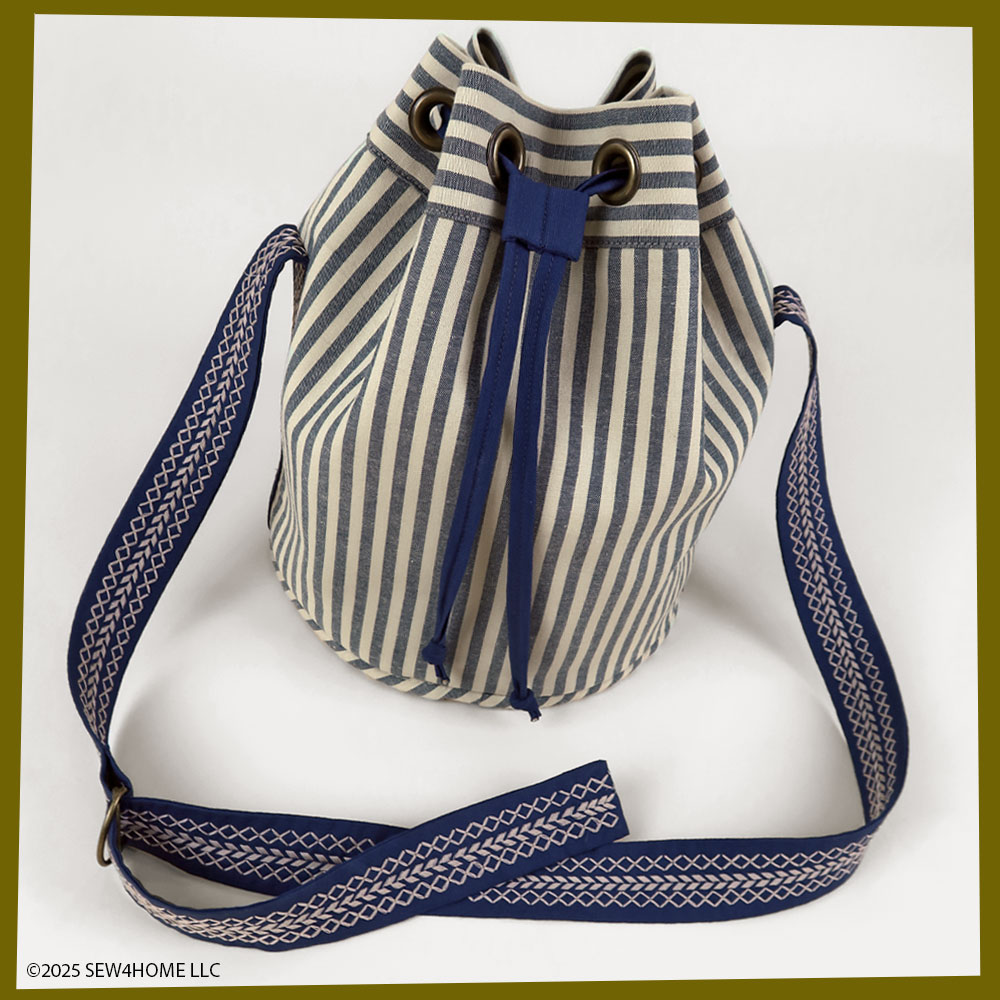
As mentioned above, the drawcord closure is a great option when you want a large opening that can still cinch down to a compact carryall. We show you how to make your own drawcord, for a perfect color match to the strap and base, as well as your own slider, which is better looking and easier to use than a plastic toggle.
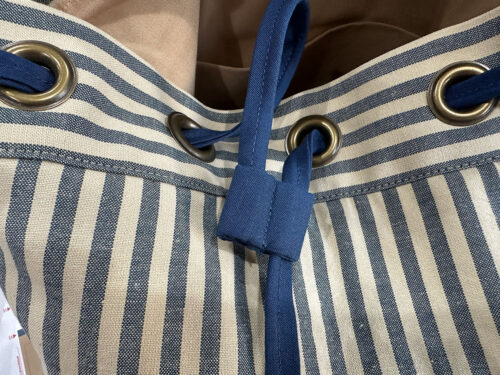
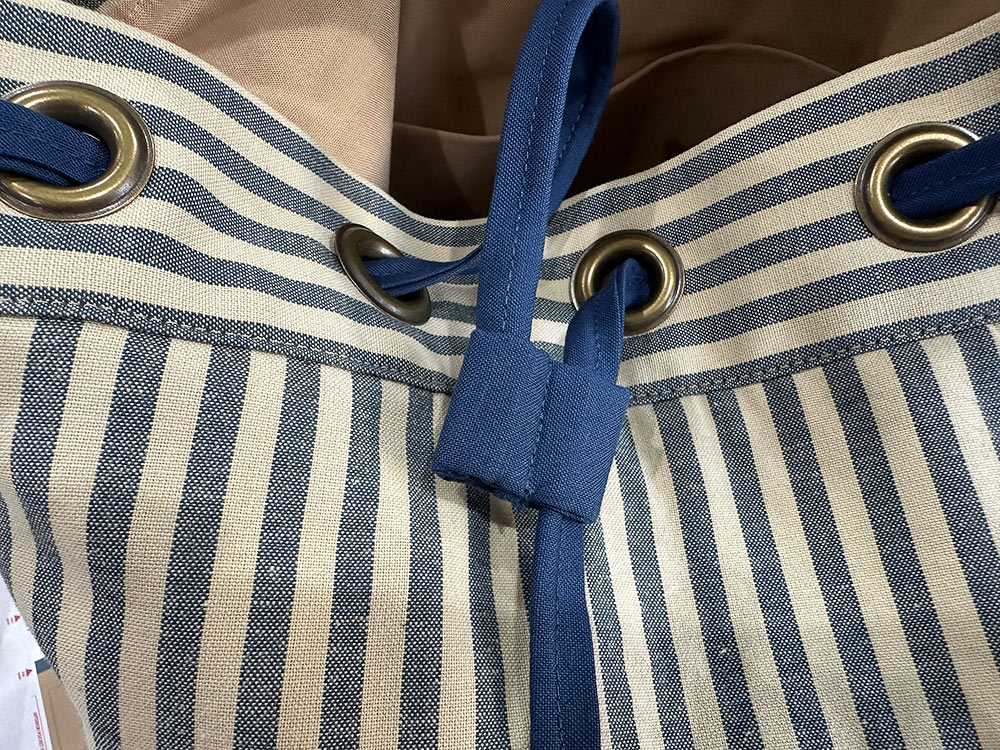
A circular base pattern is included with stitching lines to make it easy to set up for the concentric circles. And there is also a full grommet template so you can make sure the spacing of the 12 grommets is perfectly even.
The lining and exterior are created first and then the embellished base is inserted. And, of course, we have full instructions for how to insert a flat circular base into an open “tube.” Our construction process results in one visible seam allowance around the bottom of the duffle; we show you our favorite method for finishing it.
Our sample duffle was made entirely in quilting weight cottons with fusible fleece and interfacing layers creating the necessary structure. Even then, that structure is intended to be on the soft side. You want the top to gather easily and the finish to be lightweight. As always, final fabric choices are yours, but we wouldn’t recommend a heavy canvas or vinyl.
Our thanks again to Janome America for helping us bring this project to you. To understand first-hand why we are a Janome Exclusive Studio, we invite you to visit a local Janome dealer for an in-person test stitch on the machines we consider to be the best in the industry as well as the coolest accessories, like the Circular Sewing Attachment. To find out more before you go, visit the Janome website and follow them on social media.
Our Small Drawcord Duffle finishes at approximately 14” wide x 11” high x with a 9” diameter base. The single, sling style two-part strap is adjustable with a pair of D-rings and can be worn over the shoulder or crossbody.
Sewing Tools You Need

- Sewing Machine and standard presser foot
- Even Feed/Walking foot or engage your machine’s built-in feeding system; we used the Janome AcuFeed™ Flex built-in fabric feeding system – this can be particularly helpful when adding the decorative stitching to the straps
- Satin Stitch foot for decorative stitching
- Zipper foot
- Circular Sewing Attachment
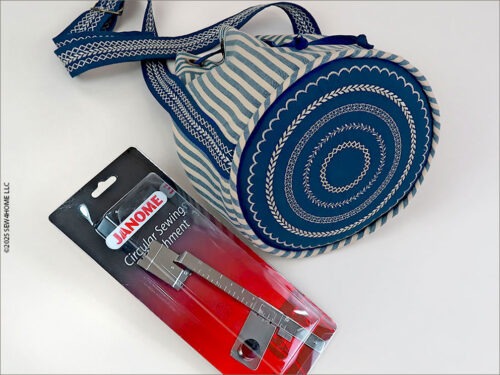
NOTE: The Circular Sewing Attachment is an optional accessory for Janome machines. If you own a Janome, we recommend visiting your local authorized Janome dealer to inquire about one. Be sure to know your model as there is more than one variation of this accessory. If you do not own a Janome, you could try to draw concentric circles with a compass or template to use as your stitching guide.

Fabric and Other Supplies
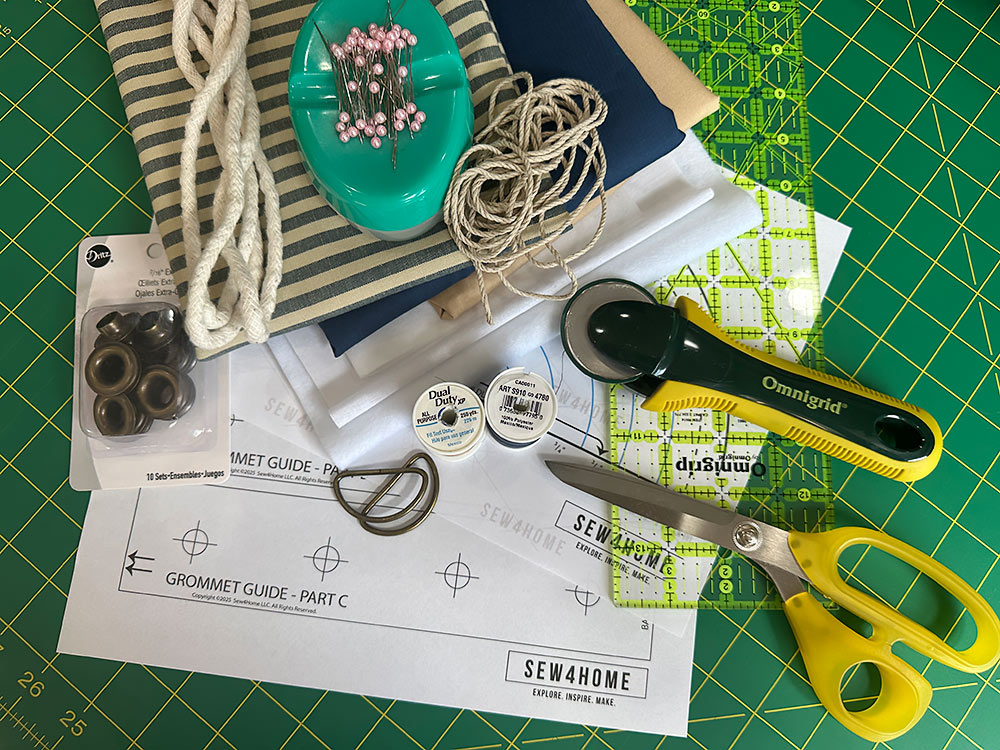
- 1 yard of 44”+ wide quilting weight fabric for the main exterior panel, grommet panel, exterior pocket, and base piping; we originally used Haberdashery Yarn Dyed Cotton Stripe in Blue from Marcus Fabrics
NOTE: If you choose not to use a stripe cut in multiple directions, you may be able to get away with a less yardage; refer to the cut sizes below in the Getting Started section. - 1 yard of 44”+ wide quilting weight fabric for the lining panel, base, pocket, and seam binding; we originally used Kona Cotton in Latte from Robert Kaufman Fabrics
NOTE: We cut our lining’s seam binding on the bias. If you choose to purchase seam binding and/or to use a different seam finishing method, you can get away with ¾ yard. - ⅝ yard of 44″+ wide quilting weight cotton in an accent color for the exterior base, straps, and the drawcord and pull; we originally used Kona Cotton in Windsor from Robert Kaufman Fabrics
- ½ yard of 45″+ wide fusible fleece; we used Pellon Thermolam Plus
- ½ yard of 45″+ wide mid-weight fusible interfacing; we used Pellon Décor Bond
- 1 yard of 20″+ wide lightweight fusible interfacing; we used woven Pellon Shape Flex
- 2½ yards of soft, skinny cording for the drawcord; we used ⅛”
- 1 yard of standard piping cord for the base accent piping; we used ¼”
- TWELVE extra-large (7/16”) eyelets (aka grommets); we used Dritz Extra-Large Eyelets in antique brass – purchasing a kit with the setting tools included, however, the eyelets and their appropriate settings tools can be purchased separately – handy if you’ve kept the tools from a previous project
- TWO 1½” D rings; we used antique brass to match the eyelets
- All purpose thread to match fabrics
- All purpose thread in a color to coordinate with the main fabric but contrast against the accent fabric; we used a tan to match the tan of the stripe
- See-through ruler
- Fabric pen or pencil
- Seam gauge
- Seam ripper
- Scissors
- Tiny scissors with sharp points, such as embroidery scissors, to cut the grommet holes
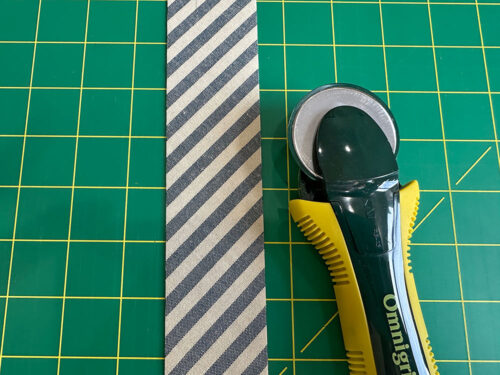
- Rotary cutter and mat
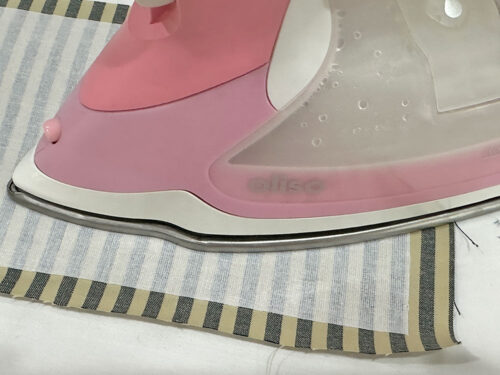
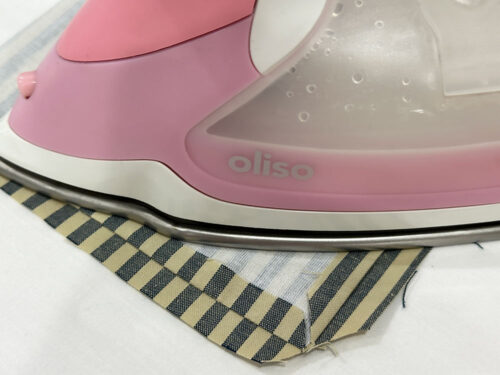
- Iron and ironing board
- Straight pins
- Sewing clips; optional but best for holding the grommet template in place
- Hand sewing needle
- Clear cellophane tape
- Seam sealant; optional for the ends of the drawcord and to reinforce the holes for the grommets and the ends of the knotted drawcord
- Small hammer to set grommets; we recommend a soft leather mallet or a ball peen hammer
- Heavy metal, stone or wooden block to use as a cutting and hammering surface for the grommets
Getting Started and Pattern Downloads
- Download and print out our TWO pattern sheets (one for the base and one for the grommet placement template), which have been bundled into one PDF to make the download easier.
IMPORTANT: Each pattern page is ONE 8½” x 11″ sheet. You must print the PDF file at 100%. DO NOT SCALE to fit the page. There is a guide rule on each page so you can confirm your final printout is to scale. Print horizontally (landscape).

- Cut out each pattern piece along the solid line.
NOTE: The base pattern is a half circle designed to be cut on the fold. If you’d rather cut with a full circle, print TWO copies of that sheet, butt them together (do not overlap) along the center line, and tape to secure. - Butt together (do not overlap) the three sections that make up the grommet placement template, aligning the printed arrows. Tape together to create the full template.
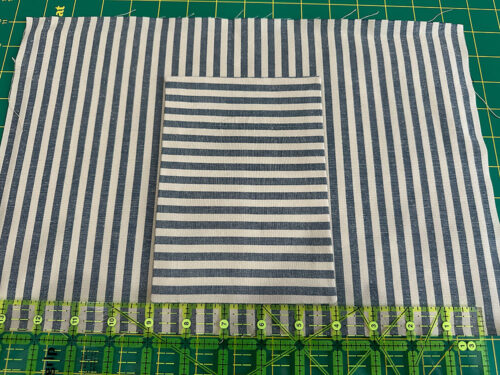
- From the fabric for the main exterior panel, grommet panel, exterior pocket, and base piping, cut the following:
TWO 15” wide x 10” high rectangles for the main exterior panels – if using a stripe, cut on the vertical
ONE 29” wide x 5” high rectangle for the grommet panel – if using a stripe, cut on the horizontal
ONE 6” wide x 15” high rectangle for the exterior pocket – if using a stripe, cut on the horizontal
ONE 2” x 29” strip for the base piping on the bias – if using a stripe, this means the stripe will be at a diagonal
- From the accent fabric for the base, straps, and the drawcord and pull, cut the following:
ONE 4” x 44” strip for the longer shoulder strap
ONE 4” x 22” strip for the shorter shoulder strap
ONE 1½” x 40” strip for the drawcord
ONE 4” x 2½” rectangle for the drawcord slider
Using the pattern, cut ONE on the fold for the base
- From the fabric for the lining panel, base, and pocket, cut the following:
TWO 15” wide x 10” high rectangles for the main lining panels
ONE 9” wide x 11” high rectangle for the lining pocket
ONE 2” x 29” strip on the bias to bind the interior seam allowance; this is optional – you can choose an alternative seam finishing option if you’d prefer not to bind or could use packaged seam binding
Using the pattern, cut ONE on the fold - From the fusible fleece, cut the following:
TWO 14” x 9” rectangles for the main exterior panels
One 1” x 3¾” rectangle for the drawcord slider
Using the base pattern, but cutting along the dotted stitch line rather than the outside solid line, cut ONE
NOTE: If you are someone who likes to keep their patterns for another make, consider printing TWO copies of the base pattern; keep one full and keep the second one trimmed along the stitch line. - From the lightweight fusible interfacing, cut the following:
ONE 28” x 4” high strip for the grommet panel
ONE 5” x 14” rectangle for the exterior pocket
ONE 8” x 10” rectangle for the lining pocket
Using the base pattern, but cutting along the dotted stitch line rather than the outside solid line, cut ONE - From the mid-weight fusible interfacing, cut the following:
ONE 1¼” x 44” strip for the longer strap
ONE 1¼” x 22” strip for the shorter strap
Using the base pattern, but cutting along the dotted stitch line rather than the outside solid line, cut ONE - Cut the small cording into TWO 38½” lengths for the drawcord.
- Leave the ¼” piping cord as-is.

At Your Sewing Machine & Ironing Board
Make the exterior pocket
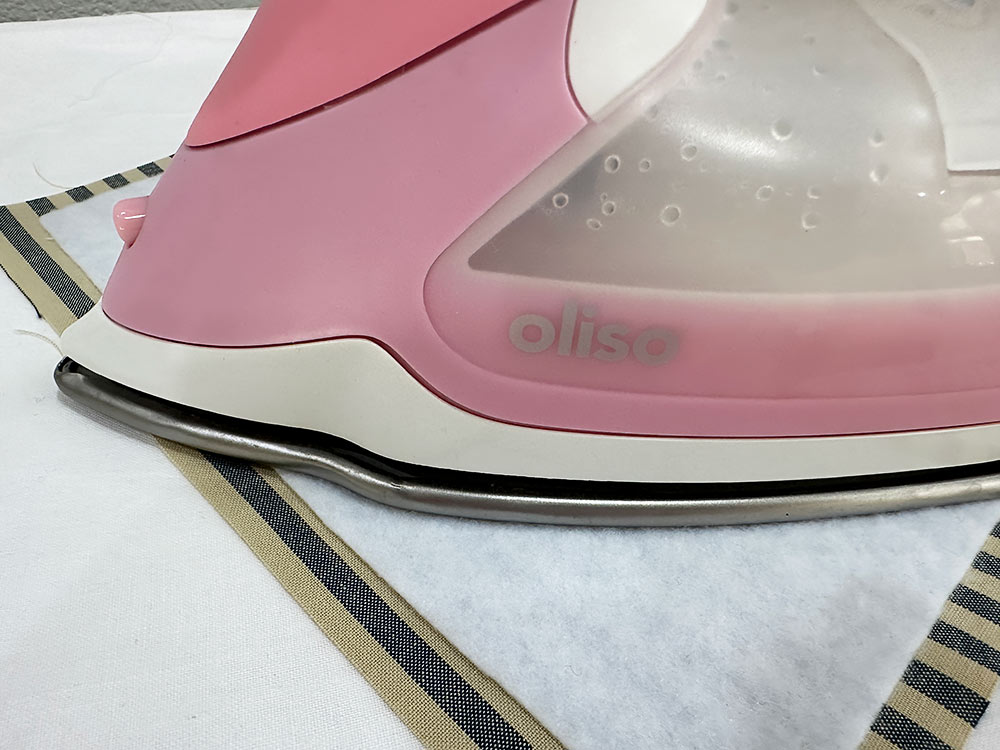
- Find the 6” x 15” exterior pocket panel and the 5” x 14” lightweight interfacing panel. Center the interfacing on the wrong side of the exterior panel so there is ½” of fabric showing beyond the interfacing on all sides. Following manufacturer’s instructions, fuse in place.
- Fold the fused panel in half so it is now 6” x 7½” and pin along both sides and across the bottom, leaving a 2” – 3” opening along the bottom for turning.
- Thread the machine with thread to best match the fabric in the top and bobbin and set up for a standard straight stitch.
- Using a ½” seam allowance, stitch along both sides and across the bottom, pivoting sharply at each corner and locking your seam at either side of that 2” – 3” opening along the bottom.
- Clip the corners and press open the seam allowance.
- Turn the pocket right side out through the bottom opening. Gently push out the corners with a long blunt tool so they are nice and sharp; a chopstick, knitting needle or point turner are all good options for this.
- Press flat, pressing in the seam allowance along the opening so it is flush with the sewn seam.


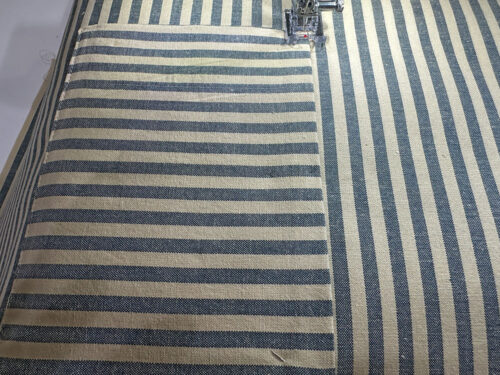
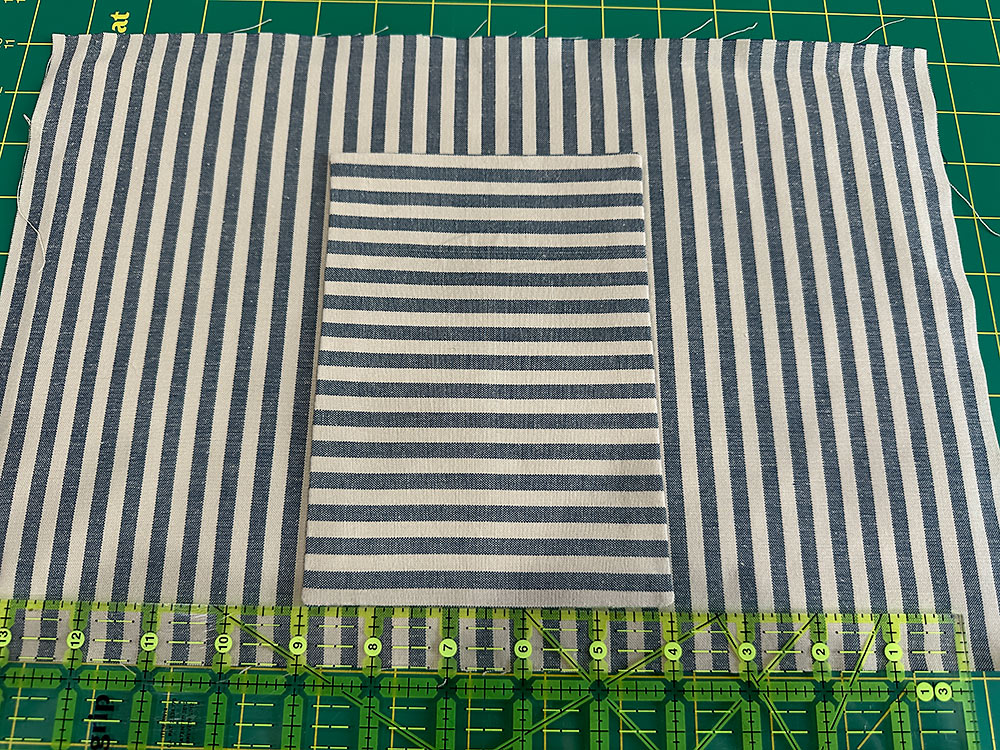
Fuse main exterior panels and place exterior pocket
- Find the two 15” x 10” exterior panels and the two 14” x 9” fusible fleece panels.
- Center a panel of fleece on the wrong side of each of the exterior panels so there is ½” of fabric showing beyond the fleece on all sides. Following manufacturer’s instructions, fuse in place.

- Find the fused back panel. At this point, both panels are identical, so simply pick your favorite to be the back. Place it right side up and flat on your work surface.
- Place the pocket on top of the back panel, centering it side to side and ¾” up from the bottom raw edge of the panel. Remember, when working with a pocket, the folded edge is the top and the seamed edge, with its opening, is the bottom.
- Pin the pocket in place.
- Keeping the same matching thread in place in the top and bobbin, re-set for a slightly lengthened straight stitch and edgestitch the pocket in place along both sides and across the bottom, sharply pivoting at each corner. This seam closes the opening at the bottom.
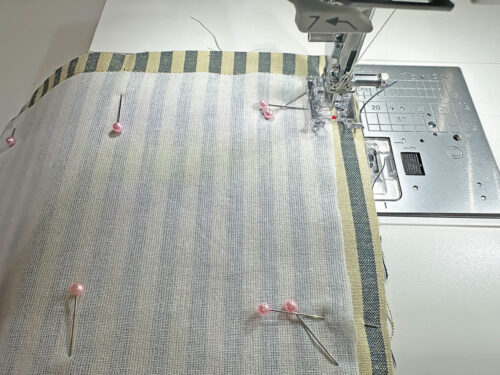
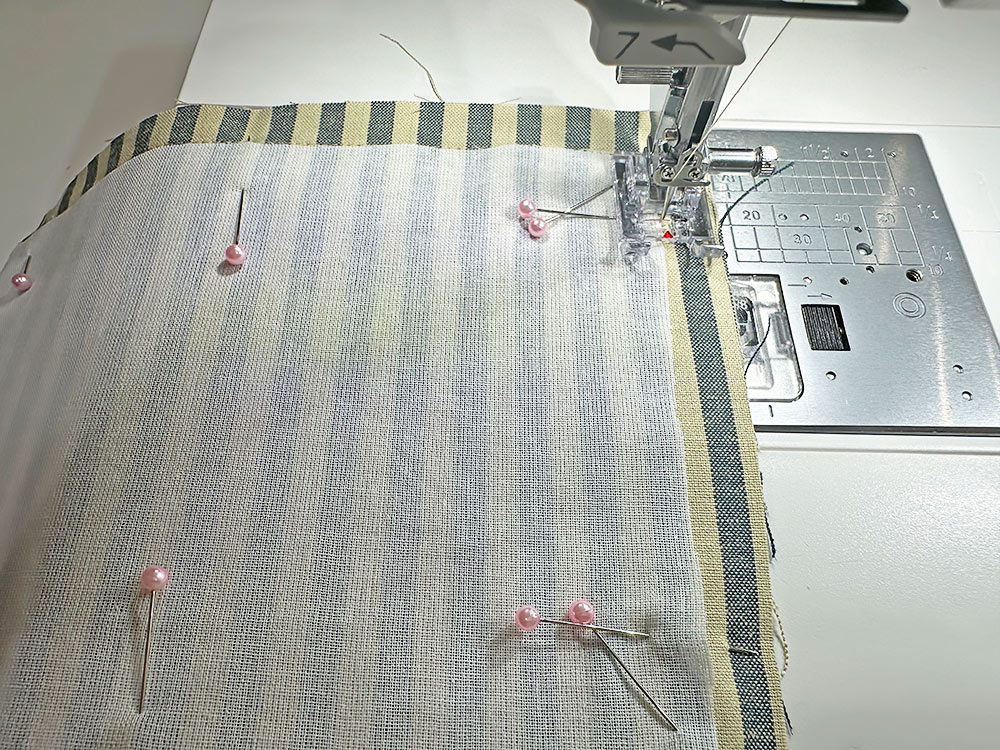
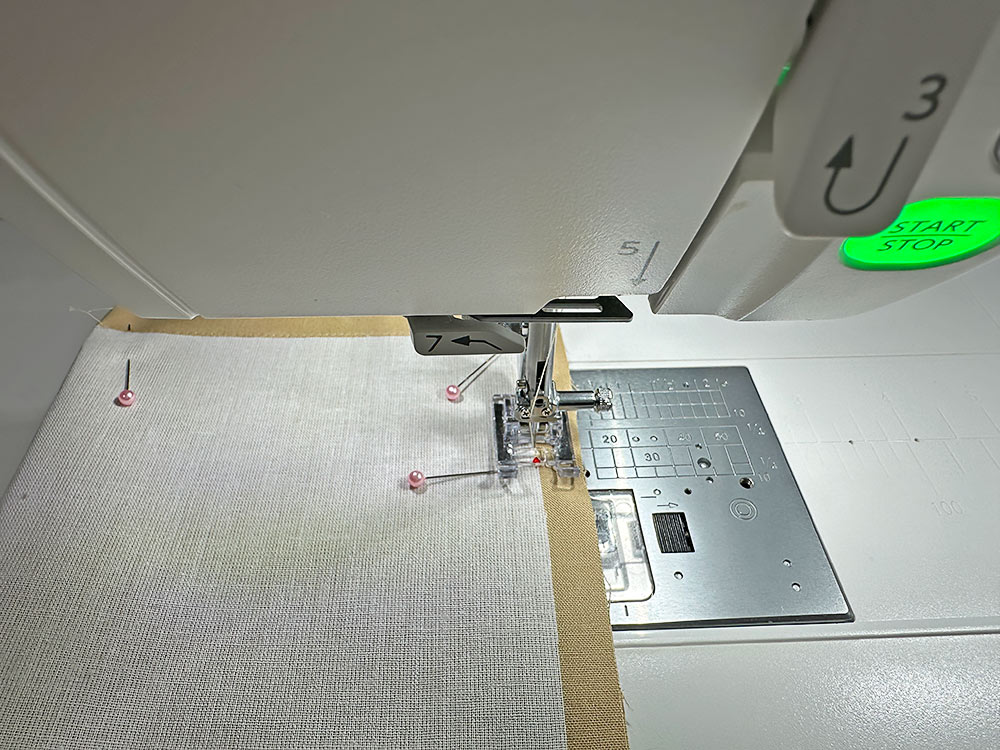
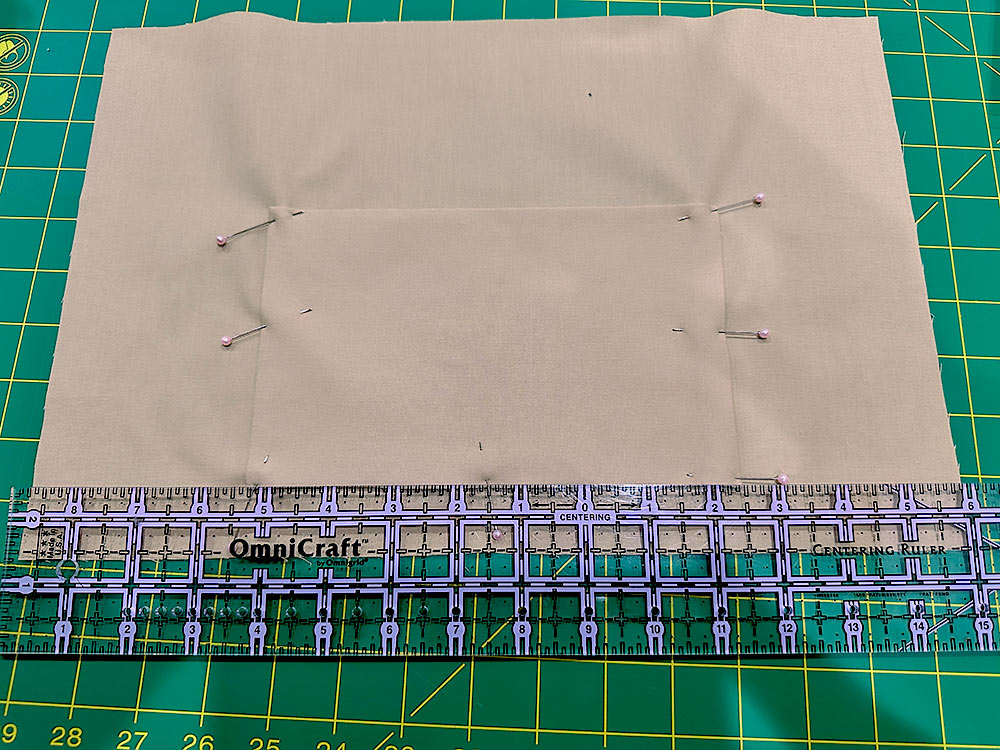
- Place the two exterior panels right sides together, sandwiching the pocket between the layers, and pin along both sides only. The top and bottom remain unpinned and unsewn.

- Re-set for a standard straight stitch and, using a ½” seam allowance, stitch both side seams.
- Press open both seam allowances and turn the exterior, which is now a tube, right side out.


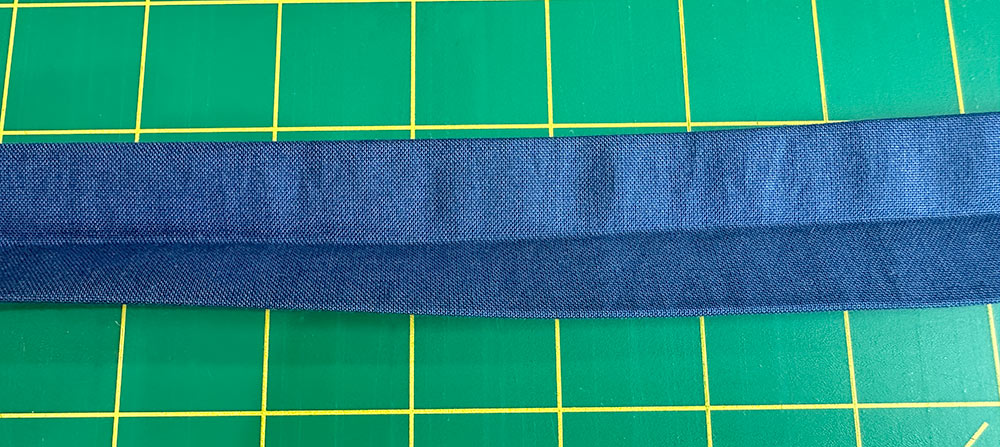
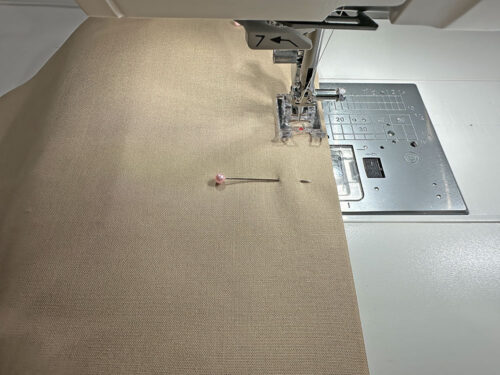
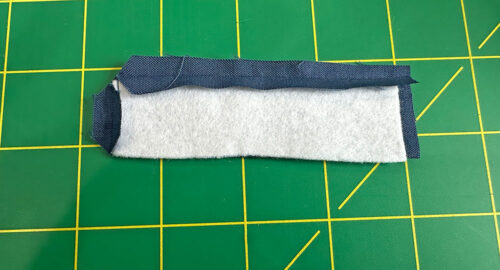
Make the straps
- Find the 4” x 44” and the 4” x 22” strap strips and the two 1¼” strips (also 22” and 44”) of mid-weight interfacing. Set the interfacing to one side.
- Fold each of the strap strips in half right sides together so they are now 2” in width. Pin along the long edge and across just one end.
- Re-thread the machine with thread to best match the strap fabric in the top and bobbin. Continue your set up with a standard foot and a standard straight stitch.
- Using a ½” seam allowance, stitch across the one end….
- … and along the length of the long side.
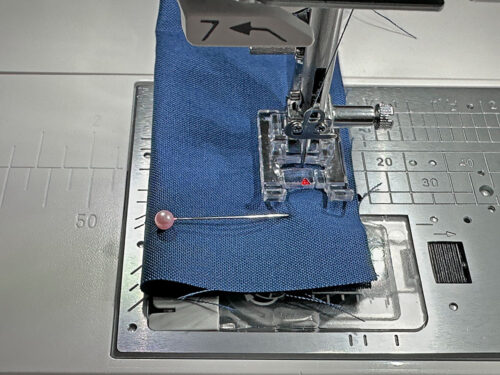
- Clip the corner and press open the seam allowance. Find the two strips of interfacing.

- Turn each strap right side out through its open end. As above with the pocket, use a long, blunt tool to gently push out the sewn end so the corners are nice and sharp. Press flat.
- Slip an interfacing strip into the open end of each strap and wiggle it all the way down until it rests against the sewn end.
NOTE: If you have any trouble slipping in the interfacing, you can gently fold one end of it over a slim ruler or dowel and use that tool to shimmy the interfacing down into the strap. Once you get it down to the sewn end, hold on to the fabric/interfacing as you pull out the tool. Use your fingers to smooth out the layers end to end. - Press well along the length of each strap to activate the fusing.
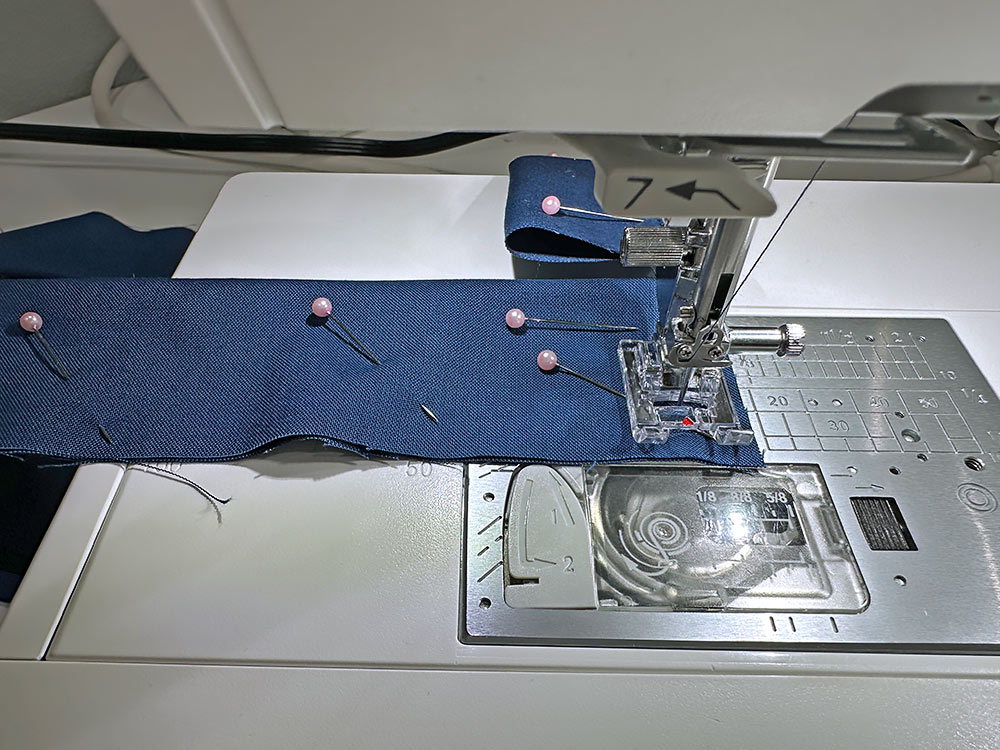
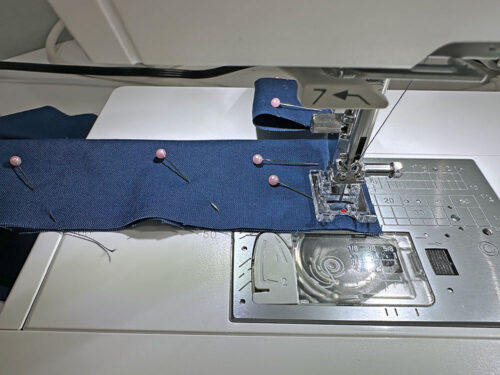
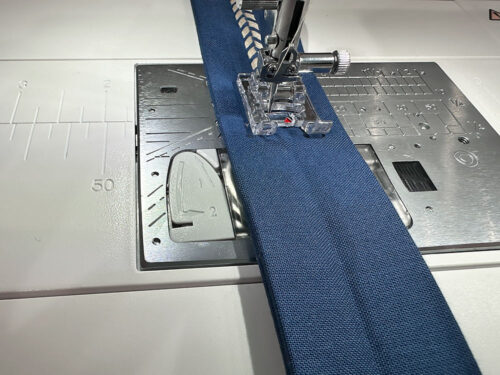
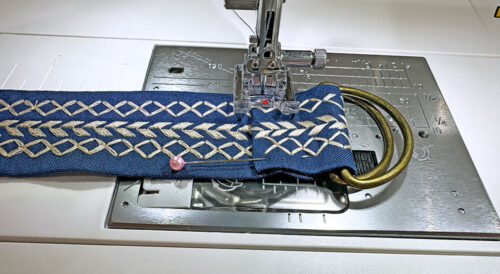
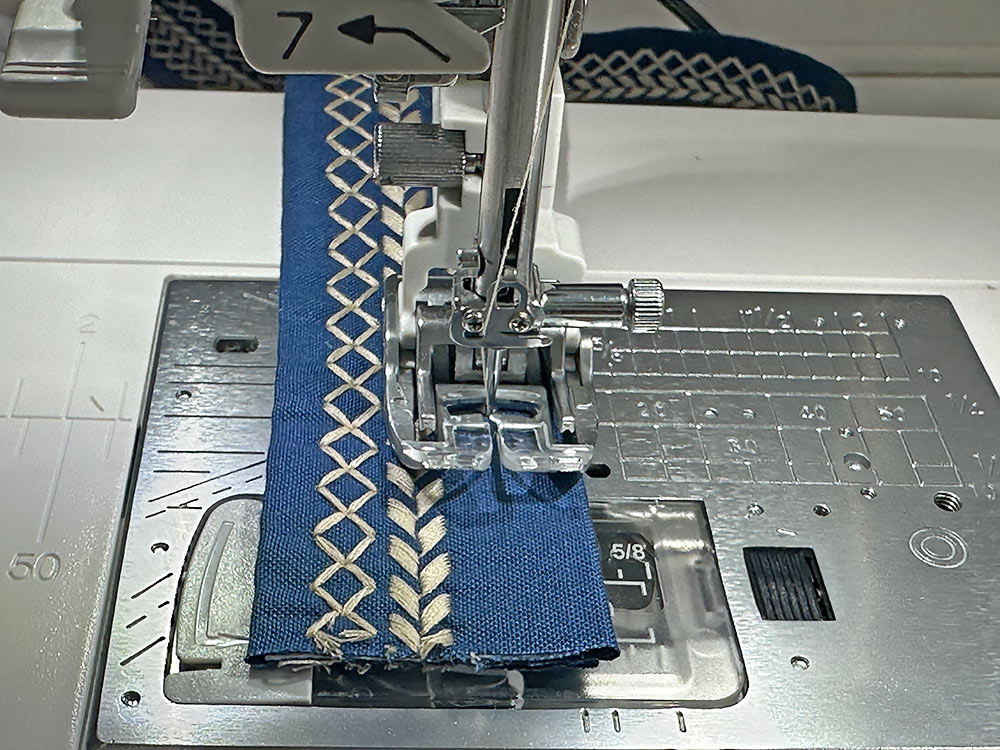
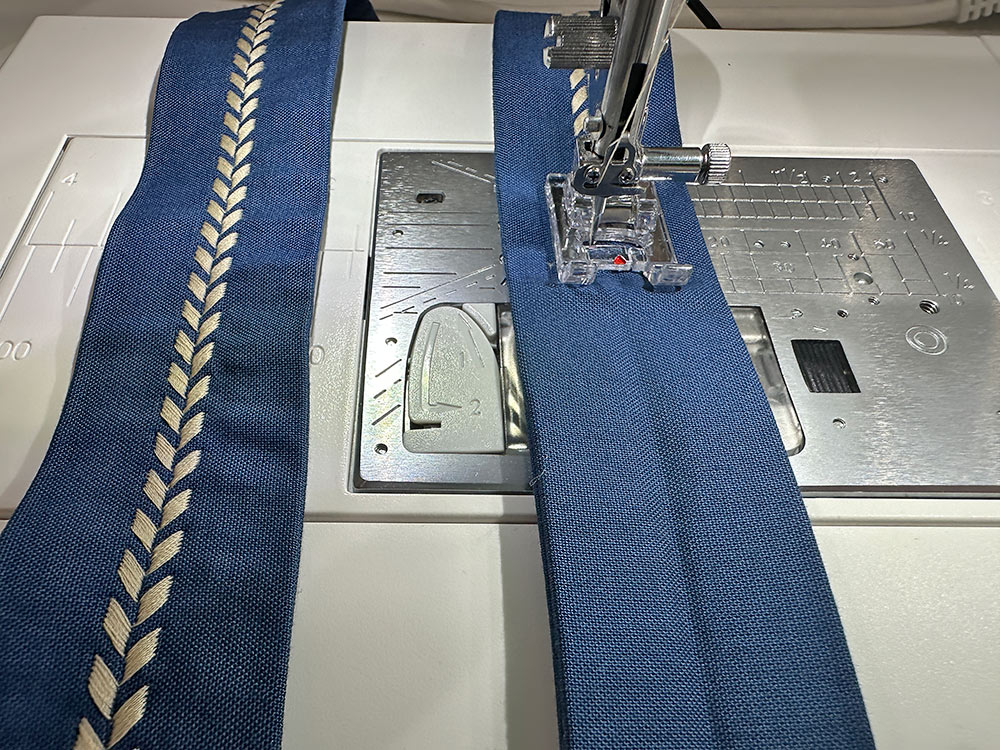
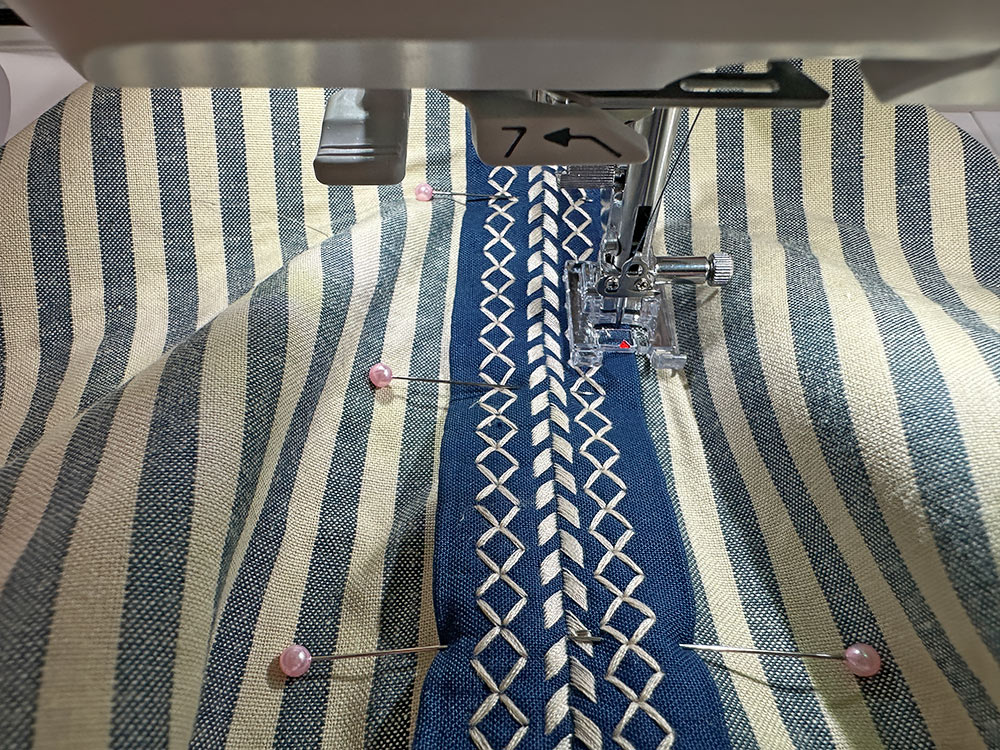
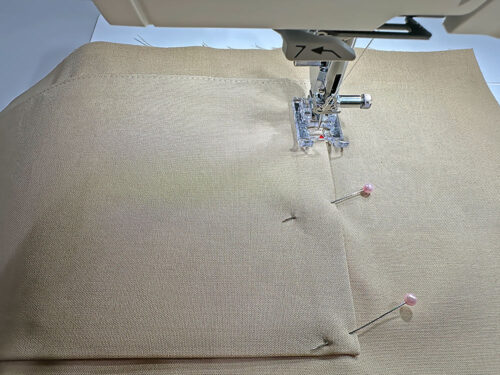
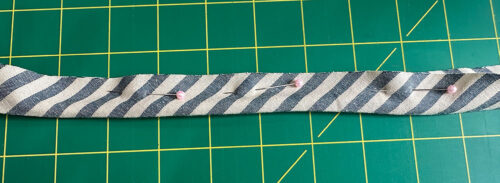
Add decorative stitching to the straps
- Find one finished strap. Fold in half and gently press to set a center crease line that runs the length of the strap.

- Select your decorative stitching… always one of the fun parts!
- We opted for three lines of stitching with each stitch sewn at a 7mm width. The final amount of decorative stitching as well as the width of the stitching is always up to you. With the smaller size of this duffle, we felt 7mm worked better than 9mm, allowing us to use three lines of stitching. On our Janome Skyline S9, we used Decorative Stitch #64 down the center and Decorative Stitch #74 along either side. The stitching will show on both sides of the strap so choose a stitch pattern that looks great from the front and the back. As we always recommend, test and practice your stitch selections on scraps to make sure you have exactly the look you want!
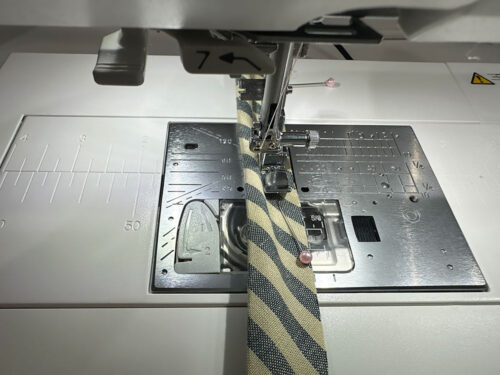
- Re-thread your machine with the contrasting thread in the top and bobbin. Use a Satin Stitch foot or similar transparent foot for the best accuracy.
- Start with the center line of stitching, following the crease line end to end.
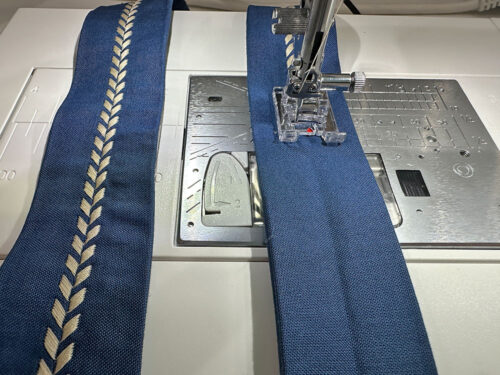
- When stitching the two outer lines, remember to always stitch in the same direction as your center line. This keeps any wrinkling or shifting from creeping in. The two outer lines of stitching should be approximately ⅛” from either side of the center stitch line.
NOTE: We switched to our AcuFeed™ Flex foot for the outer lines of stitching because this foot has several marks along that front that can act as easy-to-follow guide lines. In addition, the dual-feeding allows the narrow strap to stay flat and stable. This is optional; you could certainly stay with a standard Satin Stitch foot but would need to go quite slowly and carefully. Another option would be your machine’s Even Feed/Walking foot if you do not have a built-in feeding system.

- Stitch the center line of both straps, then change up your stitch settings and stitch the outer lines on both straps.
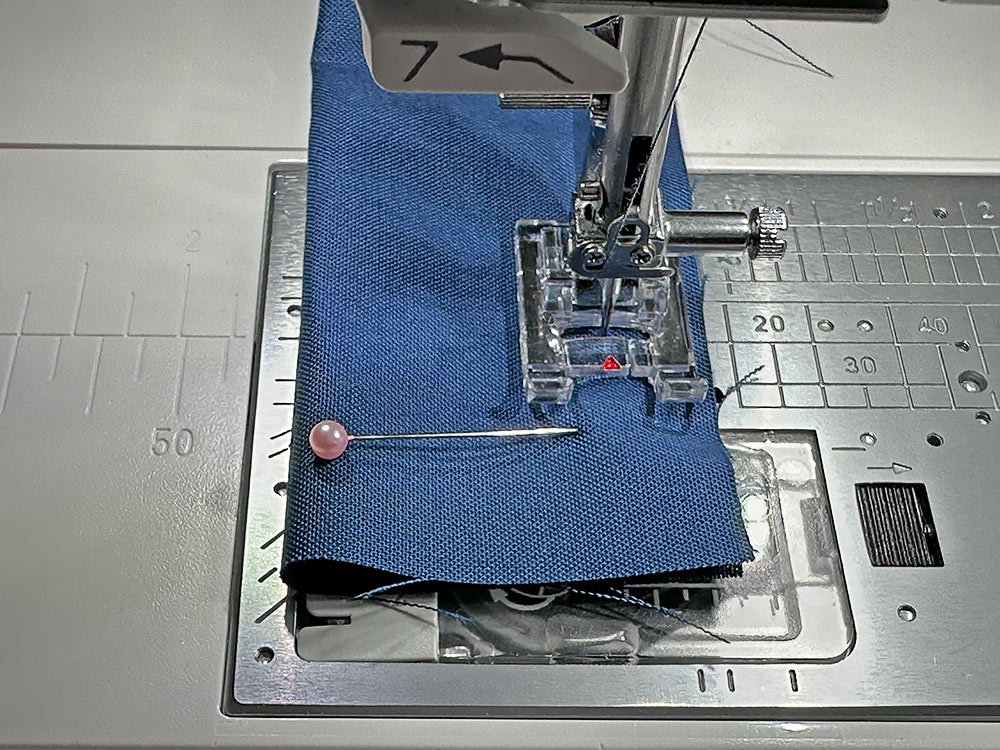
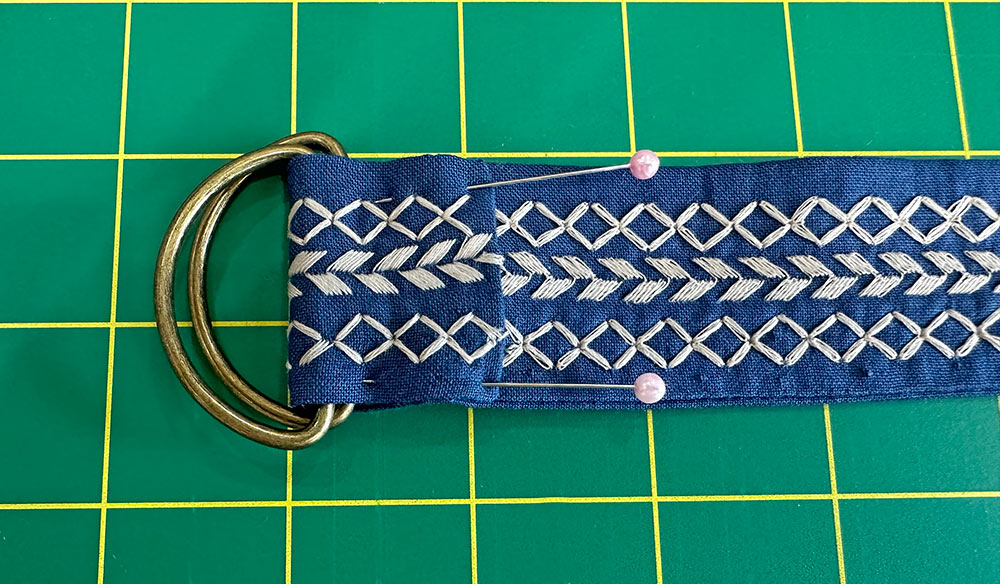
- Find the shorter strap and the two D-rings.
- Feed the finished end of the shorter strap through both of the D-rings, pulling it through and back on itself about 1”. Pin in place.
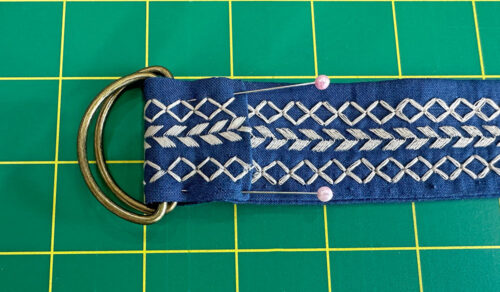
- Re-thread the machine with thread to best match the strap fabric in the top and bobbin. Re-set for a slightly lengthened straight stitch.
- Stitch across the strap end through all the layers to secure the D-rings in place.


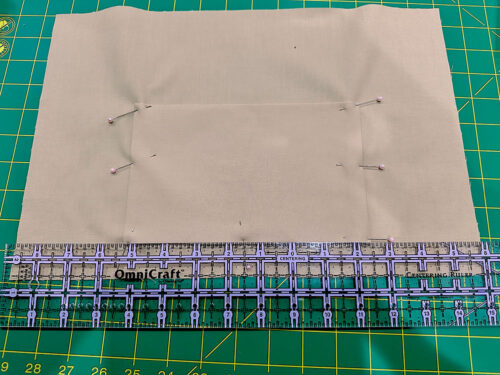
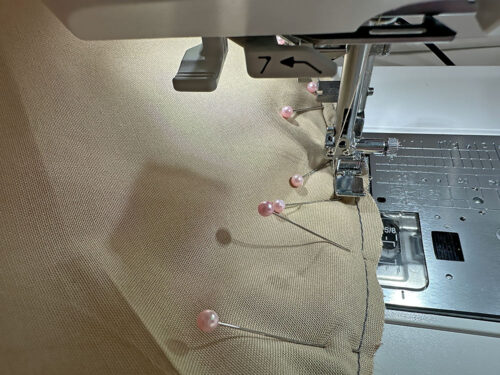
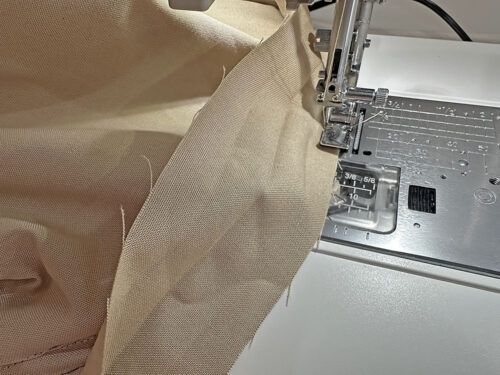
Attach the straps to the exterior
- Find the exterior “tube.” Place a strap over each side seam.
- The short strap goes over the side seam to the right of the back pocket; the long strap goes over the seam to the left of the pocket. The raw end of each strap should be flush the bottom raw edge of the main panel.
- Each strap should be carefully centered over its seam. Then, measure 1½” down from the top raw edge of the main panel and mark a horizontal line across each strap. This marks the point at which the edgestitching that secures the strap to the bag should cross over the strap. The unsewn portion at the top allows the duffel to better gather up once the final grommet panel and drawcord are in place.
- The drawing below shows a “flattened” view of the duffle that helps visualize what goes where. The edgestitching is shown in a contrasting color to better see its positioning.
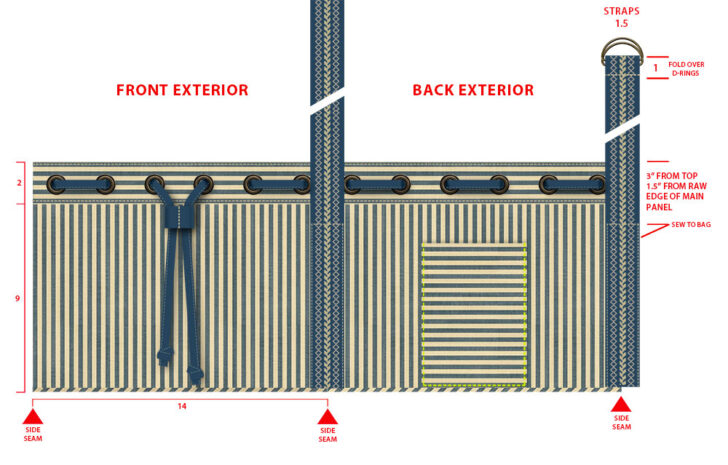
- The machine should still be threaded with thread to best match the strap fabric in the top and bobbin. Continue to use the slightly lengthened straight stitch.
- On both straps, edgestitch up to the horizontal marking, pivot and cross over, then edgestitch back down to the bottom.


Create the lining with its pocket + assemble with the exterior
- Find the 9” x 11” lining pocket panel and the 8” x 10” lightweight interfacing panel. Center the interfacing on the wrong side of the lining panel so there is ½” of fabric showing beyond the interfacing on all sides. Following manufacturer’s instructions, fuse in place.
- Fold the fused panel in half so it is now 9” x 5½” and pin along both sides and across the bottom, leaving a 3” opening along the bottom for turning.
- Thread the machine with thread to best match the lining fabric in the top and bobbin and set up for a standard straight stitch.
- Using a ½” seam allowance, stitch along both sides and across the bottom, sharply pivoting at the corners and locking your seam at either side of that 3” opening along the bottom.

- Clip the corners and press open the seam allowance.
- Turn the pocket right side out through the bottom opening. Gently push out the corners with a long blunt tool so they are nice and sharp. As above, a chopstick, knitting needle or point turner are all good options.
- Press flat, pressing in the seam allowance along the opening so it is flush with the sewn seam.
- Find one of the 15” x 10” main lining panels. As above with the exterior panels, the two are identical so simply choose one to be your “pocket panel.”
- Place the pocket on top of the main panel, centering it side to side and ¾” up from the bottom raw edge of the panel. As above, the folded edge is the top and the seamed edge is the bottom. Pin the pocket in place.
- Keeping the same matching thread in place in the top and bobbin, re-set for a slightly lengthened straight stitch and edgestitch the pocket in place along both sides and across the bottom, sharply pivoting at each corner. This seam closes up the bottom opening.
- Place the two lining panels right sides together, sandwiching the pocket between the layers, and pin along both sides only. Just as you did above with the exterior, the top and bottom remain unpinned and unsewn.
- Re-set for a standard straight stitch and, using a ½” seam allowance, stitch both side seams.
- Press open both seam allowances and turn the lining, which is now a tube, right side out.
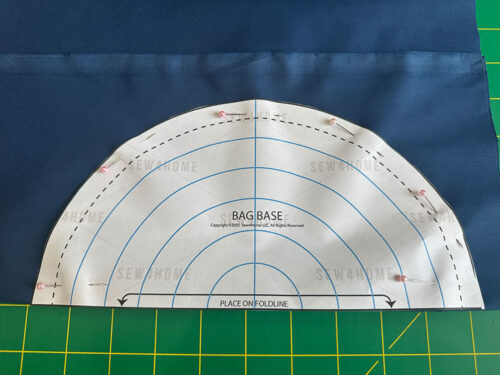
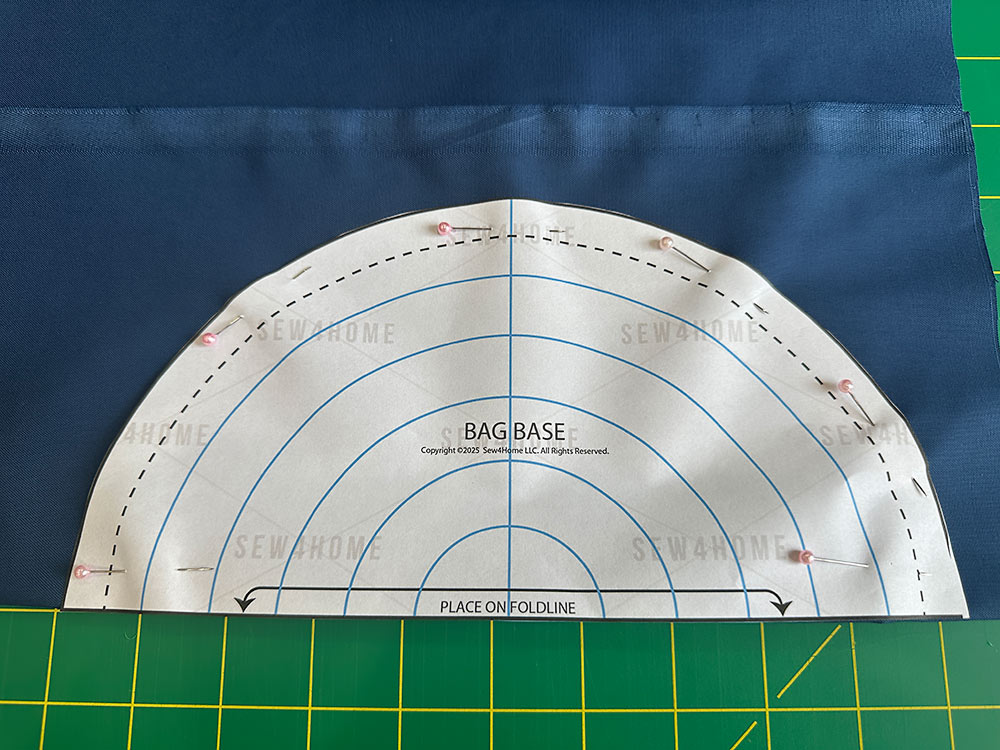
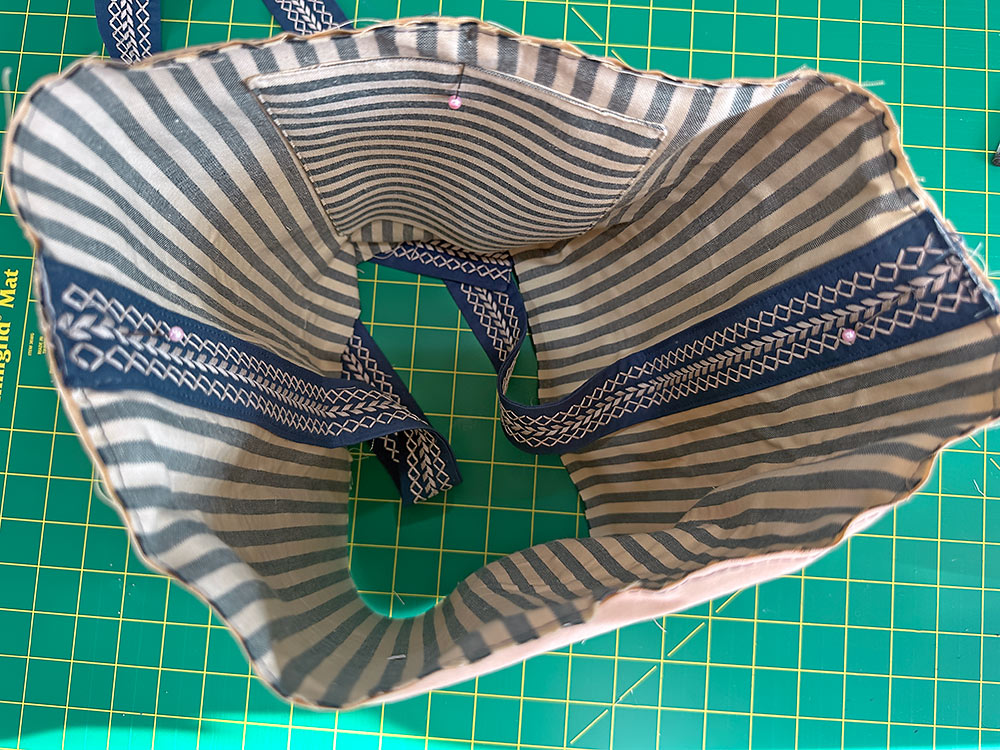
- Find the exterior “tube.” It should have the straps stitched in place. Turn it wrong side out. Slip the exterior tube inside the lining tube so the two layers are now wrong sides together. Align the side seams and make sure the pockets of both layers are back to back.
- Machine baste around the bottom through both layers to hold them in place during the remainder of construction.

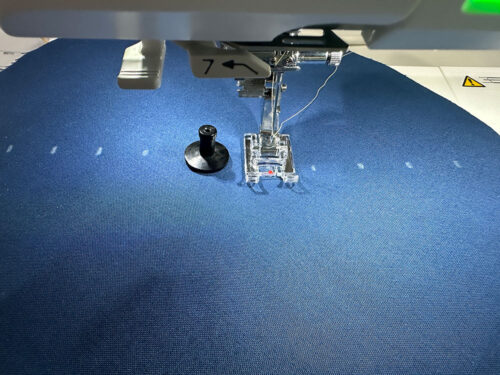
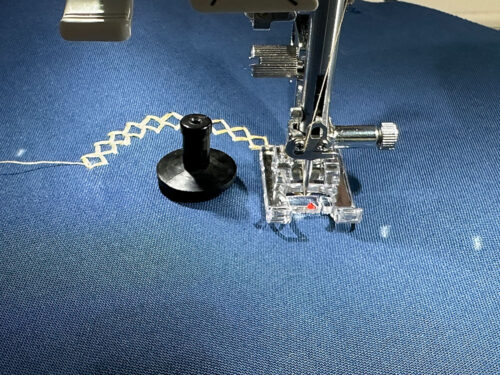
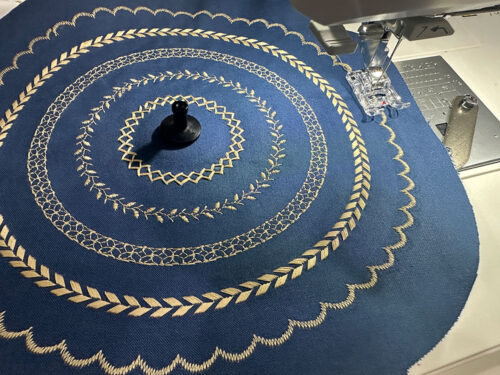
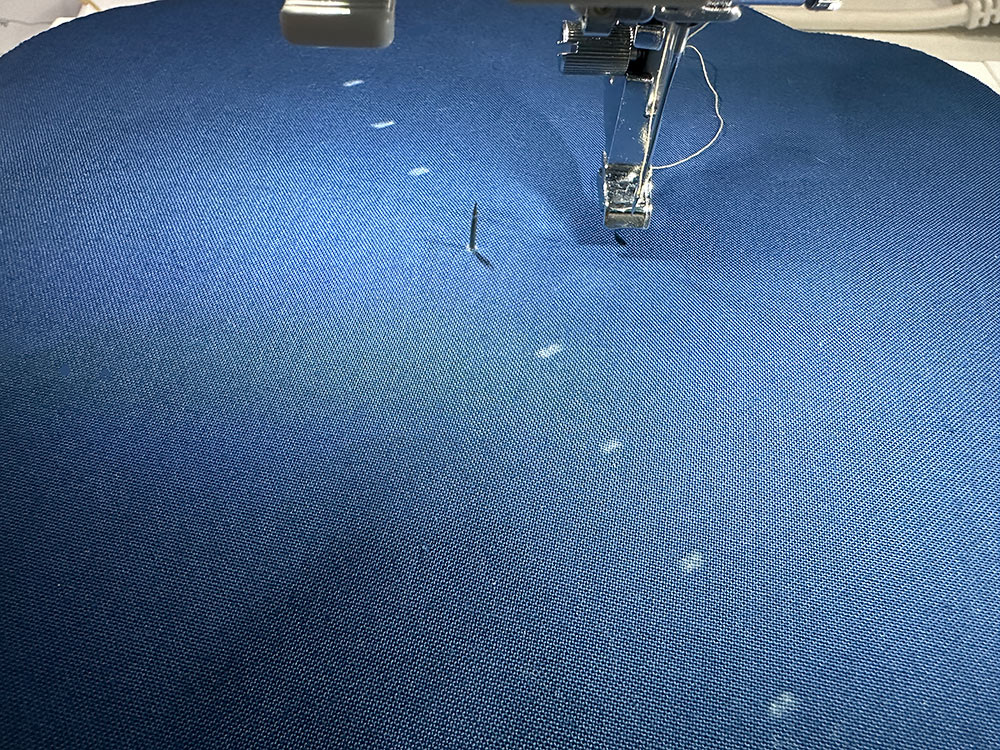
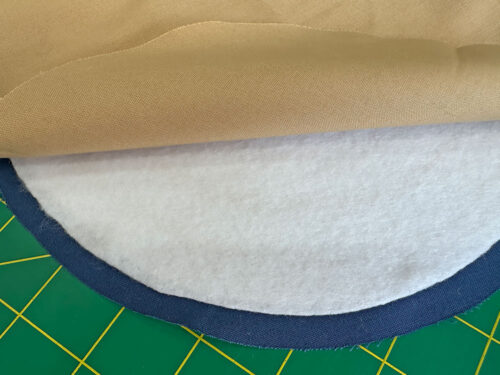
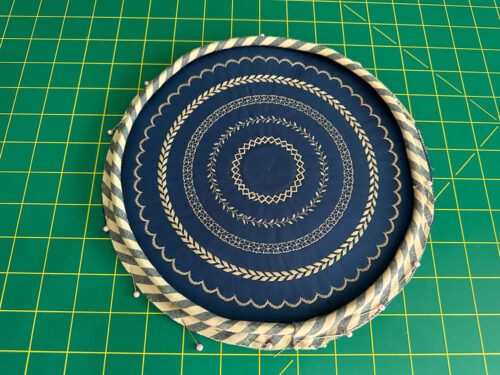
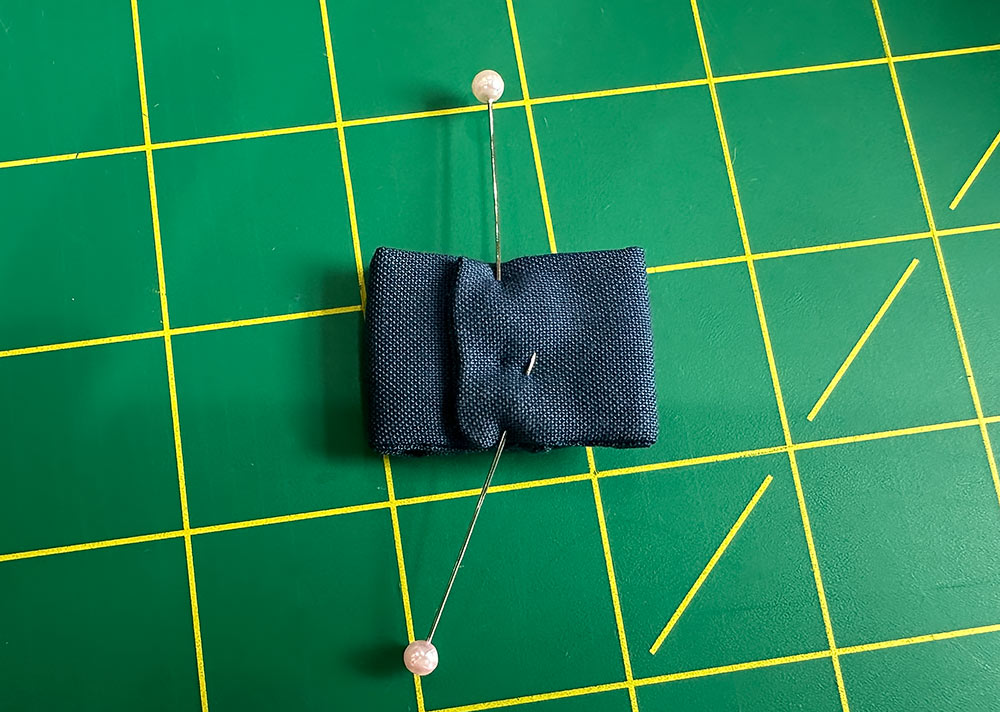
Add the circular stitching to the base panel
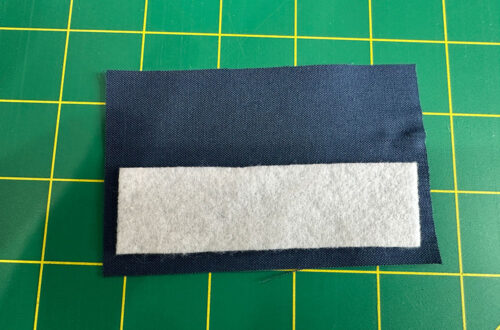
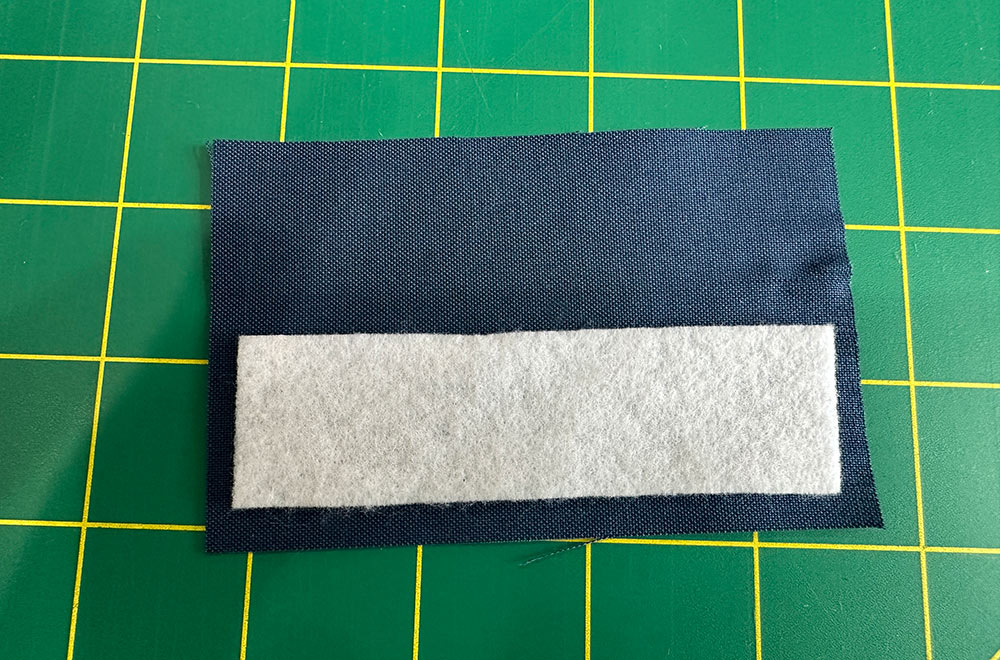
- Find the accent base panel and the two interfacing base panels: the lightweight panel and the mid-weight panel.
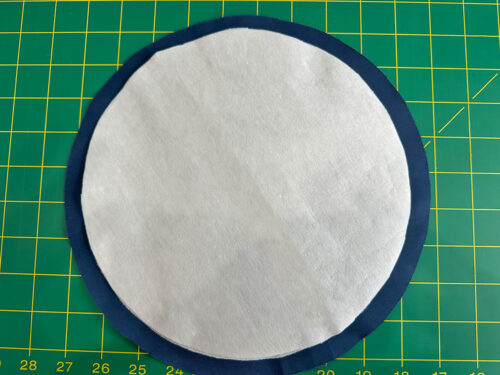
- Place the lightweight interfacing on the wrong side of the base panel, centering it so there is ½” of fabric showing beyond the interfacing all around. Following manufacturer’s instructions, fuse in place.
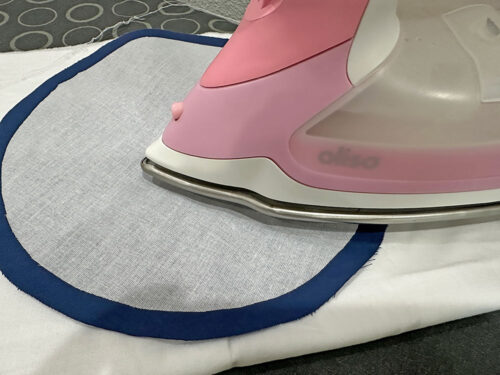
- Place the mid-weight interfacing panel directly on top of the lightweight panel and fuse it in place.
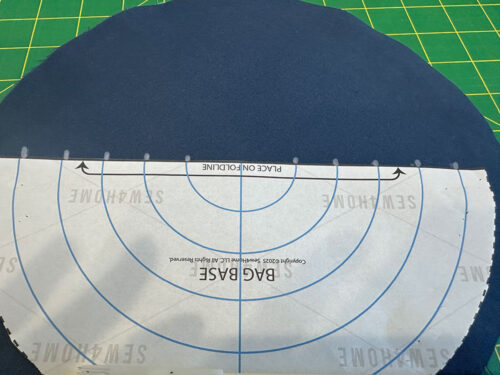
- Flip the base circle to the right side and find its exact center point. Mark this point with a fabric marking tool. The most precise way to do this is to lightly fold the circle in half one way and then half the opposite way, finger pressing to set light crease lines. The cross hairs of the crease lines mark the exact center of the circle.
- Find the original paper pattern and align its center point with your marked point. Then, draw in marks for the concentric circles. Of course, you are welcome to do fewer or more circles. If that is your choice, you can do your own measuring and marking or use the measurements on the Circular Sewing Attachment to create your desired spacing.
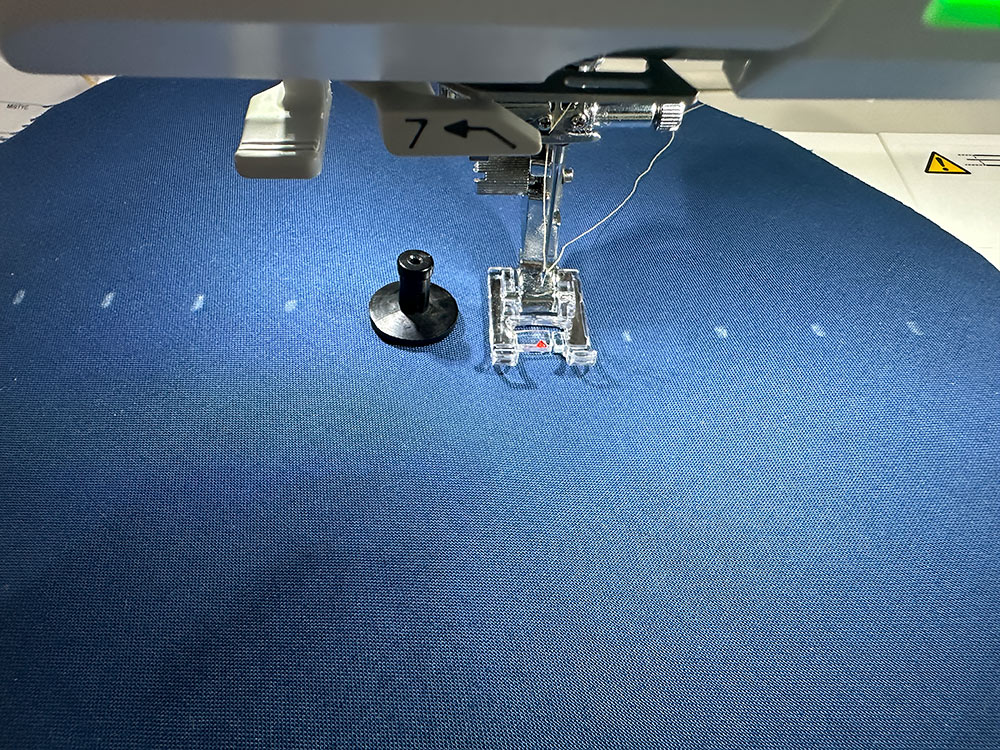
- Thread the machine with the contrasting thread in the top and bobbin. Make sure you have a full bobbin; you don’t want to run out in the middle of the circular stitching. We loved the idea of keeping the stitching all the same color. If you want to change colors, keep your bobbin thread a consistent neutral color and just change out the top thread.
- Pop off your presser foot and attach the Circular Sewing Attachment. There is a special hole in the bed of the machine into which the Circular Sewing Attachment is placed.
NOTE: As mentioned above, the Circular Sewing Attachment is an optional accessory for Janome machines. If you own a Janome, we recommend visiting your local authorized Janome dealer to inquire about one. Be sure to know your model as there is more than one variation of this accessory. If you do not own a Janome, you could try to draw concentric circles with a compass or template to use as your guide. - Drop the center point of the base circle over the exposed pin of the Circular Sewing Attachment.
- Replace the cap over the pin and attach the Satin Stitch foot.
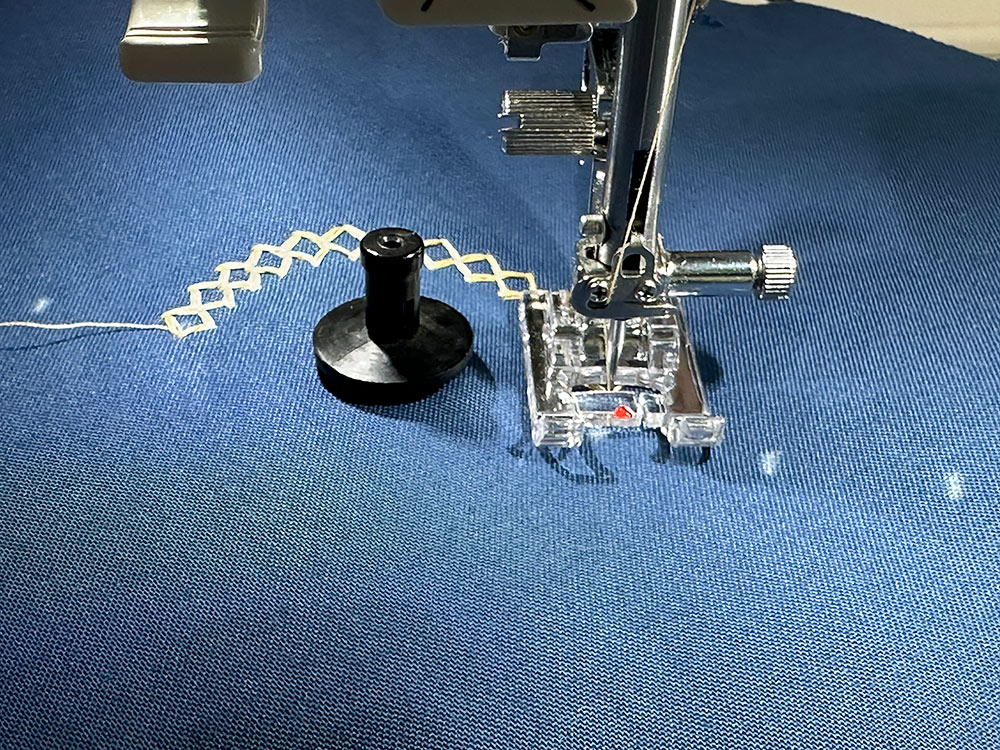
NOTE: We will call out each of the stitch selections we used from the library on our Janome Skyline S9. All were stitched at a 7mm width. You are welcome to pick out your own stitches, but as we always recommend… practice, practice first on scraps to make sure it’s the look you want. - Set the guide on the Circular Sewing Attachment to 1” and select your first stitch – the innermost circle. Our first circle was Decorative Stitch #74.
- Move the Circular Sewing Attachment guide out ¾” and set up for the second circle. Our choice was Decorative Stitch #30.
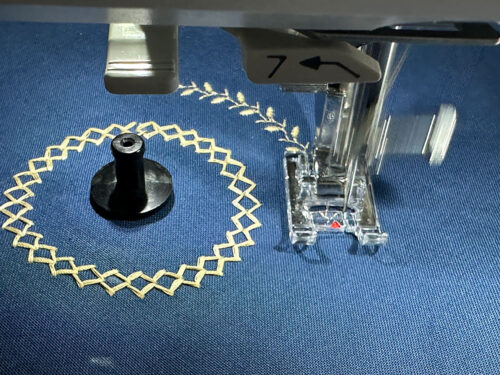
- Move out another ¾” for the third circle. Our choice was Decorative Stitch #41.
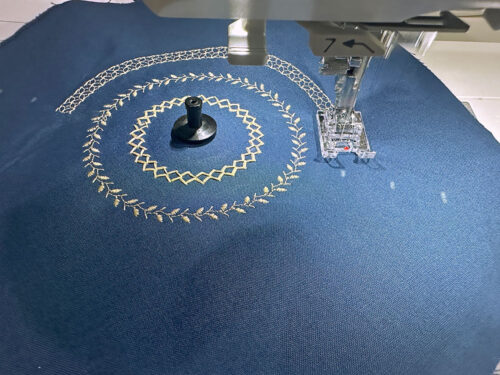
- Move out another ¾” for the fourth circle. Our choice was Decorative Stitch #64.
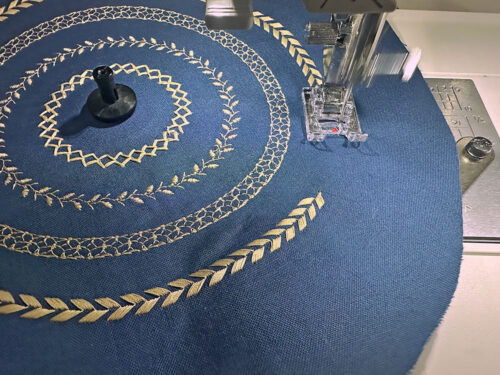
- And finally, finish out your concentric circles by moving out ¾” for the fifth circle. Our choice was Satin Stitch #17.
NOTE: If you are brand new to using this Attachment and/or considering buying one, take a look at our full tutorial on using the Janome Circular Sewing Attachment. You can also review how we used it on a set of hot pads as well as on the flap of a clutch.
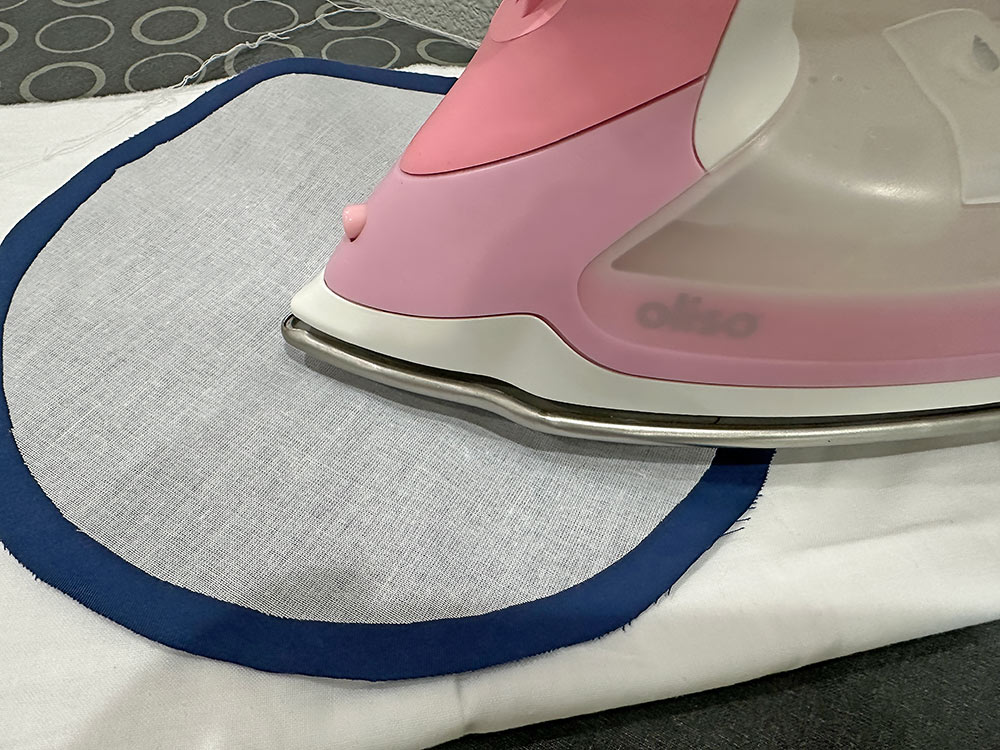


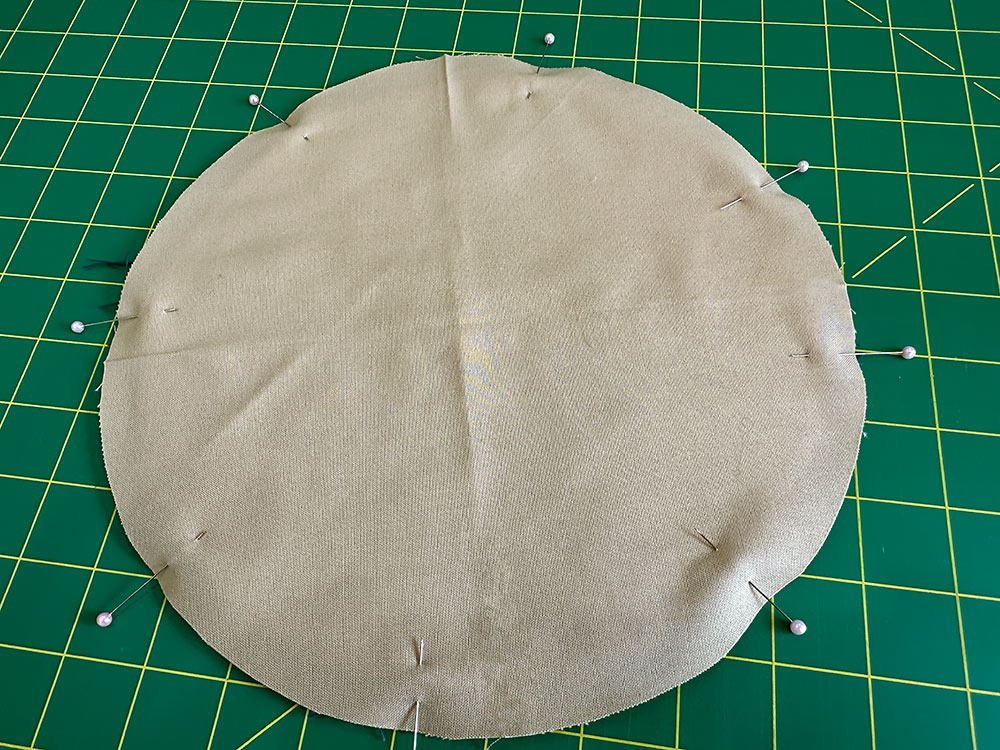
Layer the base panel and mark
- Find the remaining lining base panel and the base panel of fusible fleece.
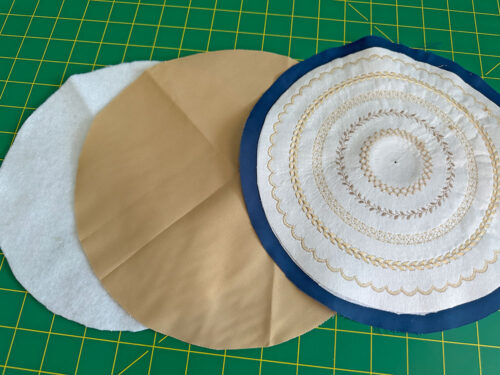
- Center the fleece on the wrong side of the exterior accent panel, covering up the back of the decorative stitching, and fuse in place. Then, layer the lining base panel on top, right side of the lining panel facing out.
- Pin all around through all the layers.
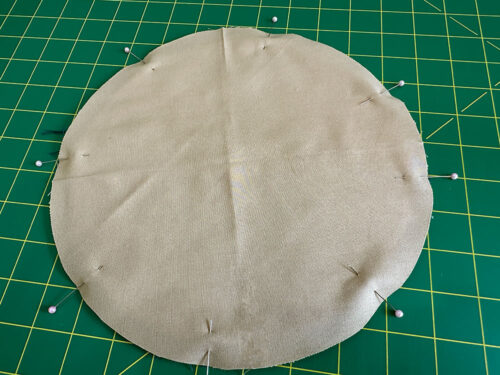
- The base panel will be sewn in place following the traditional method of inserting a flat base into a tube. If you are new to this type of technique, check out our full step-by-step tutorial.
- The first step is to fold the base panel in half vertically and then horizontally to find the four quadrant points of the circle, like the four main points on the face of a clock (12:00, 3:00, 6:00, 9:00). You can see in the photo above that these folded quadrant lines are already in place on our lining base panel.


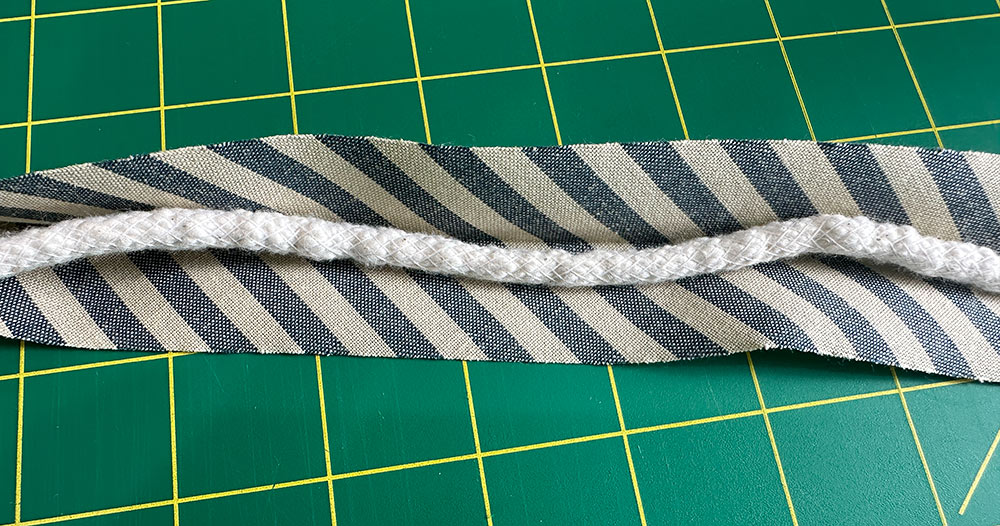
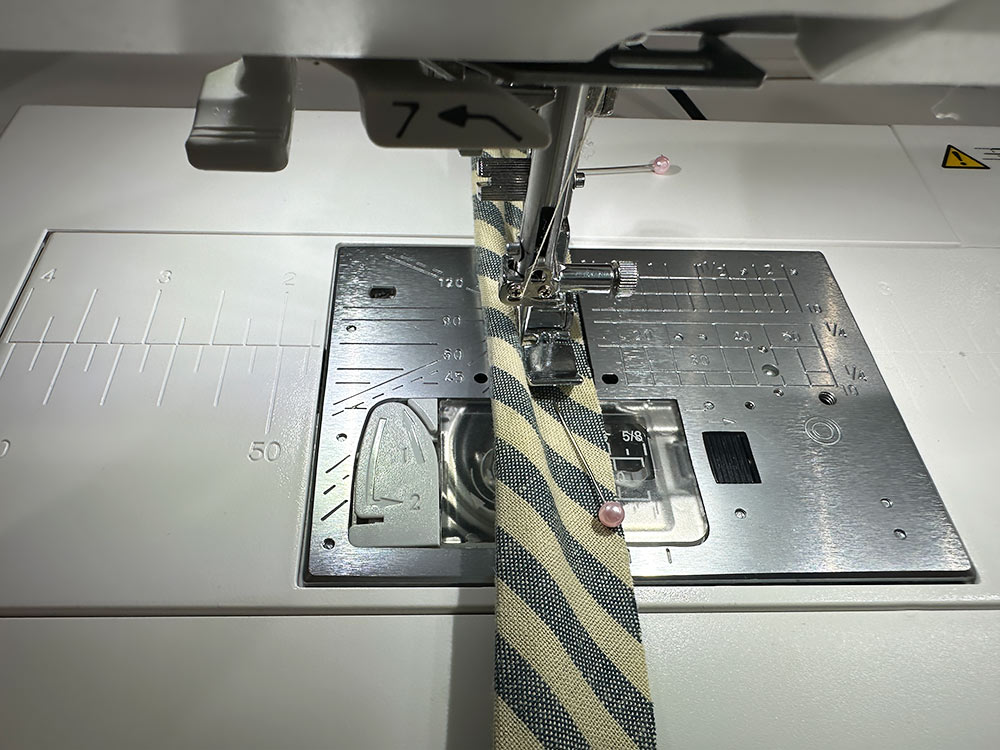
Make the piping and attach to the base panel
- Find the 2” x 29” strip (the stripe fabric cut on the bias) and the length of ¼” piping cord.
- Cut the piping cord to match the bias strip.
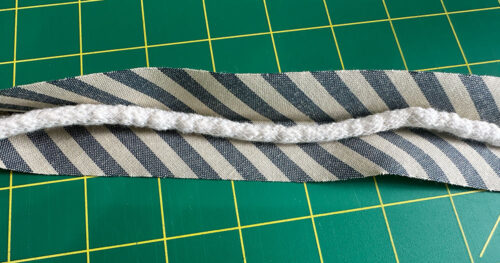
- Wrap the bias strip around the piping cord, right side out. Align the raw edges and pin in place.
- Thread the machine with thread to best match the piping fabric in the top and bobbin. Attach a Zipper foot.
- Machine baste the fabric in place, running the seam close to the cord
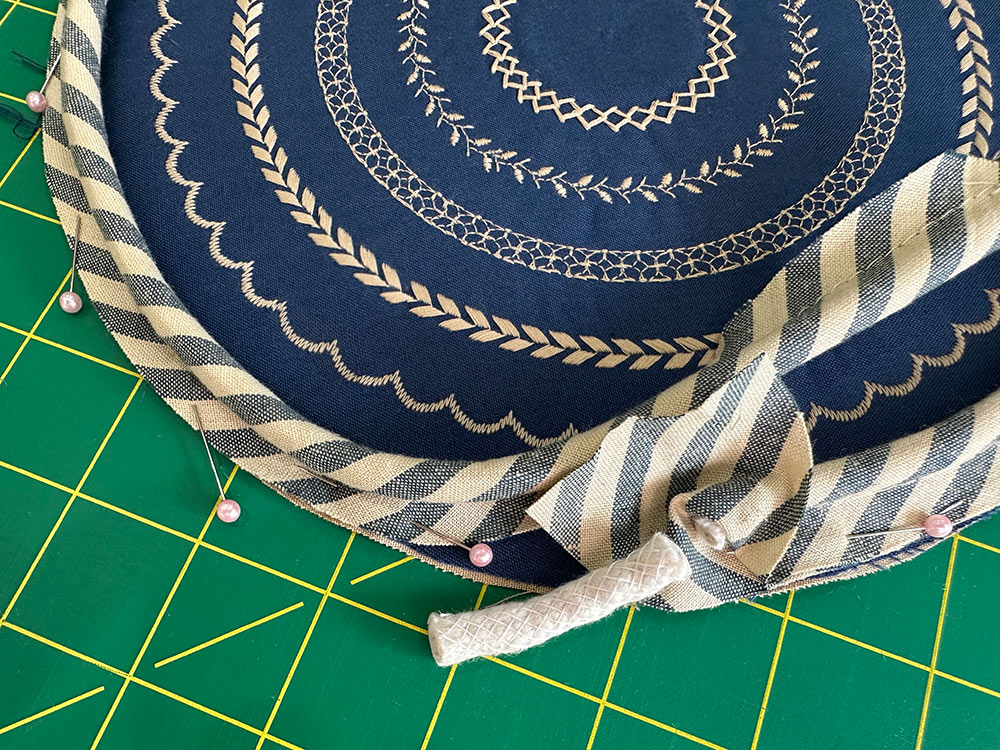
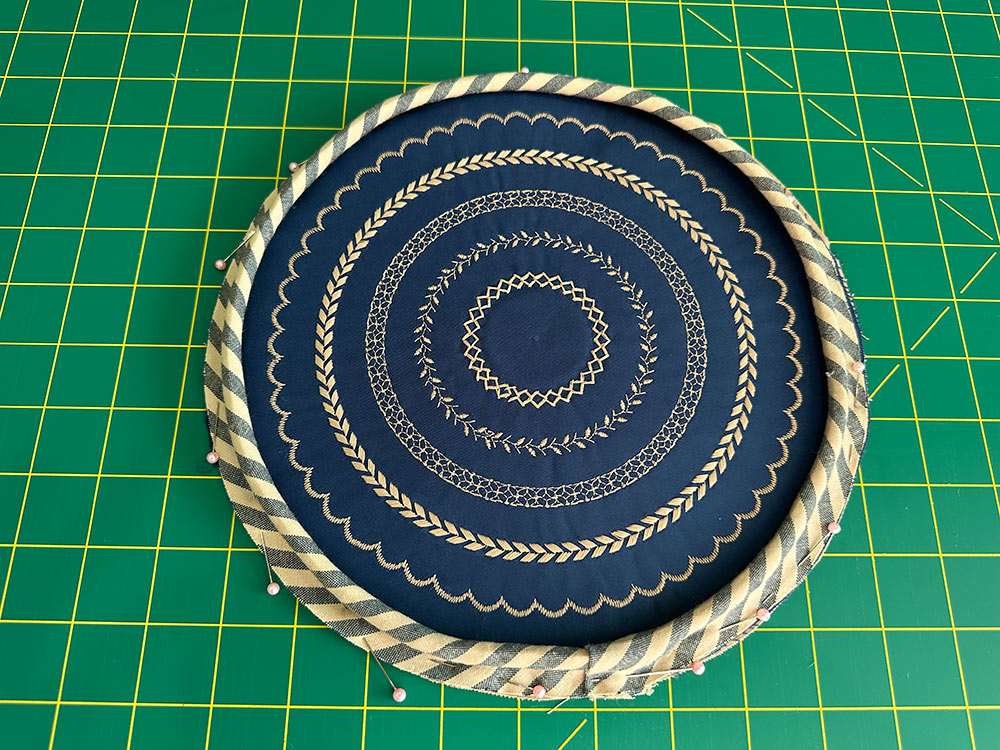
- Find the base panel unit and place it decorative stitching side up on your work surface.
- Leaving about 1” – 2″ free at the head, begin pinning the piping to the base panel. The raw edges of the piping flange/lip should be flush with the raw edges of the base panel unit. Continue around the entire perimeter of the base. If need be, you can clip into the raw edges of the piping to help keep a smooth line. We didn’t find this necessary, but it is an option. Leave a matching 1” – 2” free at the tail end. Lightly pin in place.

- When you get back around to the beginning, overlap those free ends. Pull back the fabric, ripping out the basting stitches as needed, and cut the cording only, not the fabric, so the tail of the cording is even with the head of the cording. Fold under the raw edge about ½” to create a clean edge. Trim away any excess fabric as necessary.
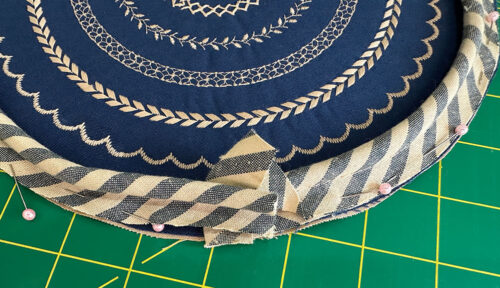
- Butt together the two ends of the cording and wrap the folded fabric of the tail around the head, enclosing the matched ends of the cording. Pin in place.
- Machine baste in place all the way around, using the Zipper foot.
NOTE: If you are new to working with piping, we have a full tutorial you can review prior to starting.


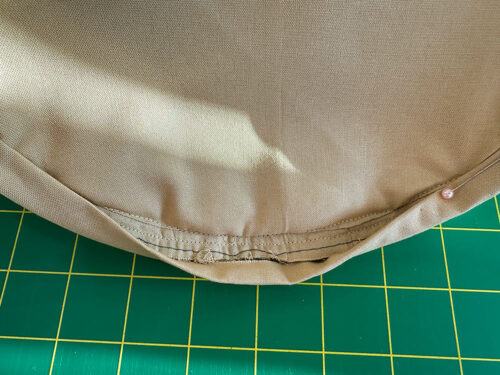
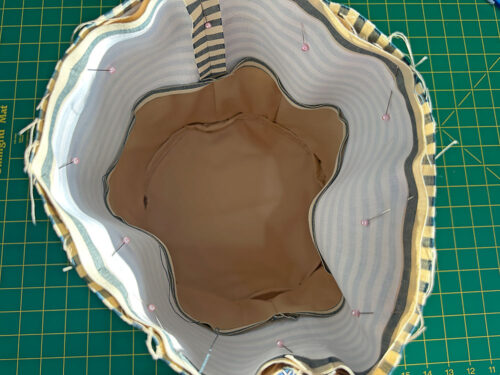
Insert the base panel and finish the interior seam allowance
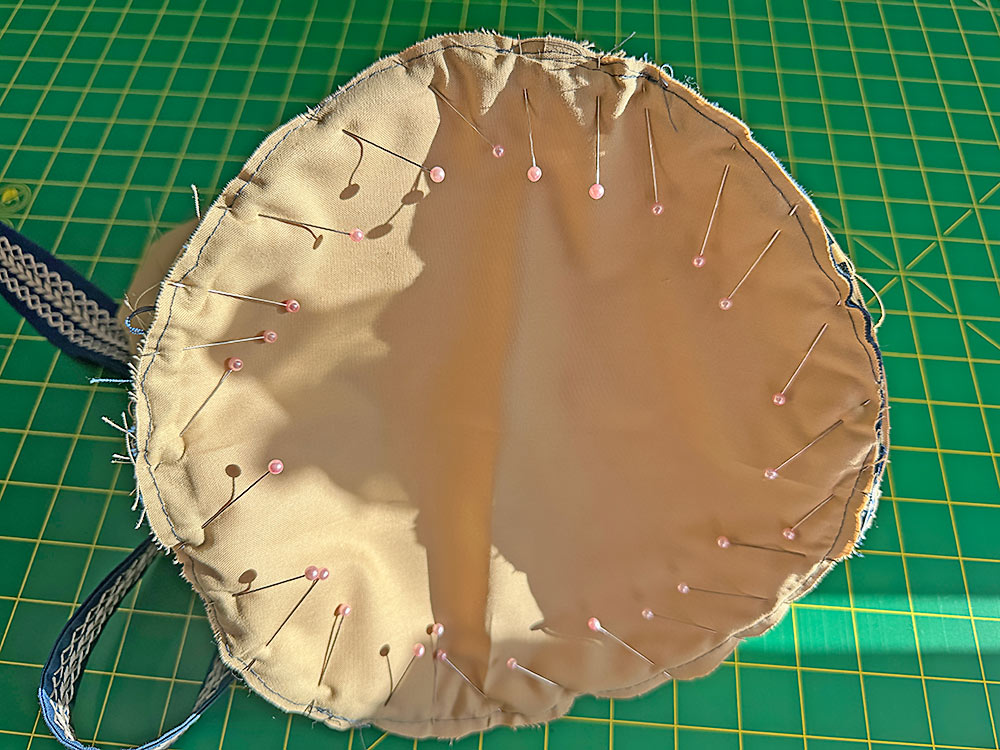
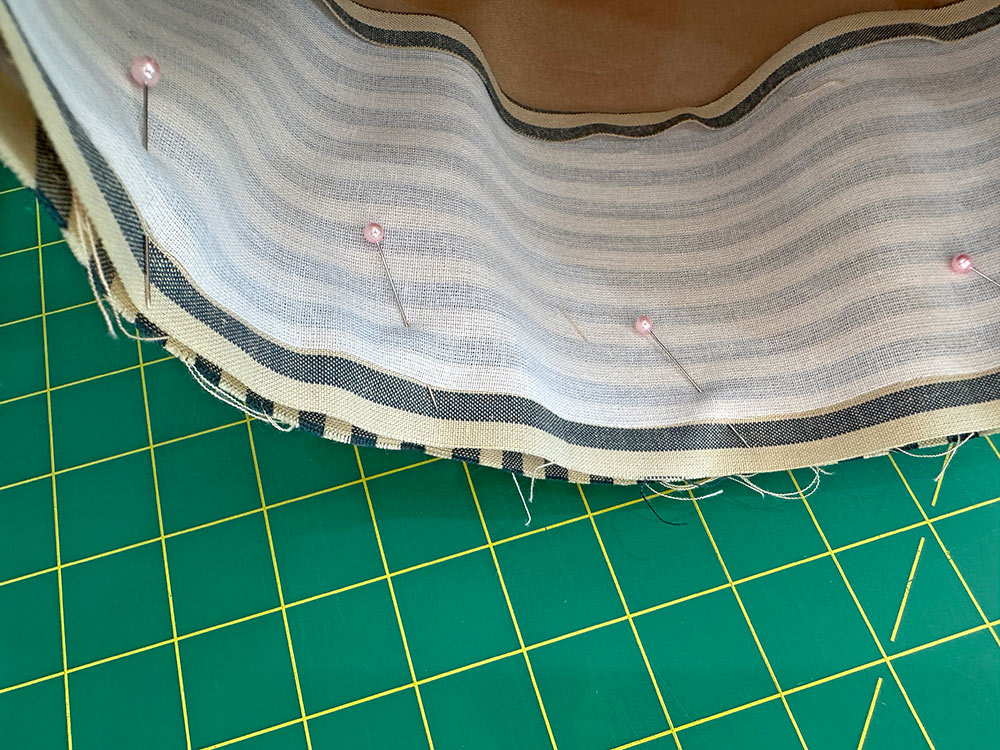
- Find the base panel unit with its piping in place. On the lining side, you should still be able to see your marked quadrant points.
- You now need to find the the four quadrant points on the body of the bag (the “tube”). The two side seams are the 3:00 and 9:00 points. Flatten in the opposite direction and align the side seams to find the front and back quadrant points (12:00 and 6:00). Mark all with pins.
- The bag should still be lining side out. Set the base into the tube so the two pieces are right sides together (it’s a little like setting a lid upside down into a box). Align the four “clock face” pin points of the base to the matching points on the tube. Pin together at these points first, then fill in around the base. Don’t be afraid to use a lot of pins in order to get the two pieces to lay flat against one another. It’s best to pin in small sections, easing as you go.

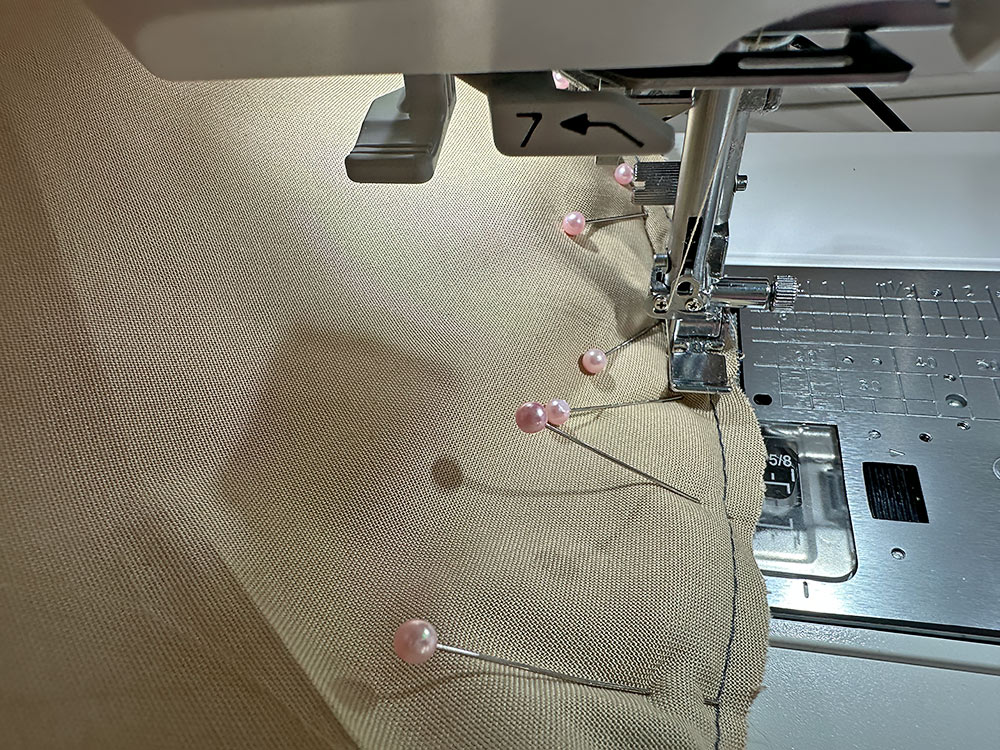
- If needed, re-thread with thread to best match in the lining fabric in the top and bobbin. Set for a standard straight stitch. Keep the Zipper foot attached.
- Using an approximate ½’” seam allowance stitch around the entire perimeter. We say “approximate” because your goal is to stitch as close as possible to the piping cord, which may be a bit narrower or wider than ½”. Go slowly, holding the layers flat with your fingers to help avoid any puckers. If you have the option on your machine, you can also adjust the needle position slightly to get as close as possible to the cord.
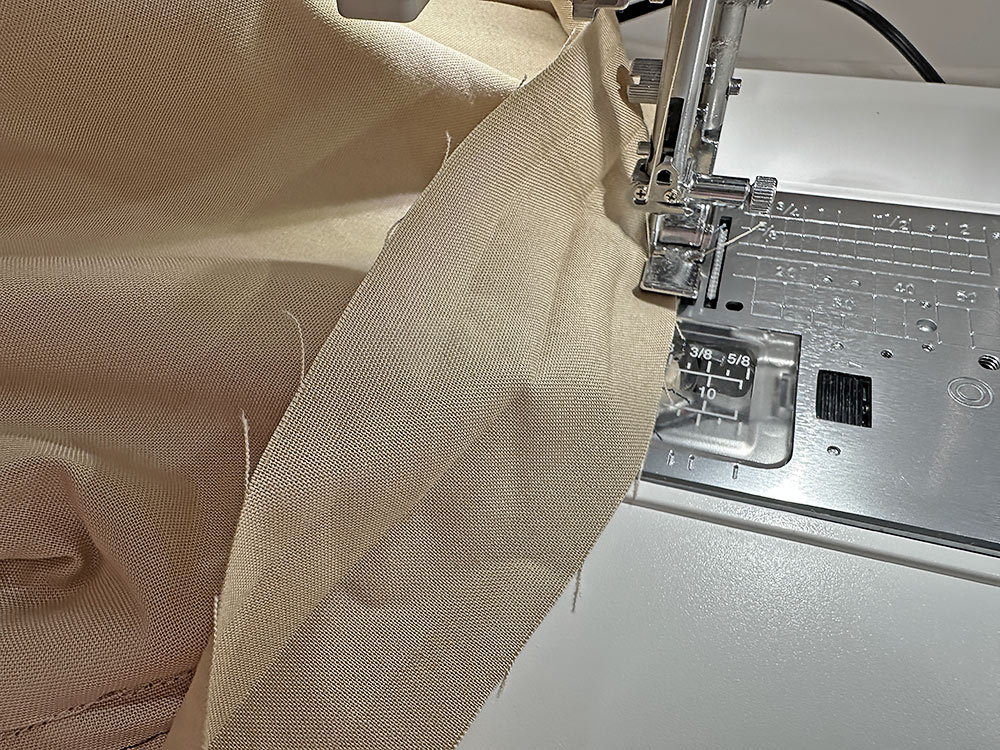
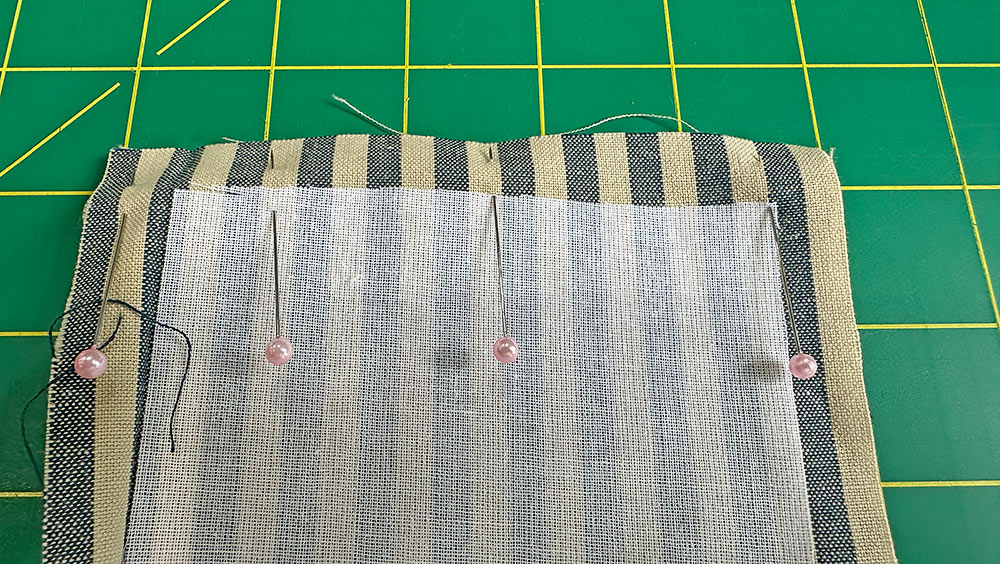
NOTE: If you’ve not inserted a round base before, don’t forget our full step-by-step tutorial you can review with lots of great pictures. - This is the point at which we chose to bind our interior base seam allowance. You could certainly use another type of machine sewn finish – even a simple zig zag stitch or overcast stitch would work. If you want the bound finish we did, find the 2” x 29” bias cut strip in the lining fabric.
- Press the strip in half then press back each raw edge to meet in the middle. Press well to set visible crease lines. This gives you the same folds you’d see on packaged bias binding. Unfold so all the crease lines are visible.
- Place one raw edge of the bias strip against the seam allowance – you are just working with the seam allowance, do not stitch onto the body of the bag. Stitch all the way around, following along in the crease line, overlapping the ends to finish.
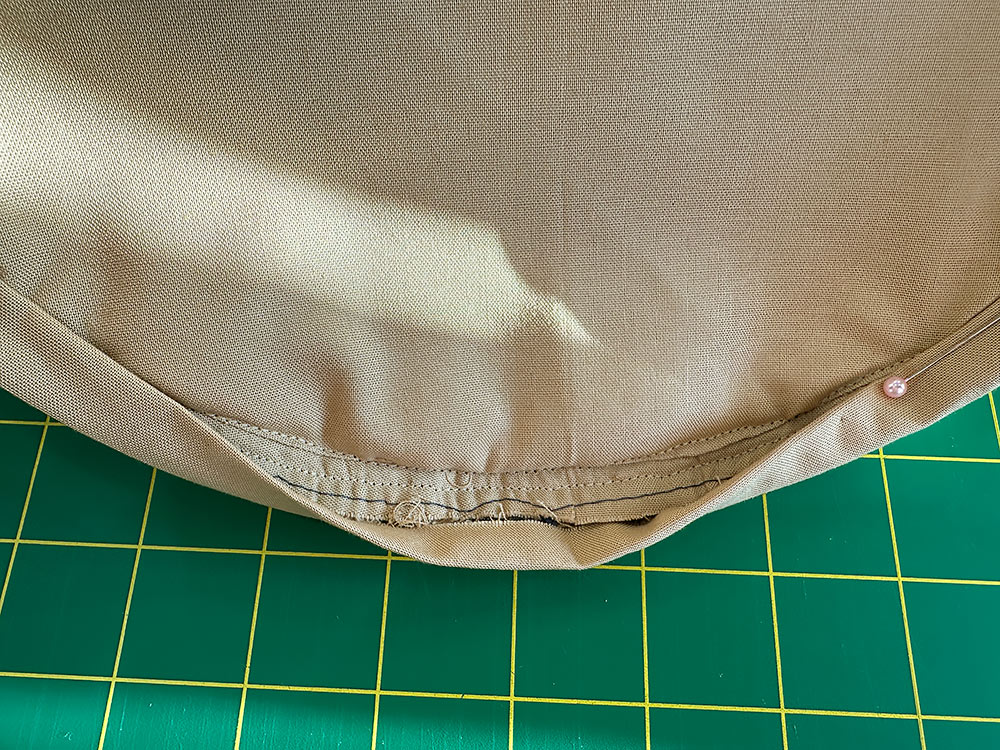
- Re-fold along the other crease lines then wrap the folded side of the strip around the seam allowance and pin in place, encasing the raw seam allowance within your custom bias strip to create a pretty interior finish.
NOTE: If you are having trouble with this wrap, you can trim back the seam allowance a bit all around to reduce bulk. - Stitch around once more, we’re still using our Zipper foot, to secure the fold. Again, remember you are stitching just on the seam allowance; you’re making a little “seam allowance package” – don’t stitch onto the bag itself. Make sure you are catching the folded edge of the bias strip as you sew all around.
- It makes a very pretty finish inside the bag.


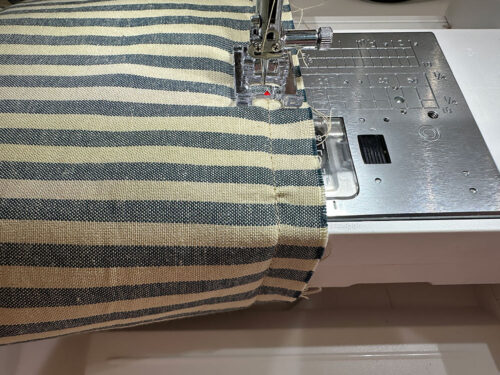
Make the grommet panel
- Find the 29” x 5” grommet panel and the 28” x 4” lightweight interfacing panel. As above with the other panels, center the interfacing on the wrong side of the fabric panel so there is ½” of fabric showing beyond the interfacing on all sides. Following manufacturer’s instructions, fuse in place.
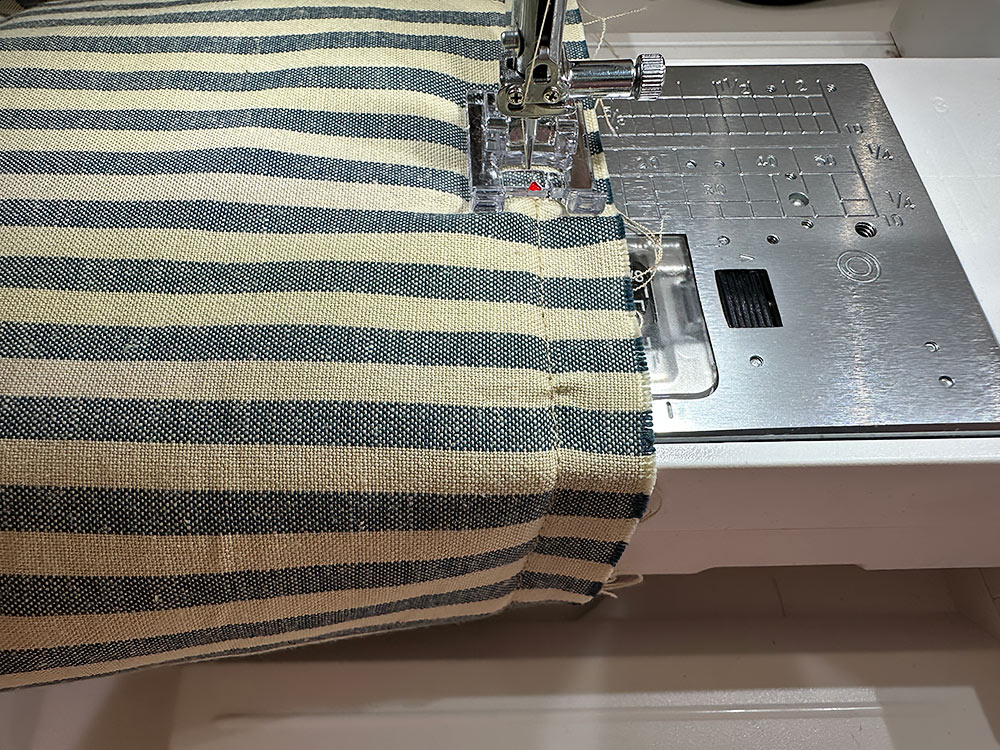
- Fold in half, creating a loop and pin across the raw ends.

- Your thread in the top and bobbin should blend with your lining and exterior fabrics. We used a light tan. Using a ½” seam allowance and a standard straight stitch, stitch the ends in place.
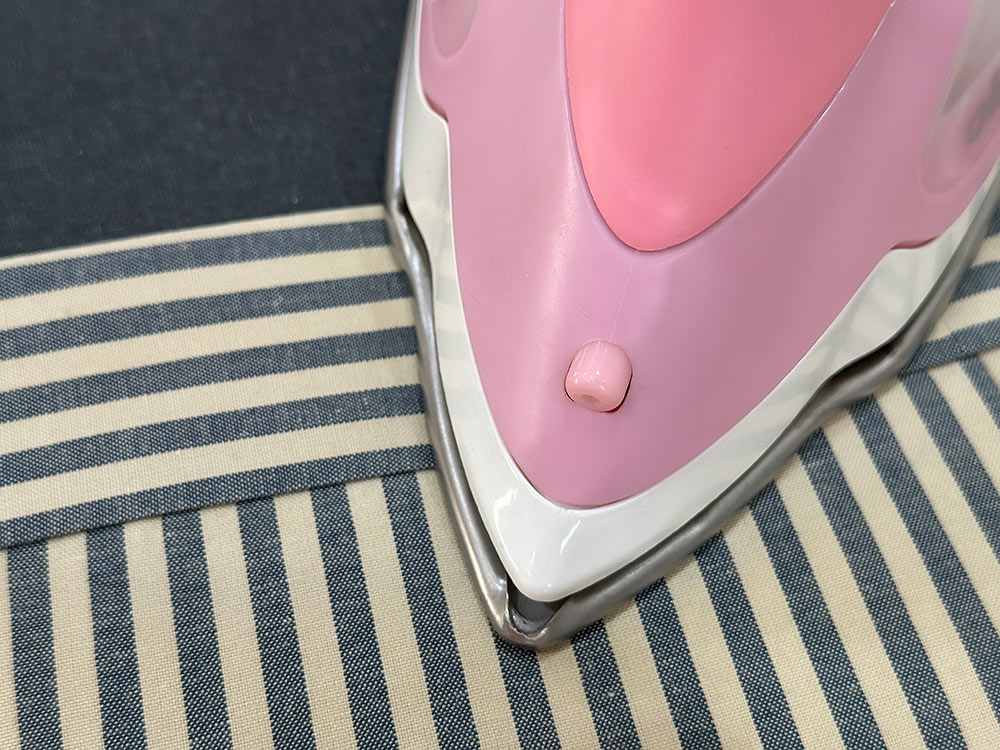
- Press open the seam allowance and fold down the upper edge ½”. Press again.
NOTE: If you are working with a directional motif, keep in mind that this folded edge will wrap around to the front and become the bottom of the grommet panel.
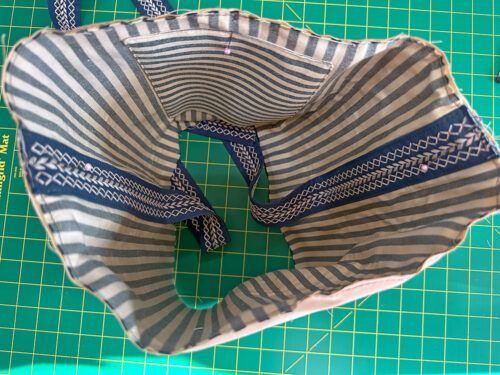
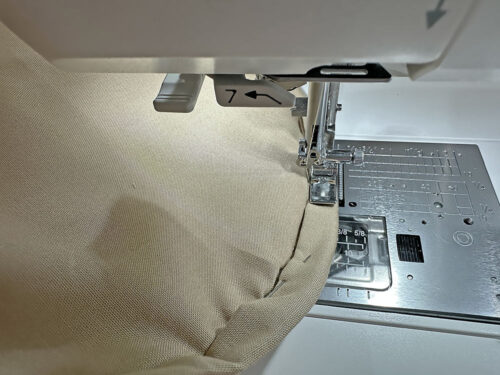
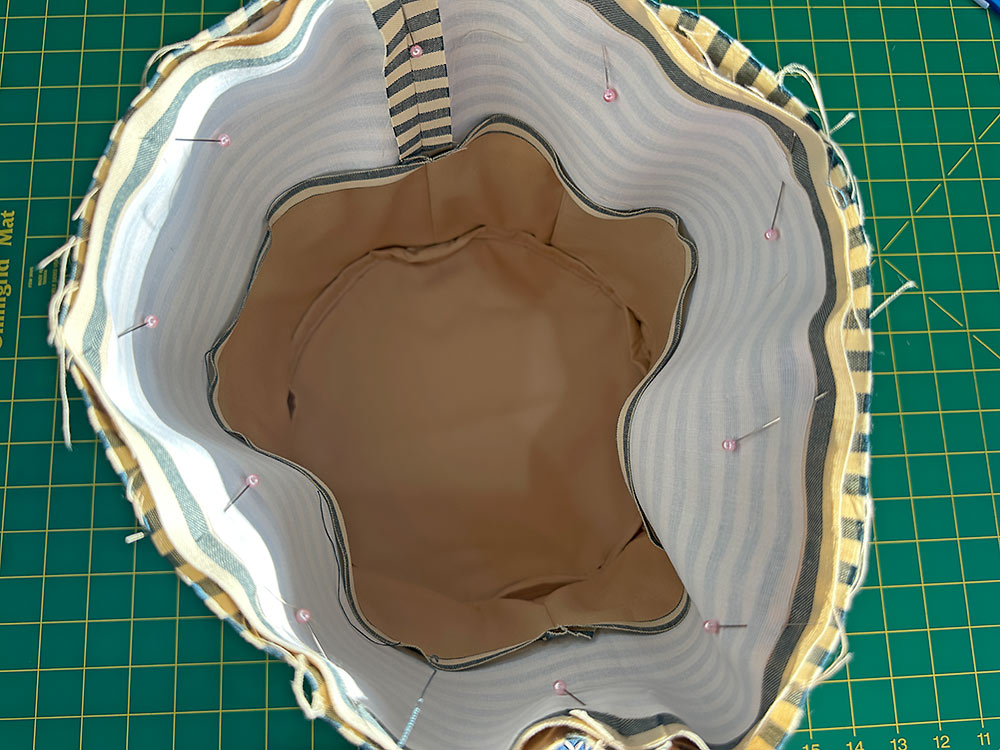
- Find the bag and turn it right side out.
- Pin the grommet panel to the top of the bag. Align the raw edge of the grommet panel to the top raw edges of the bag. The grommet panel’s seam should be aligned with one of the bag’s side seams — either one; it doesn’t matter. The right side of the grommet panel should be against the lining of the bag – so, yes, it is sitting inside the bag.

- Here’s a shot looking down into the bag. Pin all the way around.
- Using a ½” seam allowance and a standard straight stitch, stitch all the way around. Start and stop at one of the bag’s side seams for the cleanest finish. If your machine has a free arm, now is a good time to use it.
- Press the grommet panel up and away from the main body of the bag, bringing it around to the front so the folded edge of of the grommet panel covers the seam line. Press well so the panel is super flat, the folded edge is sharp, and the top fold of the grommet panel is also crisp and flat.

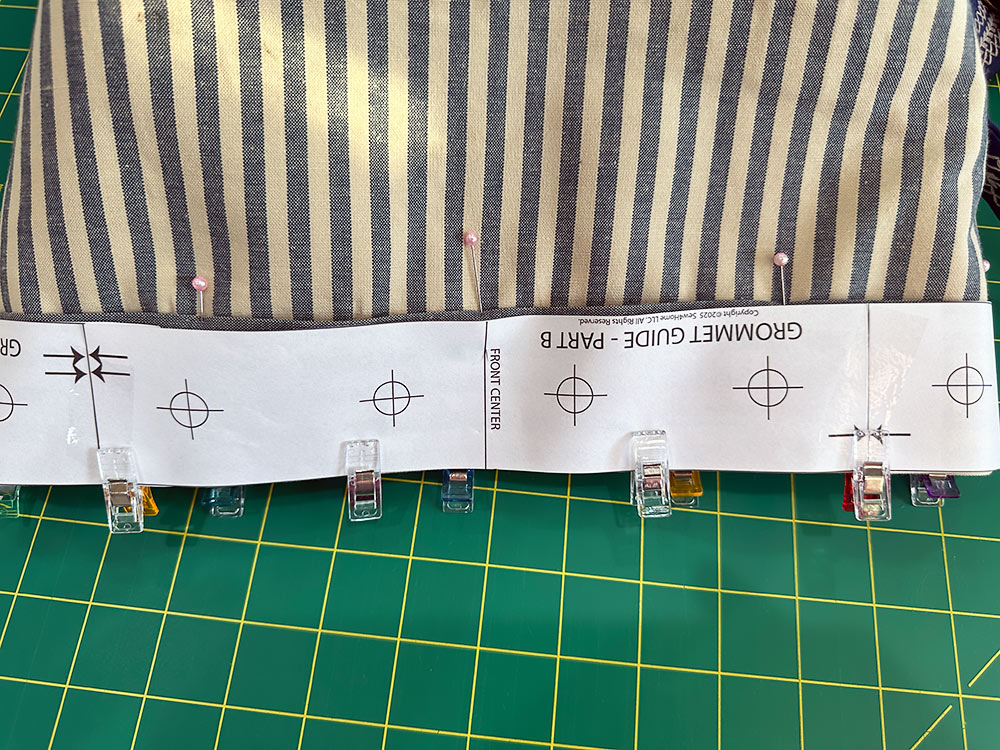
- Find the paper grommet template.
- Clip the template in place, using the marked “front center” line on the template as a guide for correct positioning.
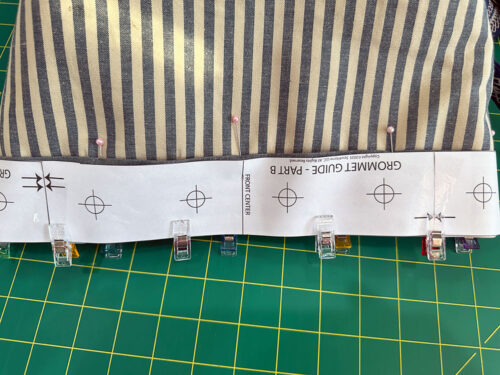
- Cut out the grommet holes from the paper template (you could also do this before clipping in place if that seems easier for you), and using a fabric pen or pencil, trace each of the 12 circles.
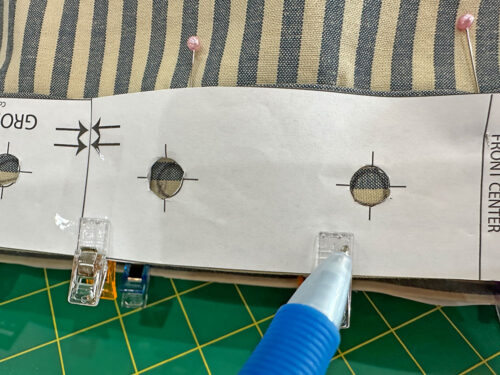
- Remove the template.
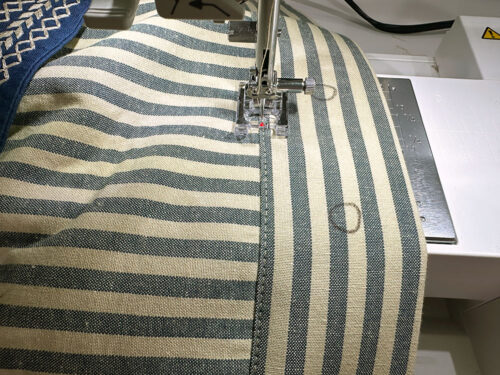
- Re-thread the machine with thread to best match the exterior fabric in the top and to best match the lining fabric in the bobbin. Slightly lengthen the stitch. Edgestitch all around to secure the folded edge of the grommet panel through all the layers.
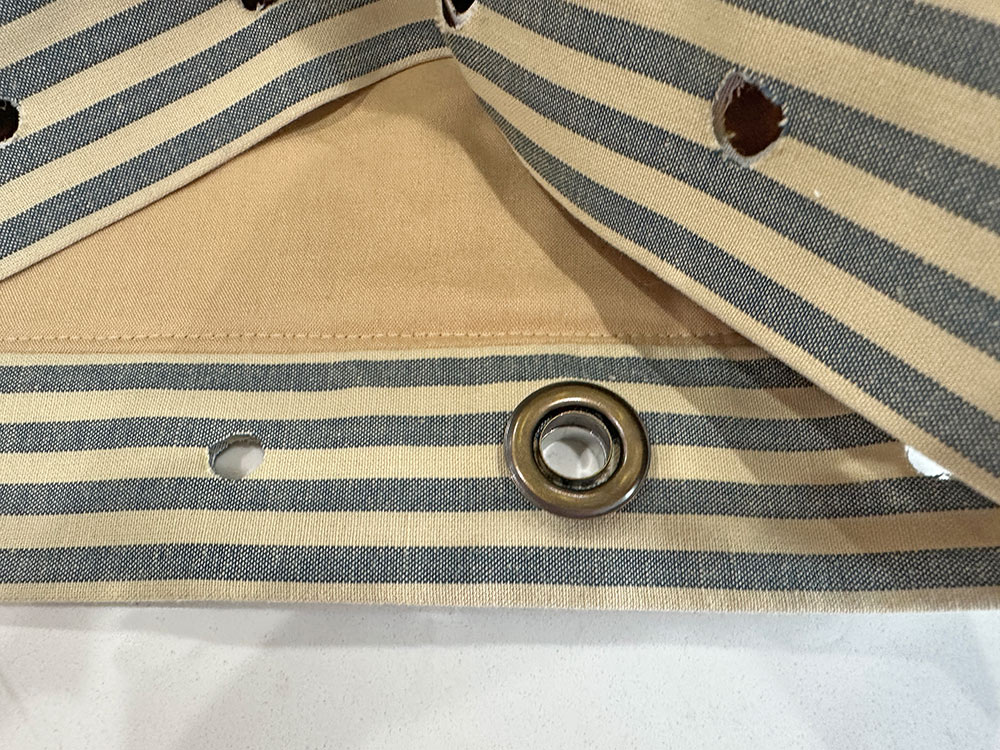
- Cut out each of the marked holes through the layers of the grommet panel and insert all the grommets. We have a full tutorial you can review on setting grommets and eyelets for all the easy steps. Our number one hint is to do your setting on a very hard surface, like a granite counter. It will allow the two parts of the grommet to seat properly with just a couple firm swings of your hammer. That’s the top tip, but the full tutorial has many more!


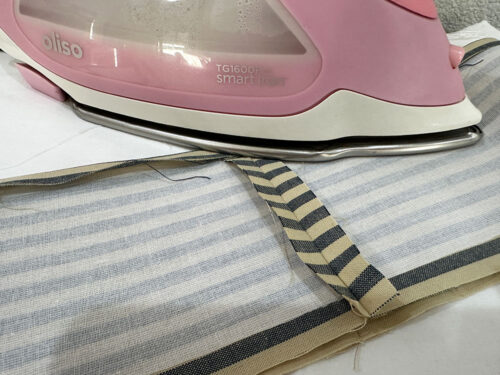
Create the drawcord and slider
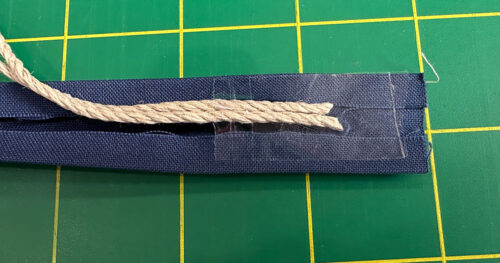
- Find the 1½” x 40” drawcord strip. Fold back each 40” raw edge ¼” and press well. Fold in half, wrong sides together, so the 40” folded edges are flush. Both ends of this strip remain raw. Press well to set a center crease.
- Find the two 38½” lengths of ⅛” soft piping cord. Open up the folded strip and place the lengths of cord, one on top of the other, down the center. This will add some needed dimension and heft to the drawcord. You’ll end up with ¾” of dead space” at each end that will make it easier to knot the ends, which is the finishing step for the drawcord tails. Tape each end in place with clear cellophane tape.
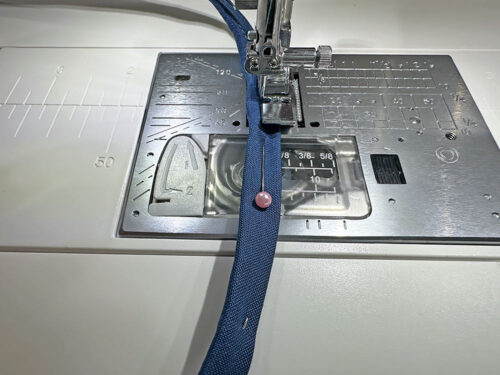
- Re-thread the machine with thread to best match the drawcord in the top and bobbin.
- Stitch down the double-fold edges, running the seam as close to the cording as possible. We switched to a Zipper foot for this narrow seam.
- You can reach in with a thin tool, like a needle, and pull out the tape from each end.
- Find the little 4” x 2½” strip. Fuse the remaining tiny strip of fusible fleece (1” x 3¾”) on one side.
- Fold the strip in half, right sides together, so it is now 4” x 1¼”
- Using a ¼” seam allowance, stitch along the 4” side and across one end. Press open the tiny seam allowance and clip the corners.
- Turn right side out through the open end. Gently push out the corners so they are nice and sharp. As above, a chopstick, knitting needle or point turner works well for this. Tuck in the raw edges of the open end to create a clean finish. If you want, this open end can be hand stitched closed, but that is optional as the final vertical seam will catch the end. Press flat.
- Fold the ends to the center, overlapping them about ½”. Pin in place.

- Stitch one vertical seam through the center to secure the ends and create the two open channels for the drawcord.
- Find the drawcord. Starting at the front left grommet, weave the drawcord in and out through the twelve grommets.
- Feed each end of the drawcord through the sides of the slider.
- Tie a knot in the end of each drawcord tail.
NOTE: You can add a drop of seam sealant to the raw ends of the knotted tails to prevent raveling.


Project Design: Anne Adams
Sample Creation: Debbie Guild