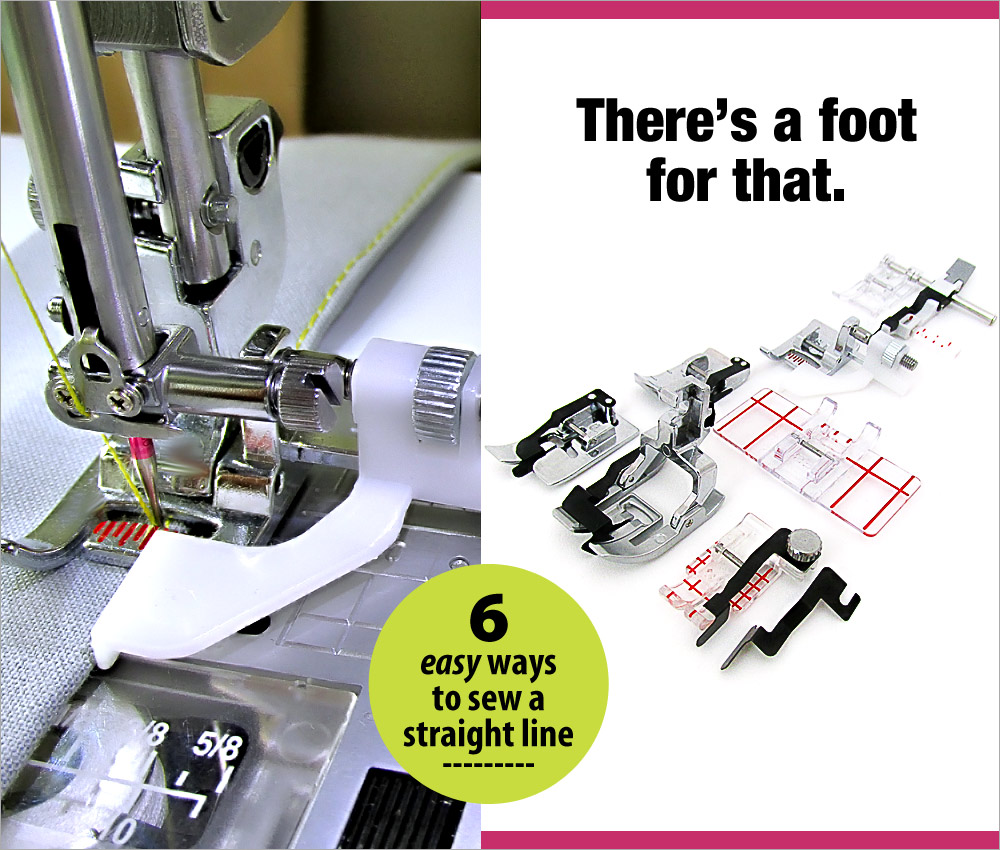
A straight line. It seems like the most basic thing you can do when sewing. But we’re amazed by the number of comments and questions we get from S4H visitors who want to know how to do it better, easier, and more consistently.
We don’t have any magical powers to make our seams and topstitching look great. What we do know is how using the right foot for the job is the real secret to a beautifully straight line. Because we’re an exclusive Janome studio, our specialty presser feet suggestions are from the Janome selection of accessories. Your machine manufacturer may have similar options for your make and model. In either situation, the recommendation is the same: investing in a specifically designed presser foot is well worth it. It makes many processes less frustrating, allows you to finish a task quicker, and gives you more professional results.
You may have your own favorite feet that we haven’t mentioned here. If so, leave us a comment below about what you use to stitch straight ahead.
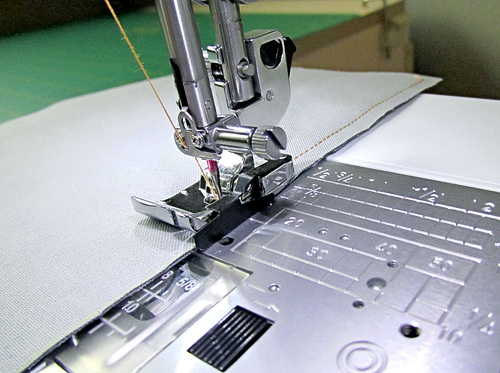
Quarter Inch Seam Foot
This is one of the most basic options for keeping seams on the straight and narrow. A Quarter Inch Seam Foot is included as a standard part with many machine models. There is a flange positioned on the foot exactly ¼” (6mm) from the center of the needle hole, giving you a perfect quarter inch seam with a straight stitch. Some models, such as the Janome Skyline S7 pictured below, have a specific stitch selection to insure the needle position is extra perfect. Check your machine’s manual to confirm your correct needle drop. Align the flange against the side of the fabric and stitch. Keep the fabric running right against the flange throughout your stitching.
Edge Guide Foot
One of our favorite specialty feet for precise topstitching and edgestitching is the Edge Guide Foot. The way it works is similar to the Quarter Inch Seam Foot above, as well as some options below, in that there is a flange to help guide your fabric. The cool thing is how it’s adjustable, so you can position that flange exactly where you need it. The scale on the front of the foot is marked in 1mm units. Attach the foot, adjust your needle drop position (if necessary), lower the needle, and lower the foot. With your needle set, simply turn the adjusting thumb screw on the foot to butt the flange against the edge of the fabric. That’s it; you’re ready to stitch super straight. We especially love this foot for very narrow edgestitching along straps and handles.

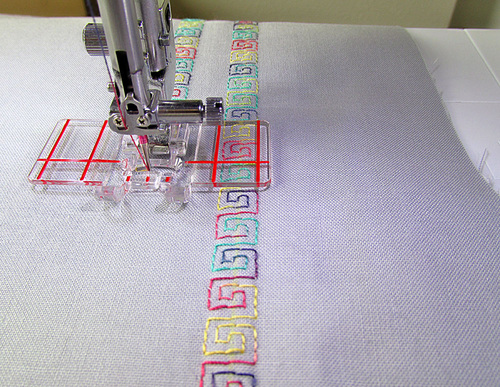
Border Guide Foot
If you want to sew a number of perfectly parallel rows of stitches for a decorative effect, you’d normally have to get out your ruler and fabric pencils or spend time constantly adjusting a quilting guide bar. But the Border Guide Foot lets you do it with virtually no measuring or marking. Simply line up your previous row of stitching between the red guide lines on the foot and you can immediately sew perfectly spaced rows to either side. It’s also a great option for straight line quilting. The “wings” of the foot extend both to the left and the right of the needle so everything can stay even while moving across your fabric from either direction.
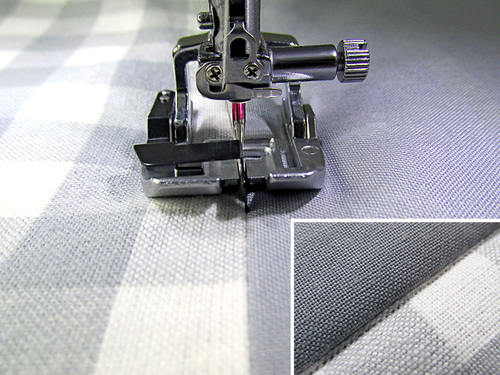
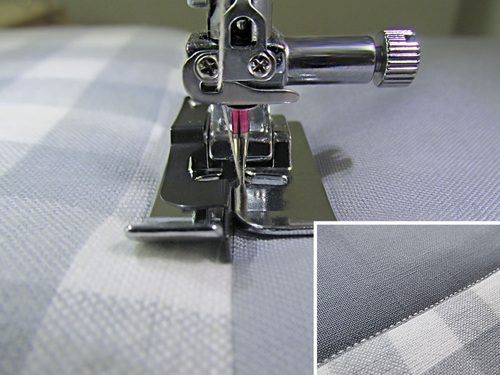
Ditch Quilting Foot
A Ditch Quilting Foot is like a laser line for keeping a straight seam. All you need to do is align your fabric so the foot’s center guide is in the ditch created by a previous seam you’re following. As you sew, the guide spreads the seam ever so slightly, allowing you to stitch perfectly “in the ditch.” It’s great for reinforcing seams, quilting that follows a seam line, or you can run the guide along a drawn line for things like pocket panel divisions. We’re showing the version of the foot available for the built-in Janome AcuFeed™ Flex fabric feeding system on our Skyline machine. Standard snap-on Ditch Quilting presser feet are also available.
As a little extra tip, the photo below shows how you can use the center flange on a Blind Hem Foot to create a similar effect. The stitch is not as perfectly buried in the ditch as it is with a true Ditch Quilting Foot, but instead runs just to the right of the seam. It could be an interesting option when you want a bit more contrast to your straight stitching.
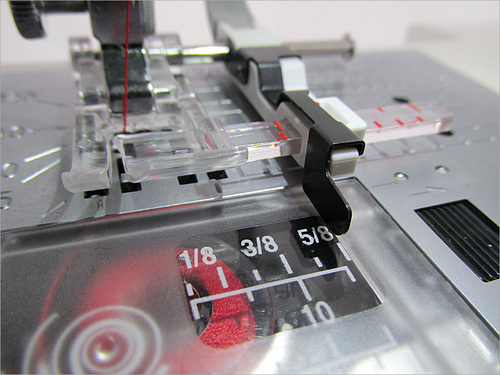
Sliding Guide Foot
Want even more adjustment flexibility? The Sliding Guide Foot has a perfectly balanced outboard guide you can smoothly slide to the right then lock into place, from ⅜” to 1⅛” from the center needle drop (10mm – 30mm). The foot contains both inch and millimeter markers so you can align the proper width, lock the measurement in place, and stitch straight and true. We did a full review of this foot you can read for even more information and ways to use it.
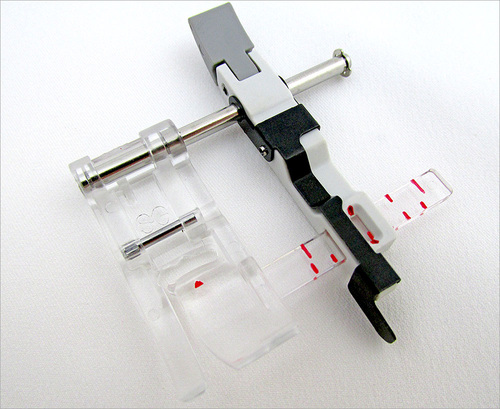

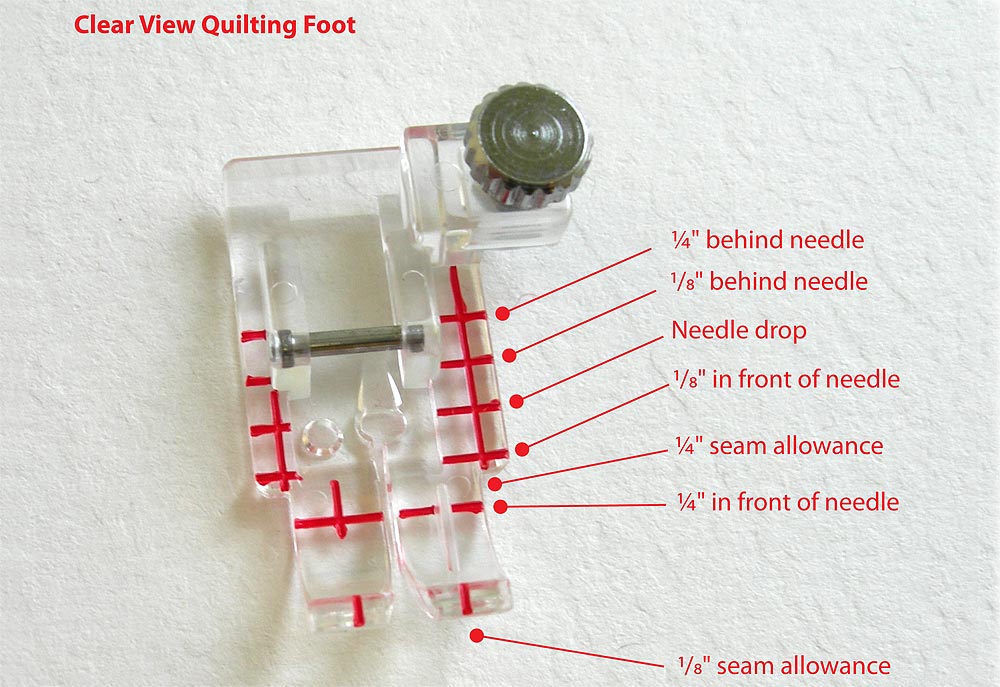
Clear View Quilting Foot and Guide Set
Want a way to get several of these straight line helpers in one foot? Gotcha covered! The Clear View Quilting Foot and Guide Set comes with two interchangeable guides: the Quarter Inch Guide and the Ditch Stitch Guide. In addition, as shown below, the foot itself is clearly marked with red guide lines for ⅛” and ¼” seam allowances, as well as cornering marks for both ⅛” and ¼” seams in front and behind the needle drop. Check out our full review to see exactly how to use this cool three-in-one foot.
![]()

I also use my even feed ditch foot to sew my binding by machine. I sew the binding to the back then when I bring it to the front, I run the “ditch” guide along the edge of the binding and move the needle a couple of clicks to the right, and it’s lovely and straight all the way around then.
Yes! We love it for that as well. Thank you for adding to the list.
Just a heads up about 1/4″ feet – that metal guide will move on you making your blocks the wrong size. I was using a 1/4″ foot on a quilt, the first blocks were coming out true to measure but the last blocks were marginally larger and causing problems. Measuring the seams of the different blocks showed they’d been getting slightly narrower and narrower as I made more blocks. I had another 1/4″ foot and, when I measured the placement of the guides on both, the guide on the one I’d been using had been pushed outwards and away from… Read more »
Hi Mea — you didn’t mention the brand, but – wow – that is not one we’ve heard before especially if the machine is set in Patchwork mode, but it sounds like you have the backing of your quilt group. It’s always good to hear what folks have run into. Everyone’s experience is so interesting.
I have a bernette b79 will they feet work on my sewing machine?
Hi Roxanne, as we mention above, these are feet made especially for Janome models so they won’t work on your Bernina, but your machine may have similar feet. It is likely you at least have a Quarter Inch Seam foot and the Ditch Quilting foot. If you describe the others to you local dealer, he/she might have some suggestions.
How do I order some of these items?
Hi Linda – We don’t sell Janome accessories here at S4H. You can to reach out to your local Janome dealer, many of whom are offering curbside pickup, or search online for dealers who are currently selling online. To start, here is the Dealer Locator page for Janome America:
https://www.janome.com/find-a-dealer/
Can I use theborder guide foot on my 525s janome sewing machine
@Lou – That isn’t a machine that is in the current US line, so I can’t give you a guaranteed answer. There is a version of the border guide foot for 7mm machines, if your model is this maximum stitch width, it should work. You could reach out to Janome for a more definitive answer; we simply won’t have information on retired models or models that are sometimes different outside the US line. You are reach their customer service at: custrel@janome-america.com
Do any of these fit the new Continental M7?
@Connie – The wonderful M7 comes standard with a Quarter Inch Foot — all five of the other feet do come in a 9mm version, which is what you would want for the M7. Have fun on the straight and narrow 🙂