Paring down to the basics is one of the secrets of successful sewing. When you master the techniques to build the best framework for a project, your finish is always more pleasing and more professional.

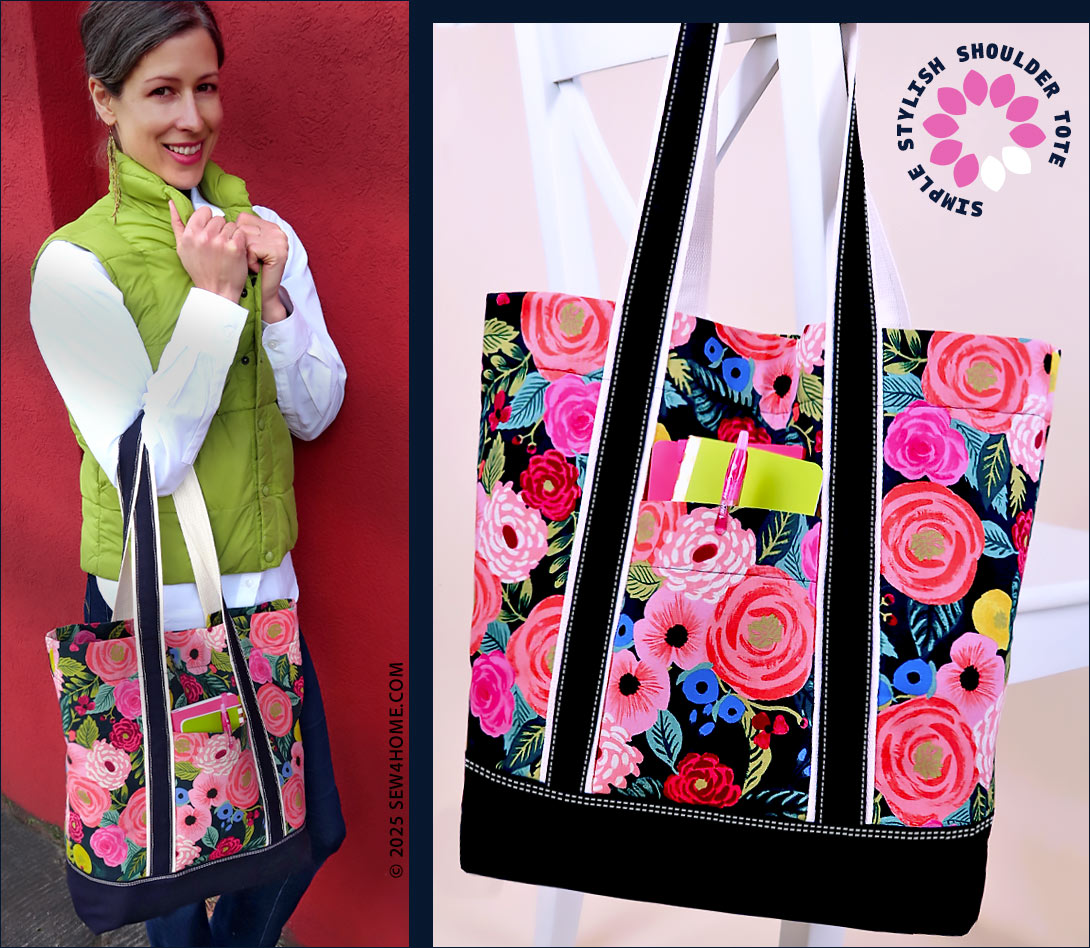
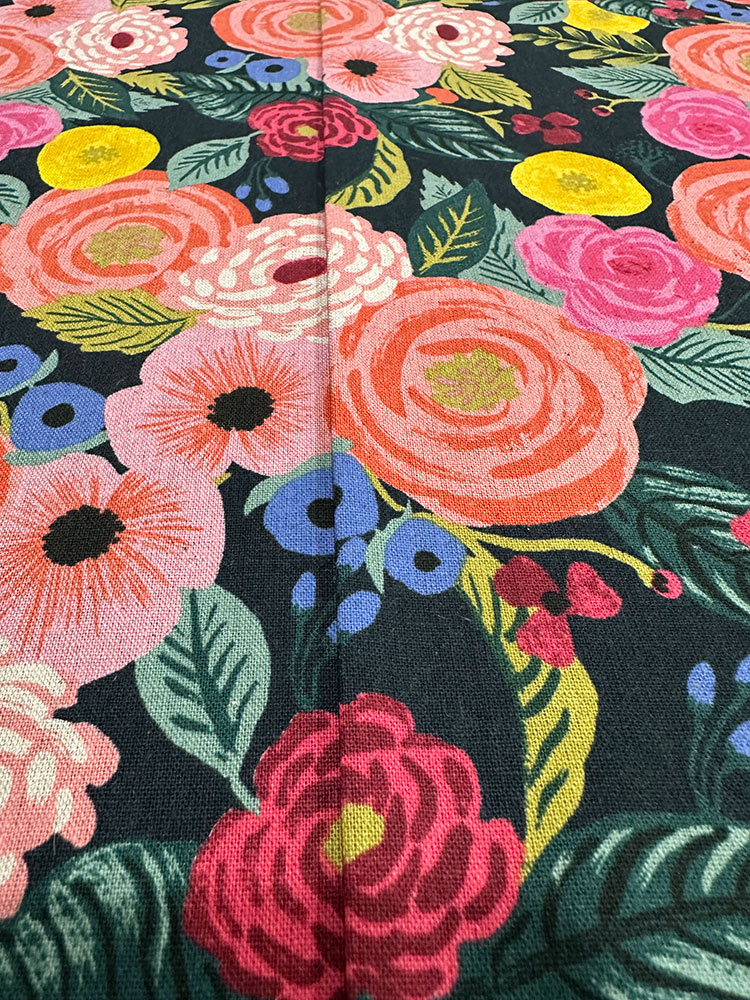
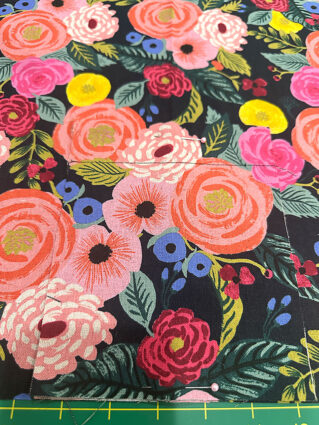
The fabric combination we chose features a mid-weight canvas in an eye-catching floral with a heavier-weight solid canvas for the base panels. Make sure to click through to our full tutorial on how to perfectly match the front pocket to its background panel. Inside is a standard quilting cotton. When selecting your lining fabric, we recommend going with a light color – especially in a generously sized tote like this one. It can be frustrating enough to find smaller items in a bigger bag, but add in the challenge of dark fabric and the frustration level doubles!

Our thanks again to Janome America for their support of this project and many of the other most popular projects across the S4H site. To understand first-hand why we are a Janome Exclusive Studio, we invite you to visit a local Janome dealer for an in-person test stitch on the machines we consider to be the best in the industry. To find out more before you go, visit the Janome website and follow them on social media.
Our Simple, Stylish Shoulder Tote finishes at approximately 13” wide x 15” high x 4½” deep with a handle drop of about 12”.
Sewing Tools You Need

- Sewing Machine and standard presser foot
- Even Feed/Walking foot or engage your machine’s built-in feeding system; we used the Janome AcuFeed™ Flex built-in fabric feeding system throughout much of the construction
- Edge Guide foot; optional for the inner topstitching along the layered handles
- Bi-Level foot; optional for the precise stitching along the outer edge of the webbing handles
- Zipper foot; if making the optional zipper pouch
- Twin Needle; optional for the horizontal topstitching along the base panel
Fabric and Other Supplies
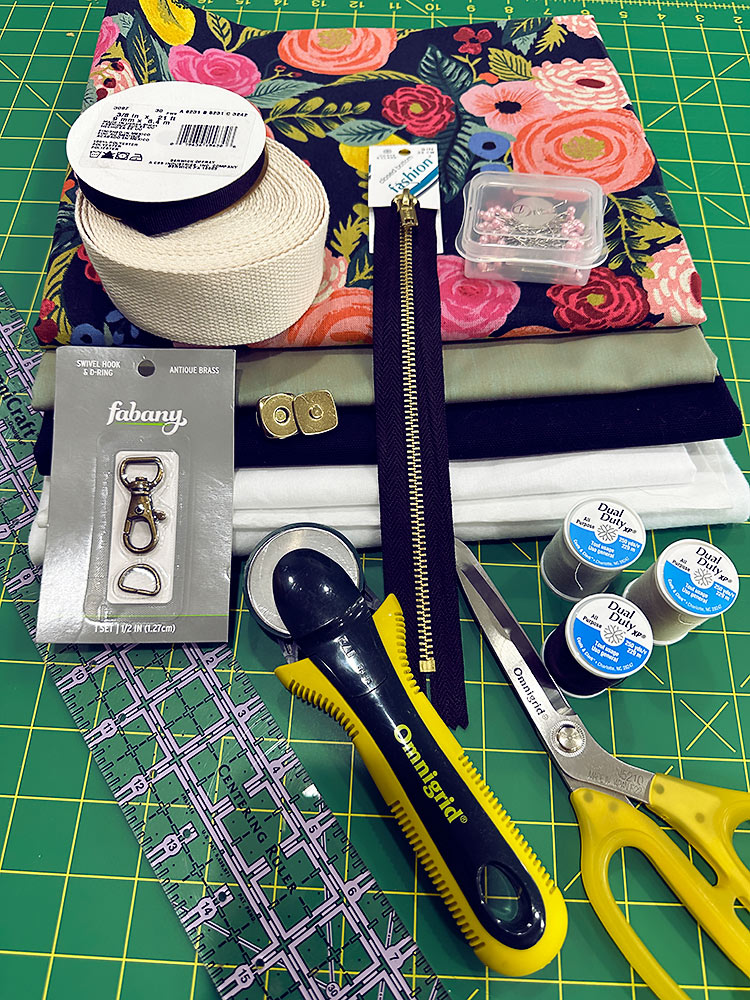
- 1 yard of 44”+ wide lightweight canvas, canvas/linen blend or similar for the upper exterior panels; we used English Garden-Juliet Rose in Navy from the Rifle Paper Co. — a 6.4 oz canvas
- ½ yard of 44”+ wide mid-heavyweight canvas in a coordinating solid color for the base exterior panels and the handle accents; we used Big Sur Canvas in Dark Navy from Robert Kaufman Fabrics — a 9.6 oz canvas
- 1 yard of 44”+ wide quilting weight cotton or similar for the lining; we used Warp Weft Hue in Seaside by Alexia Abel for Ruby Star Society
- ½ yard of 45” + wide fusible fleece; we used Pellon Thermolam Plus one-sided fusible fleece
- ¼ yard of 45”+ wide mid-weight fusible interfacing for the pockets and to back the magnetic snap; we used Pellon Décor Bond
- Scrap or ⅓ yard of 20” + wide lightweight fusible interfacing – just need just a 12” x 15” panel for the optional zipper pouch; we used Pellon Shape-Flex woven interfacing
- 3 yards of 1½” wide webbing for the handles; we used cotton webbing in off-white
- ½ yard of ½” wide ribbon for the interior lanyard; we used black grosgrain
- ONE ¾” magnetic snap; we used brass
NOTE: The magnetic snap is optional. If you want a tote you can fill all the way to the top, you can omit the snap. - ONE ½” swivel clip for the interior lanyard: we used antique brass
NOTE: Most swivel clips at this smaller size come packaged with a same size D-ring; we used this D-ring for the tab on the optional pouch. If your swivel clip does not have a matching D-ring and you wish to make the optional pouch, you’ll need to purchase ONE ½” D-ring. - ONE 9” zipper for the optional zipper pouch; we used a gold-tone metal zipper in black
- All-purpose thread to match fabric and webbing for construction
- All-purpose thread to in a contrasting color for topstitching on the solid canvas; we used off-white against our navy canvas
- See-through ruler
- Fabric pen or pencil
- Iron and ironing board
- Scissors and/or rotary cutter and mat
- Seam gauge
- Seam ripper
- Straight pins
- Hand sewing needle
Getting Started
- From the fabric for the upper exterior panels (the English Garden in our sample), fussy cut the following:
TWO 18½” wide x 15” high rectangles for the main panels
TWO 6” wide x 8” high rectangles for the exterior pocket; for the best look, the front pocket panel should be fussy cut to match the front background panel.

NOTE: We carefully fussy cut the pocket to be a perfect match to the front background panel. If you are new to this technique, we have a full tutorial you can review prior to starting. - From the fabric for the exterior base panels (the navy canvas in our sample), cut the following:
TWO 18½” wide x 6¼” high rectangles for the main base panels
FOUR 2⅛” x 25” strips for the straps
NOTE: You need four because they will be sewn together end to end to form two strips of the proper length. - From the fabric for the lining (the Warp Weft Hue cotton in our sample), cut the following:
TWO 18½” wide x 17½” high rectangles for the main panels
ONE 9” wide x 11” high rectangle for the lining pocket - From the fusible fleece, cut TWO 17½” x 12” panels.
- From the mid-weight interfacing (the Décor Bond in our sample), cut the following:
ONE 5” x 7” panel for the exterior pocket
ONE 8” x 5” panel for the lining pocket
TWO 2” x 2” squares to stabilize the magnetic snap - From the webbing, cut TWO 49” lengths.
- From the ribbon for the lanyard, but ONE 13” length.
For the Optional Drop-in Zipper Pouch
- From the tote exterior fabric, cut the following:
TWO 10” wide x 6” high rectangles
ONE 1½” x 2” strip for the D-ring loop
TWO 1¼” x 2½” strips for the zipper end tabs - From the tote lining fabric, cut TWO 10” wide x 6” high rectangles
- From the lightweight interfacing (the Shape Flex in our sample), cut ONE 12” x 15” panel.
At Your Sewing Machine & Ironing Board
Make the straps
- Find the four 2⅛” x 25” strips cut from the solid canvas.
- Place two strips right sides together, aligning their two 2⅛” ends. Just one set of ends; you’re making a longer single strip not a loop. Pin in place. Repeat with the remaining pair.
- Using a ½” seam allowance stitch together. Press the seam allowance open and flat. You now have two 49” strips.

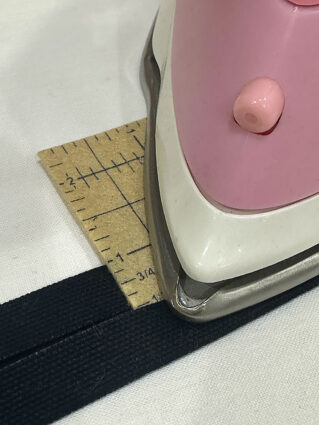
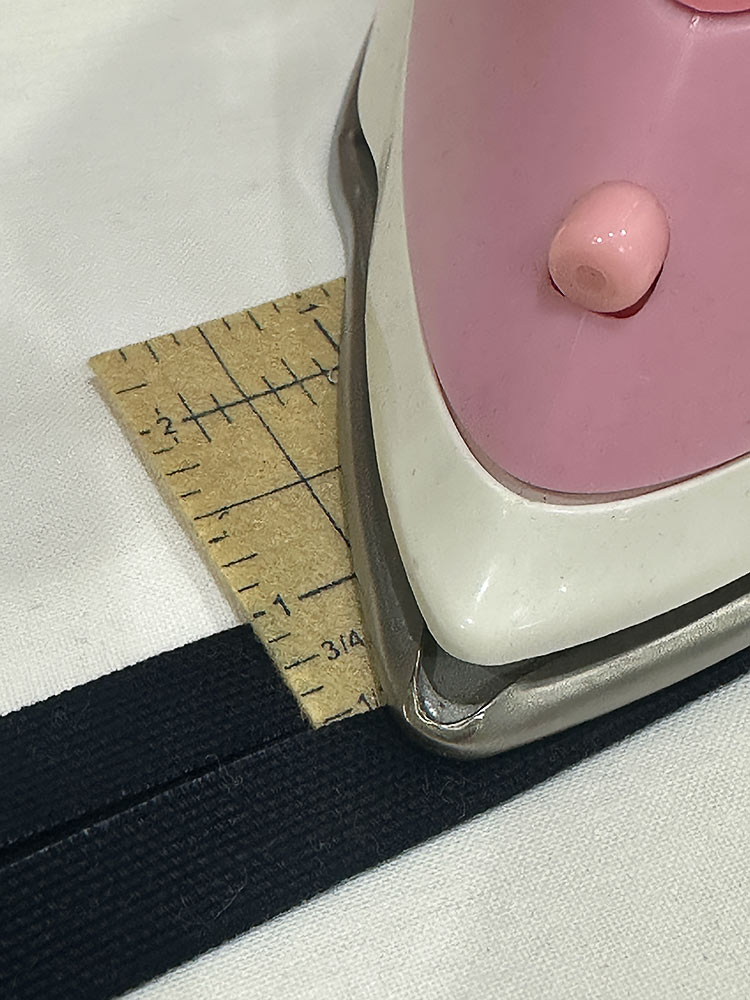
Along each 49” raw edge of each strip, fold in and press ½”. Your strips are now 1⅛” in width
NOTE: We used our Clover Hot Ruler, which is helpful for pressing skinny folds on skinny straps.
- Find the two 49” lengths of webbing.
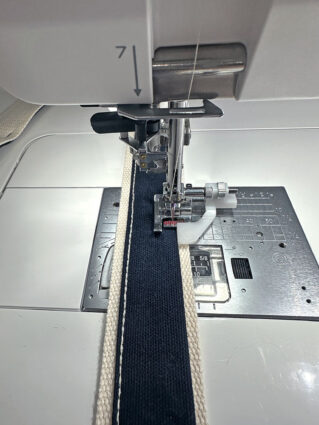
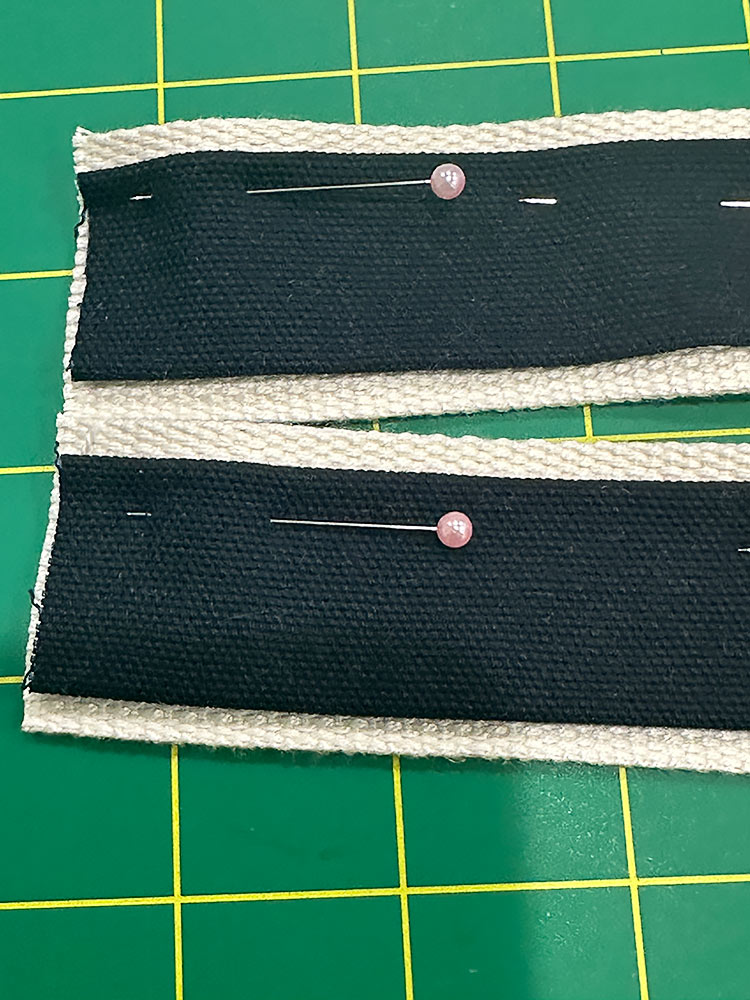
- Center a pressed canvas strip on each length of webbing. The raw ends of the webbing and the raw ends of the canvas strip should be flush; the seam of the canvas strip should land at the center of the length of the webbing (at 24½”).
- Pin the canvas strip in place along each length of webbing.

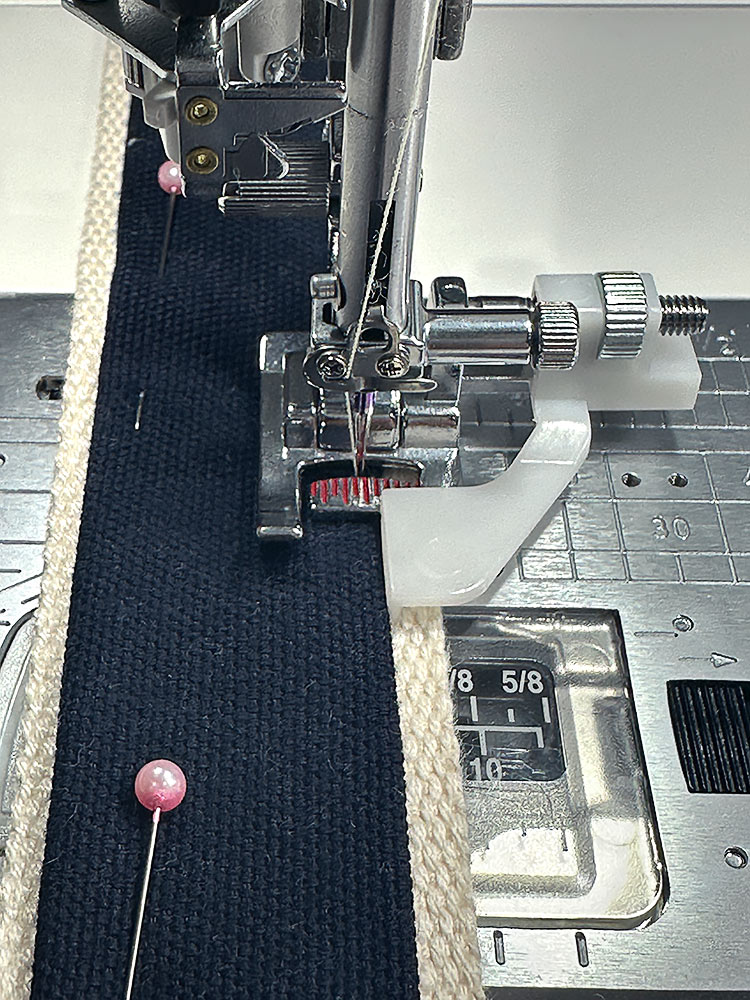
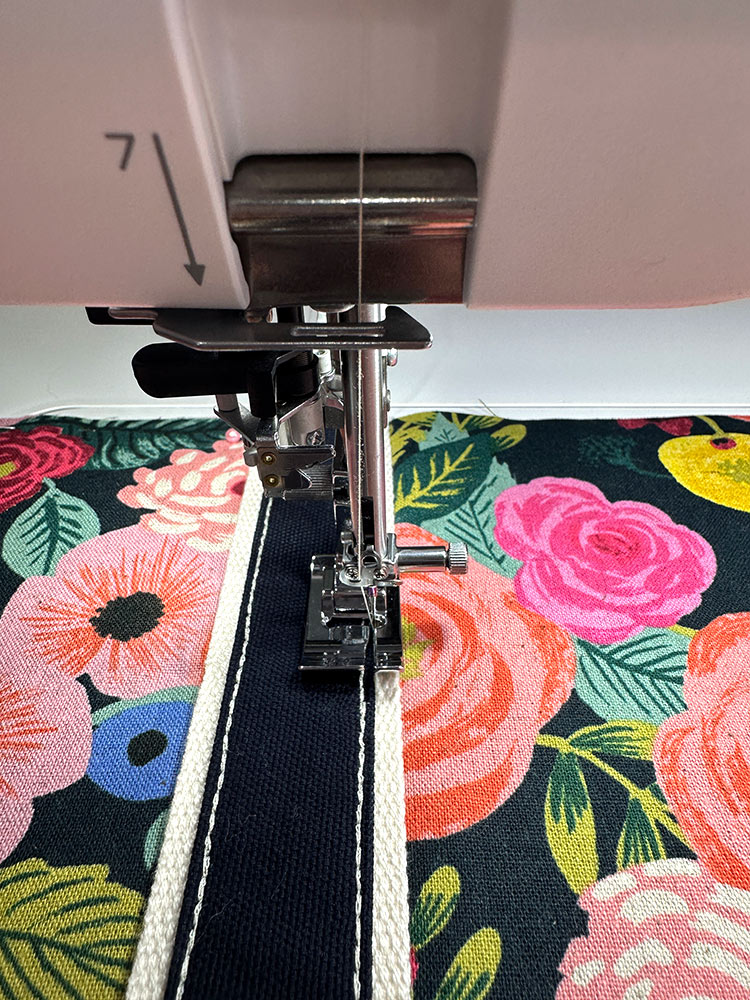
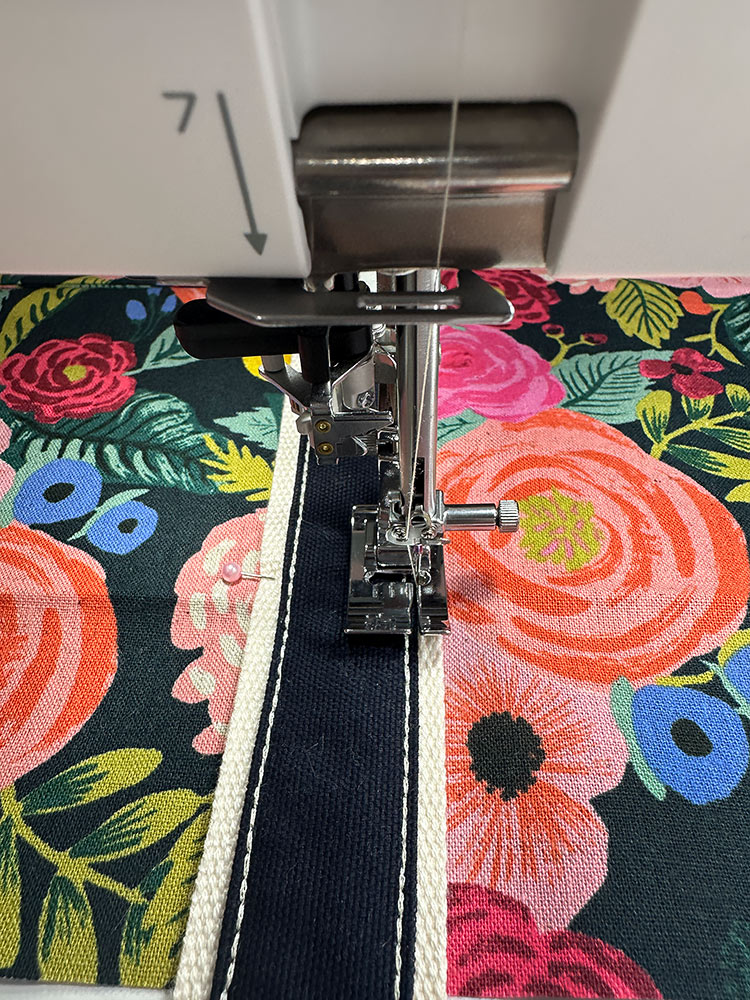
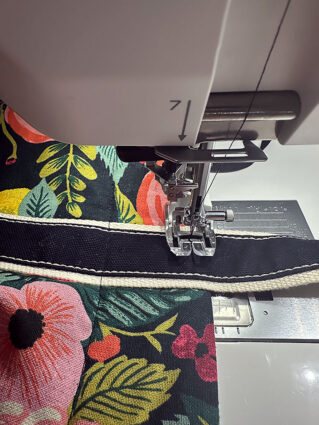
NOTE: If you find it difficult to pin through the thicker layers, you could use clips (we like Wonder Clips). Or you could use a fusible seam tape along the back of each canvas strip to adhere it to the webbing without needing pins or clips. - Thread your machine with the contrasting thread you chose for the canvas topstitching – we chose an off-white for our navy canvas,
- If possible, attach an Edge Guide foot to allow for a super precise line of topstitching very close to the folded edge of the canvas strip, using the edge of the canvas itself as your guide. This is one of our favorite Janome presser feet.
- If possible, set up your machine for a lengthened Triple Stitch. This type of back-and-forth stitch is usually found in your utility stitch menu. We lengthened to 4mm.
- For both lengths, staying close the edge, stitch along both sides of the canvas strip to adhere it to the webbing.
NOTE: You can try other presser feet to get your best result, but do practice first on scraps to make sure you can get the look you want. If you can’t find a stitch similar to a Triple Stitch, you could instead use a standard lengthened straight stitch in a heavier thread.
Make the exterior pocket and layer on the front panel
- Find the two 6” x 8” exterior pocket panels and the 5” x 7” mid-weight interfacing panel.
NOTE: As mentioned above, we pattern-matched one pocket panel to the front exterior panel so this is our pocket front. If you chose not to do this, simply choose your favorite panel of the two to be your pocket front. - Center the interfacing on the front pocket panel so there is ½” of fabric showing beyond the interfacing on all four sides. Following manufacturer’s instructions, fuse in place.
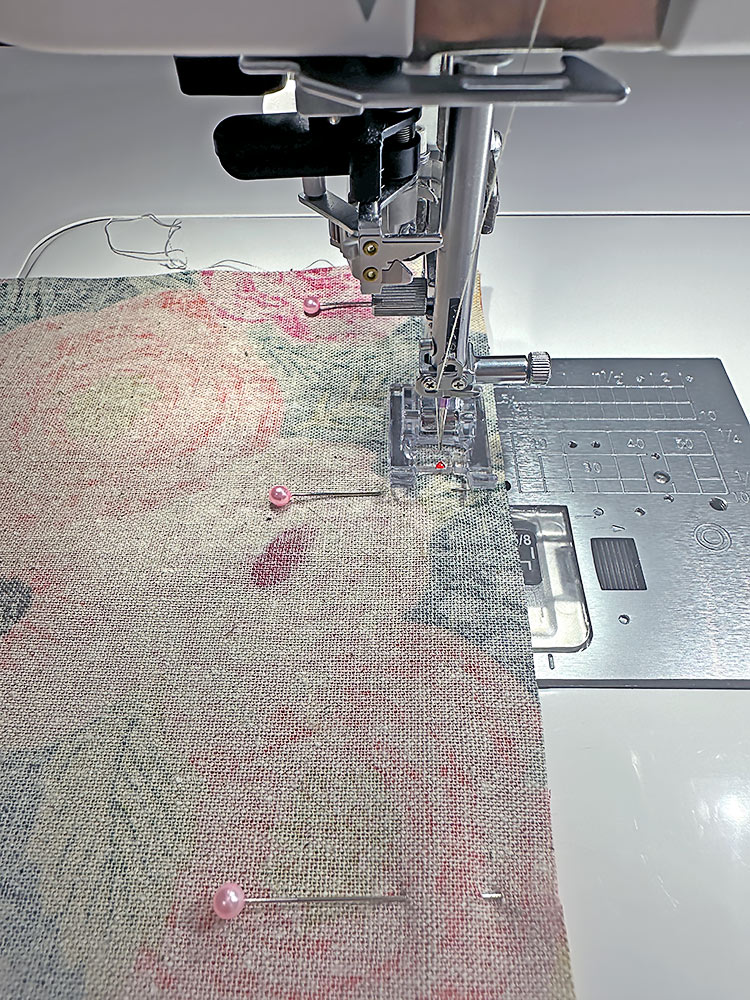
- Place the fused pocket panel right side together with the lining pocket panel. Pin along the top edge only.
- Re-thread with thread to best match the fabric in the top and bobbin. Re-set for a standard lengthened straight stitch. Attach a standard foot or see-through foot, like the Satin Stitch foot we selected.
- Using a ½” seam allowance, stitch across the top edge only.
- Press the seam allowance open and flat, then fold the two layers so they are now wrong sides together and the seam runs straight and even across the top.
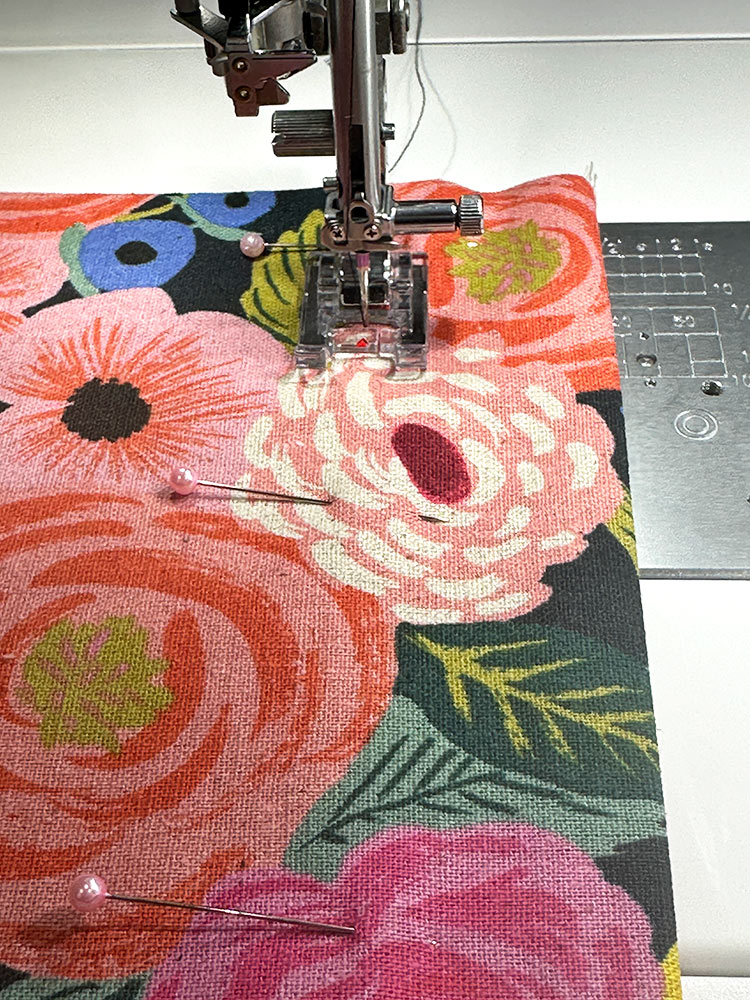
- Re-thread with a thread that coordinates with the exterior fabric yet still stands out a bit – you want this seam line to show up. We chose black.
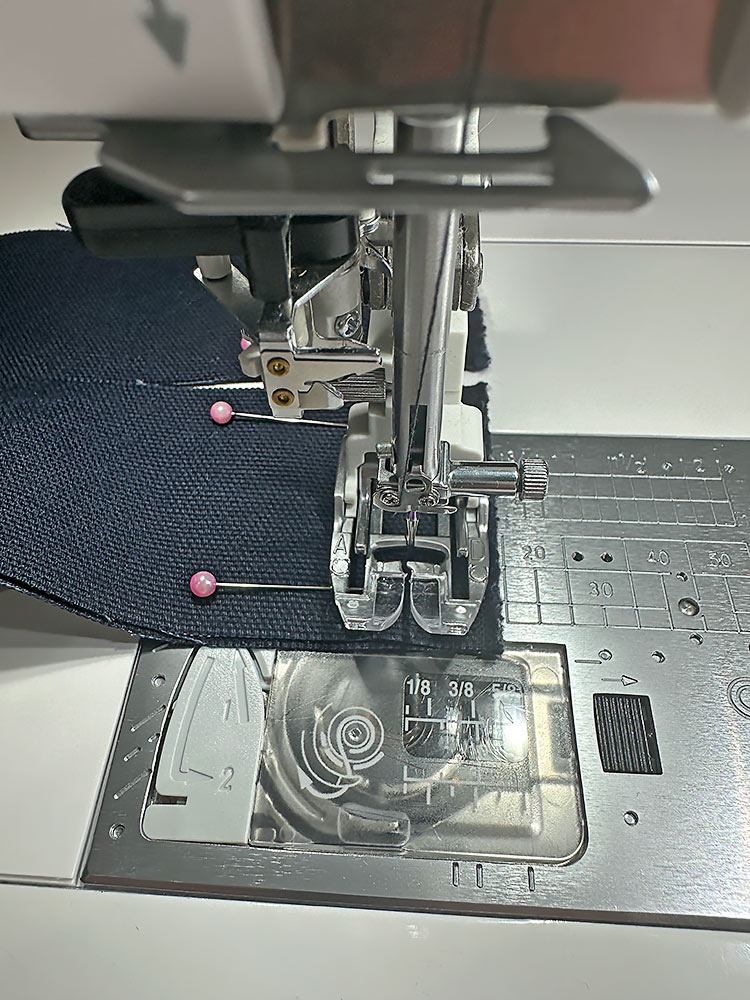
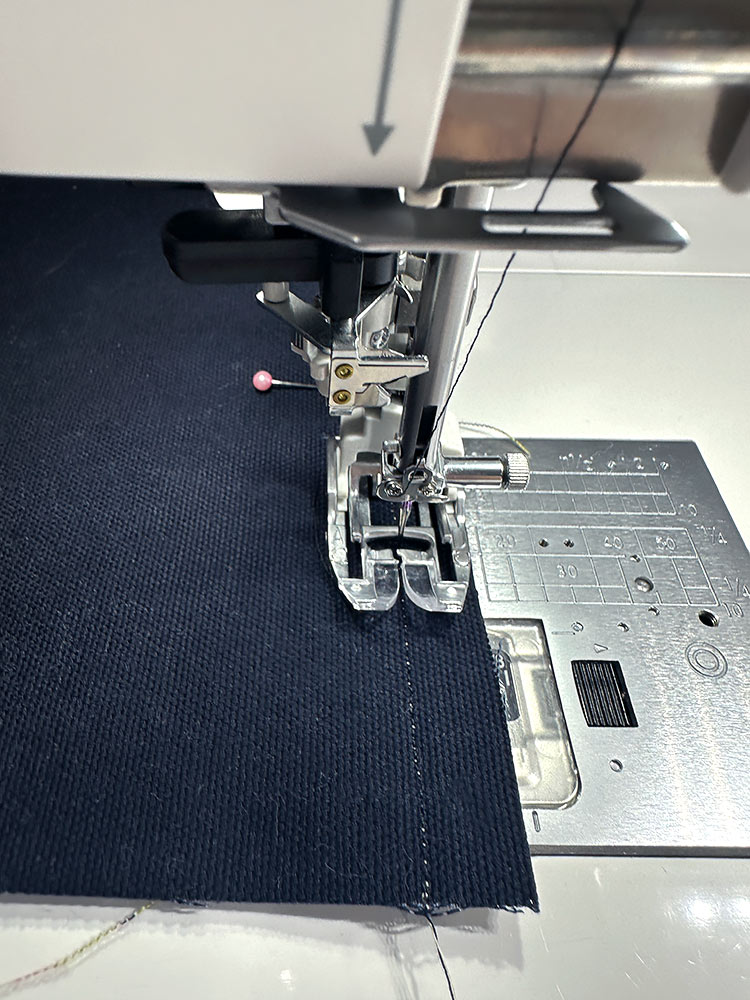
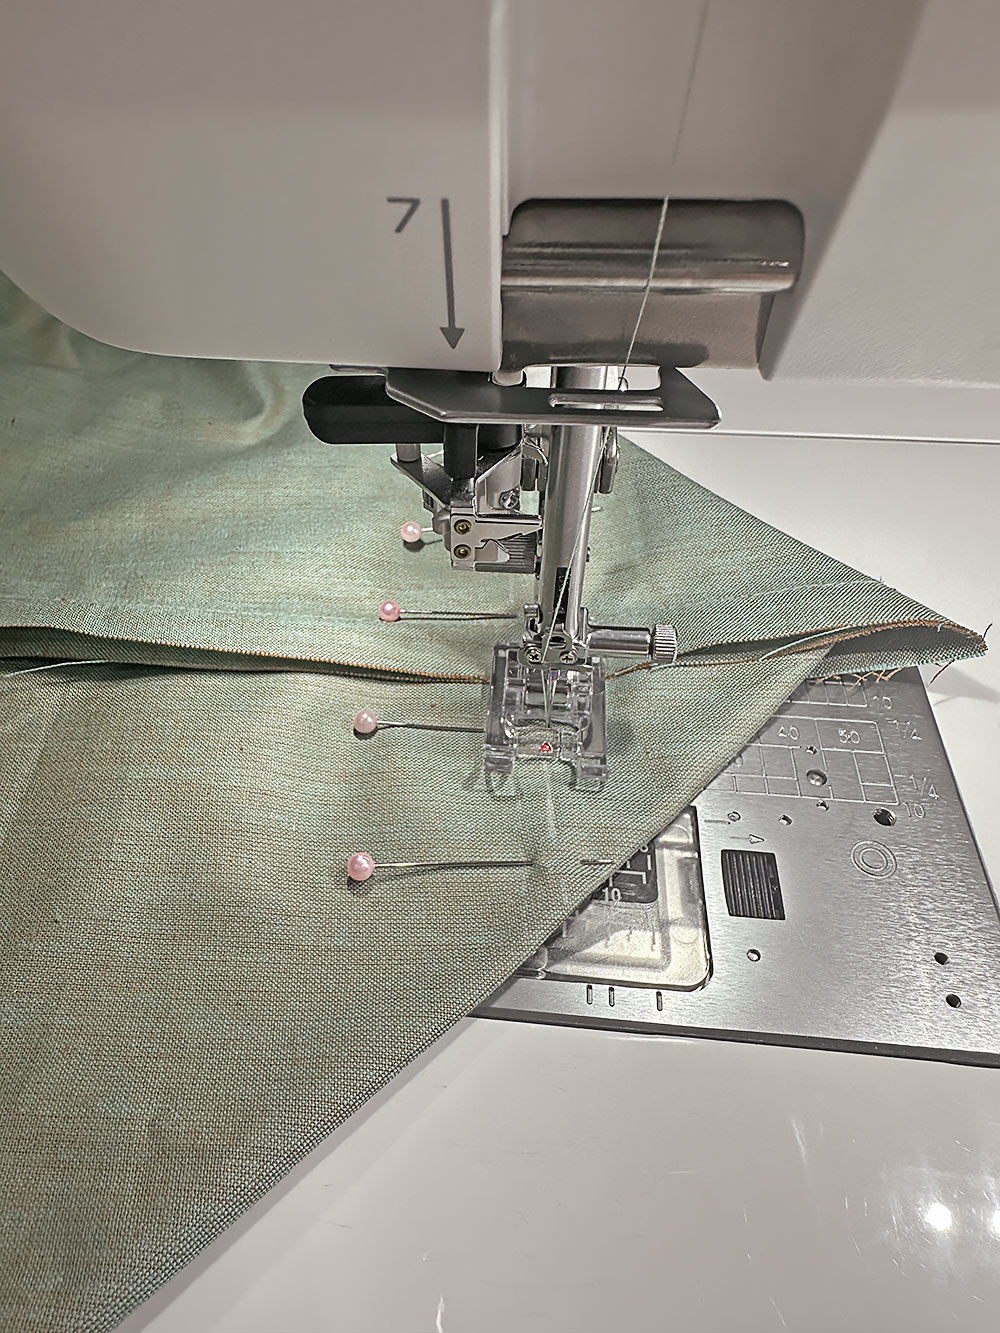
- Topstitch across the pocket 1½“ down from the pocket’s top seamed edge. This creates a faux hem.

NOTE: We used the extended plate markings on our Janome machine to get a perfect 1½” line. If you do not have this option, you can draw in a guide line prior to stitching with a fabric pen or pencil. As always, when working with a fabric marker on the right side of your fabric, make sure it is one that will easily wipe away or vanish with exposure to the air or the heat of an iron. - Find the main front panel. Place it right side up and flat on your work surface.
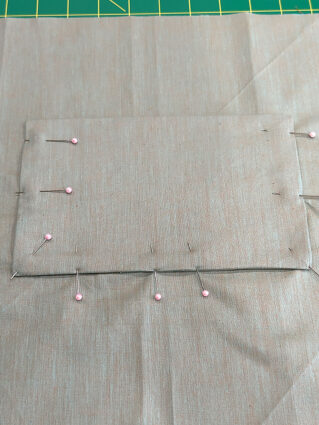
- Place the finished pocket in position. The pocket should be centered side to side on the main panel and the bottom raw edges of the pocket should be flush with the bottom raw edge of the panel. Of course, if you went to the trouble to pattern-match your pocket, it will be super easy to align the motifs. Lightly pin the pocket in place at the center top and center bottom.
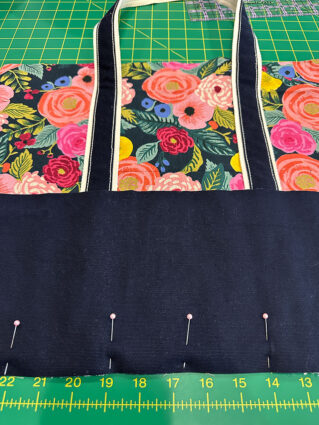
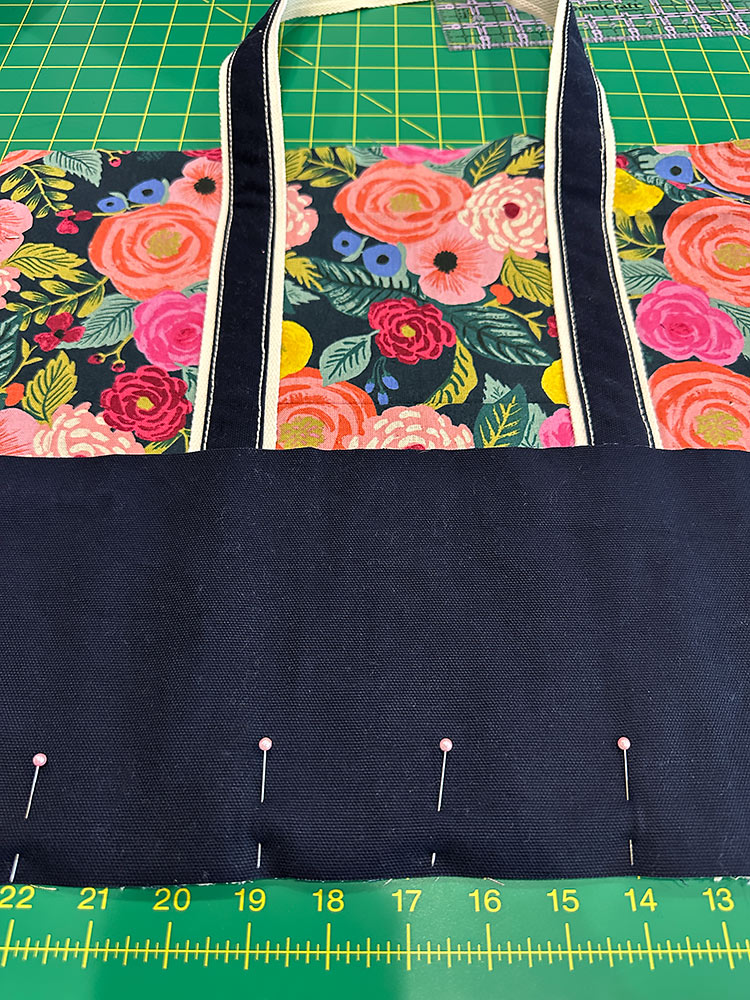
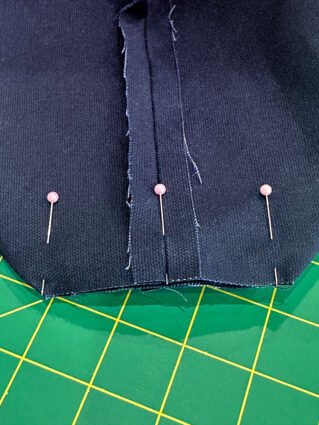
- Find the one of the finished straps. Align one end flush with the bottom of the panel and centered over one side of the pocket. Pin the strap from that bottom end up, stopping 2½” from the top raw edge of the panel. This stopping point is important as the extending fabric will become the facing on the inside of the bag.
- Make a loop and come down the opposite side of the pocket. On this side, the pins start at 2½” from the top edge of the panel and continue down to the opposite end of the strap, which is flush with the bottom raw edge of the panel. Double check to make sure there are no twists in your handle loop. Then double check that the two sides of the webbing are parallel with 5” between their inner sides.
- Repeat with the remaining strap on the back panel, but there’s no pocket on this side so simply maintain your parallel ends and the 5” width.
NOTE: To keep track of the “upper stopping points” of your handle straps, it can help to fold back the upper edge of the both the front and back panels 2½” and press well to set a crease line. You should unfold to complete construction, but you can then use this crease as a visible line of where to stop and start.
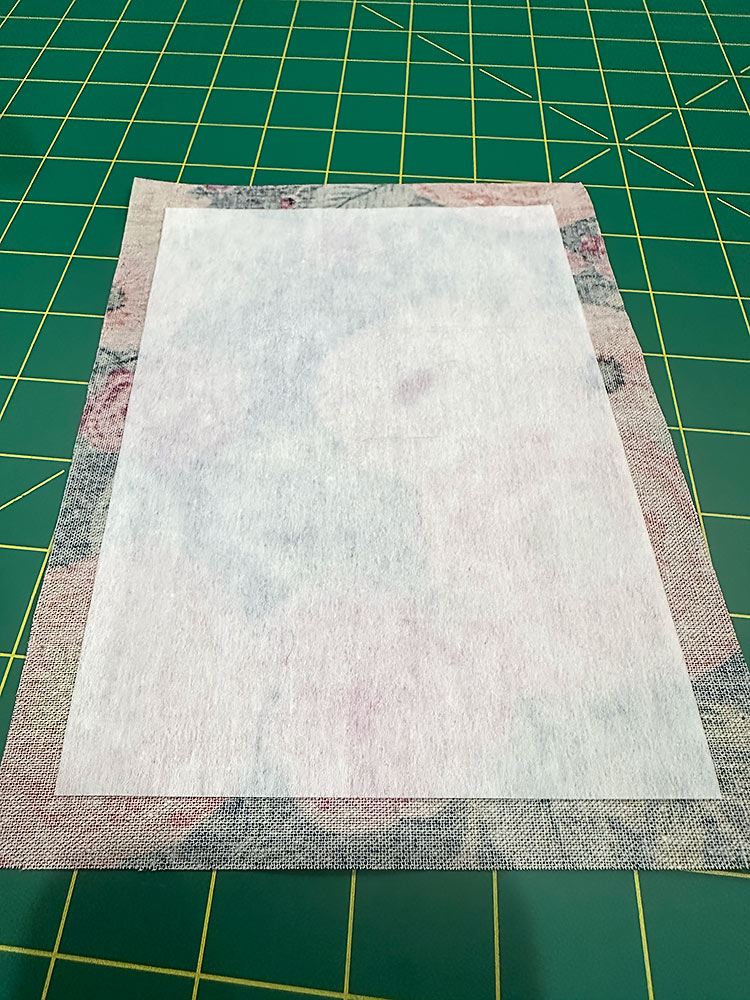


Add the fusible fleece
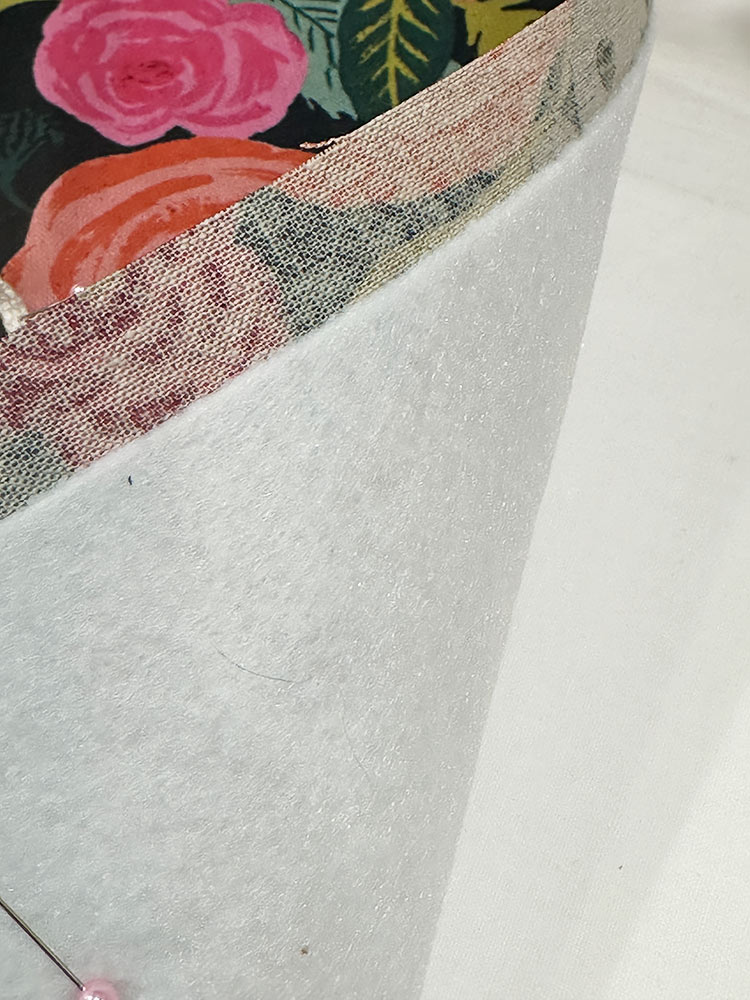
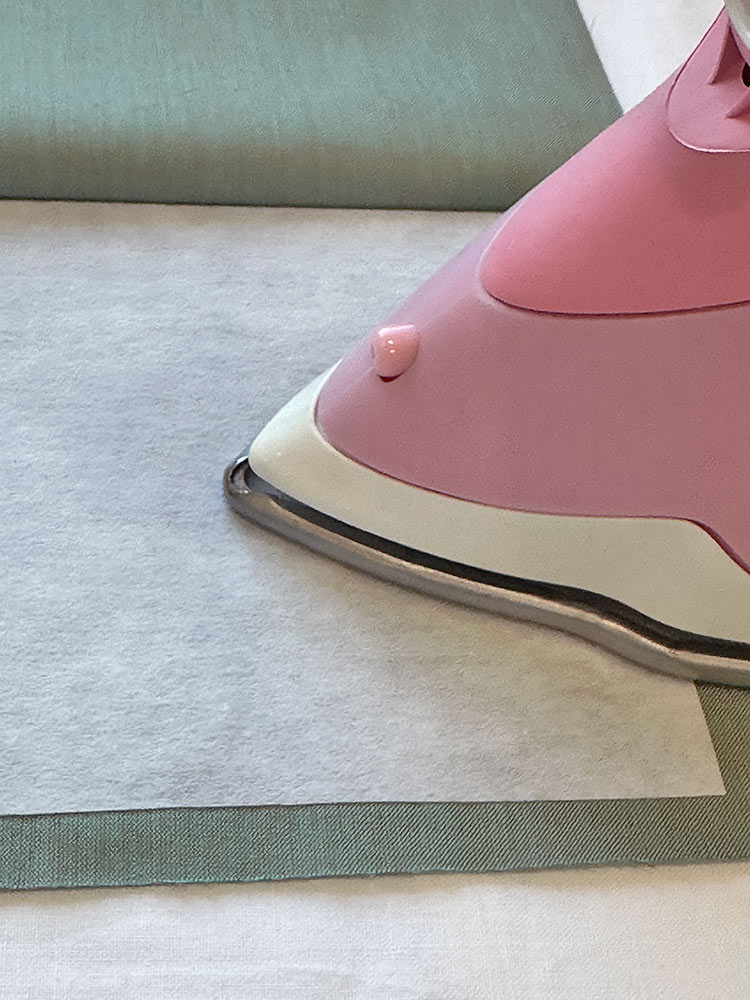
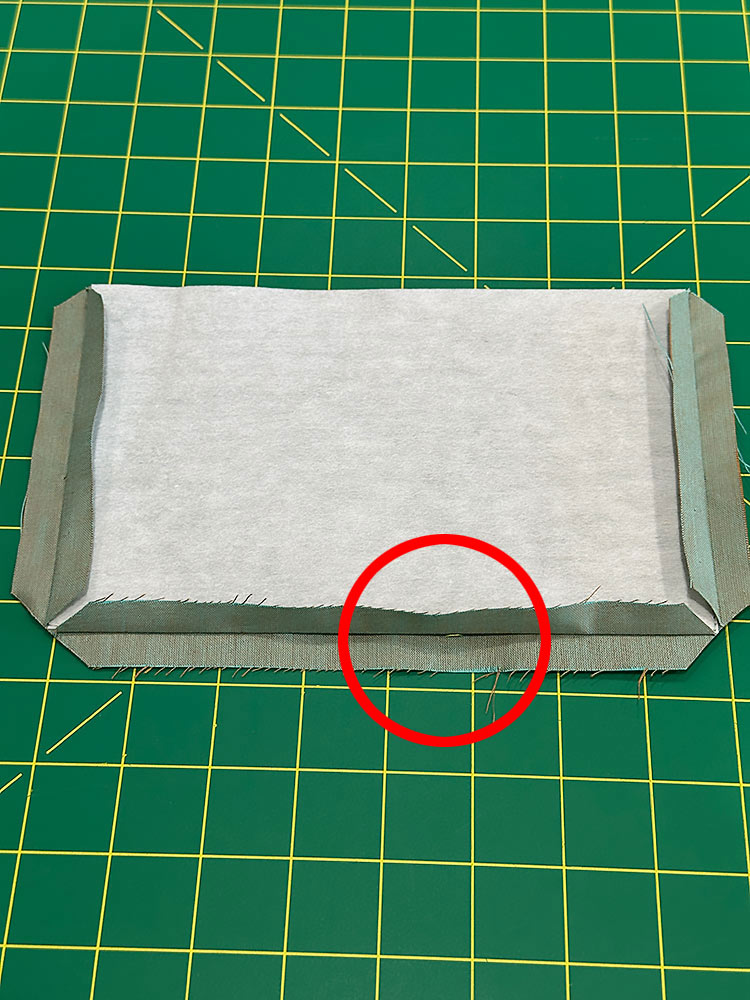
- Find the two fusible fleece panels. Center the fleece on the wrong side of both the front and back panels (both of which should have their handle straps pinned in place). The fleece panel should sit so there is ½” of fabric showing beyond the fleece along the bottom and both sides. Along the top, the fleece should sit 2½” down from the top raw edge of the panel.
- You can use a pressing cloth to lightly fuse from the back side of the panels. Then flip over both panels and press firmly from the front, following manufacturer’s instructions, to fully adhere.
- Flip over for a quick check to insure the fleece is secure and flat against the panels.


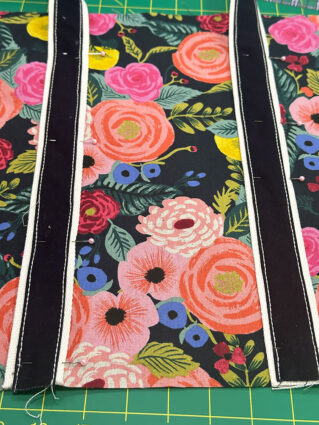
Attach the straps to the exterior panels
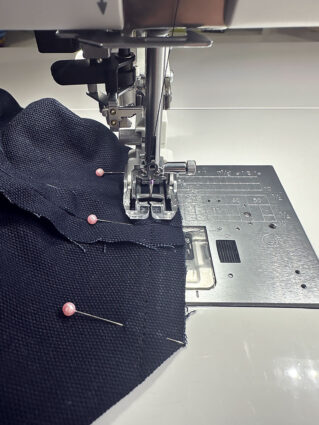
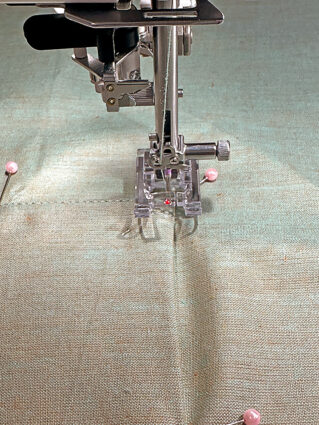
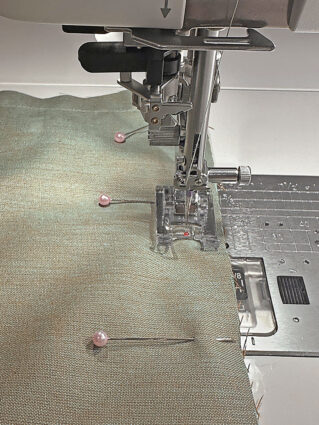
- Re-thread the machine with thread to best match the webbing in the top and bobbin. The machine should still be set for a standard lengthened straight stitch.
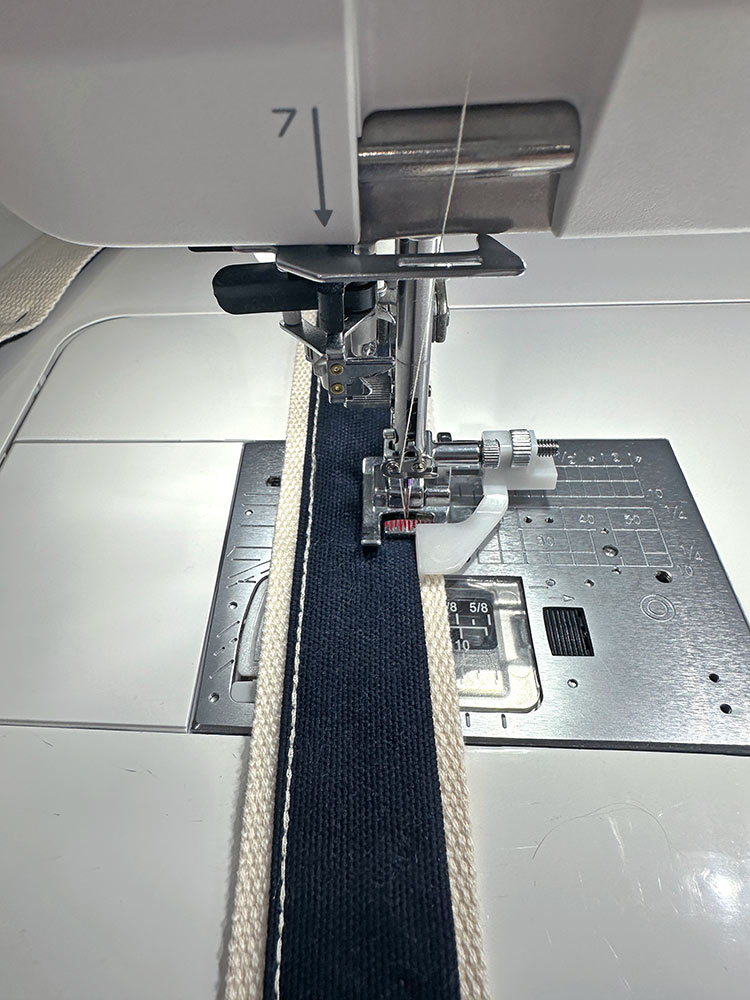
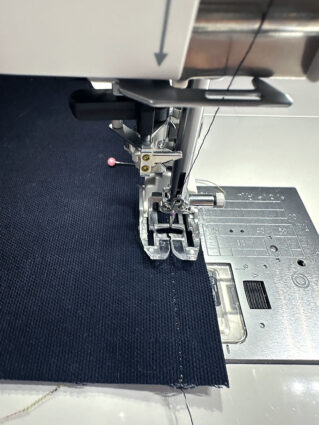
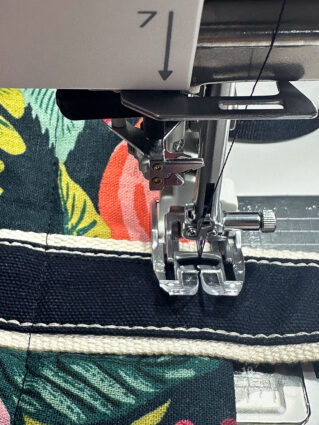
- If possible, attach a Janome Bi-Level foot. This gem of foot has two levels to accommodate varying fabric layers. These split levels guide the foot, creating a consistent line of edgestitching or topstitching. It is perfect for webbing straps like these.
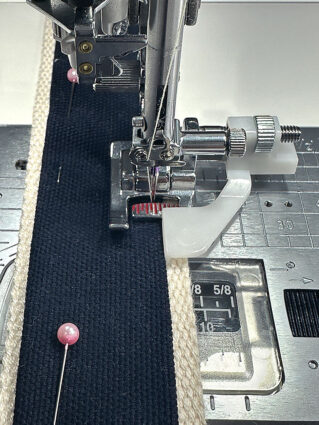
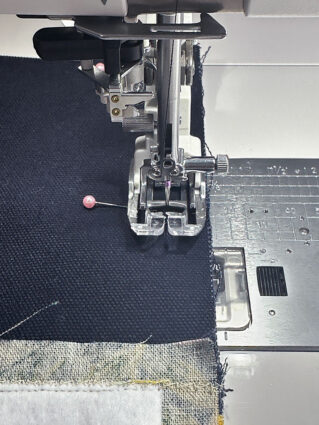
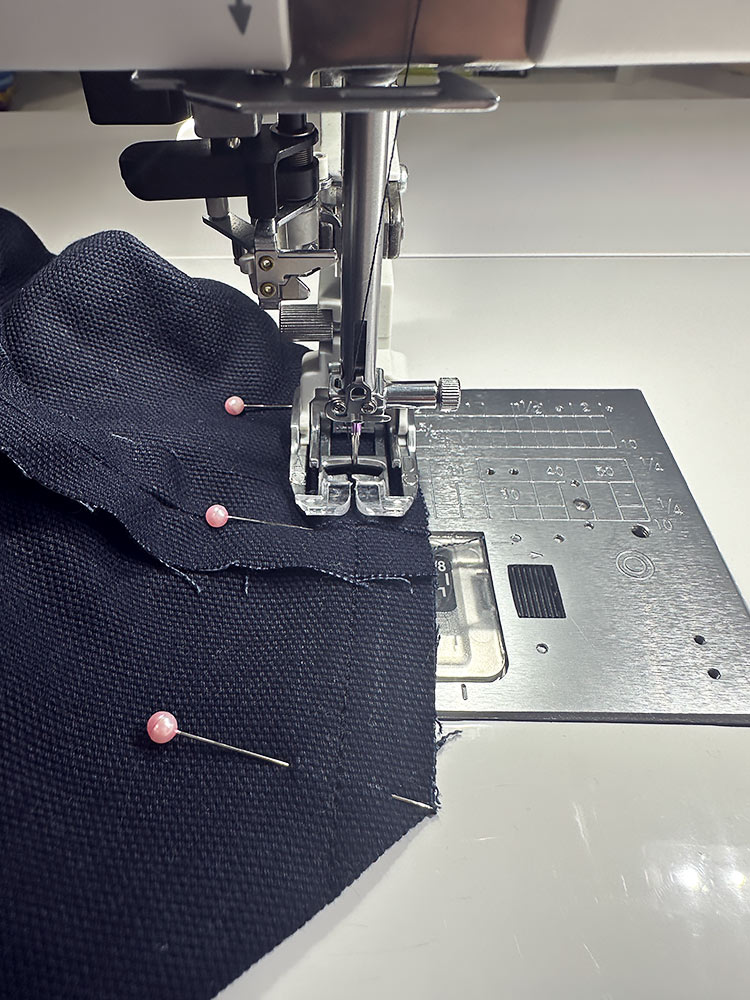
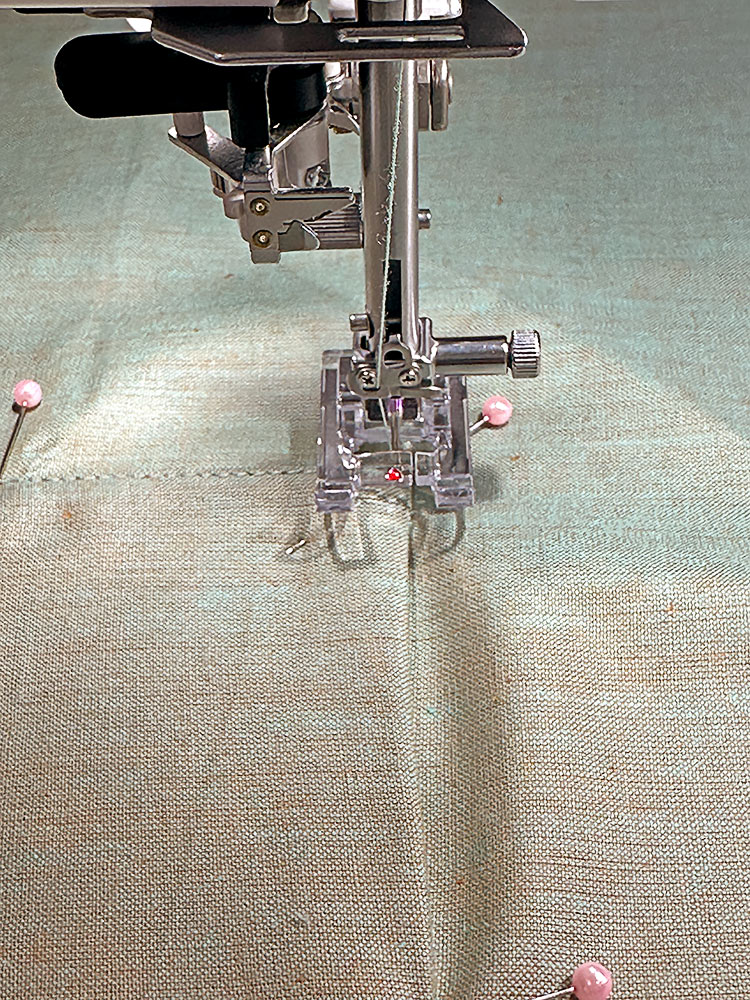
- Edgestitch along the right and left sides of both ends of the webbing straps on both the front and back panels. You are stitching just along the webbing – do not stitch onto your canvas strip.

- Stitch from the bottom up to the 2½” stopping point and lock your stitch. Do not pivot and stitch across the webbing. Instead, remove and re-set to stitch the opposite side, from the top (in the photo below you can see our “stop here” crease line) down to the bottom. In other words, you are stitching four short lines of edgestitching on both the front and back to secure the webbing.

NOTE: Securing the straps horizontally comes later. Patience.
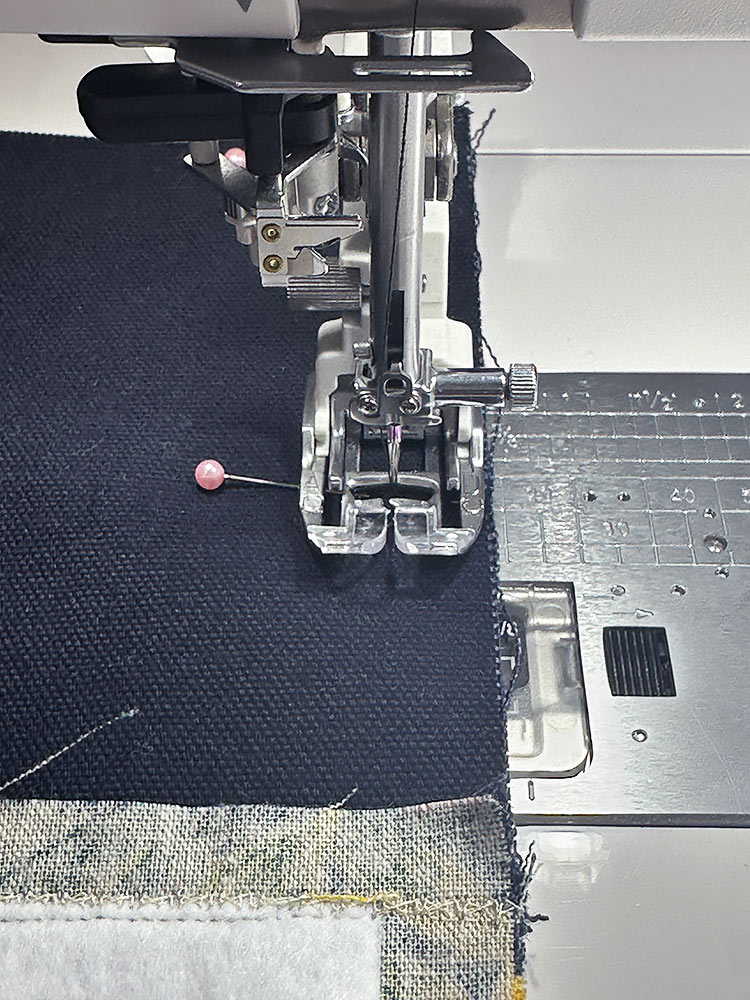
Add the bottom panels with their twin needle topstitching
- Find the two 18½” wide x 6¼” high base panels in the solid canvas.
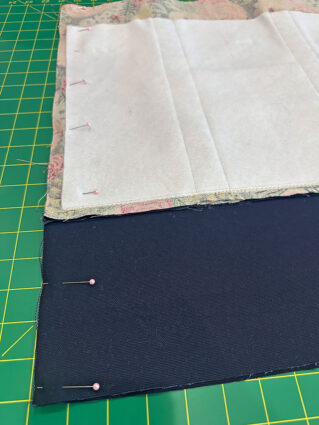
- Place a base panel right sides together with the main front and back panels. The bottom raw edge of the main panel should be flush with the top raw edge of the base panel. Pin in place.
- We engaged our Janome Acufeed™ Flex fabric feeding system. You will want to do the same or attach an Even Feed/Walking foot.
- Re-thread with thread to best match the fabric in the top and bottom. Re-set for a standard straight stitch.
- Using a ½” seam allowance, stitch across.
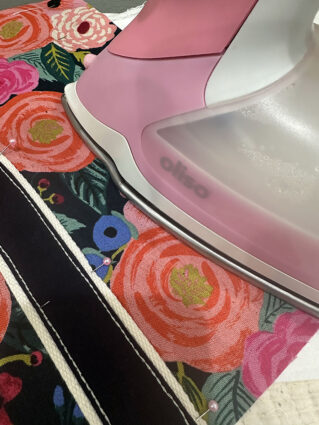
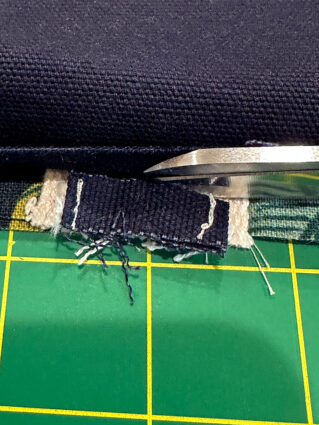
- Fold the base panel and its seam allowance down. Press well.

- At each of the bottom ends of the webbing, trim away the canvas from the webbing to help decrease the thickness. It should easily pull away from the webbing, but you can pull out your seam ripper to loosen the original topstitching if necessary.
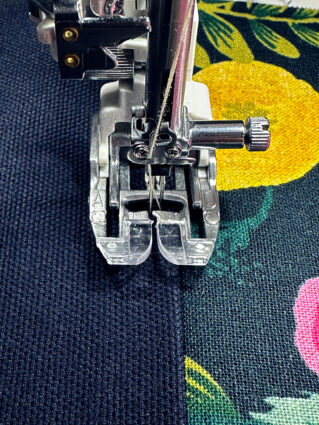
- Continue using your Even Feed/Walking foot or AcuFeed™ Flex system, but insert a twin needle. Re-set for twin needle topstitching with the contrasting thread in both top needles and the bobbin. As above with the contrasting topstitching on the canvas strip on the handles, re-set for a lengthened Triple Stitch. You machine manual should have specific details on the proper set up for twin needle stitching.


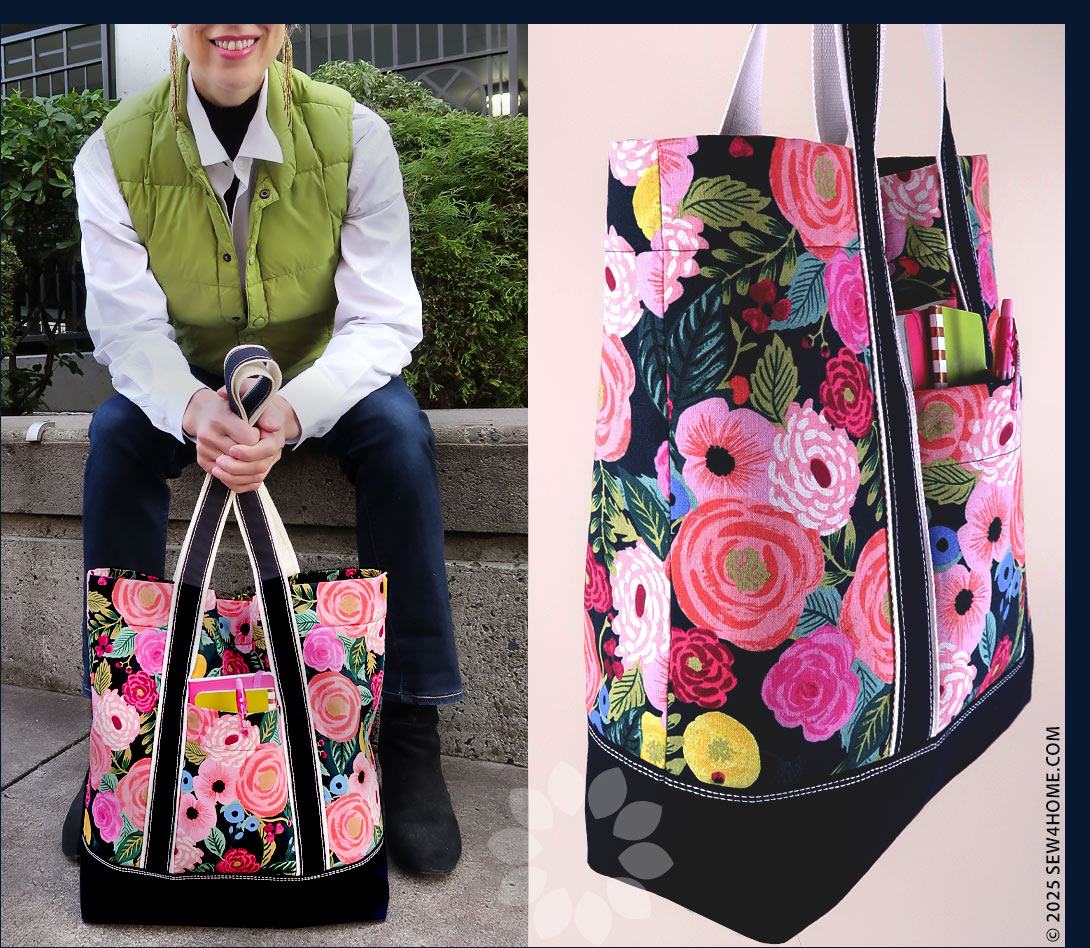
Box the exterior corners
- Place the front and back panels right sides together. All raw edges should be flush. Be especially careful to align the horizontal base panel seams. Pin together along both sides and across the bottom.
- We opted to continue with our AcuFeed™ Flex system. Replace the twin needle with a standard needle. Re-thread with thread to best match the fabric in the top and bobbin. Re-set for a standard straight stitch.
- Stitch along both sides and across the bottom, pivoting at the two bottom corners. The top remains unsewn.
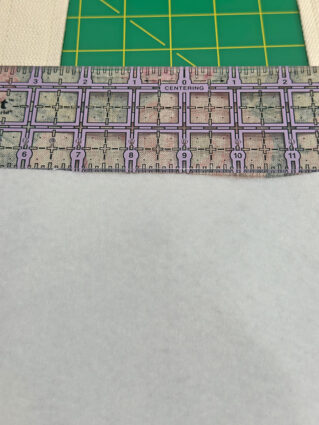
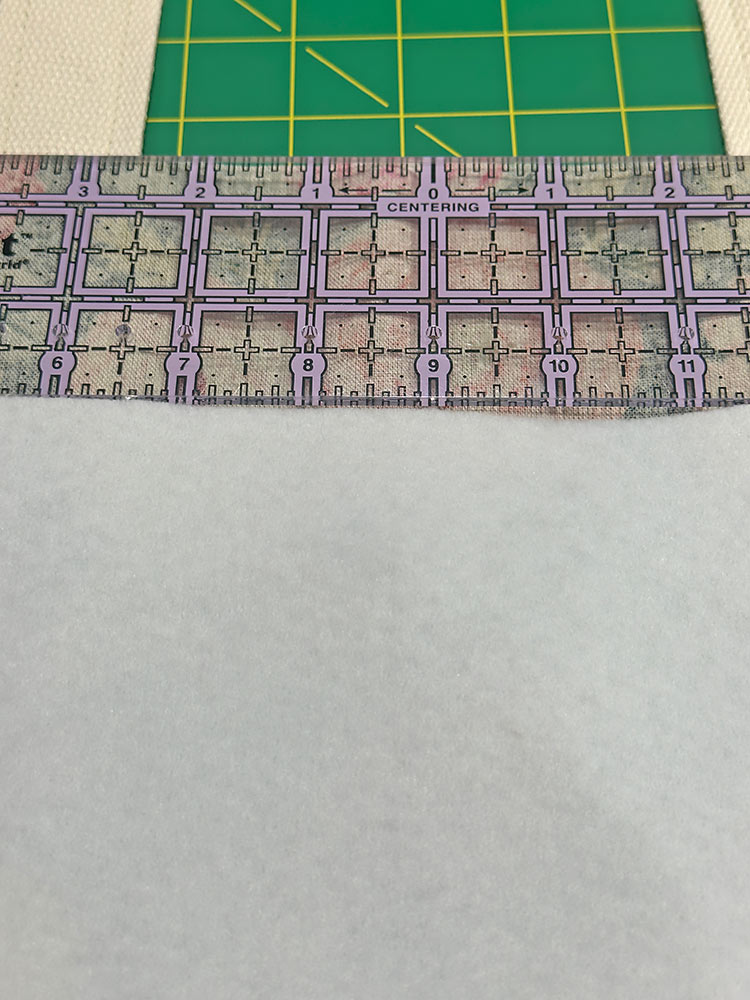
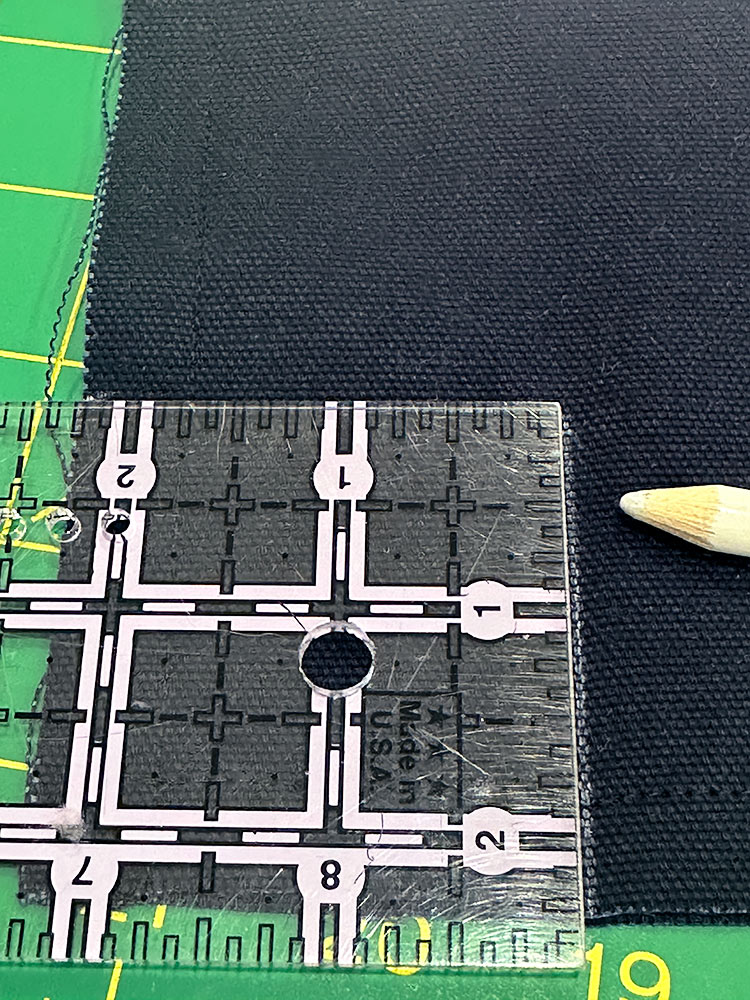
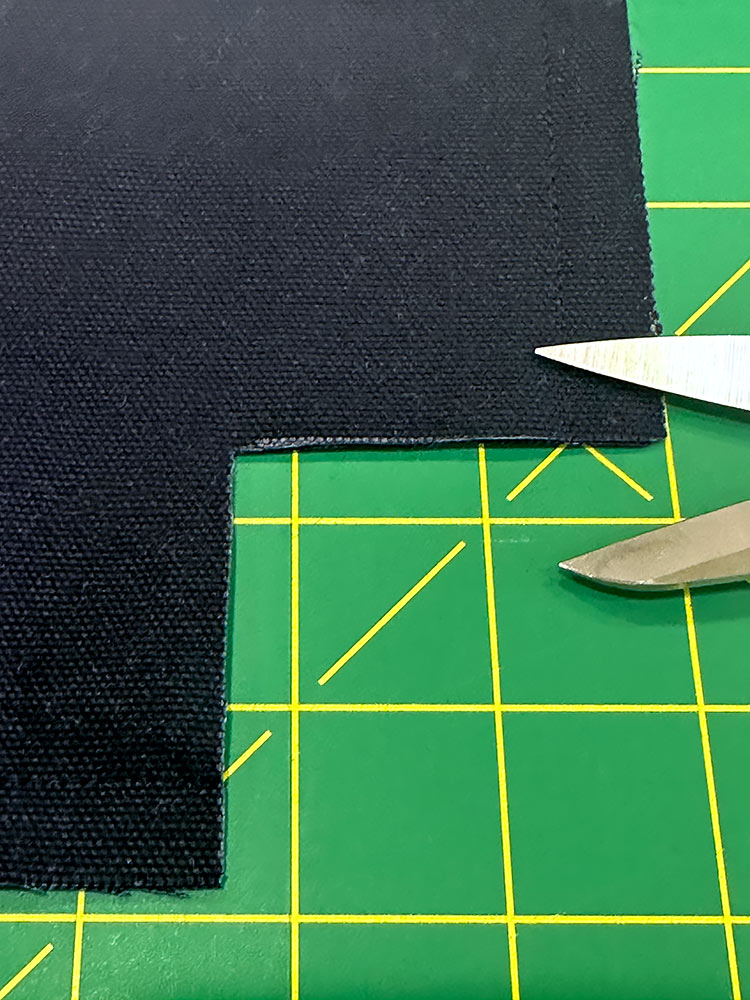
- Measure and mark squares of equal size at each corner. For this tote, we want a 4½” finished corner, which means our squares should HALF that or 2¼” x 2¼”.
Cut out each corner through both layers.

- Press the side and bottom seam allowances open and flat.
- Pull apart each corner and carefully align the side seam with the bottom seam. Pin in place.
- Using a ½” seam allowance, stitch across the corner. For extra toughness in the corner, we recommend stitching across two or even three times.
NOTE: If you are brand new to boxed corners, we have a full tutorial you can check out prior to starting the project.


Add the magnetic snap – optional
- Turn the exterior bag right side and push out your pretty box corners.
- Along the top raw edge of the bag, press back the upper raw edge ½”, then press back an additional 2”. NOTE: This second fold may be a re-fold along the original crease line you set above as a stop-line for the handle topstitching.
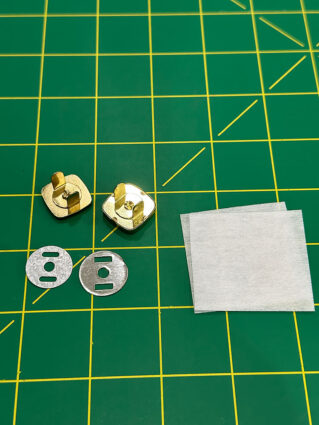
- Find the two halves of the magnetic snap and the two squares of interfacing.
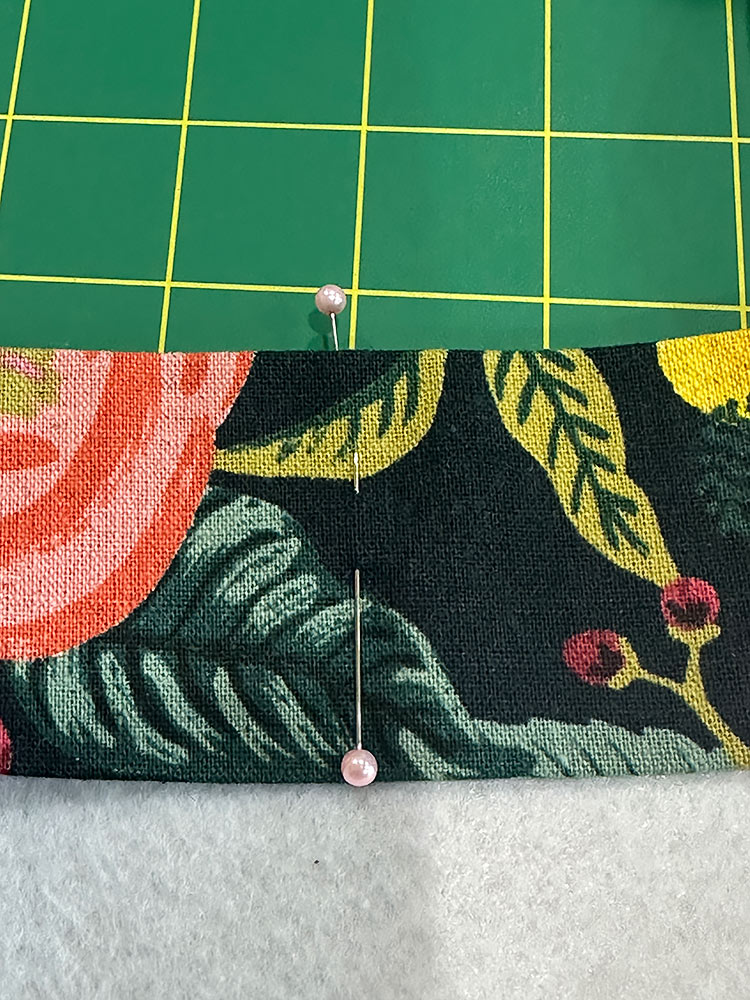
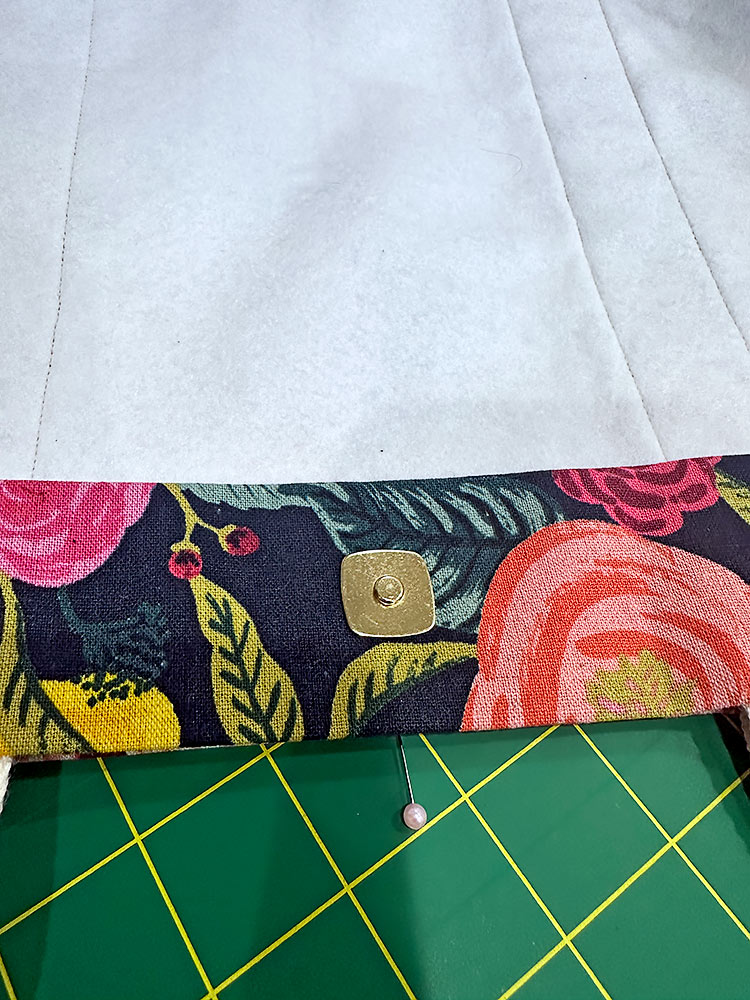
- Along the front of the tote, find the exact center, marking this point with a pin.

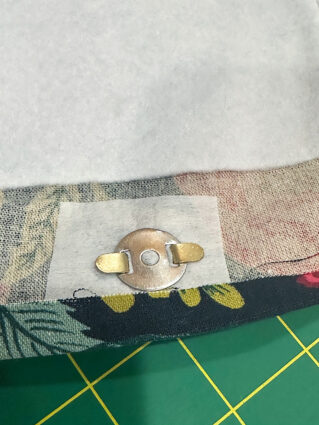
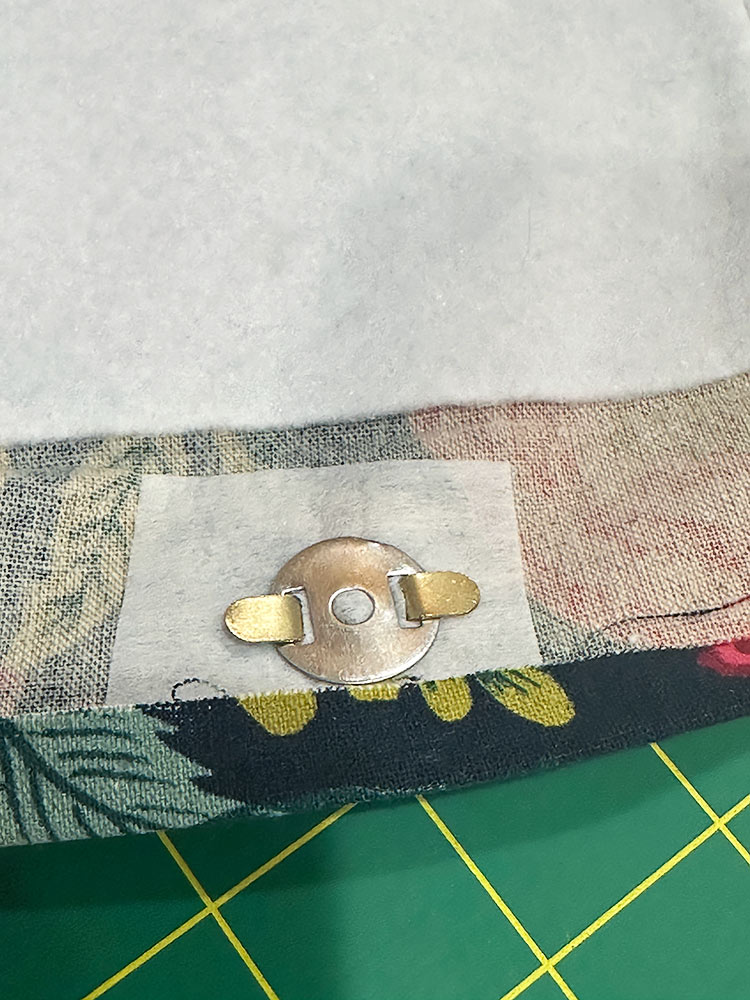
- Lift up the facing and fuse a square of interfacing behind it. This provides a bit of stabilization for the heavy magnetic snap.
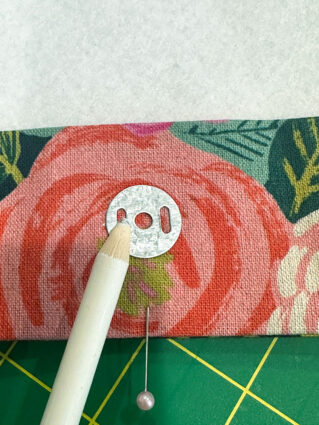
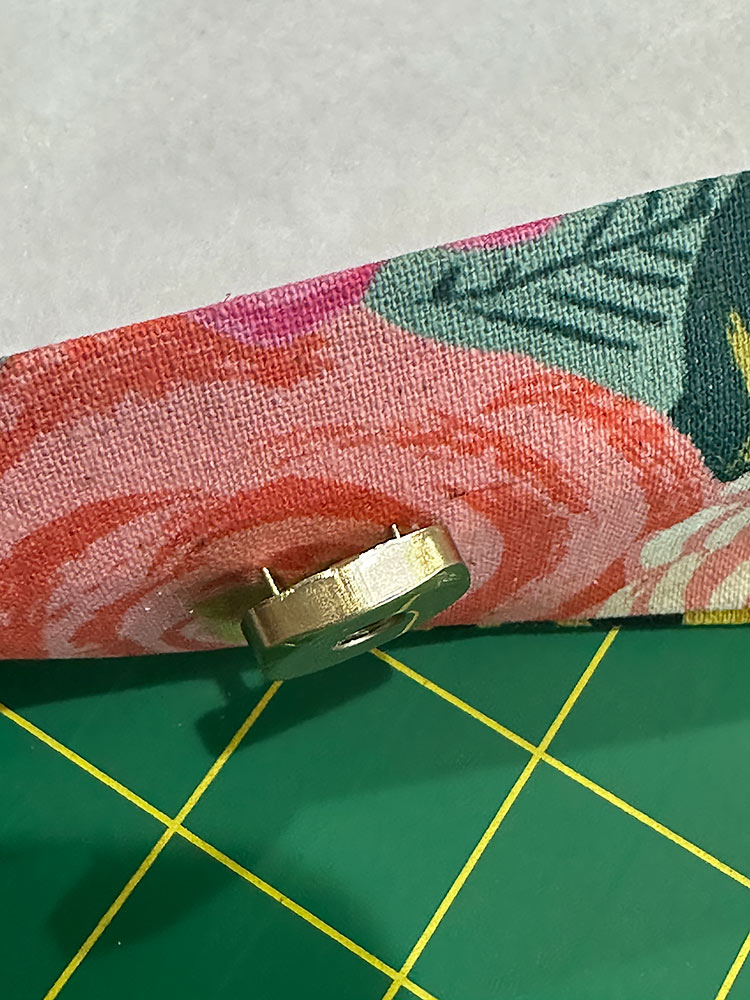
- Refold the facing and center a washer at the pin point. The center of the wash should sit 1” down from the top folded edge of the tote.
- Use a fabric pen or pencil to trace through the slits in the washer.
- Make small clips at the marked slits (just through the single layer of the facing) and insert the front half of the
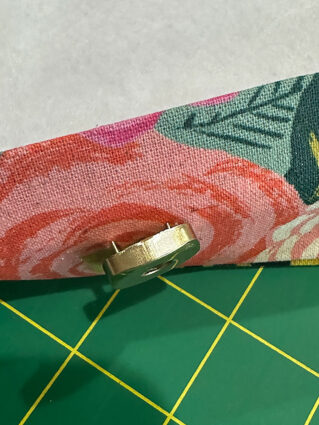
- Slip the washer over the prongs and flatten to secure.
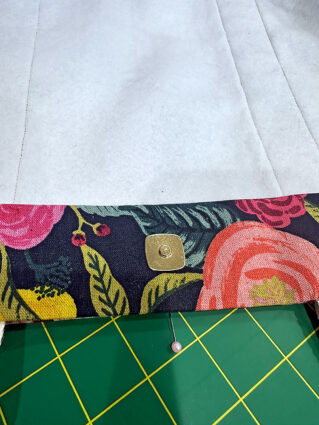
- Repeat to insert the opposite half of the snap at the center back facing.
NOTE: The steps here are summarized. If you are brand new to working with magnetic snaps, you can review our full, step-by-step tutorial.


Create the lining
- Find the 9” x 11” pocket panel and the 8” x 5” panel of mid-weight interfacing.
- Fold the pocket panel in half, wrong sides together, so it is now 9” x 5½”. Press well to set a crease line.
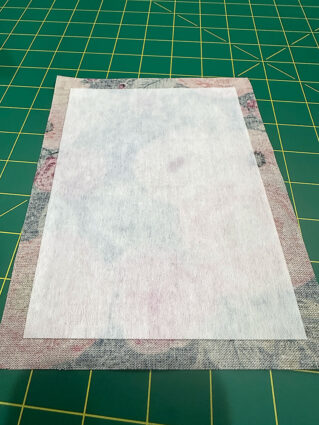
- Unfold the pocket panel and place the interfacing. The top of the interfacing should sit right up against that crease line. Along the sides and bottom, there should be ½” of fabric showing beyond the interfacing. Following manufacturer’s instructions, fuse in place.

- Refold the pocket panel in half again, but this time it should be right sides together. Pin along both sides and across the bottom, leaving an approximate 2” opening at the center of the bottom seam for turning.
- We switched back to a standard Satin Stitch foot. Re-thread with thread to best match the lining fabric in the top and bobbin. Keep a standard straight stitch.
- Using a ½” seam allowance, stitch along both sides and across the bottom. Remember to pivot at each bottom corner and to lock the seam at either side of the opening left for turning.
- Clip the corners and press open the seam allowance.
- Turn the pocket right side out through the bottom opening.
- Using a long blunt tool, gently push out the bottom corners so they are as sharp as possible. A knitting needle, chopstick or point turner are all good options. Press flat, pressing in the seam allowance at the bottom opening so it is flush with the sewn seam.
- Find the back lining panel (both lining panels are the same, simply choose one to be your back panel).
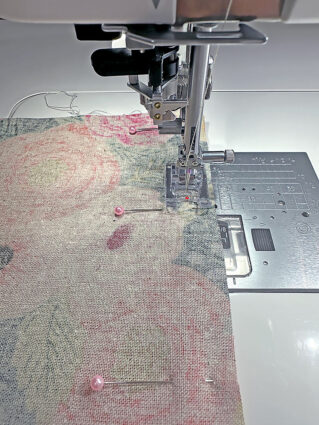
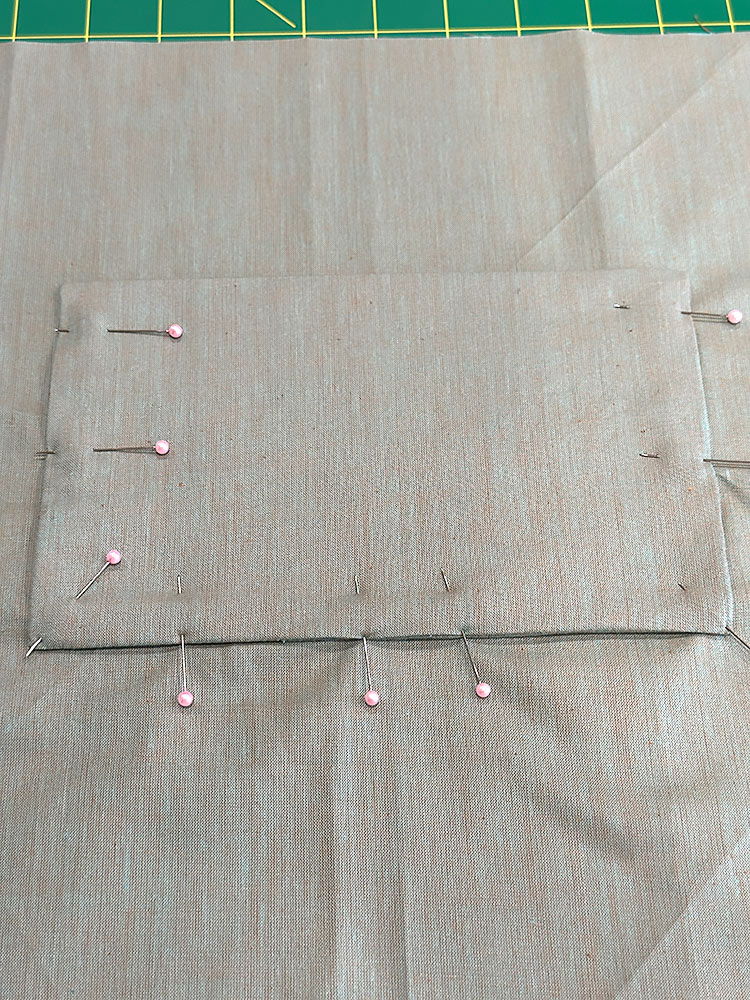
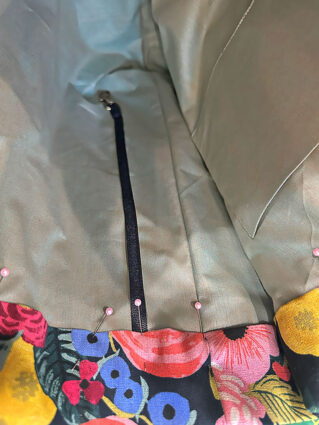
- Place the pocket into position. The folded edge is the top of the pocket. The interfaced side of the pocket should be facing out. Center the pocket side to side, 4” down from the top of the panel. Pin in place along both sides and across the bottom.
- Edgestitch along both sides and across the bottom, pivoting at the corners. This seam closes the opening left for turning. Some people like to do a substantial back-tack at both upper corners to start and end the seam. These are stress points, and the extra stitching can help stabilize them.
- Place the front and back lining panels right sides together, sandwiching the pocket between the layers. Pin along both sides and across the bottom.
- Using a ½” seam allowance, stitch along both sides and across the bottom, pivoting at the bottom corners. The top will remain unsewn.
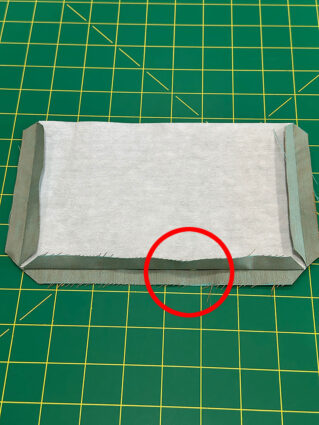
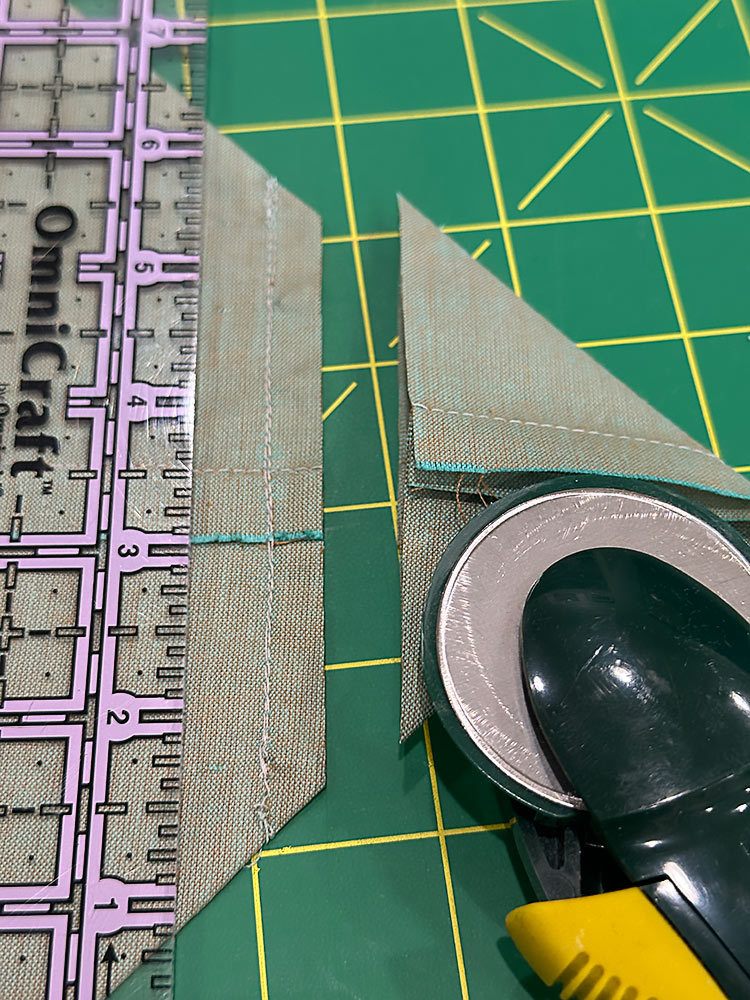
NOTE: Because the lining is lighter weight than the exterior, we opted for a different box corner. If you are brand new to boxed corners, check out our full tutorial that details BOTH ways to create box corners as well as the formulas for cutting the correctly sized starting panels. - With the tote still wrong side out, use both hands to pinch and pull apart one corner. As you pull, the fabric will begin to form a little peak with the corner point at the top and the seam line running down the middle. It is very important your seam is centered within the peak; this is what will make the lines of your finished corner look perfect.
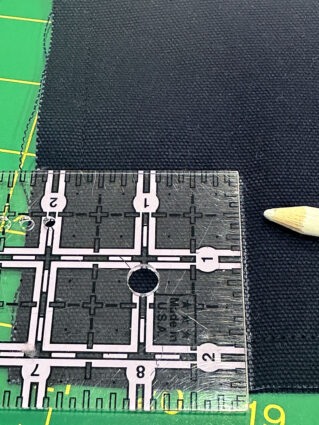
- Slide your ruler or seam gauge along the peak until you reach the point at which your “triangle” is the appropriate 4½”finished corner width.
- Draw a horizontal line at this measurement.
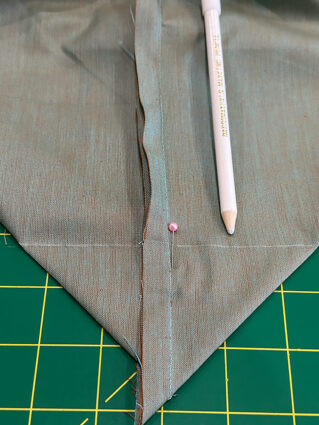
- Stitch along the drawn line. You can stitch across two or even three times to reinforce the corner.

- Trim away the peak to ½” from the line of stitching.

- Repeat to box the opposite corner.


Make the interior lanyard
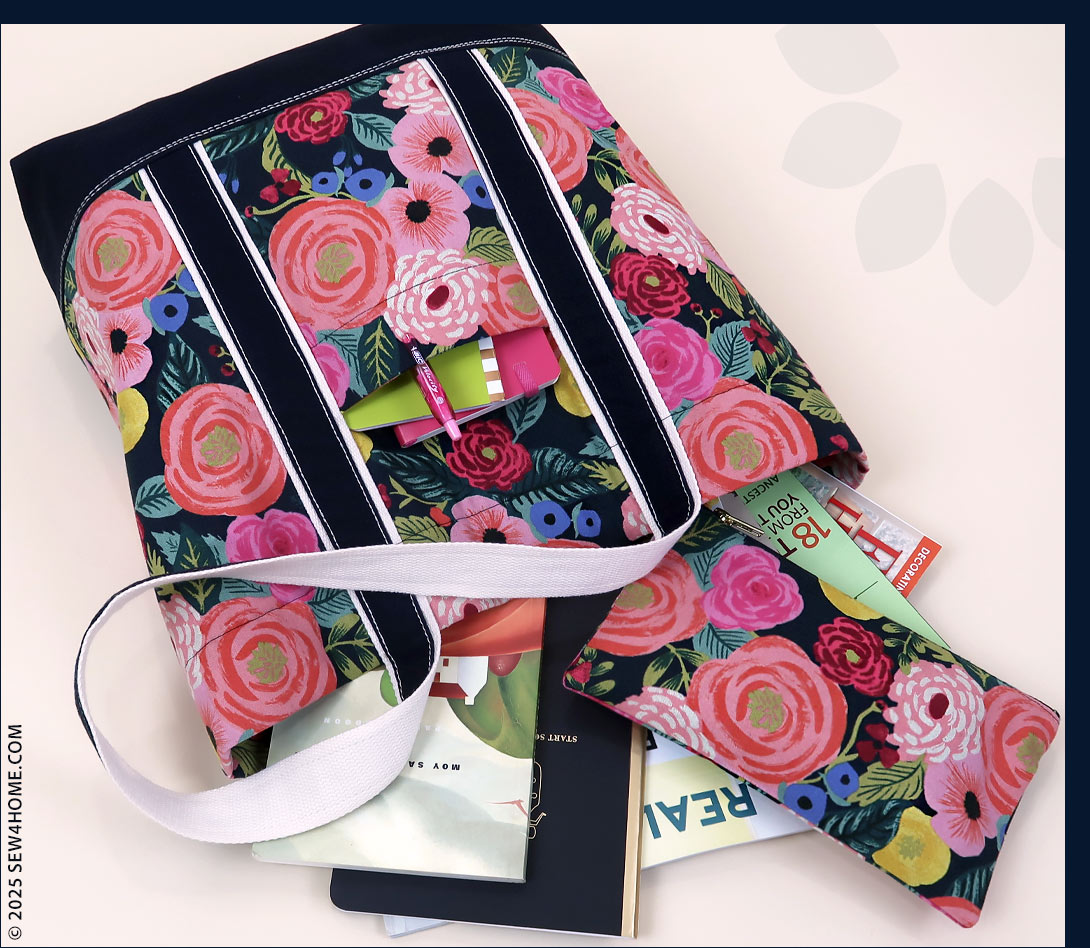
- We used our lanyard to hold a matching drop-in zipper pouch, but it would be just as handy to clip a set of keys so they don’t get lost in the tote.
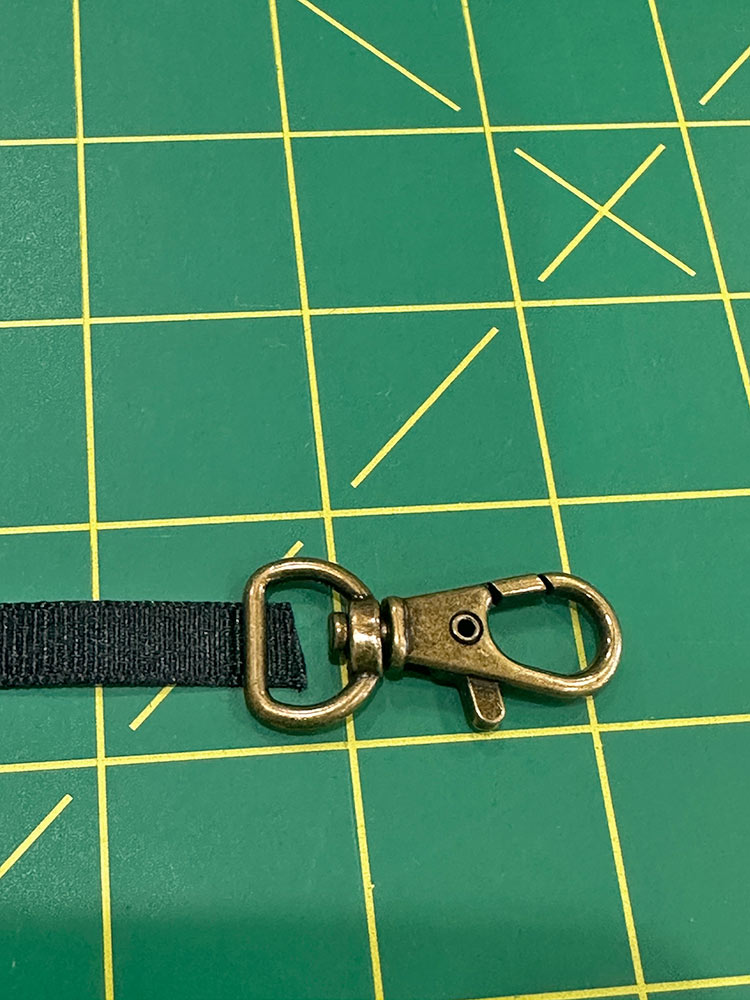
- Find the length of ribbon and the swivel clip.
- Feed one end of the ribbon through the base of the clip.

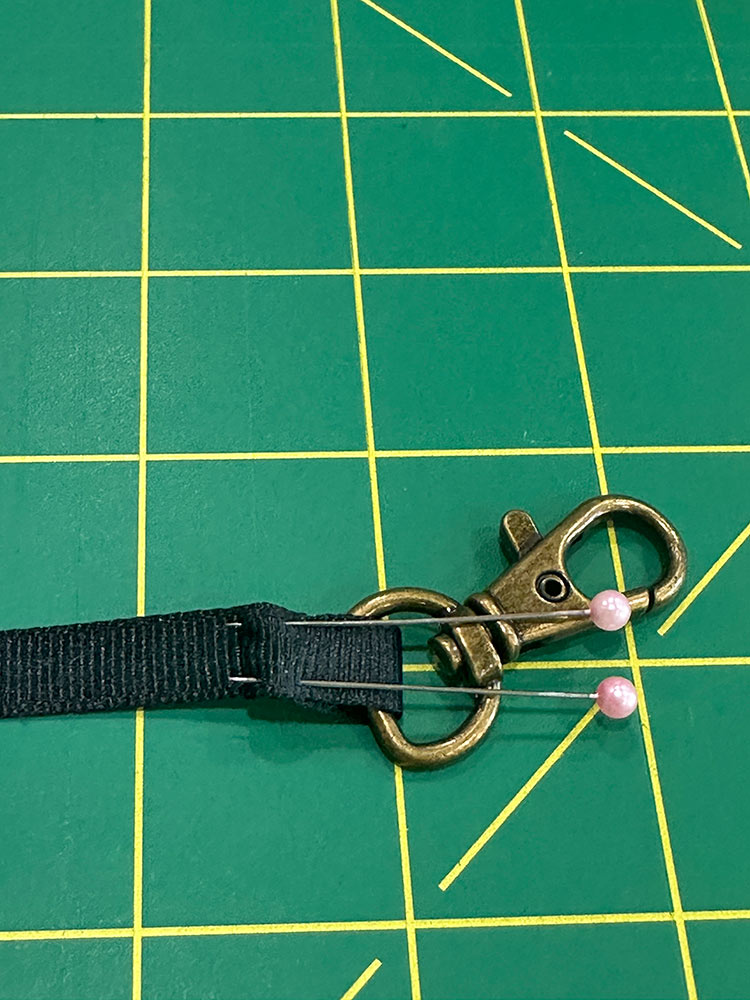
- Pull the end through and turn under the raw edge to make a tiny hem. Pin in place.

- Stitch across to secure with either a straight stitch or zig zag in matching thread.
Assemble the lining and exterior and place the lanyard
- Find the exterior bag. Make sure it is right side out.
- Find the lining bag. Make sure it is wrong side out.
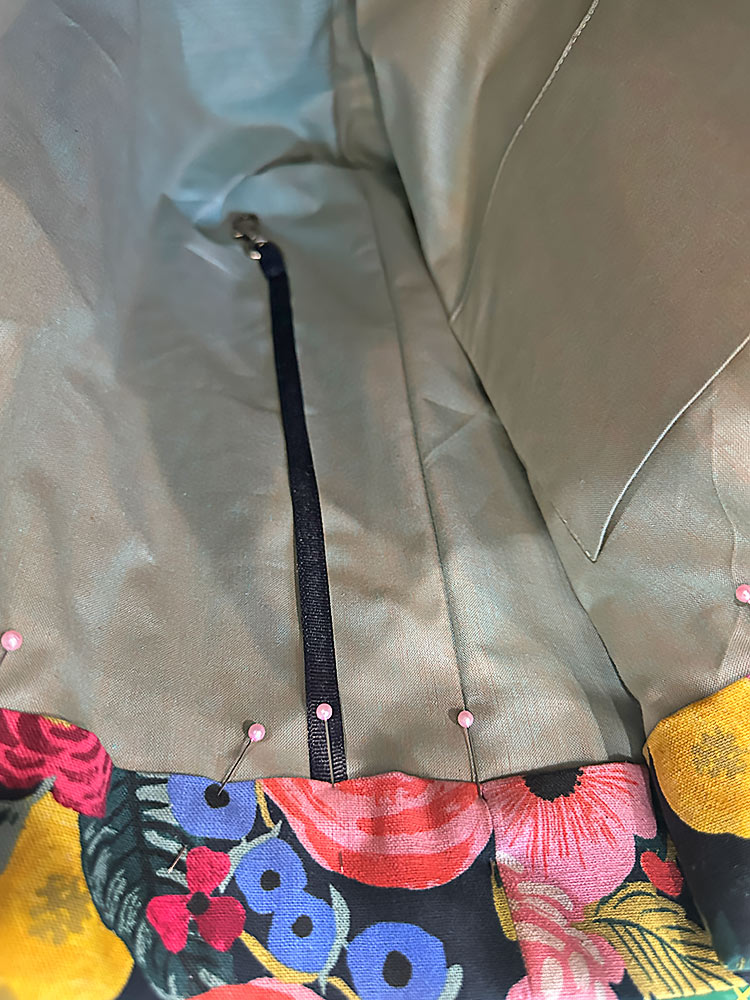
- Drop the lining into the exterior so the two are now wrong sides together. The lining pocket should be positioned against the back of the exterior bag.
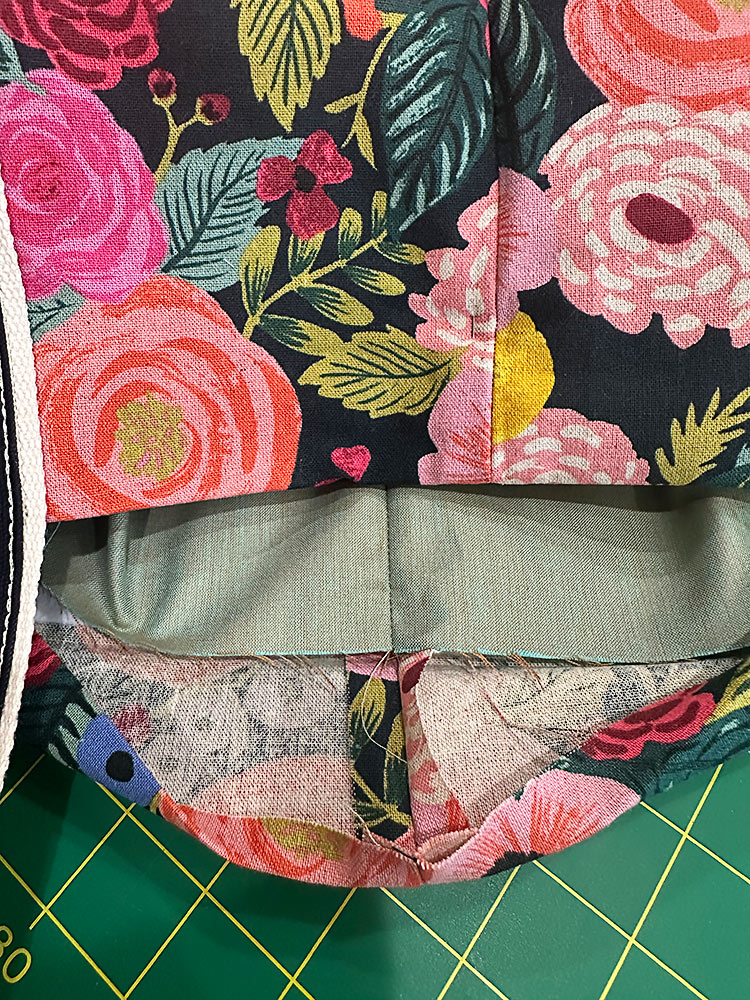
- Push down the lining so the box corners align. The side seams of the exterior and lining should also align, and the top of the lining should come up to the bottom fold of the exterior “facing” – just above the fusible fleece.
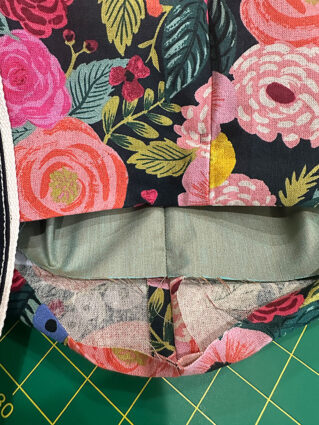
- Fold down the exterior all around, forming the interior facing. Pin in place all around.
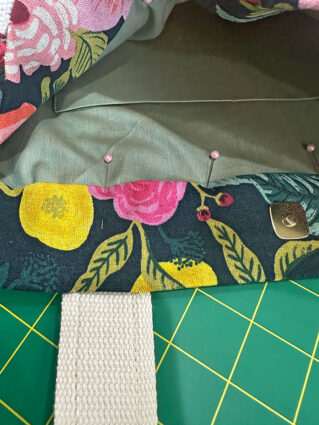
- Find the lanyard and slide the raw end under the facing. It should be positioned along one side. Looking at the front of the bag, that means the left side behind the side seam… towards the back. Pin the lanyard in place.

Final edgestitching and topstitching
- For the best result, switch back to a fabric feeding option. We used our Janome AcuFeed Flex system; you could also switch to your Even Feed/Walking foot.
- Re-thread with thread that best matches the exterior fabric as well as blends with the canvas accent strips on the handles. We went with black thread. Re-set for a slightly lengthened straight stitch. If your machine has a free arm, now is a good time to use it.
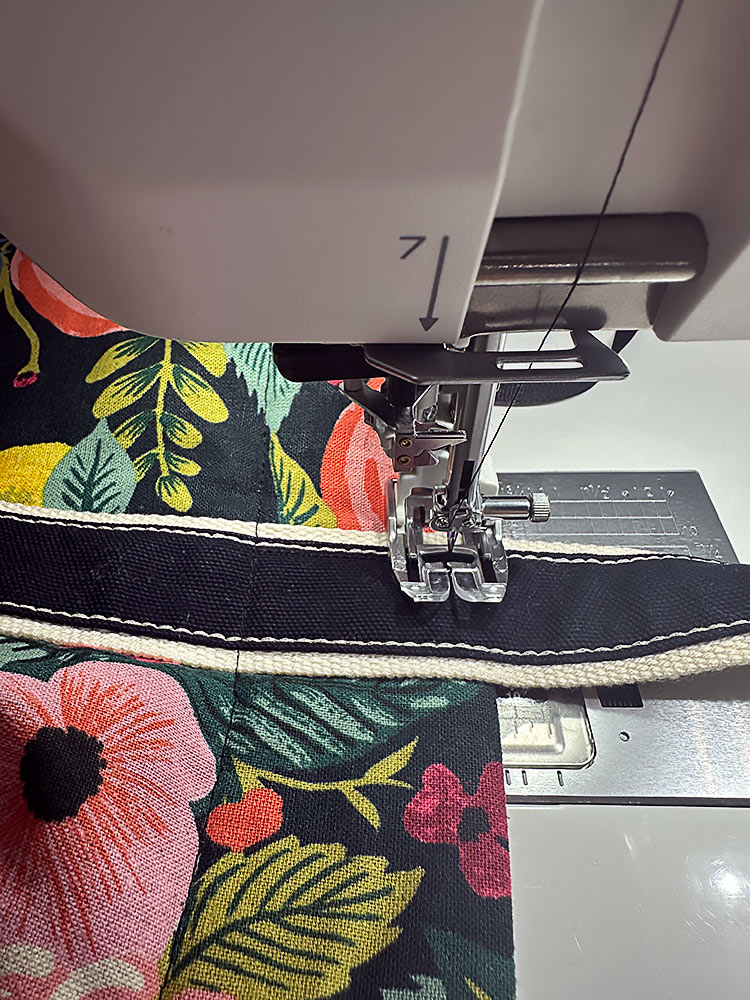
- Edgestitch all the way around the bottom folded edge of the facing.
- Then, to secure the straps, return to the portion of each strap that lays against the facing.
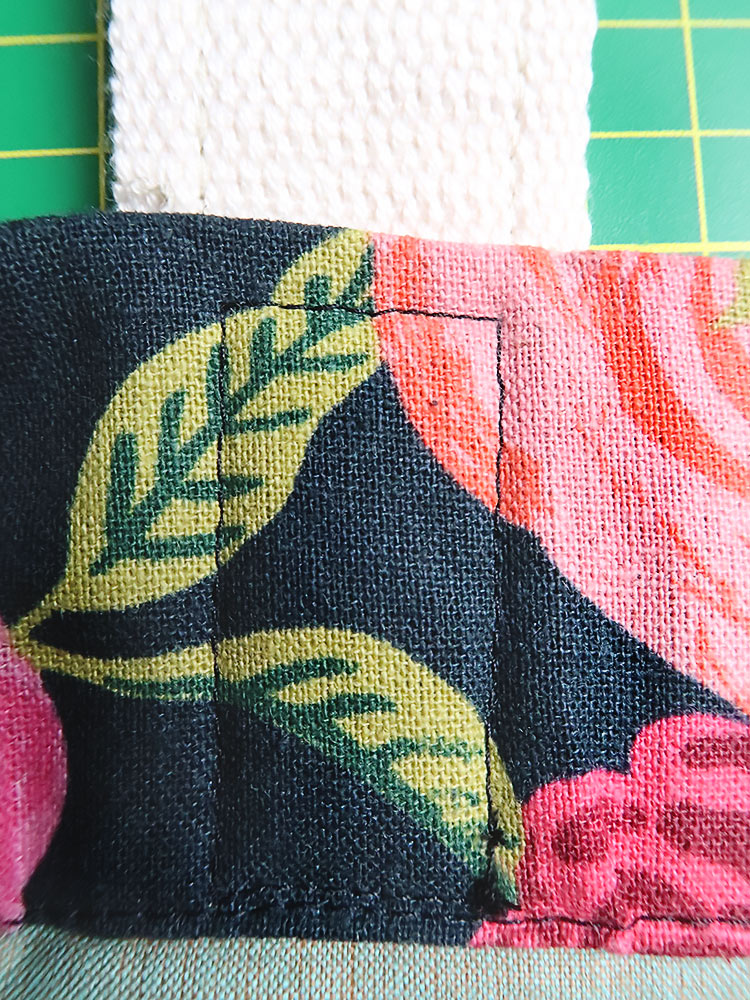
- Stitch an open box (just a rectangle – no X through the center as is sometimes done) within the canvas portion of the strap. Do not cross over the topstitching or encroach onto the webbing. The box should be about ¾” wide x 1½” high.
- Here is a close-up from the inside of the bag since this box is virtually invisible from the outside.

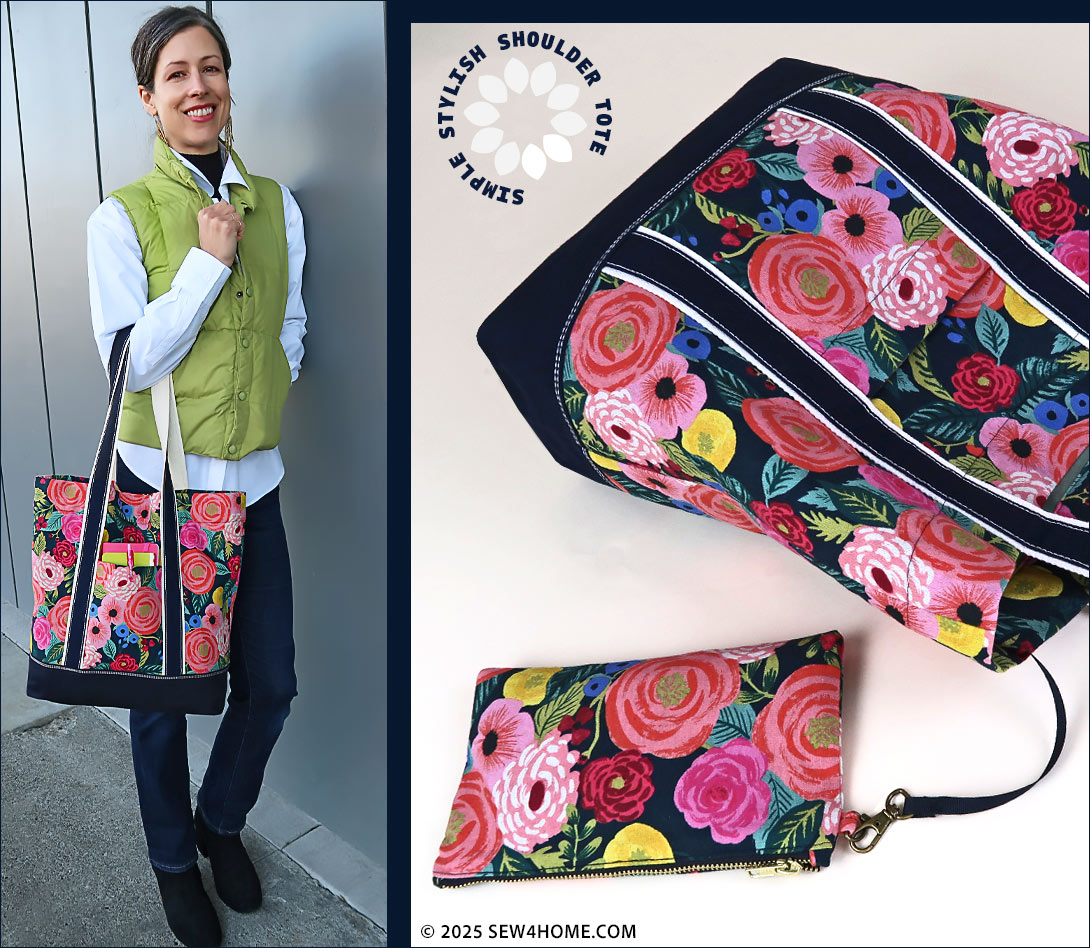
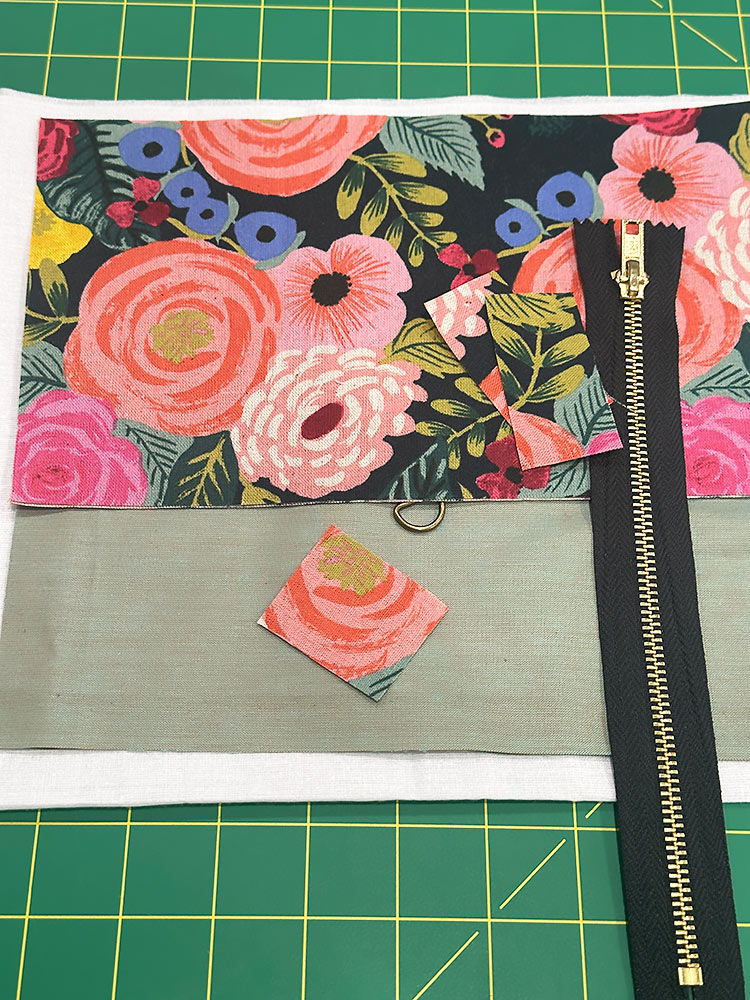
Optional pouch
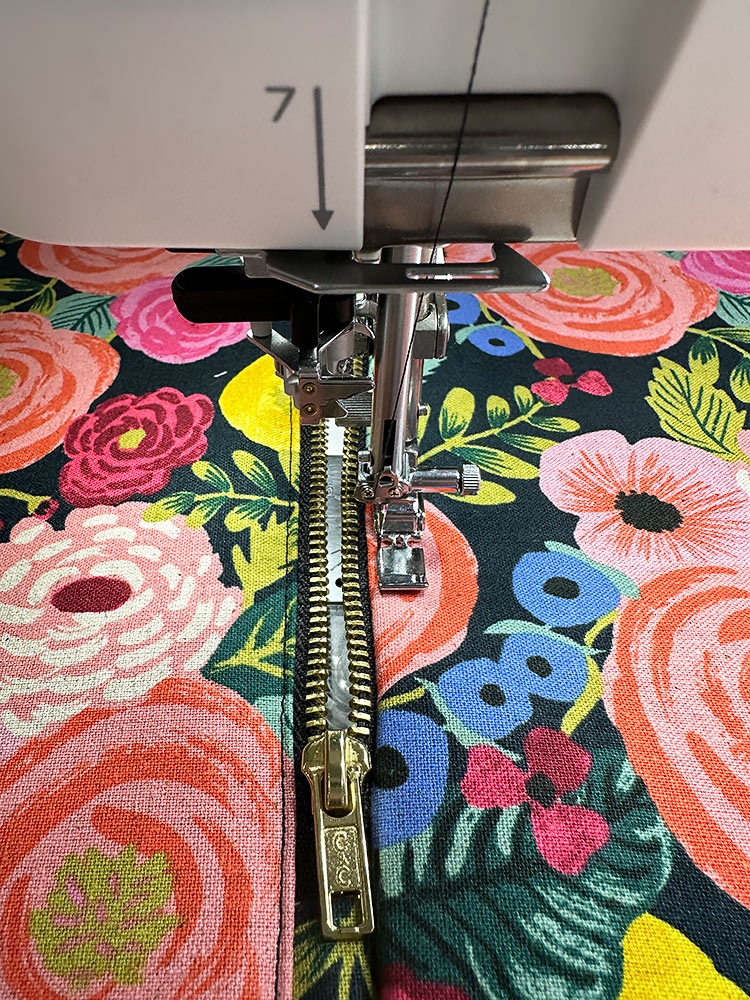
- We completed our drop-in zipper pouch in matching fabric, following this free S4H tutorial. It features the same exterior and lining fabric as the tote, some tiny exterior fabric squares for the zipper end tabs and D-ring loop, a panel of interfacing, and a 9” zipper.

- The companion tutorial is quite detailed and practicing the zipper insertion with end tabs is a skill you can use again and again.

- The original tutorial also shows how to make a custom lanyard. For this project, we simply used the interior lining’s ribbon lanyard.
Project Design: Anne Adams
Sample Creation: Debbie Guild
This project really takes me back! Just ten days ago I was wondering why I don’t have a “smaller” open tote (of my own creation; I have a few promotional ones from various businesses) and here you go tempting me to make one. Love the way the straps are sewn for that neat, professional look. I’ve always recommended S4H for its detailed, skill-building tutorials and this is a prime example.
Thank you so much! It was fun to come up with a tote that pulls together so many great bag basics 🙂 I hope you give it a go! As always, thank you for sharing the S4H love with your sewing friends.