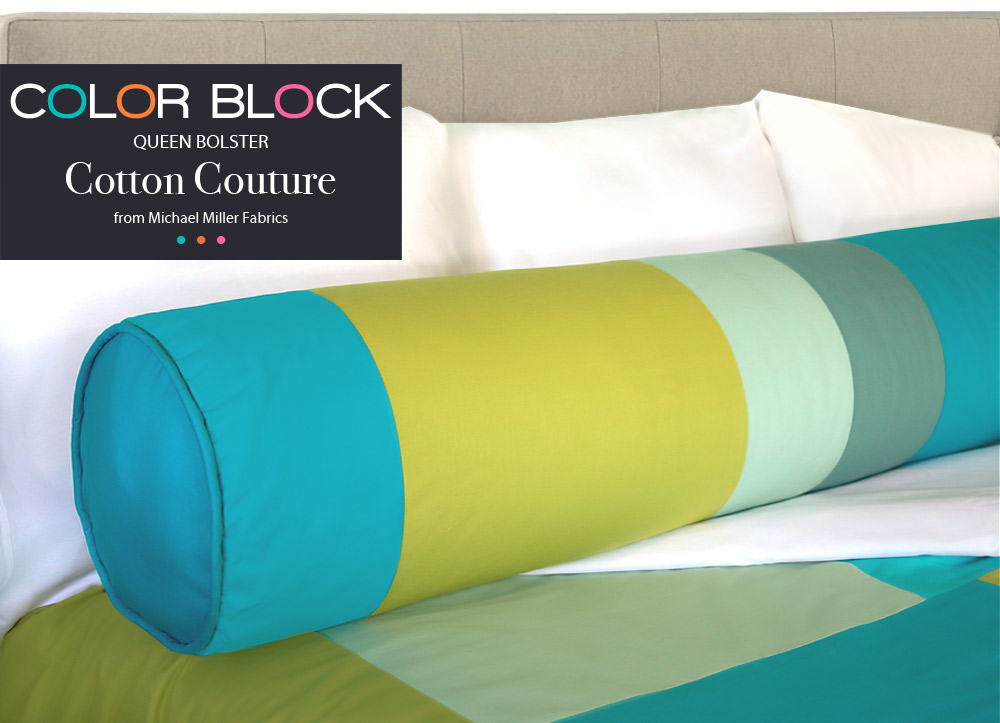
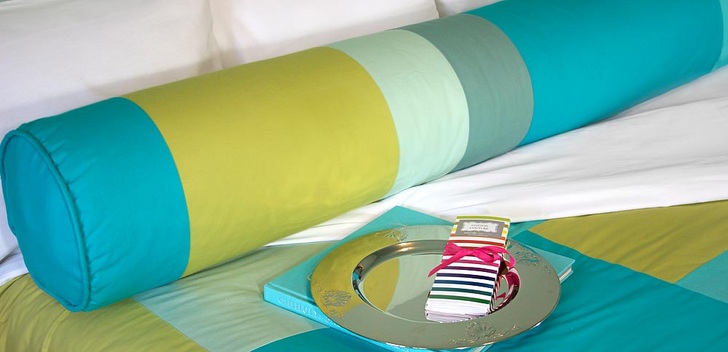
A bolster pillow is always a popular decorative choice for bed linens. Its long, rolled shape creates a distinct horizontal line, like a cushy fence holding in place all the pillows behind it. Bolsters can be any size, but we decided it would be wonderful to create one that spanned the entire width of a queen bed. This beauty is 60″ wide!
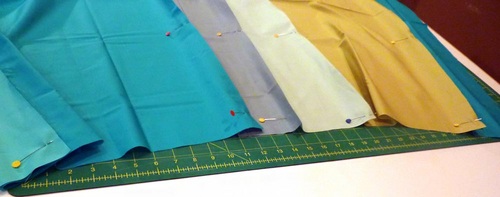
We used cool aqua blues and soft grass greens to create our dream worthy bed-width bolster. Today’s quality quilting cotton collections offer a rainbow of choices from which to create a color block blend to perfectly match your own décor.
Sewing Tools You Need

- Sewing machine and standard presser foot
- Serger; optional, but makes finishing the long seams much faster
- Zipper foot
- Quarter Inch foot ; optional
Fabric and Other Supplies
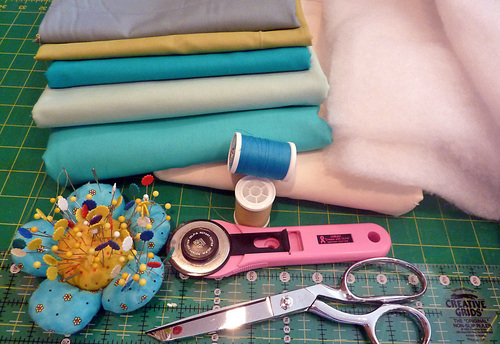
- FIVE coordinating quilting weight cotton colors; we originally chose colors from the Cotton Couture collection by Michael Miller Fabrics; Turquoise, Kryptonite, Mint, Jade and Luna. Our color block blend is shown below. Follow our recommendations or choose your own.

Turquoise: 1½ yard
Kryptonite: ½ yard
Mint: ¼ yard
Jade: ¼ yard
Luna: ¾ yard - 2 yards of 45″ wide fabric for the bolster’s lining; we originally used Vanilla from the Cotton Couture collection by Michael Miller Fabrics
- 2 yards of 96″ wide 16-ounce bonded batting; this type of super-wide width is sold by the yard at fabric retailers – you’re most likely to find it in the home décor or batting section of the store
- 2¾ yards of ⅜” piping cord
- 2 large bags of polyester fiber fill; we originally used Soft-Touch® Poly-Fil Supreme
- All purpose thread to coordinate with fabric
- See-through ruler
- Yardstick
- Iron and ironing board
- Scissors or rotary cutter and mat
- Fabric pen or pencil
- Straight pins
- Seam gauge
- Seam ripper
- Hand sewing needle
Getting Started
The cuts below are listed by the fabric colors within our sample. Simply refer to the diagram above to follow along and/or substitute your favorite colors.
- From the Turquoise, cut the following:
ONE 6½” x 33½” rectangle
ONE 24½” x 33½” rectangle
ONE 11″ x 11″ square
Use the remaining yardage to cut multiple 2″ wide strips on the bias. You need a finished length of 39″. - From the Kryptonite, cut the following:
ONE 14½” x 33½” rectangle - From the Mint, cut the following:
ONE 6½” x 33½” rectangle - From the Jade, cut the following:
ONE 6½” x 33½” rectangle - From the Luna, cut the following:
ONE 4½” x 33½” rectangle
ONE 11″ x 11″ square
Use the remaining yardage to cut multiple 2″ wide strips on the bias. You need a finished length of 39″. - From the Vanilla, cut the following:
ONE 60½” x 33½” rectangle
TWO 11″ x 11″ squares - Cut the bonded batting down to 60″ in width. Keep the full 2 yard length.
At Your Sewing Machine & Ironing Board
Creating the end caps
- Find the two colored 11″ x 11″ squares and the two lining squares.
- Fold and press one 11″ x 11″ square in half and then in half again, creating intersecting crease marks.
NOTE: You do not have to press the crease marks with an iron; you can simply fold by hand and finger press. - Lay the folded square on your work surface so the center point is in the lower left corner of the square. Folded, it is now just 5½” x 5½”.
- Place a see-through ruler or tape measure at the exact center of this lower left corner, and swing the ruler/ tape from the top to the bottom of the square, like a compass or pendulum, measuring and marking a dot at the 5¼” point in three to four spots. You are creating a semi-circle.
- Draw an arc to connect the marks. If you own a large compass, you could also use it to create your 5¼” arc.
- Cut along your drawn line.
- Repeat to fold and cut the three remaining 11″ x 11″ squares.
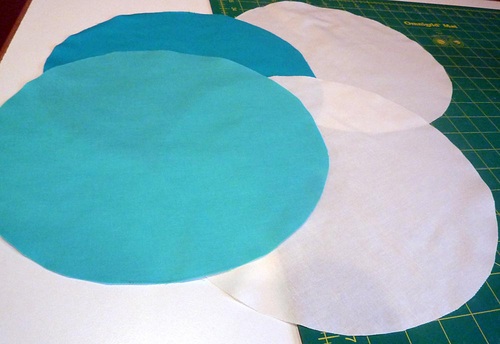
- Unfold all the pieces; you’ll have four 10½” circles.
- Press the circles flat to remove the creases. Set them aside.
NOTE: We also have a full tutorial you can review on drawing circles. If you don’t feel like practicing your geometry skills, you could also find a household item with a 10½” diameter, such as a pot lid or dinner plate, and use it to trace your circles.
Sewing together the bolster panels
- Find all SIX 33½” colored rectangles.
- Line them up following the diagram above.
- With right sides together, pin the first and second panels together along one 33½” side.
- Sew together, using a ¼” seam allowance.
- Press both seam allowances toward the darker of the two colors.
- Repeat, moving from left to right and adding one panel each time until you have the finished six-panel piece.
- Your final sewn piece should be 60½” x 33½”.
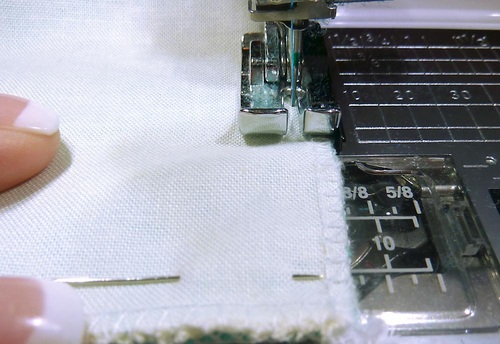
- Place the 60½” x 33½” lining rectangle against the wrong side of this finished exterior panel-piece. Pin around all four sides.
- Using a zig zag stitch on your sewing machine or your serger (we used a serger), go around the entire perimeter of both layers. You are attaching the layers together and finishing the edges at the same time. By attaching the layers, you can work with this panel as one piece during the remainder of the construction.
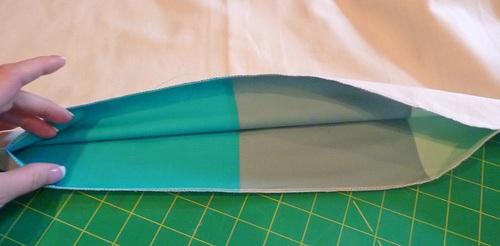
- Fold this panel right sides together lengthwise to create a long tube. Pin together along the 60½” edge.
- Sew together, using a ¼” seam allowance. We used our Quarter Inch foot to easily maintain a perfect line across this VERY long seam.
- IMPORTANT: Stop and re-start your seam to leave a 20″ opening in the middle. You’ll need the opening later to turn the whole thing right side out and through which to insert the batting. Remember to lock your stitch on both sides of this opening.
- Press the seam allowance open, including at the opening; it should be pressed back at ¼” so it is flush with the sewn seam.
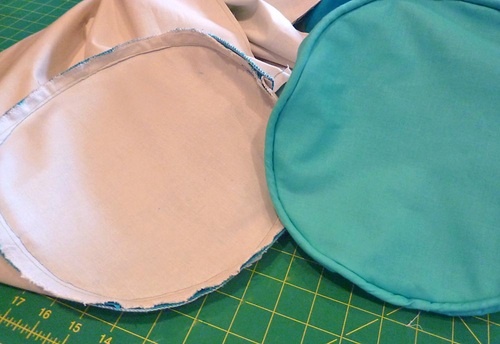
Line the end caps and set up marking points
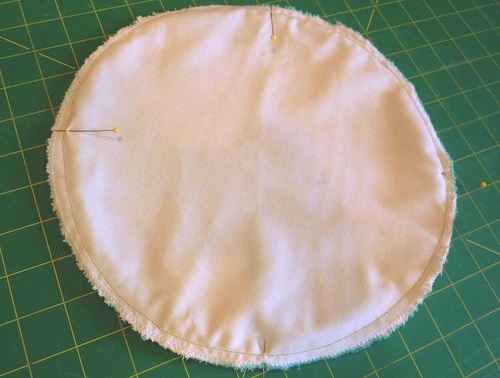
- Find the four end cap circles.
- Place a lining circle against the wrong side of each colored circle.
- Pin all around.
- As above, using a zig zag stitch on your sewing machine or your serger (we used a serger), go around the entire perimeter of both layers of each circle pair. You are attaching the layers together and finishing the edges at the same time. As above, by attaching the layers, you can work with each end cap as a single piece during the remainder of the construction.
- Fold the circle in half and then in half again to find the four quarter points on the circle. Make each point with a pin. It’s like the 12:00, 3:00, 6:00 and 9:00 points on a clock face.
NOTE: This whole end cap process is the same as what you’d done to insert any flat round base into an open round tube. If you’re new, check out our full step-by-step tutorial prior to starting.
- Set the lined end caps aside.
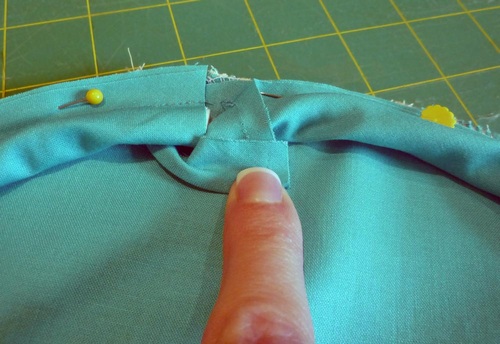
- In order to create marks on the bolster tube that will line up with the pin marks on each end cap circle, you need to press the ends of the tube carefully. First, press the seam open (which you should have already done above).
- Then, gently pull the seam to the right, so you can press a fold directly opposite the seam.
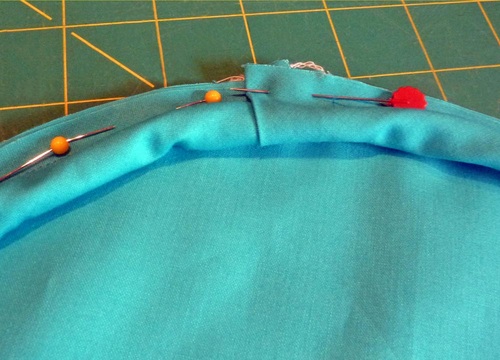
- Now, gently pull the tube in the opposite direction, matching up the seam and the first crease, and press two additional creases at each side.
- Remember, you are only pressing the very end of the bolster, just enough to place your pins. The seam line and the three pin marks will now match the quadrant pins on the end cap circles.
NOTE: Again, don’t forget about our full tutorial about inserting a flat base into a tube.
Piping
- If this is your first time making piping, see our tutorial, How To Make And Attach Your Own Piping.
- Stitch together your 2″ bias strips as needed to create TWO 39″ finished lengths. One in the Turquoise color and one in the Luna color.
- Cut the ⅜” piping cord into two 39″ lengths.
- Wrap the fabric around the cord. Pin close to the cording to hold it in place.
- Using a Zipper foot, sew close to the cording to create your fabric covered piping.
- Find the Luna end cap circle. Pin the length of Luna piping around the circle, aligning the raw edges.
- Remove excess cord from the piping by pulling the cord out and trimming about ½” from the end; you want the two ends of the piping cord to be flush with one another where they meet around the circle.
- Over lap the fabric and complete pining.
- Using a Zipper foot, stitch in place. Keep your stitching as close to the piping cord as possible.

- Repeat to attach the Turquoise piping to the Turquoise end cap circle.
- Again, if you’re new to attaching piping, check out our tutorial for additional tips on joining and finishing.
Insert the end cap circles
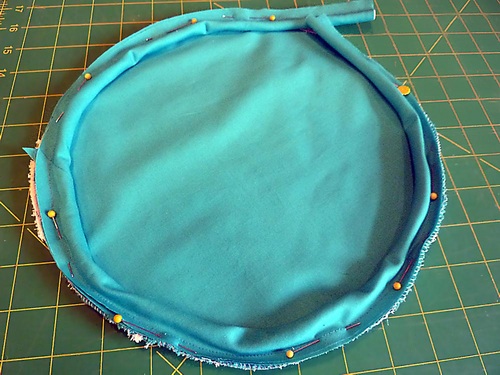
- Place one end cap circle inside each end of the bolster tube. Our ends are designed to match the color of each outside panel of the tube, which means you match Luna to Luna and Turquoise to Turquoise.
- Set the end cap into the tube, right sides together. Line up those helpful pins you placed above. This is similar to how set-in sleeves are sewn. Pin in place around the entire circle. Don’t be afraid to use plenty of pins.
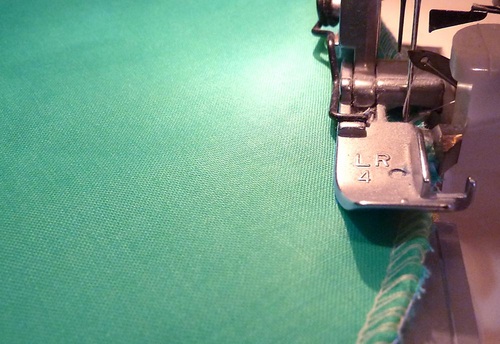
- Now you are now going to ‘stitch in the round.’ Place the pinned end of the tube so the raw edge is flipped up a little under the sewing machine foot. This will make it easier to sew around the circle.
- Using a ¼” seam allowance, sew around the circle through all the layers.
- Repeat to attach the opposite end cap.
NOTE: At the risk of becoming annoying, if you’re new, don’t forget to read through our Flat Base into a Tube tutorial.
- Turn the bolster right side out through the opening in the tube.
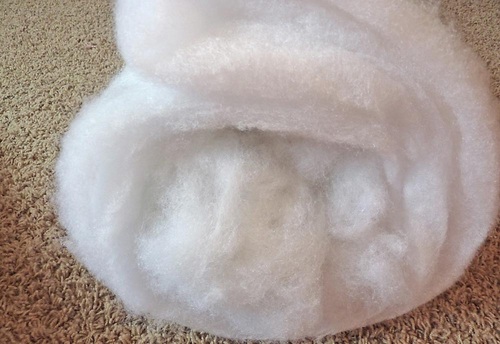
The batting insert
- Find the 60″ x 72″ piece of bonding batting.
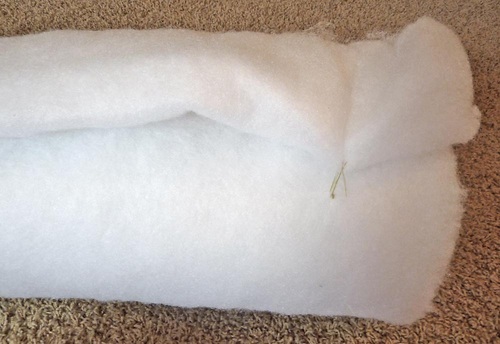
- Roll it up like a cinnamon roll.
- Tack the end of the batting at four or five points to hold the roll in place.
- For added fullness, you can stuff handfuls of Poly-Fil into both ends of the tube. Stuff to your desired thickness. Be gentle with your stuffing, you want to avoid any ‘waves’ across the tube.
- Insert the tube of batting into bolster cover through opening.

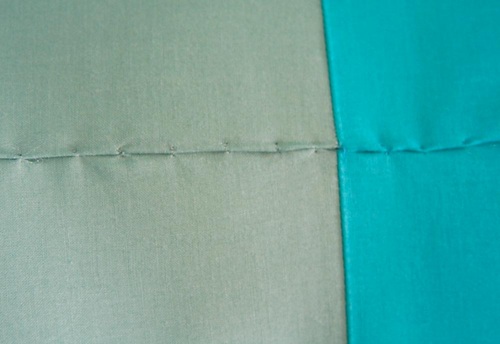
- Take a good look and make sure you are super happy with the loft of the bolster. Add more stuffing if you feel you need more (or remove some if you think it’s too plump). Our design is stitched closed, so stuff now or forever hold your peace. Bolsters are traditionally meant to be decorative and, therefore, are usually just spot-cleaned.
- Thread a hand sewing needle with matching thread, and slip stitch the opening closed.
Project Design: Alicia Thommas
Sample Creation and Instructional Outline: Debbie Guild