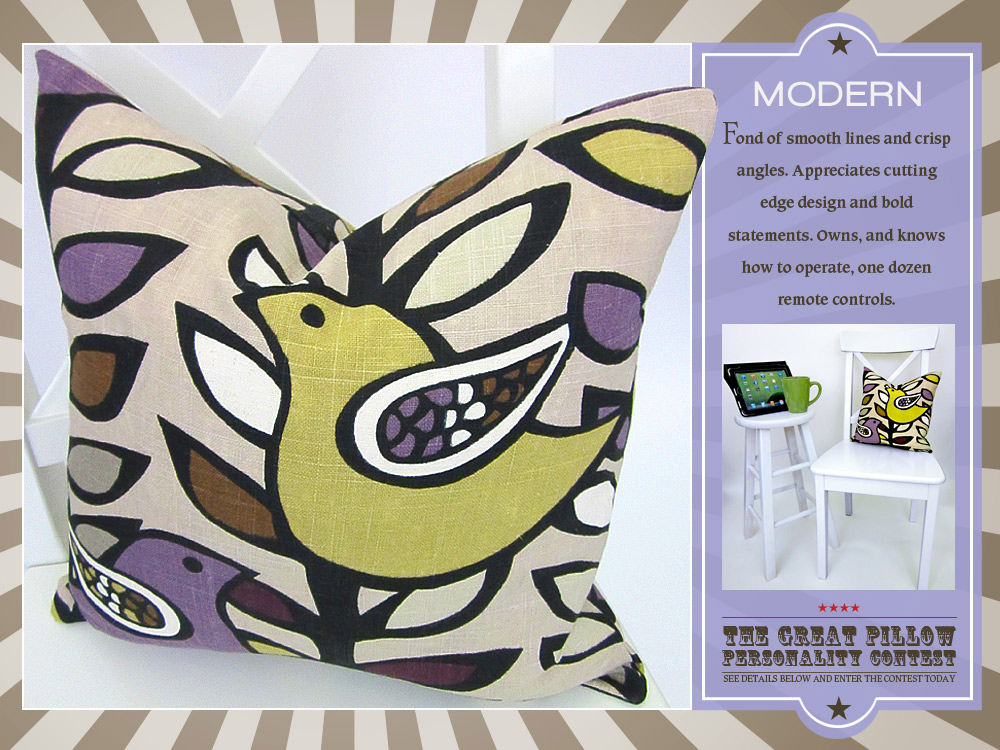
A pillow doesn’t need a lot of extra fol-de-rol to have plenty of personality. (Okay… the Cinderella lovers can sing along with me now: “All the sensible people of this world will say, fol-de-rol and fiddle-dee-de and fiddley, faddley foddle… all the wishes in the world are poppy cock and twoddle.”) Today’s pillow is super simple: cut, sew, stuff – done. The tricks are to find the perfect fabric, spend the extra time to fussy-cut your squares to best showcase the motif, then pick a super cushy insert, like Fairfield’s Feather-Fil® for that high-end, karate-choppable look.
A pillow like this takes just half a yard of fabric, so you can indulge in a more expensive choice without breaking the bank. Even spending a bit more, you’ll still come in way under those pricey pillows you’ve seen in the high-end stores and catalog. Plus… yours will be a one-of-a-kind original.
Fairfield products are easy to find! They’re available at the big box stores, national fabric stores, as well as your favorite local quilt shop.
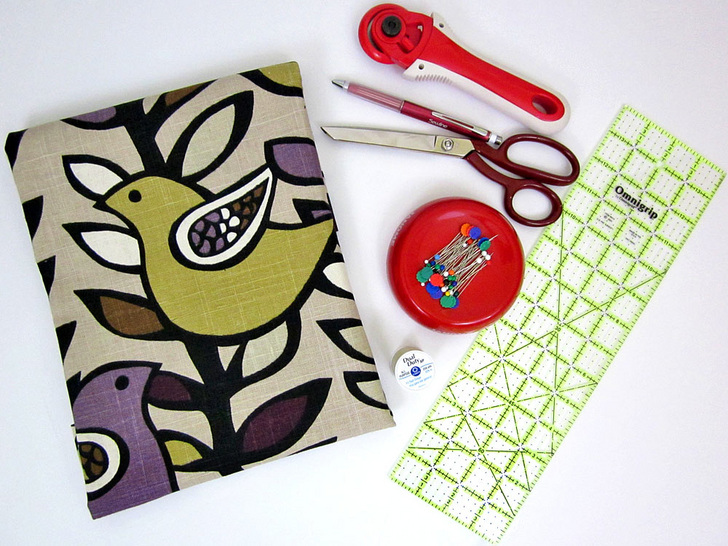
Sewing Tools You Need
- Any sewing machine (we recommend the Janome Hello Kitty 15822)
- Clear View Quilting Foot and Guide Set (optional)
Fabric and Other Supplies
- ½ yard of 54″ wide décor weight fabric; we used Oslo in Amethyst by Richloom, available at Fabric.com
- One 16″ x 16″ Feather-fil® insert from Fairfield: 95% feather and 5% down with a heavy-weight 100% cotton cover
- All-purpose thread to match fabric
- See-through ruler
- Fabric pen or pencil
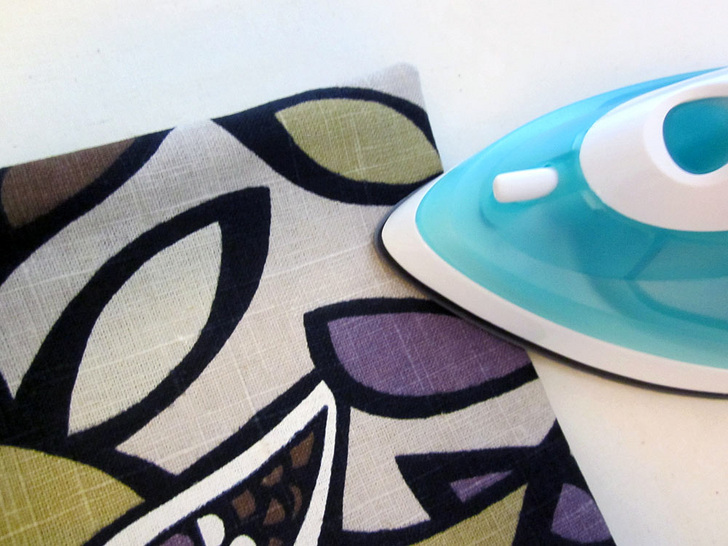
- Iron and ironing board
- Scissors or rotary cutter and mat
- Seam gauge
- Seam ripper
- Straight pins
- Hand sewing needle
- Tissue or pattern paper (optional for fussy cutting)
Getting Started
- From the decorator fabric, fussy cut TWO 16″ x 16″ squares.
NOTE: For pillows where it’s ALL about the fabric (there are no additional embellishments), we like to cut a pattern from tissue paper or other semi-transparent paper in order to really be able to see the motif and get the very best cuts possible. We then lay a see-through ruler along the edge of the paper and cut with a rotary cutter.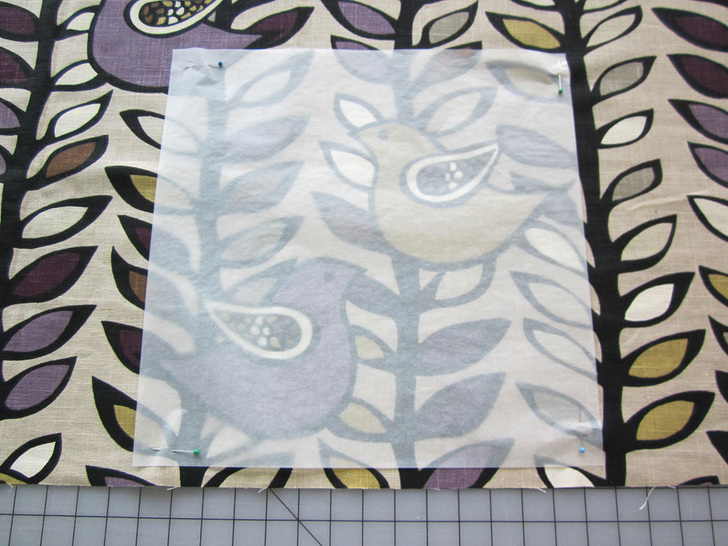
At Your Sewing Machine & Ironing Board
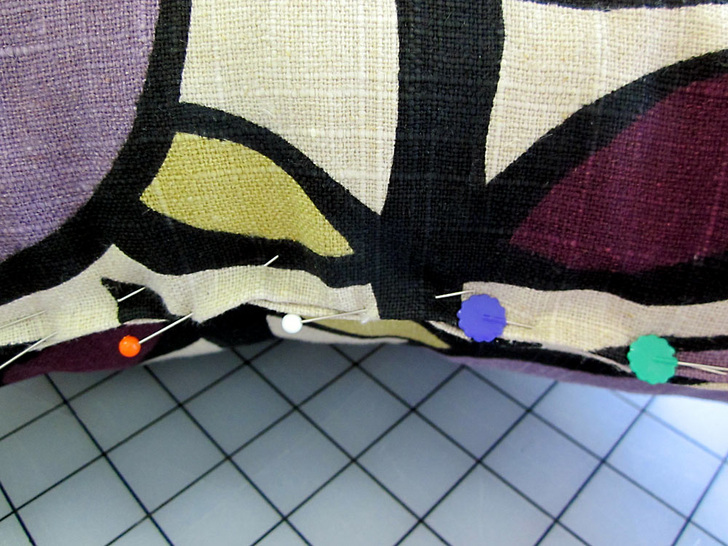
- Place the two squares right sides together, aligning all four raw edges. Pin in place all around, leaving an approximate 7″ opening along the bottom edge.
- If you have a directional fabric as we did, make sure both sides are facing the proper direction.
- Using a ¼ – ½” seam allowance, sew around all four sides. Remember to pivot at the corners and to lock your seam at both sides of the 7″ bottom opening left for turning.
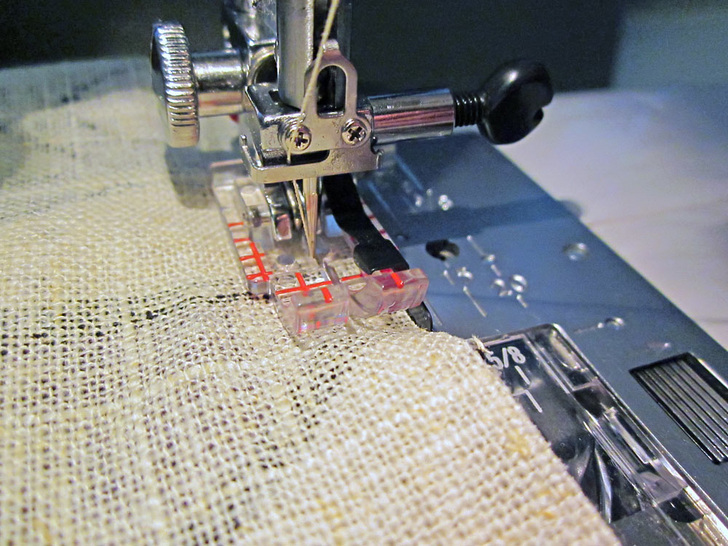
NOTE: As we’ve mentioned throughout our series, you want your pillow cover to finish from ½” – 2″ smaller than your pillow insert. Because we wanted a little extra room for a cushier pillow, we opted to stay on the large end of the scale. I used my Janome Clear View Quilting Foot and Guide Set to get a perfect ¼” seam, which gave me a finished cover size of 15½” x 15½”. - Trim all four corners at a diagonal. For more about corner-cutting, see our tutorial.
- turn the cover right side out through the opening and press flat.
- Turn under the raw edges of the opening used for turning so they are flush with the sewn seam. Pin closed.
- Insert the pillow form, we used a wonderfuly “smashable” Feather-Fil® insert from Fairfield. Gently fluff it into each corner, working from the farthest side out toward the opening.
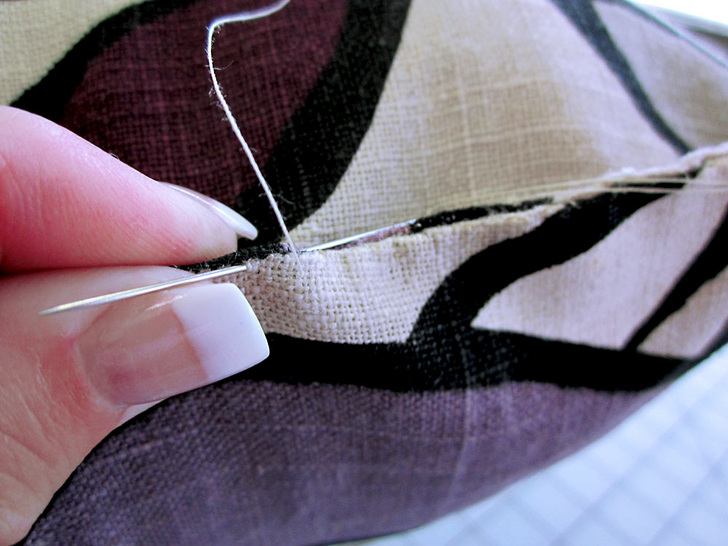
- Thread a hand-sewing needle with matching thread and slip stitch the opening closed. Use small stitches to keep your work as unnoticeable as possible.
Project Design: Alicia Thommas
Sample Creation and Instructional Outline: Liz Johnson