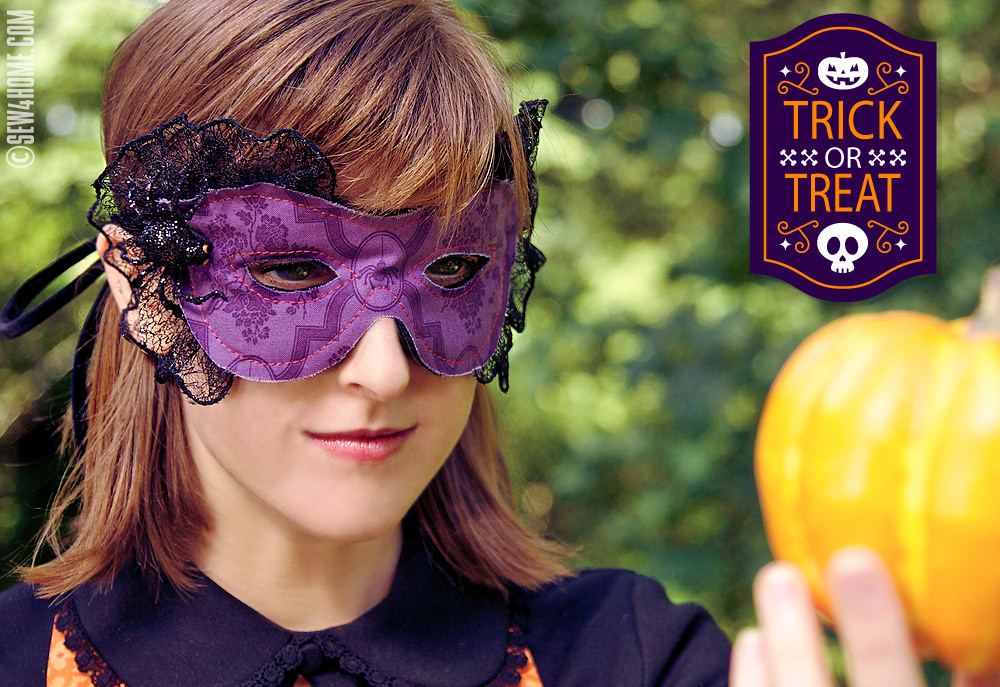
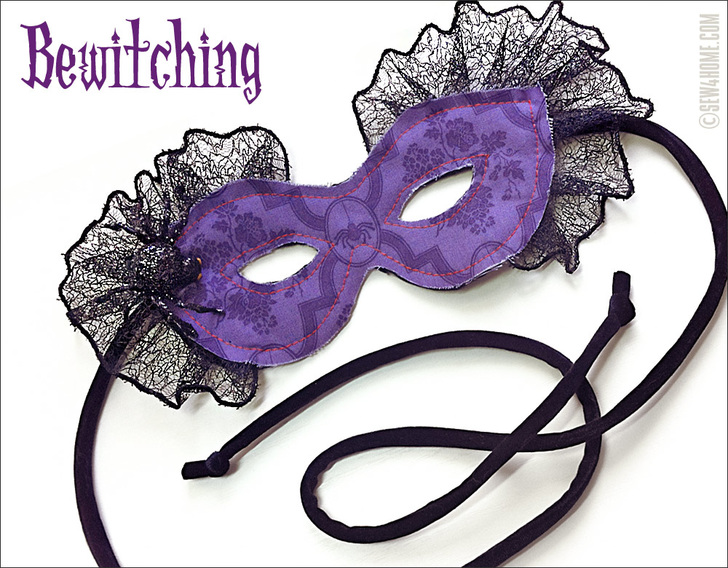
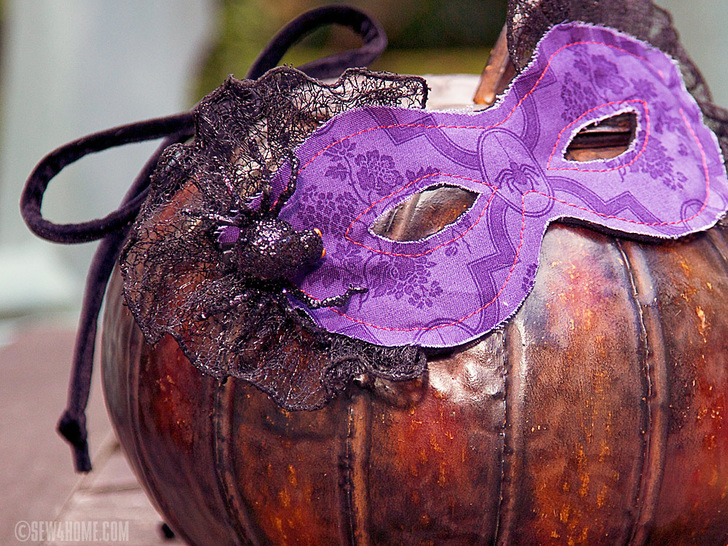
A little wicked glamour and a wicked little spider come together to make a spellbinding Halloween mini mask. It’s what the most beguiling witches are wearing this season; combining spider web construction with a practical soft fleece backing. Your jeweled spider continues to weave its web while you bewitch those who dare to cross your path.
This mask fits an average adult witch. When you download and cut out the free pattern, you can use it to check and make sure the eye holes align properly. Adjust the holes if necessary before you cut your fabric.
The Haunted Mansion collection we used originally is no longer readily available, but there are lots of other bewitching new Halloween fabrics from which to choose, new options debut each season. You need just a small bit of fabric; we used a 10″ x 10″ pre-cut Layer Cake square.
The mask itself finishes at approximately 8¾” wide x 3¾” high, excluding the lace, which will depend on the width of ribbon you use. Ours was 2″.
Sewing Tools You Need

- Sewing Machine and standard presser foot
Fabric and Other Supplies

- Layer cake square (10″ x 10″) or scrap of fabric approximately 10″ x 5″
- One 10″ x 5″ scrap of black polyester fleece – thick wool felt could also work
- 1 yard of apx. 2″ wired-edge ribbon, we originally found our crazy web ribbon at a local craft store
- 1 yard soft black velvet cording
- 1 spider, we also found our sparkly spider at a local craft store
- Thread to match or contrast; we used contrasting thread
- Small sewing scissors, plus your junk drawer scissors to cut the wired-edge ribbon
- Straight pins
- Seam gauge
- Sram ripper
- Tape measure
- Lint roller
- Hand sewing needle
Getting Started and Pattern Download
- DOWNLOAD AND PRINT THE PATTERN.
IMPORTANT: This pattern download consists of ONE 8½” x 11″ sheet. You must print the PDF file at 100%. DO NOT SCALE to fit the page. There is a scale box on the page to insure your printout is the correct size. Print horizontally (landscape). - Cut out the pattern along the solid line.
- Place the pattern on the main fabric and cut ONE mask. We fussy cut our fabric to position a spider right above the nose.

- Place the pattern on the polyester fleece and cut ONE mask. We used a lint roller to gently remove the loose fleece bits after cutting out the panel.

- Cut the yard of velvet cording in half to yield TWO 18″ lengths.
- Cut TWO 16″ lengths of wired-edge ribbon.
- Trim off ONE wired edge, approximately ¼” from the wire as shown below.
NOTE: Remember to use your junk scissors on the wire ribbon so you don’t damage your good sewing scissors.

- Hand gather the raw edge of the ribbon with a hand needle and thread, using a loose running stitch to hold the gathers in place. Then pin the gathered ribbon to the wrong side of the main fabric mask as shown in the photo below. It helps to use your fingers to create a similar gather along the wired edge first. Be sure to tuck the cut ends to the underside of the fabric so there are no wires poking out. Don’t be afraid to use plenty of pins to get the look your want.

- Hand baste the wired ribbon to the mask as shown below. This gets all those pins out of the way and makes finishing the mask easier.

- Turn the mask over and trim away any extra bits of ribbon that might interfere with the eye holes.

- Flip the mask so it is again right side up.
- Tuck a length of the velvet cord at either side of the mask. The ends should be placed between the fabric and ribbon layers so the cord lays across the ribbon. Align the cord with the eye holes as shown in the photo below. The ends should be inserted behind the fabric approximately ½”, making sure they don’t poke into the eyeholes. Pin in position. You want the cord to come straight out, not slant up or down.

- Place the fleece against the back of the mask, sandwiching the wired edge ribbon and velvet cording between the layers. Pin in place through all the layers.


At Your Sewing Machine
- Set your stitch length to its maximum – what you would normally use for machine basting.
- Sew the mask together. GO SLOWLY! Keep your needle in the down position and pivot as needed. You are sewing all the way around the outer edge of the mask as well as around each eye hole. Your seam should be about ¼” from the raw cut edge of the layers.
NOTE: You can use either a matching or contrasting thread. We used bright red in the top and black in the bobbin to match the fleece. The plus side of using a matching thread is that your stitching will barely show, so any imperfections are difficult to see. The plus side of the contrasting thread is that it adds a little additional spark to the mask. - Tie a single knot at each end of the velvet ties.

- Sew a spider to the mask approximately where shown in our photo. Or, use your imagination!


Hints and Tips
We tried on the mask as we sewed so we could: 1) check the eye holes in pattern, 2) insure the velvet cording felt like it was in the right position before sewing, and 3) hold the spider to finished mask to find the best position. Watch out for pins! And spiders.
This is such a cute pattern for Halloween; I shall try making it. Thank you!
Hi Mealnie – Thanks! I hope you do make it – if so, we’d love to see a picture of you wearing it 🙂