
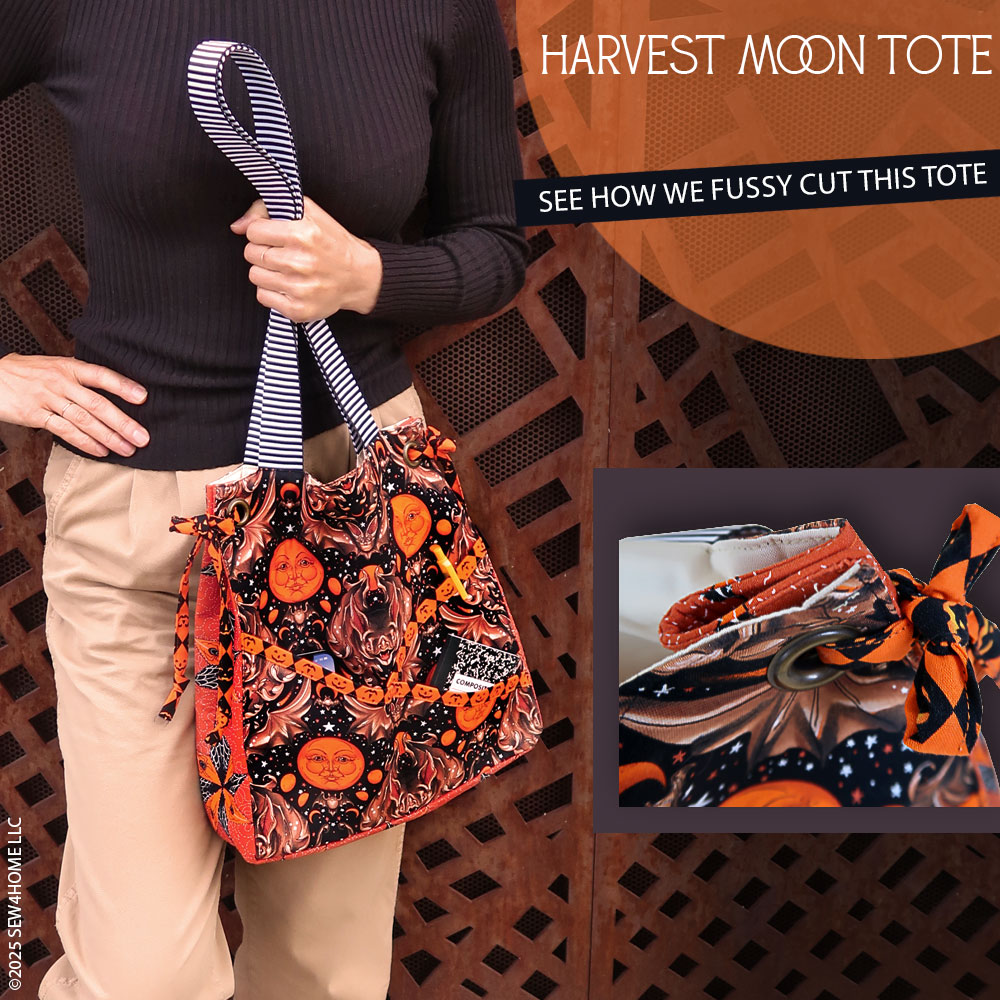
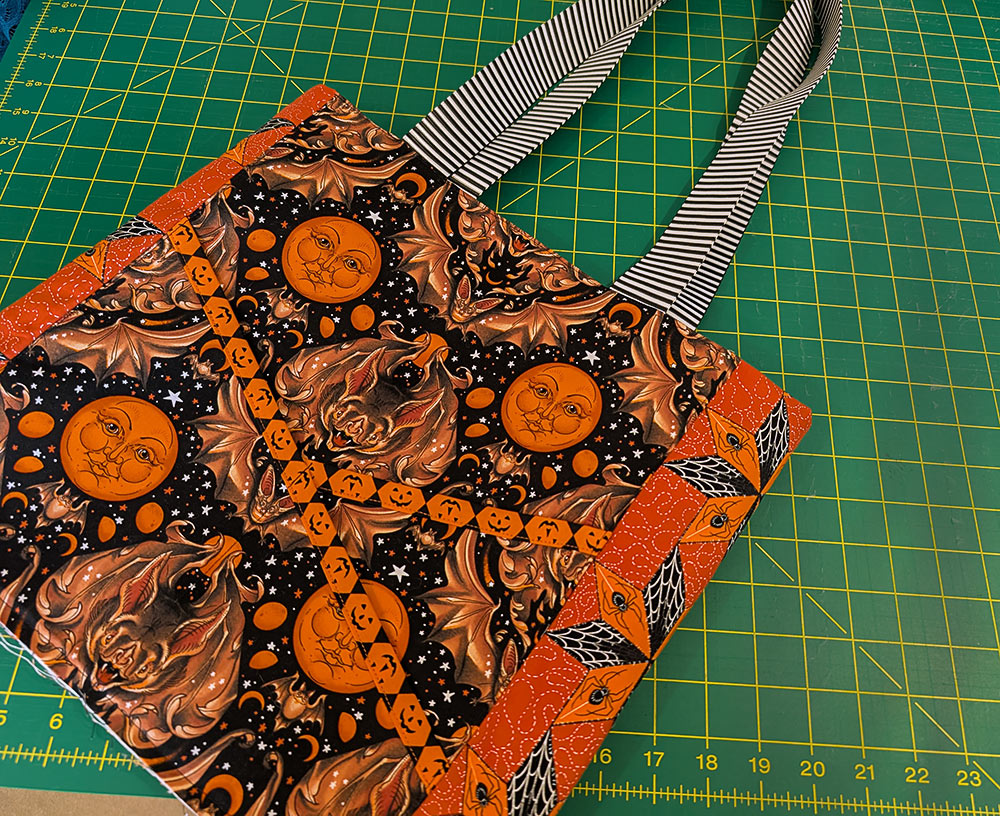
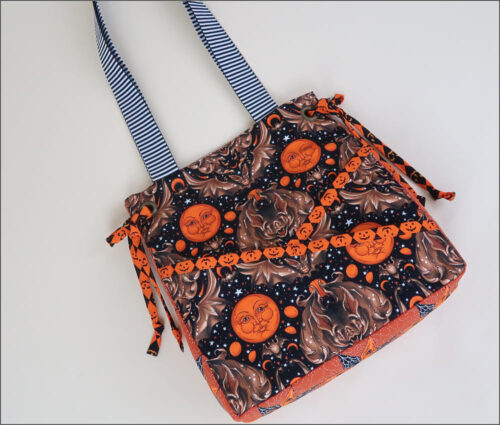
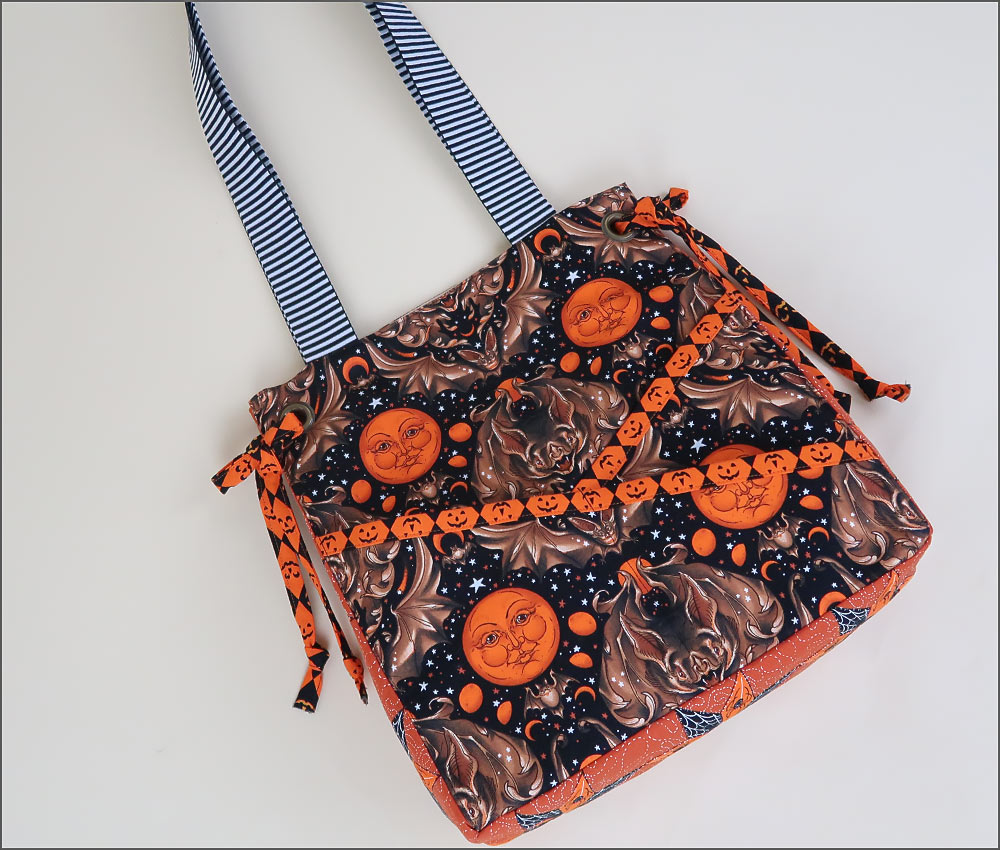
This terrific tote has a unique seasonal style, but its silhouette and structure are timeless and would be wonderful in any fabric combination. The project gives you a chance to fussy cut and pattern match, outline motifs with a quilting stitch, add pleated side grommets, and learn a clever binding trick that yields a perfect reveal and a smooth finish front and back.

We send our thanks to Janome America for their sponsorship of this project. Our tote is doable on any machine. We used the amazing top-of-the-line Continental M17, because it’s just super fun to sew with, but we would have had equal success with a mid-range Skyline S3 or an entry level Janome Loft 100. It’s one of the things we love about being a Janome Exclusive Studio: power, precision, and ease-of-use throughout their entire line. If you’re a S4H regular, you know we talk a lot about using the best machines; that’s because it’s so important. The easier, more precise, and more reliable your tools, the sooner everything becomes frustration-free and your own creativity takes over.
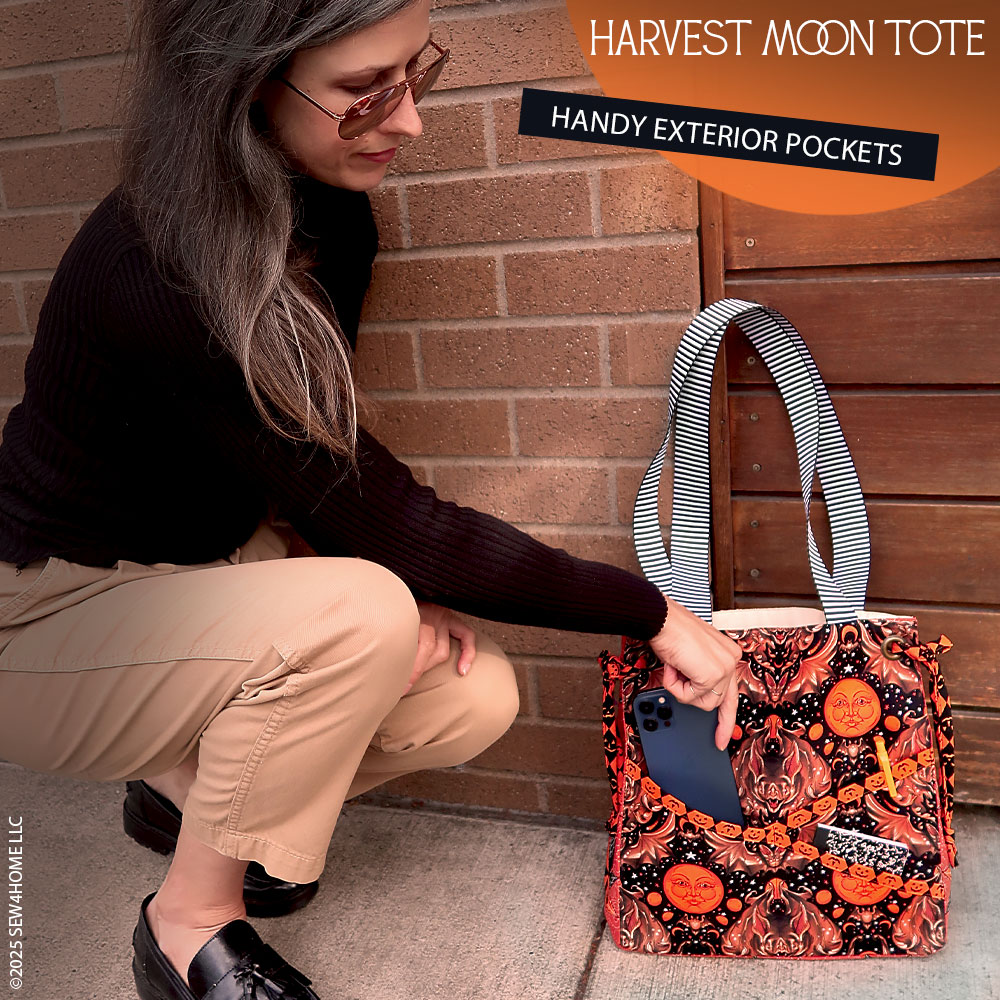
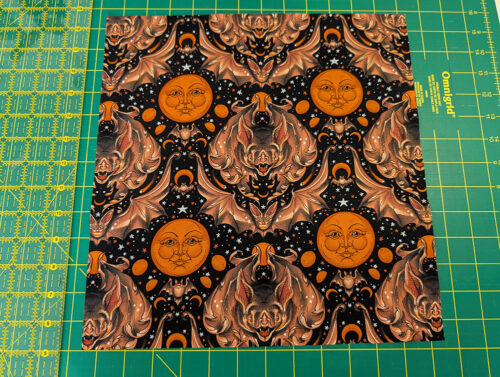
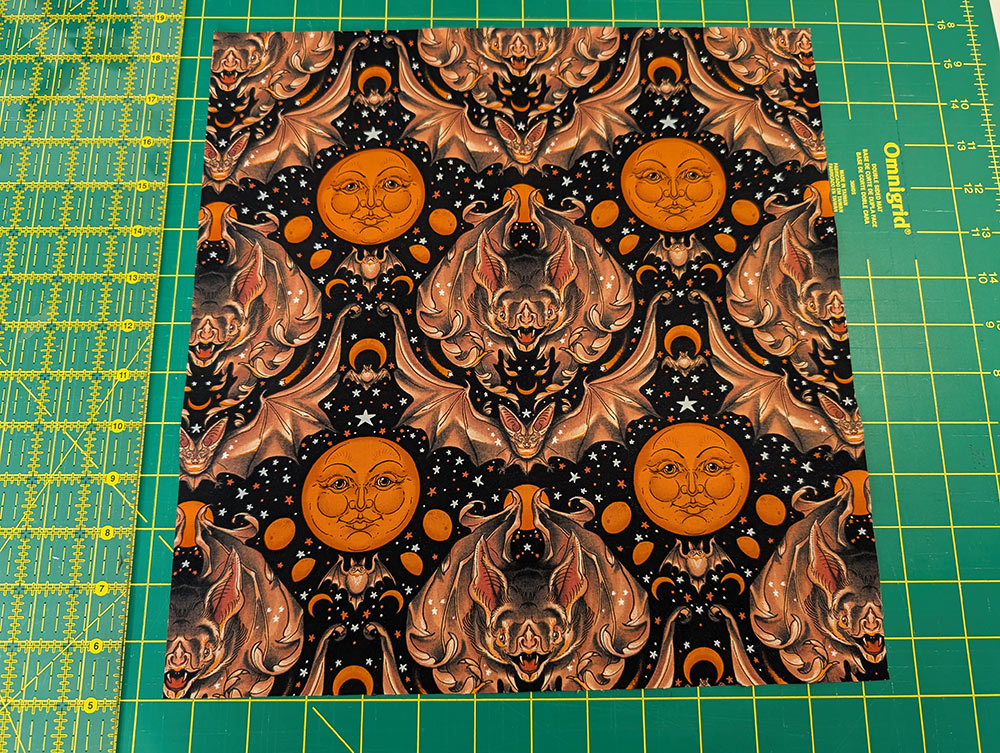
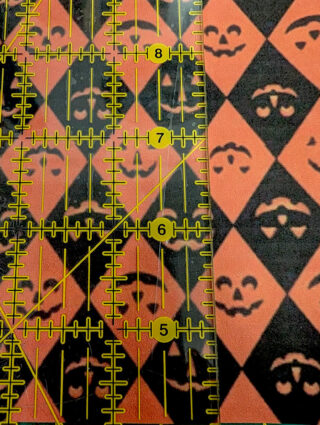
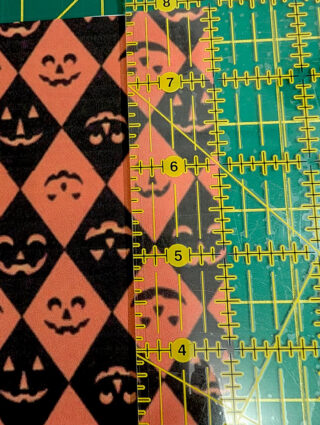
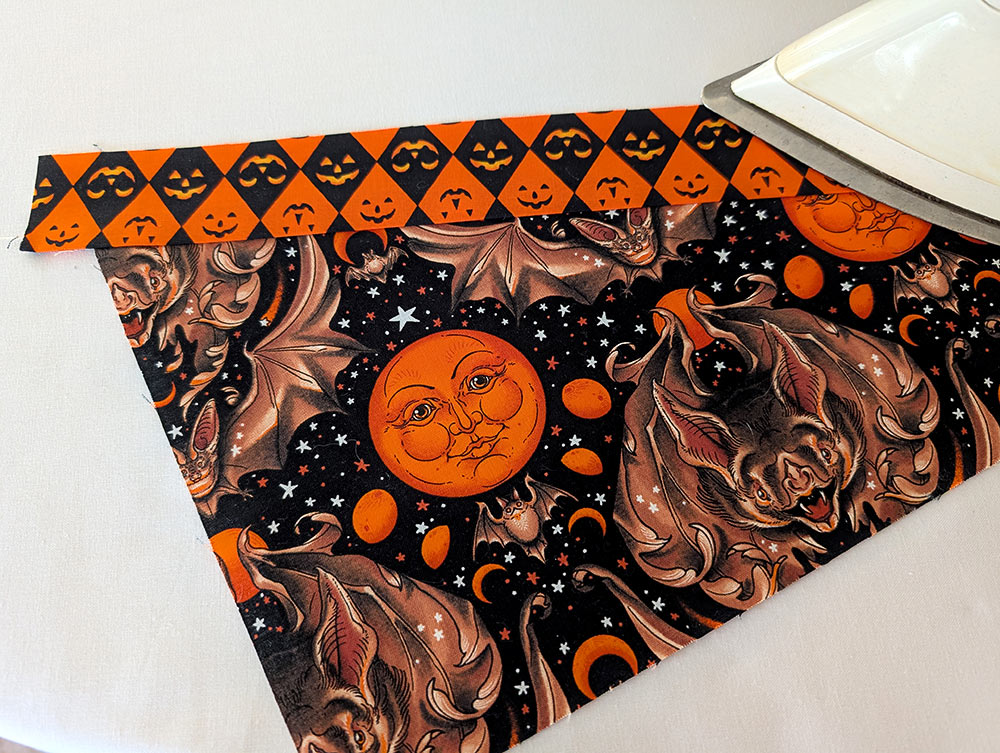
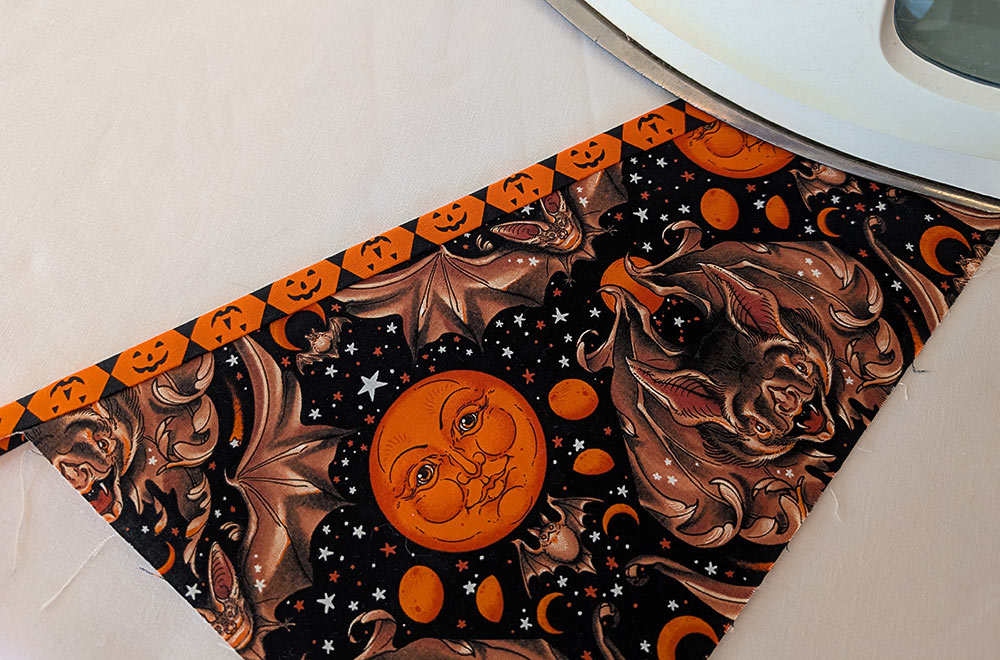
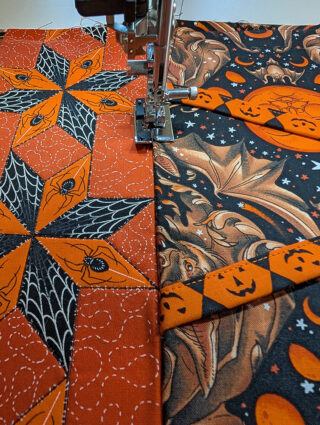
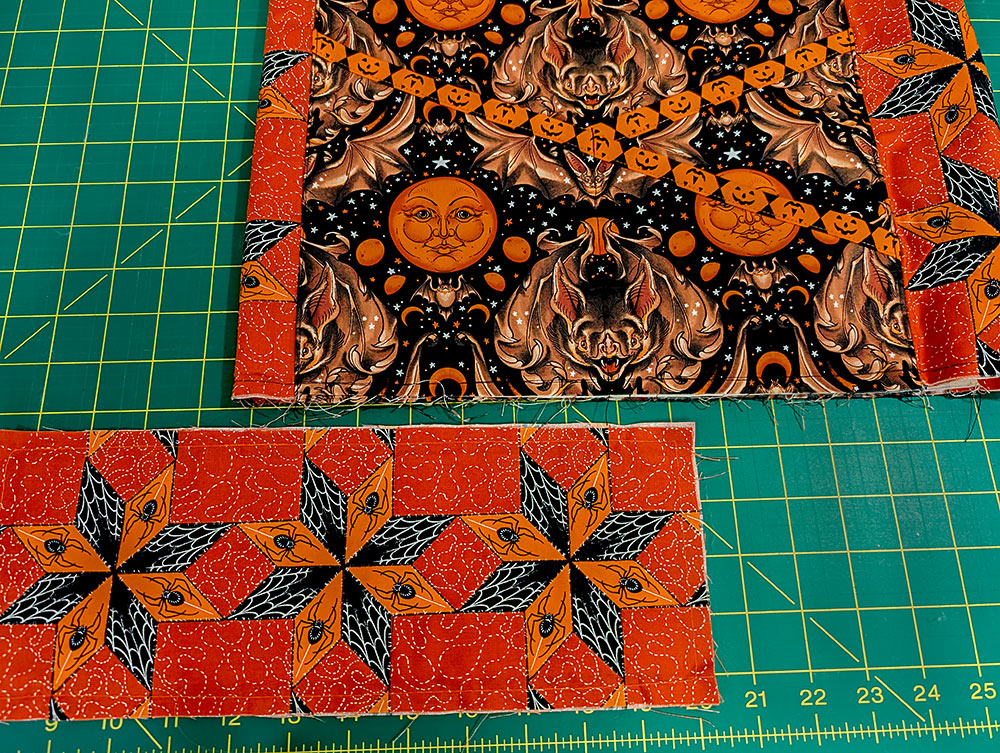
Our Halloween themed fabric includes beautiful bats swirling under full moons, spidery stars, and rows of grinning jack o’lantern faces. It’s all from the Costumes + Cobwebs collection by Club Hauer for FreeSpirit Fabrics. As always, fabric choices are ultimately up to the individual maker. That said, we did receive numerous shout-outs from the younger members of the S4H Team, claiming the gorgeously gothic look was perfectly on-trend and slay (you may need to look that one up; I did, but trust me – it’s good). All our cuts, including the solid color lining, are quality quilting cotton.
There are four things we think you’re going to love when constructing this tote. First off: the fussy cutting and pattern matching. When you have fabulous fabric motifs with which to work, make sure they are showcased. We explain our favorite steps for perfect pattern matching and link to our full fussy cutting tutorial should you want to learn more.

If getting the best from your binding drives you a little crazy, Love It #2 describes how we attached the binding along the front crossover pockets. We show you how to carefully measure and cut the binding strip, attaching it first to the front panel, then to the back panel. The two seams touch and create a natural fold line so you can bring the layers wrong sides together and topstitch for a clean finish. Still going a little crazy? No worries; we have step-by-step instructions and photos to take you through it.
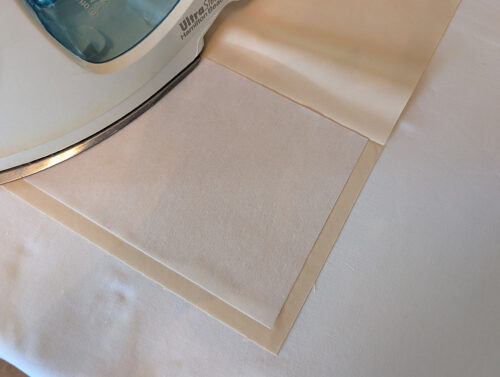
Our choice for stabilization is a fusible fleece, which gives a soft yet stable finish. It’s also a perfect platform for bringing a little texture into the mix. Our Janome machines have what we believe is the best fabric feeding in the industry, from their standard superior feed dogs to the AcuFeed™ Flex built-in feeding system. We put it to the test with a some outline quilting around the Stars and Spiders motifs on the side panels as well as on the base. Stitching around a fabric’s motif is easier than you might think, especially with a larger motif. We detail the presser feet we chose as well as our stitch settings. Try it, you’ll Love It (that’s #3).

Although you’re using these techniques on a tote, the tips will apply to lots of different projects. Learning something new to add to your sewing toolbox is always a good thing.
Our thanks again to Janome America for their support of this project and many of the other most popular projects across the S4H site. To understand more about why we are a Janome Exclusive Studio, we invite you to visit a local Janome dealer for an in-person test stitch on the machines we consider to be the best in the industry. To find out more before you go, visit the Janome website and follow them on social media.
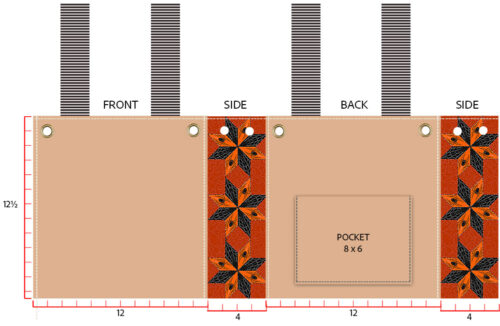
Our Harvest Moon Tote finishes at approximately 12” wide x 12½” high x 4” deep with two single loop handles with a drop of about 13”.
Sewing Tools You Need

- Sewing Machine and standard presser foot
- Blind Hem foot; optional but our recommendation for precise topstitching
- Open Toe Satin Stitch foot
Fabric and Other Supplies
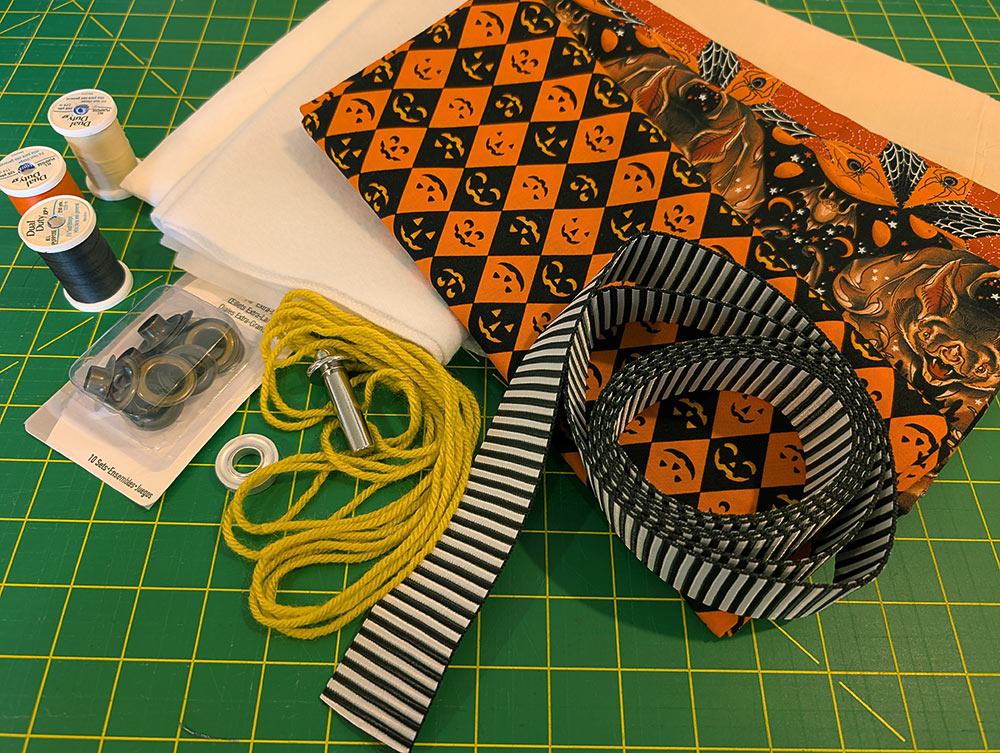
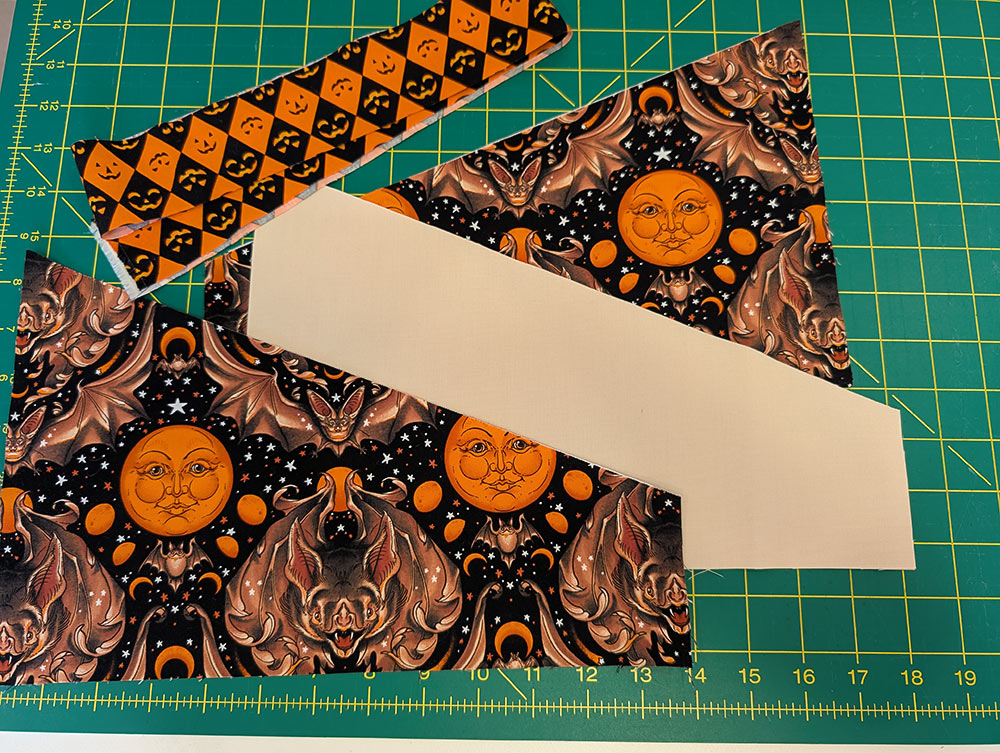
- 1 yard ** of 44”+ wide quilting weight cotton for the exterior front and back panels and the front pocket panels; we used Full Moon Flight in Black by Club Hauer for FreeSpirit Fabrics
NOTE: ** We used a full yard in order to do our fussy cutting and pattern matching (outlined below). If you are not fussy cutting (although that would be sad) and/or have fabric with a very random motif, you could get away with as little as ⅝ of a yard. - ¾ yard of 44”+ wide quilting weight cotton for the exterior and lining side panels and the exterior and lining base panels; we used Stars and Spiders in Orange by Club Hauer for FreeSpirit Fabrics
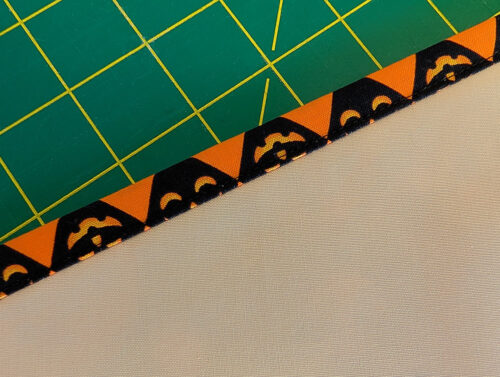
- ¾ yard ** of 44”+ wide quilting weight cotton for the front pocket binding, base panel interior binding, and the side ties; we used Jack of Diamonds in Orange by Club Hauer for FreeSpirit Fabrics
NOTE: ** We needed this larger cut in order to be able to cut our tie strips vertically and as full lengths and our pocket and base binding strips horizontally and as full lengths – no piecing. If you are not fussy cutting and/or have fabric with a very random motif, you could get away with as little as ¼ yard. - ⅝ yard of 44”+ wide quilting weight cotton for the front and back lining panels, the exterior pocket lining, and the lining pocket; we used Kona Cotton in Sand from Robert Kaufman fabrics
- ½ yard of 45” + wide fusible fleece; we used Pellon Thermolam Plus one-sided fusible fleece
- ½ yard of 45”+ wide mid-weight fusible interfacing for the exterior pockets and lining pockets; we used Pellon Décor Bond
- 2 yards of 1½” wide webbing for the handles; we used a black and white heavyweight striped webbing originally from Renaissance Ribbons – this webbing is no longer available through the vendor but any mid-to-heavyweight 1½” webbing will work.
- FOUR large eyelets/grommets – 7/16”; we used Dritz large eyelets in antique brass
- Appropriate setting tools for your grommets
- 3 yards of yarn or thin cording to stabilize the side ties – optional; we used standard knitting yarn
- All-purpose thread to match fabrics
- See-through ruler
- Fabric pen or pencil
- Iron and ironing board
- Scissors
- Rotary cutter and mat
- Seam gauge
- Seam ripper
- Straight pins
- Tissue paper or similar for fussy cutting/pattern matching
- Standard black marker or similar also for fussy cutting/pattern matching
- Seam sealant; optional for the ends of the side ties and to reinforce the holes for the grommets
- Small hammer to set grommets; we recommend a soft leather mallet or a ball peen hammer
- Heavy metal, stone or wooden block to use as a cutting and hammering surface for the grommets
Getting Started and Pattern Download
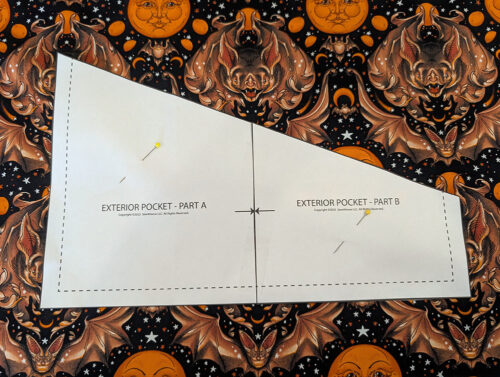
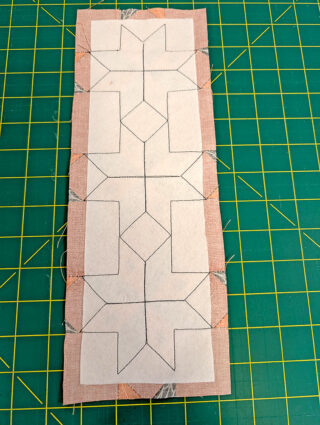
- Download and print out the TWO pattern pages that include the pieces for the front pockets.
IMPORTANT: Each pattern page is ONE 8½” x 11″ sheet. You must print the PDF file at 100%. DO NOT SCALE to fit the page. There is a guide rule on each page to confirm your final printout is to scale. Print horizontally (landscape).

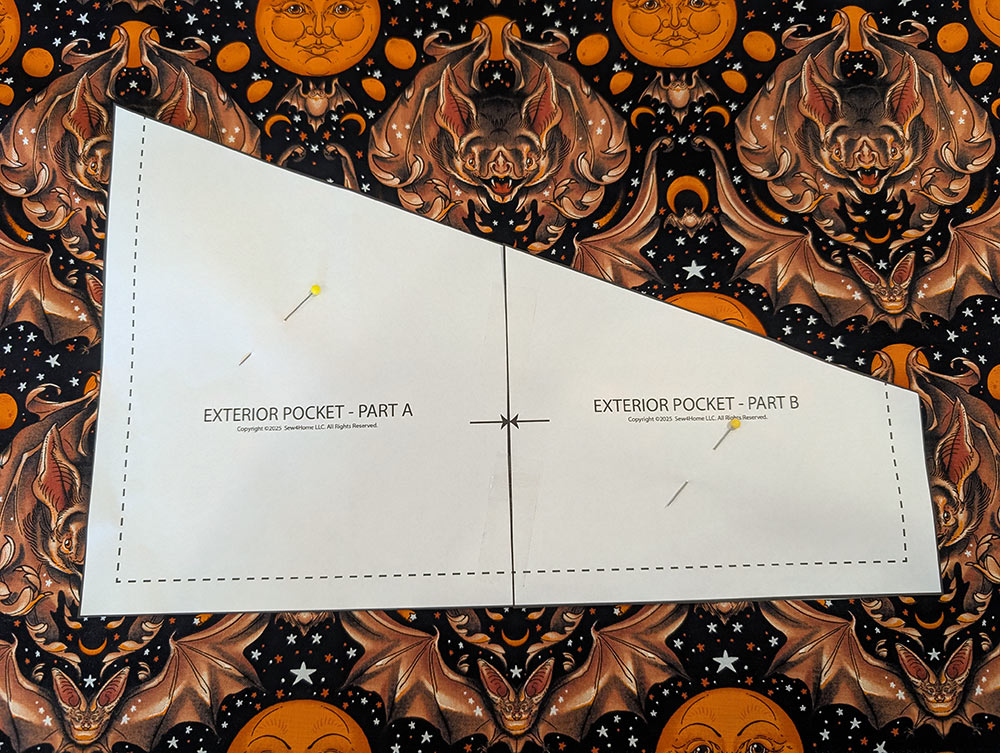
- Cut out each pattern along its solid outer line. Using the arrows as your guide, butt together Part A and Part B (do not overlap) and tape together to complete the full pocket pattern. You will use this same pattern, trimmed along the dotted seam allowance line, to cut the pocket interfacing. If you like to keep your patterns for future makes, print two sets of the pages. Keep one assembled pattern as is; keep the second as a trimmed version.
- From the fabric for the exterior front and back panels and the front pocket panels (Full Moon Flight in our sample), cut the following:
NOTE: These as the general cuts required. To follow our fussy cutting, read the fussy cutting section below.
TWO 13” wide x 13½” high rectangles for the main front and back exterior panels
Using the assembled pocket pattern, cut one with the pattern facing right side up and a second with pattern facing right side down.
Fussy cutting the exterior panels and pockets
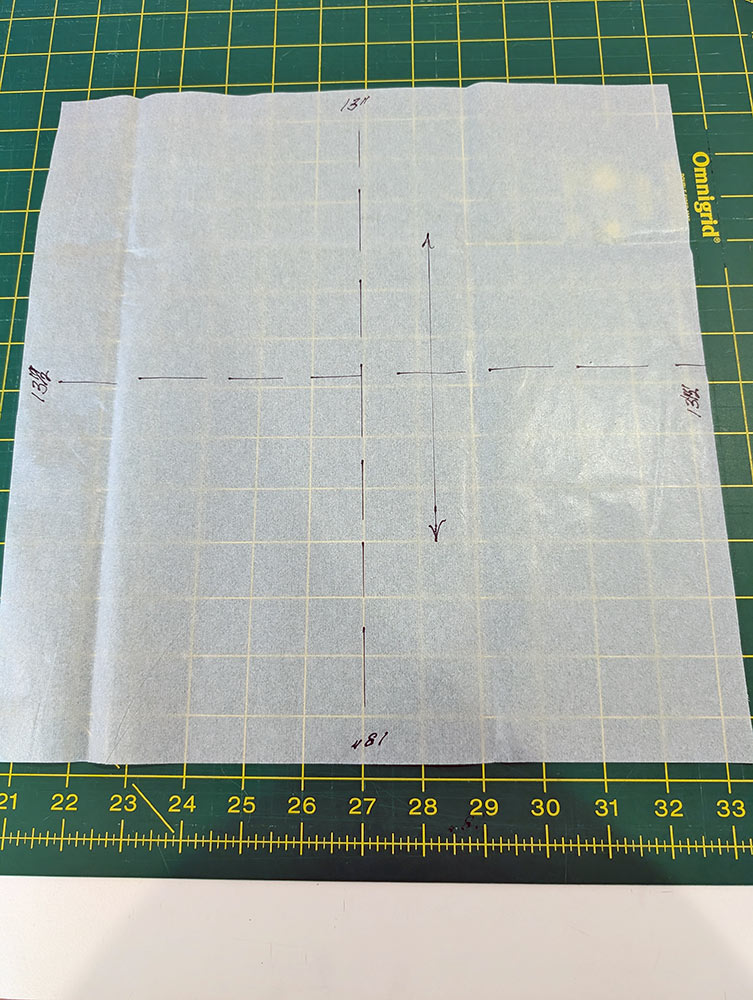
- Cut a piece of tissue or pattern paper to the size of the front and back panels: 13” wide x 13½” high. Measure and draw in both vertical and horizontal center lines. And, add a directional arrow showing the orientation of your motif. Our motif runs vertically.
NOTE: Do take the extra time to insure your tissue panel is straight and true. In other words, do not cut wild; use a ruler and rotary cutter if possible.
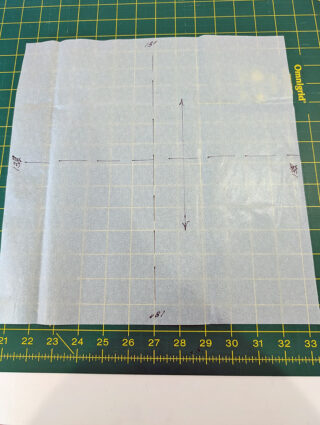
- Using the tissue panel as your guide, center your motif(s) in each quadrant and overall within the panel. For our motif, we traced each full moon to insure it sat in the exact center of each quadrant.
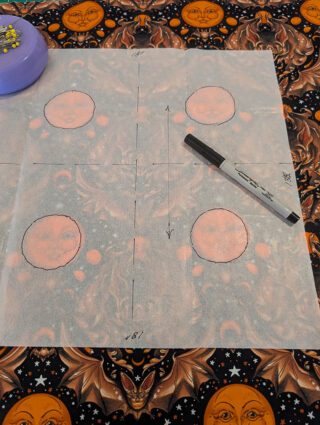
- Using the tissue panel as your pattern, cut out your beautifully centered front panel, then repeat to cut a matching back panel.
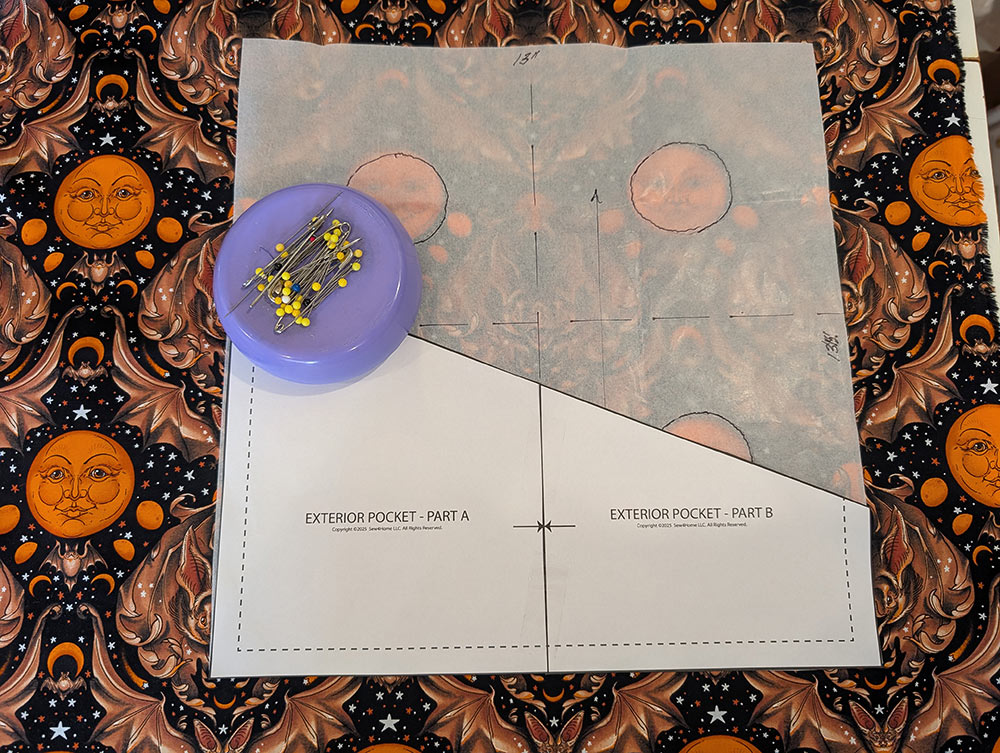
- Return to the remaining fabric with your tissue panel and use it once again to overlay onto a perfectly centered motif(s). Find the pocket pattern and place it on top of the tissue so the left side and bottom edge of the pocket pattern are flush with the tissue.
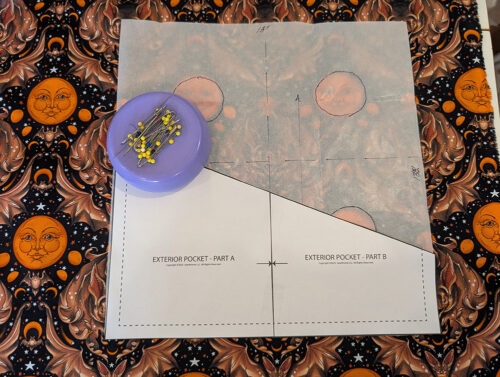
- Holding the pocket pattern so it doesn’t shift (you could even lightly tape it in place on the fabric), carefully slide out the tissue panel. Pin the pocket pattern in place and cut out the pocket.
- Repeat this process again, but this time, the pocket panel should be placed right side down with its right side and bottom edge flush with the tissue panel. You now have two mirror-imaged pocket fronts.
NOTE: For more information about how to perfectly match a pocket to a background panel, we have a full tutorial you can review prior to starting. - From the fabric for the front pocket binding, base panel interior binding, and the side ties (Jack of Diamonds in our sample), cut the following:
NOTE: These as the general cuts required. To follow our fussy cutting, read the fussy cutting section below.
TWO 2” x 15” strips for the exterior pockets
ONE 2” x 36” strip for base panel
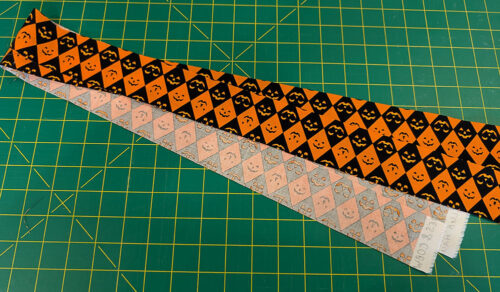
TWO 2” x 27” strips for the side ties

Fussy cutting the binding and ties
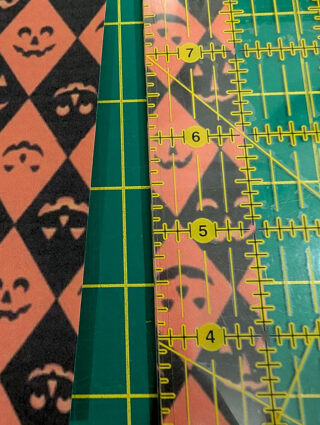
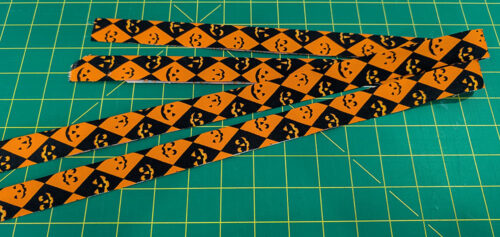
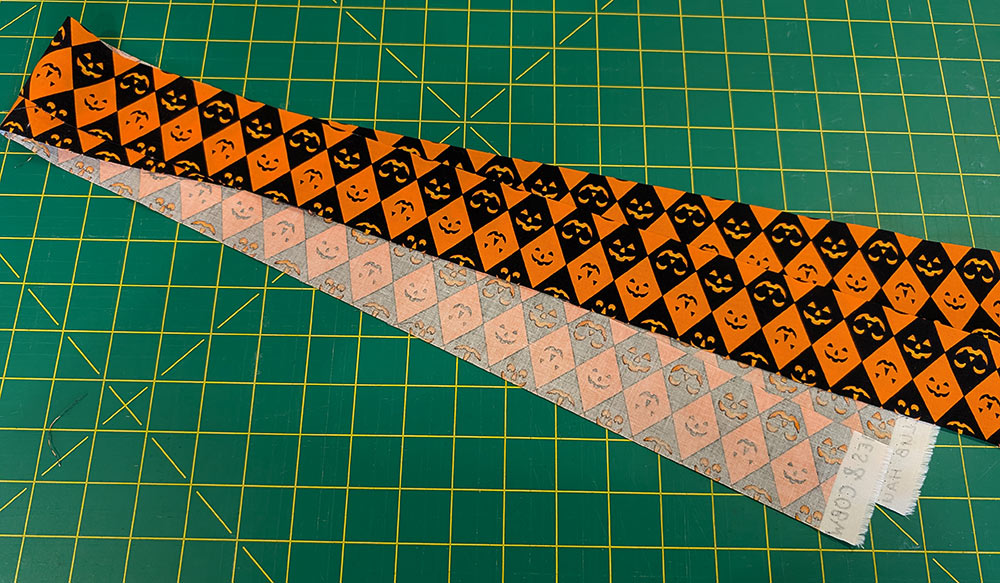
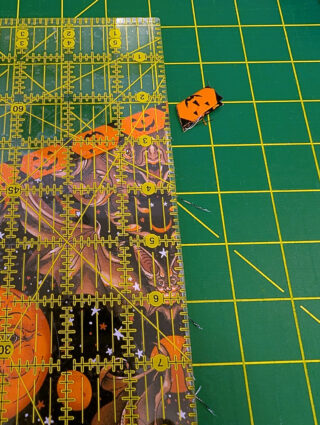
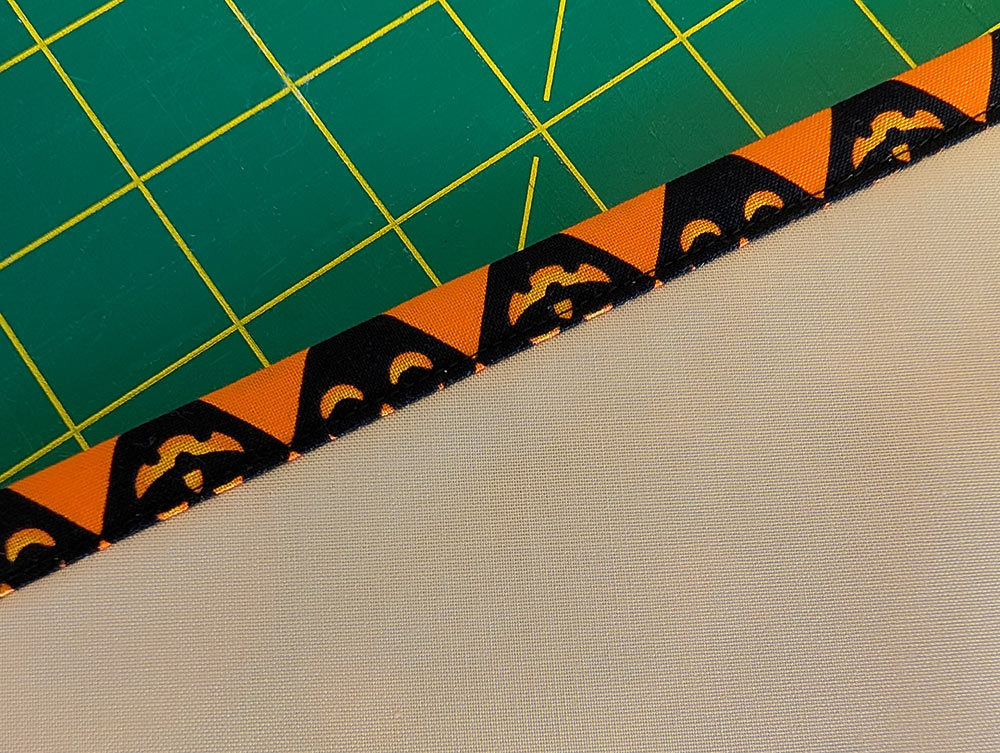
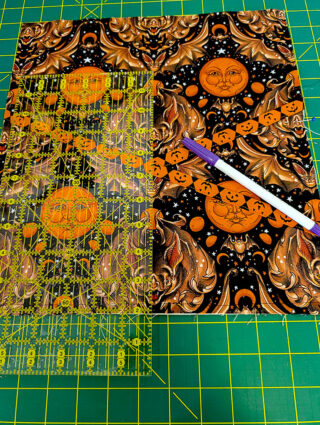
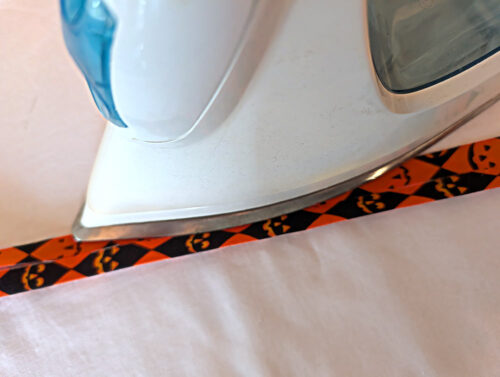
We did rather precise fussy cutting of our fabric for both the binding strips as well as the tie strips in order to end up with horizontal “pumpkin faces” for the pockets and base binding and vertical faces for the side ties. To make best use of the ¾ yard of fabric, the ties need to be cut first, using the full 27” height of the fabric (27” = ¾ yard) parallel to the selvedge. The binding strips can then be cut across the width of the fabric that remains, about 36″ wide.
For the tie strips
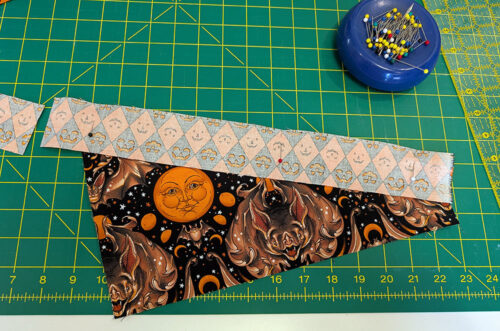
- Our ties were cut vertically so that as the tails of the ties hang down along the vertical sides of the finished tote, the “pumpkin faces” are vertical diamonds. Cool, huh?
- At the edge of the fabric nearest the selvedge, find a vertical row of black diamonds that is about 3-4” in from the selvedge. Place the ¼” mark on your see-through ruler along the vertical center line of of those black diamonds. This means the edge of the ruler will be ¼” into the vertical row of orange diamonds to the right.
- Draw a vertical line the full length of the panel through the orange diamonds.

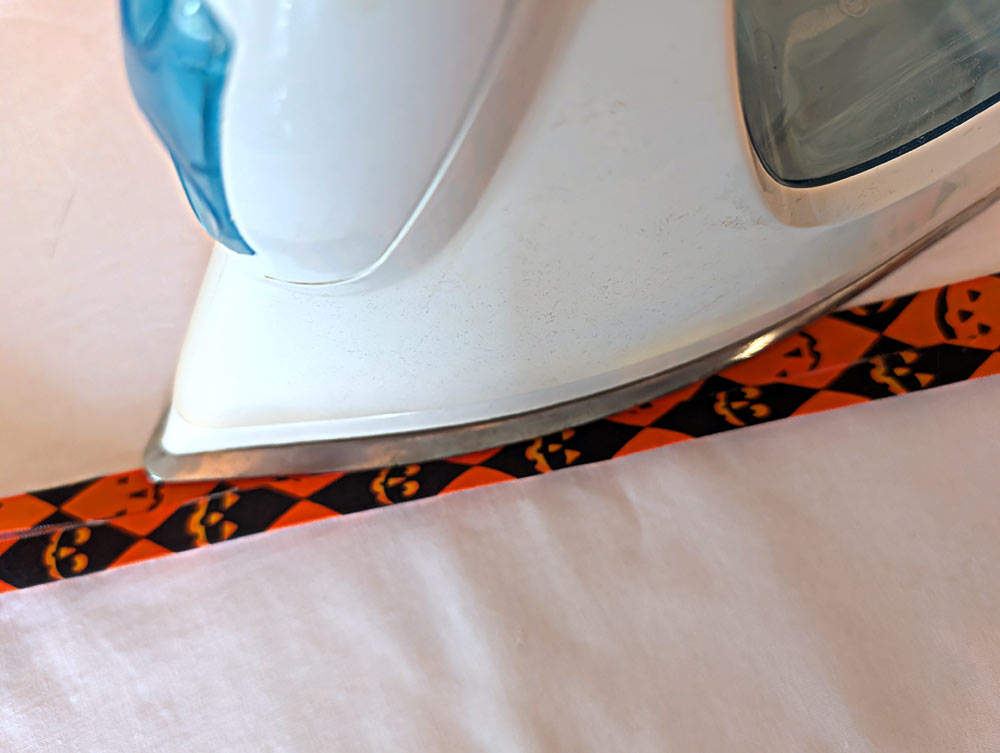
- At your ironing board, fold the fabric panel wrong sides together along this drawn line and press well.
- Move to your cutting board and align the edge of your ruler 1” down from that pressed fold.
- Slice along this 1” line. That completes one folded tie strip.
- Using this method, cut the second tie strip. You need TWO 27” lengths.


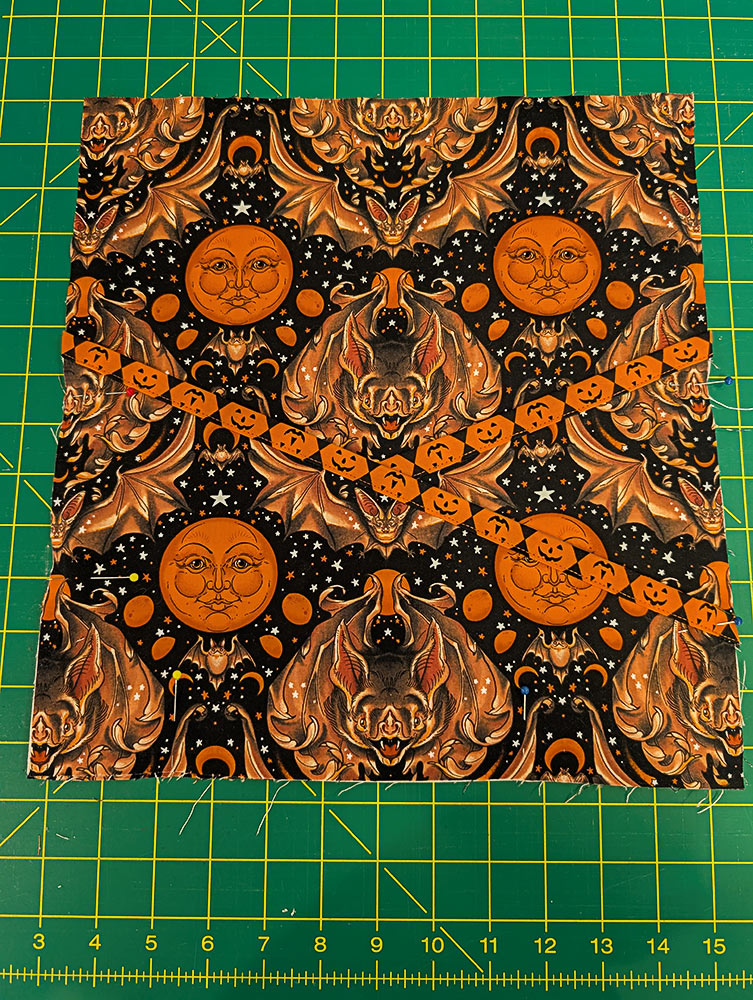
For the pocket and base panel binding strips
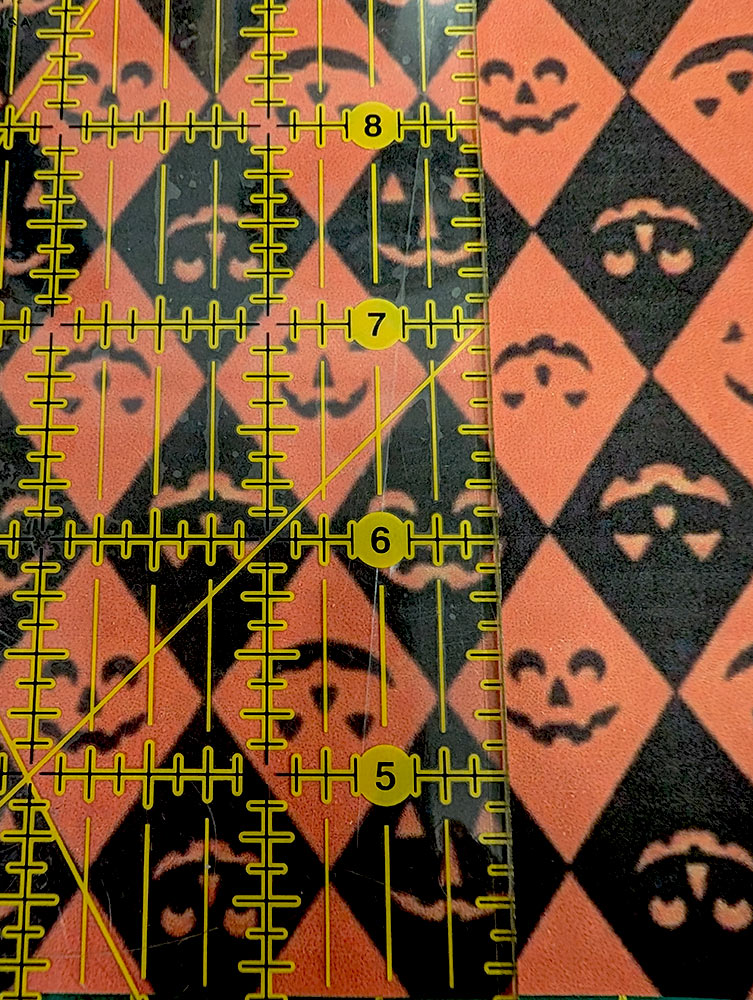
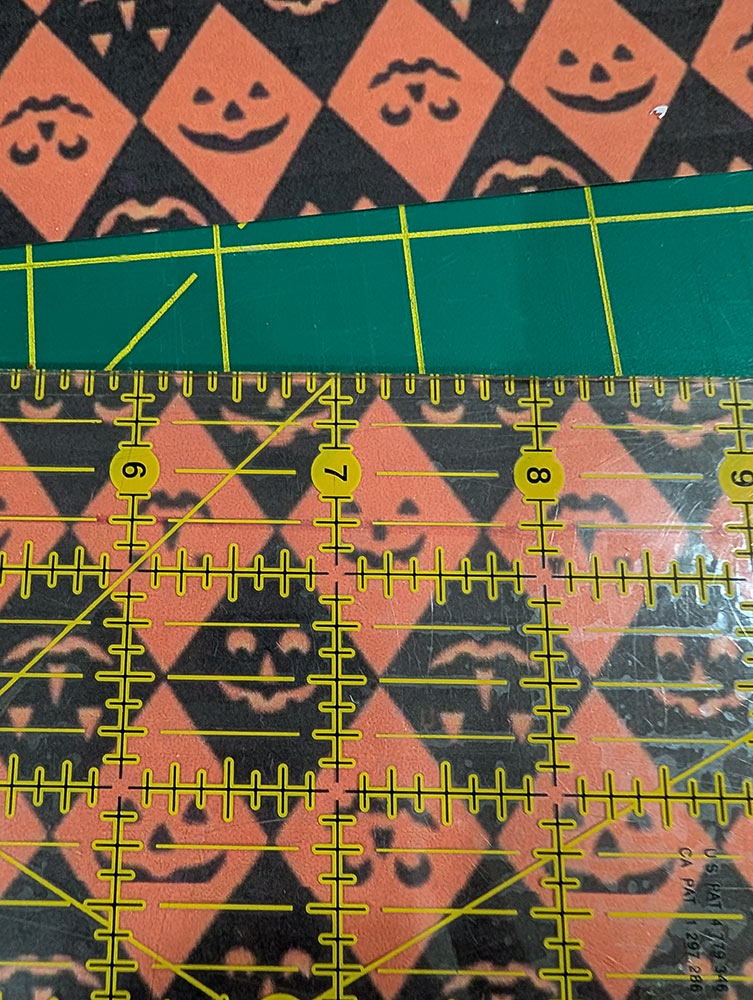
- On our fabric, each diamond shape is 1” across. The finished width of our binding is ½“, and we want to use a consistent ½“ seam allowance throughout construction.
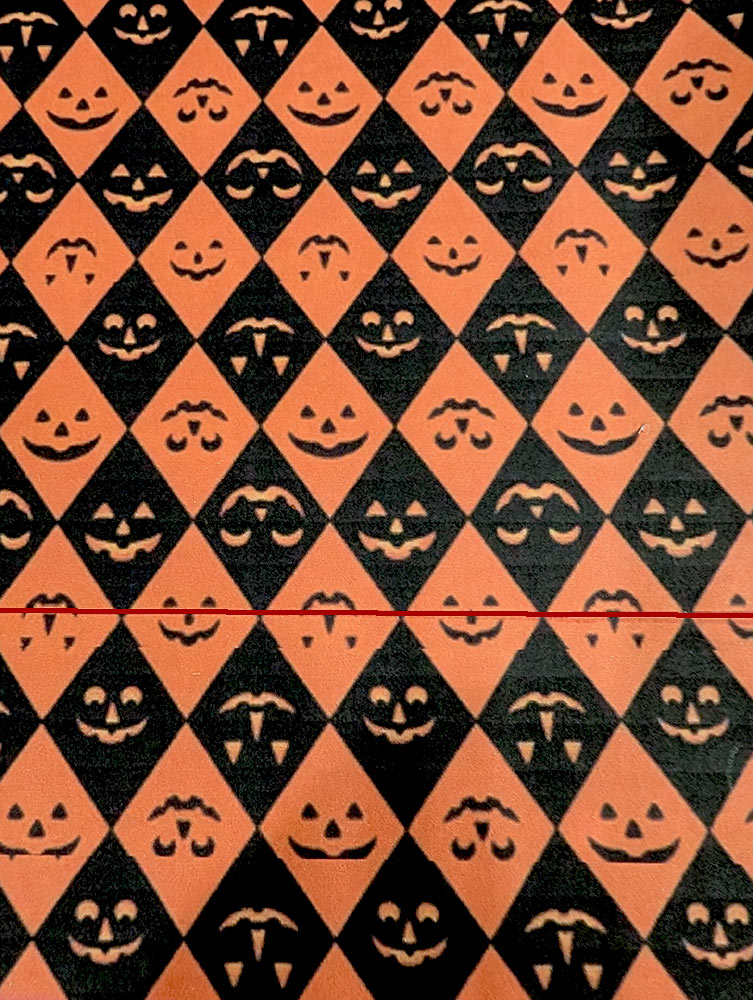
- To make all this work out, first find the horizontal center line of a row of orange diamonds. Use your see-through ruler to draw a line through the row of diamonds at this center point.

- Again using your see-through ruler, measure ¾” up from your drawn horizontal center line. This is your upper cut line. Using a rotary cutter, slice along this upper line.
- From this upper cut, measure 2” down. This is the lower cut line.

- Using a rotary cutter, slice along this lower line to produce the final 2” fussy cut strip. As always when working on the right side of your fabric, you should use a marking tool that will easily wipe away or vanish with exposure to the air or the heat of an iron – so your original drawn line can now be erased.

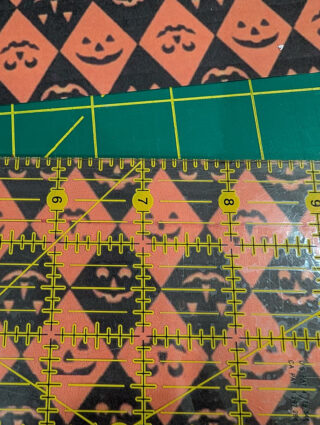
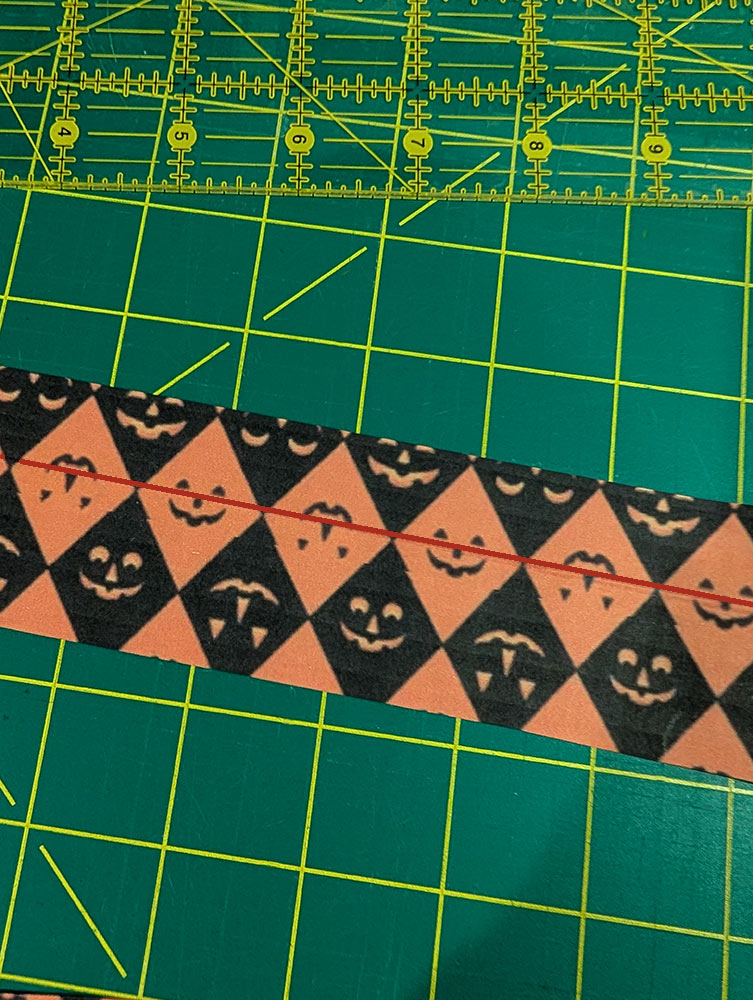
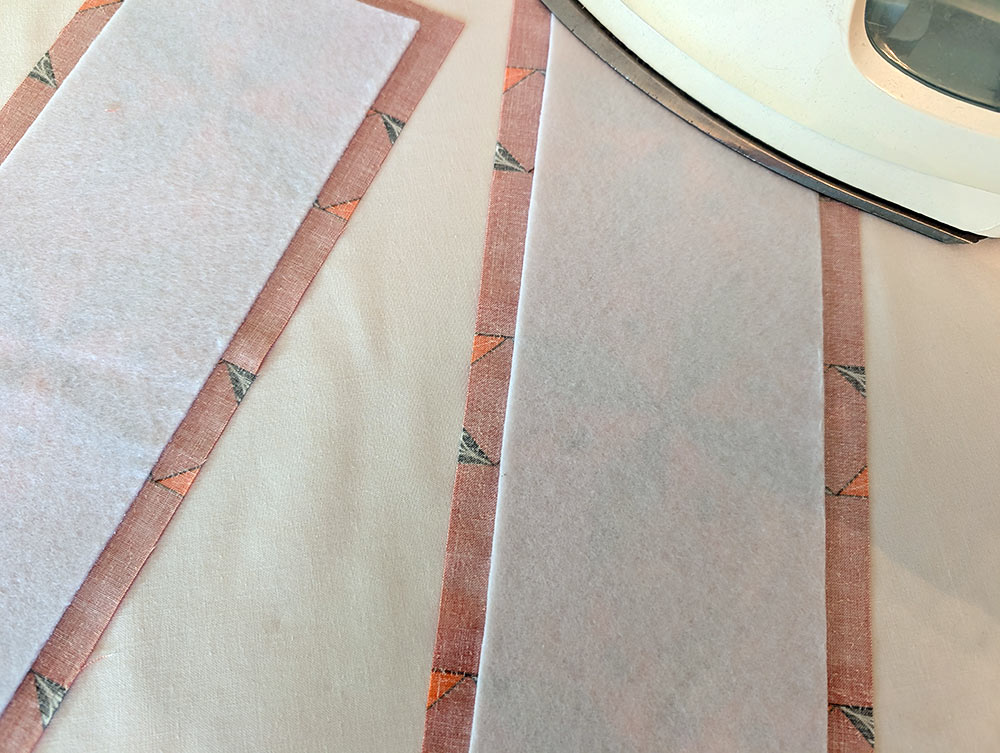
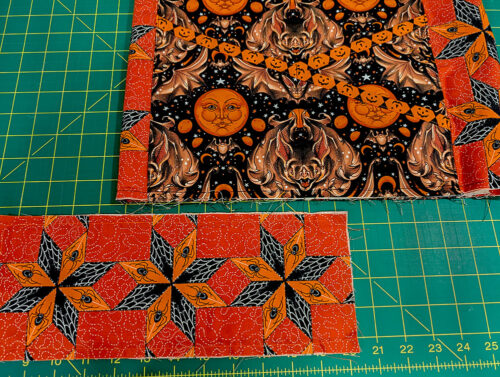
- Use this method to cut two WOF (width of fabric) 2” strips. One length should already be approximately 36” – perfect to use for the base panel binding. Sub-cut the second strip into TWO 15” lengths for the pocket binding.
- Below is an image of our two starting WOF strips.

Other cuts
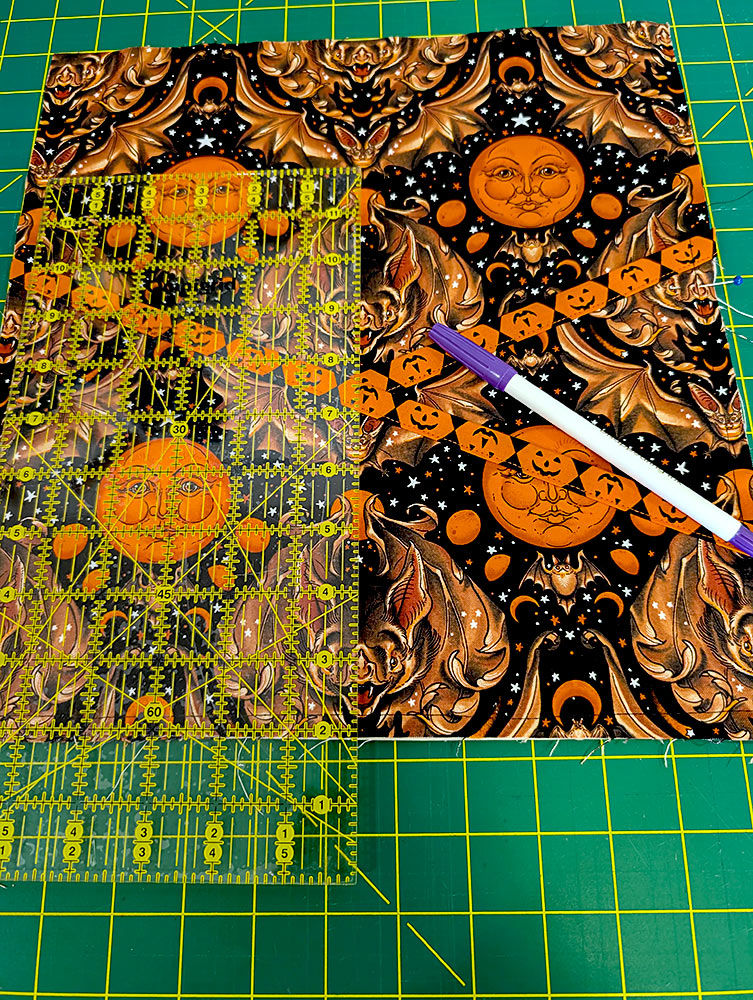
- From the fabric for the exterior and lining side panels and the exterior and lining base panels (Stars and Spiders in our sample), fussy cut the following:
NOTE: For our fussy cuts, we made sure the Spider Stars were centered side to side and top to bottom within each panel.
FOUR 5” wide x 13½” high rectangles for the exterior and lining side panels
TWO 13” wide x 5” high rectangles for the exterior and lining base panels - From the fabric for the front and back lining panels, the exterior pocket lining, and the lining pocket (Kona Sand in our sample), cut the following:
TWO 13” wide x 13½” high rectangles for the front and back lining panels
ONE 9” wide x 13” high rectangle for the interior pocket
Using the assembled pocket pattern, cut ONE with the pattern facing right side up and ONE with the pattern facing right side down.
NOTE: You could also fold your fabric, pin the fabric on the layers and just cut once. This also gives you the mirror image panels needed for the crossover pockets. - From the fusible fleece, cut the following:
TWO 12” x 12½” rectangles for the main front and back panels
TWO 4” x 12½” rectangles for the side panels
ONE 4” x 12” rectangle for the base panel - From the mid-weight fusible interfacing, cut the following:
ONE 8” x 6” rectangle for the interior pocket
Using the assembled pocket pattern, but cutting on the dotted seam line rather than the solid outer line, cut TWO
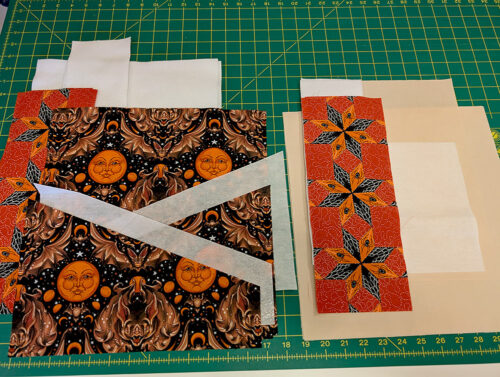
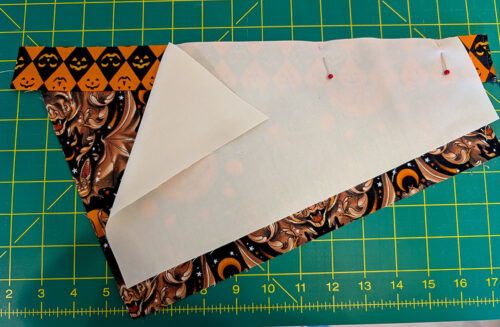
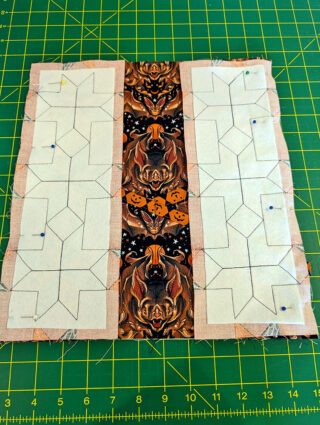
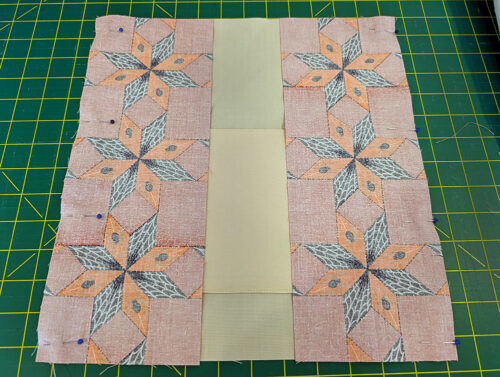
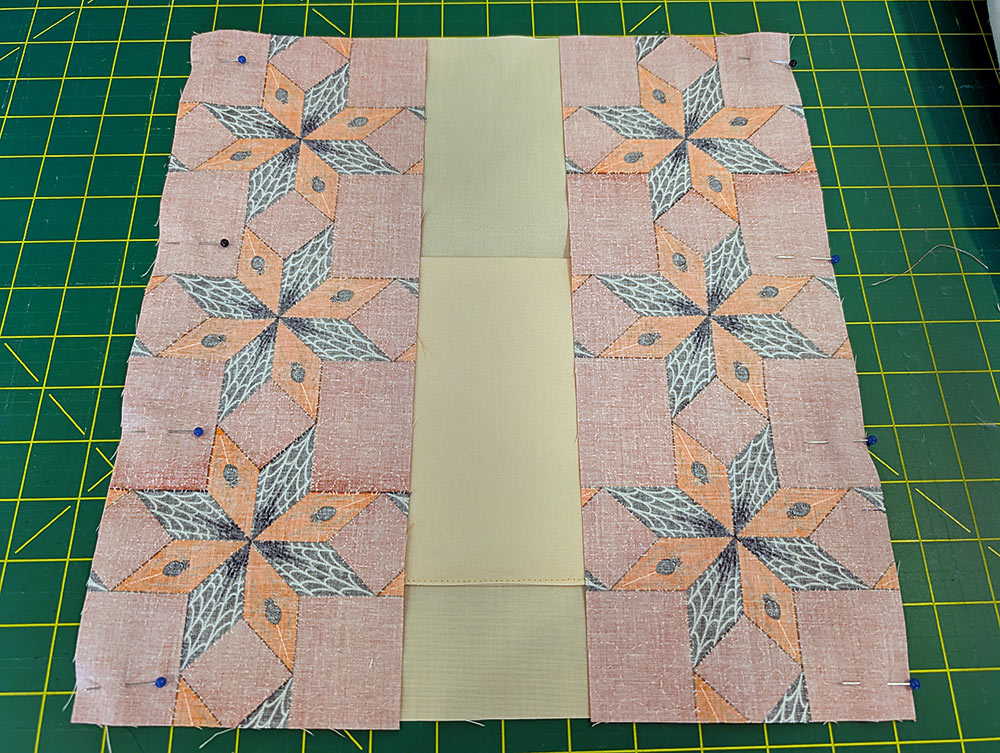
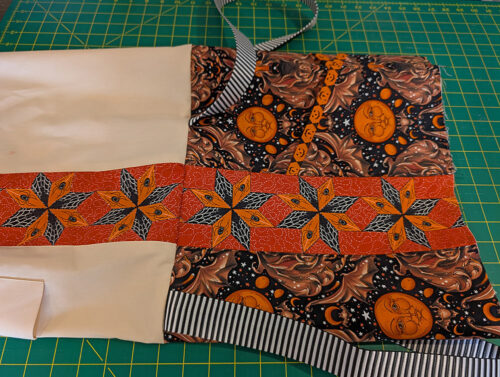
NOTE: As above, you can either cut the two pieces individually, one with the pattern right side up and one with the pattern right side down or fold the interfacing and cut through the layers just once to yield the two mirror-image panels. - Below is an image of all our main panels ready to assemble.
- From the webbing, cut TWO 30 lengths.
- From the yarn/skinny cording, cut FOUR 27” lengths.

At Your Sewing Machine & Ironing Board
Fusing fleece and interfacing
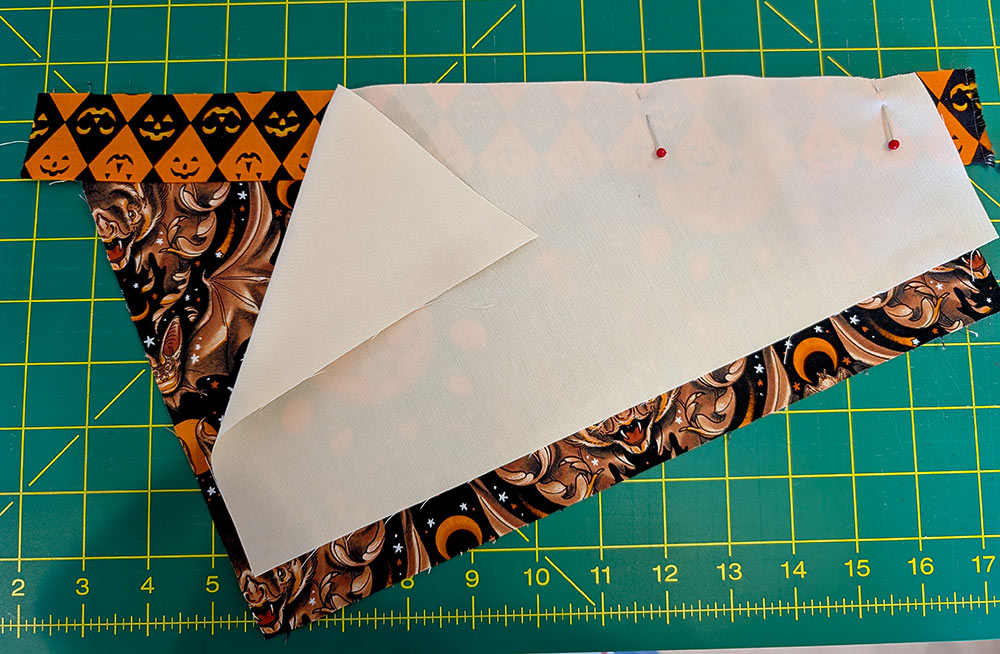
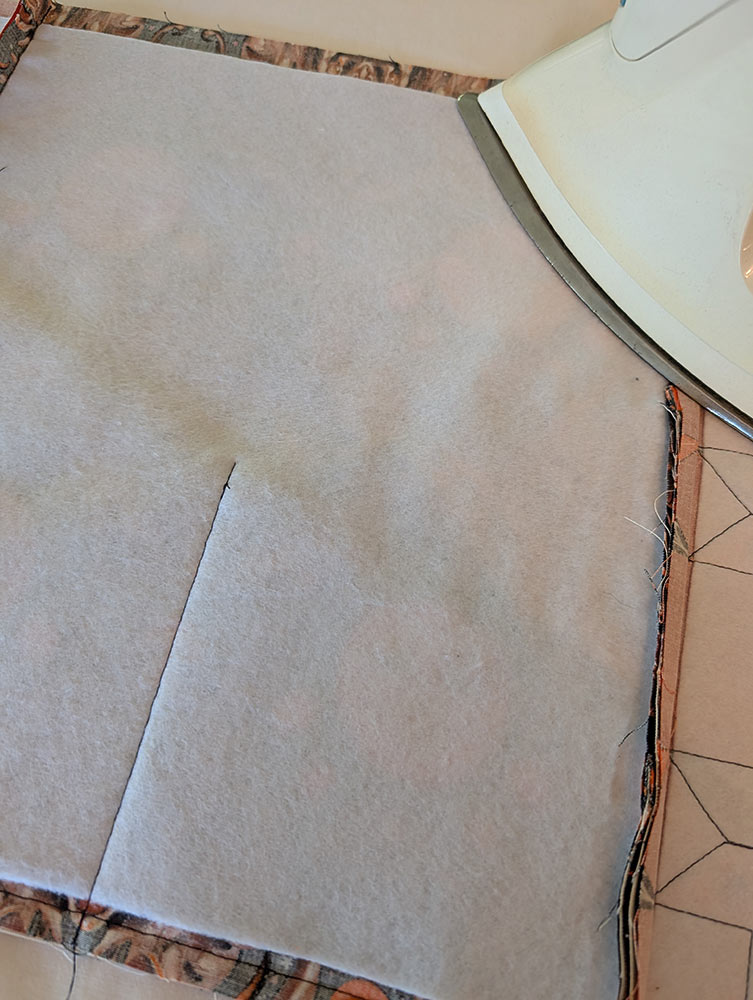
- Match up the fusible fleece panels with their appropriate exterior fabric panels. In all instances, the fleece should be centered on the wrong side of the fabric panel so there is ½” of fabric showing beyond the fleece on all sides. Following manufacturer’s instructions, fuse each fleece panel in place.

- Apply each mid-weight interfacing panel to its appropriate exterior pocket panel. For the front pockets, because you cut on the dotted seam line, the top diagonal edges are flush, but along the sides and bottom there should be ½” of fabric showing beyond the interfacing. Following manufacturer’s instructions, fuse in place.

- For the interior pocket, the interfacing is applied to just one half. To do this, first fold the fabric panel in half wrong sides together so it is now 9” x 6½”. Press to set a center crease line. Unfold wrong side up so the crease line is visible. Place the interfacing on what will be the front facing half of the pocket, aligning the top edge with the center crease line. There should be ½” of fabric showing beyond the interfacing along the sides and bottom. Following manufacturer’s instructions, fuse in place.

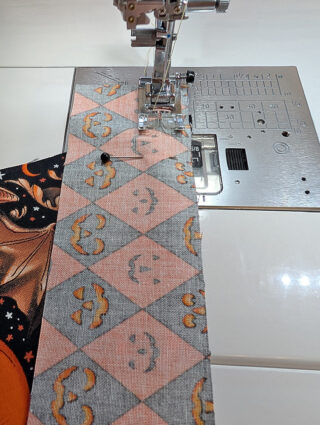
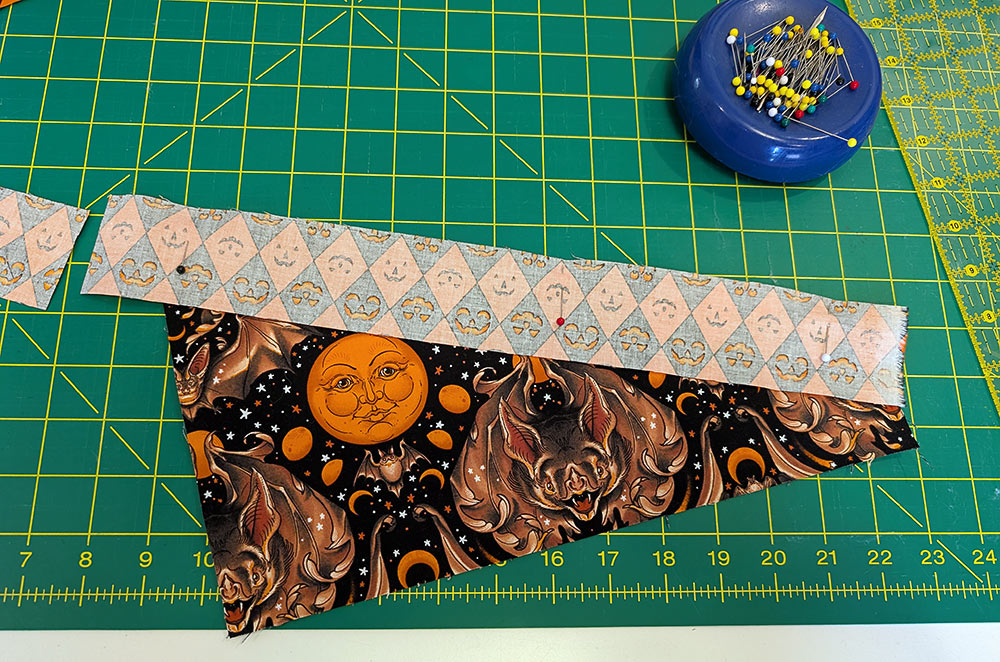
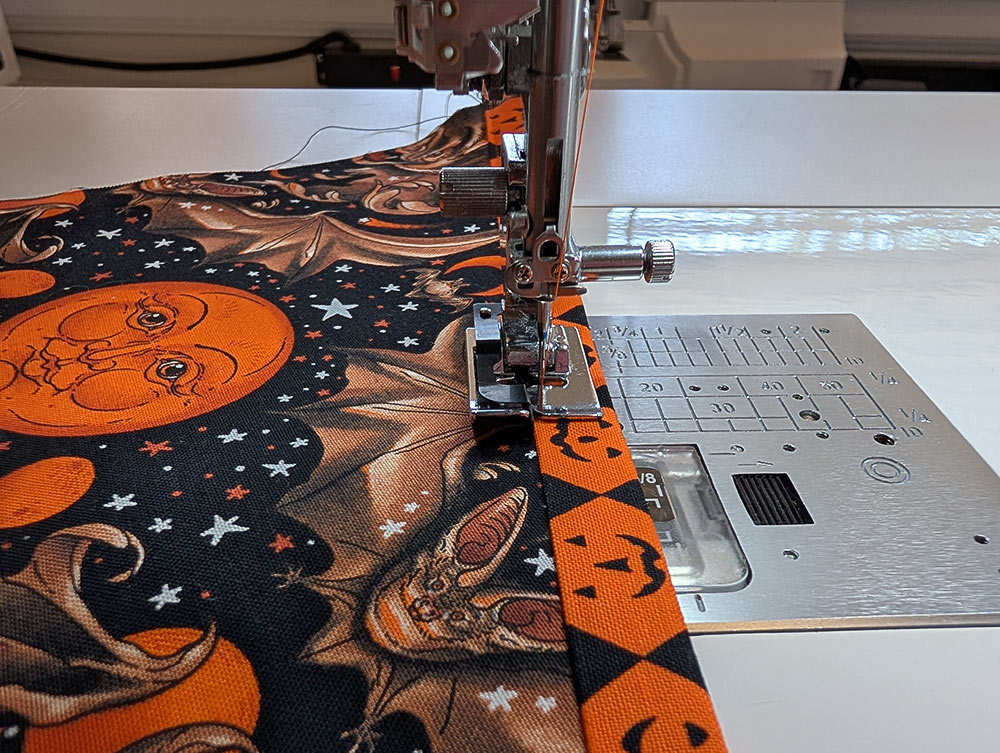
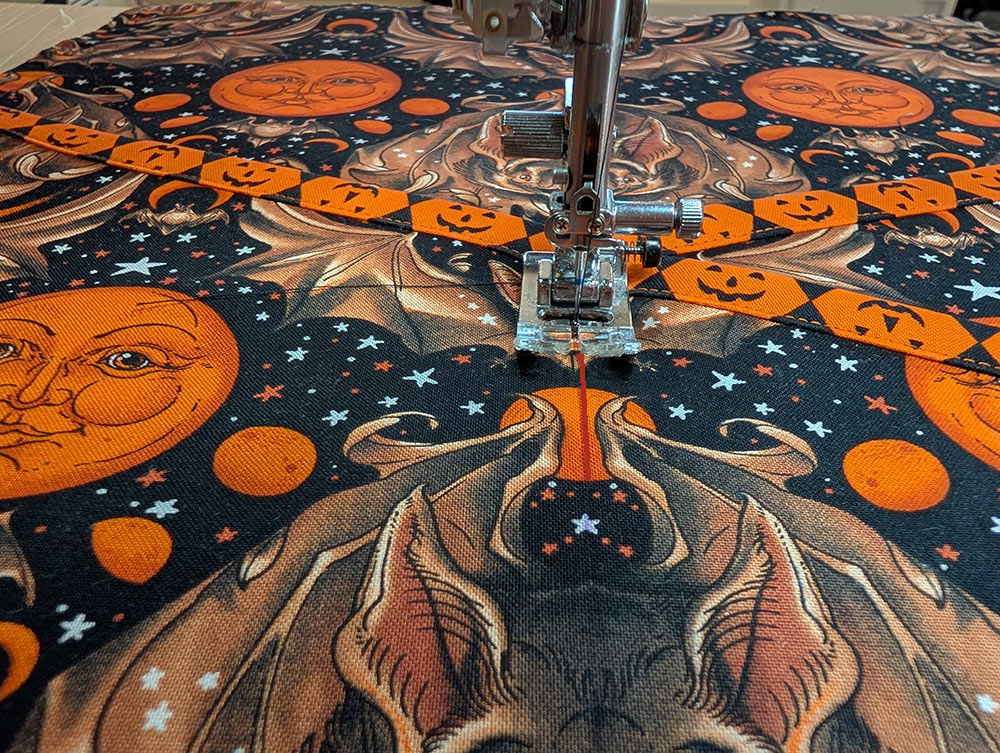
Attach the binding to the exterior pockets
- Gather your exterior pocket panels, which should have their interfacing panels already fused in place, along with the exterior pocket lining panels and the two 2” x 15” pocket binding strips.

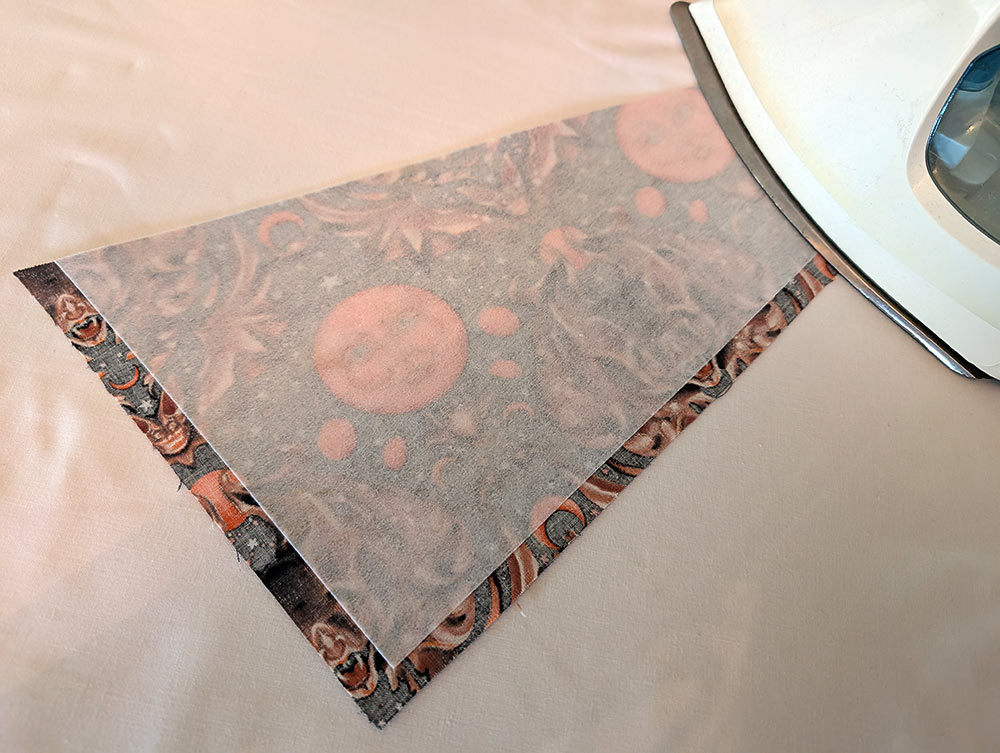
- Place one binding strip right sides together with one pocket panel, centering it along the diagonal upper edge. The 15” strip will extend about ½” on each end; this is correct. If using our cool fabric choice, align the edge of the binding strip with the complete orange diamonds row with the top edge of the pocket. Pin in place.
- Using a ½” seam allowance, stitch together.
- Press the binding strip up, pressing the seam allowance together and towards the binding strip.
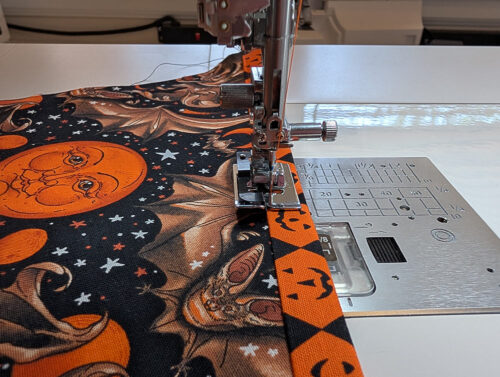
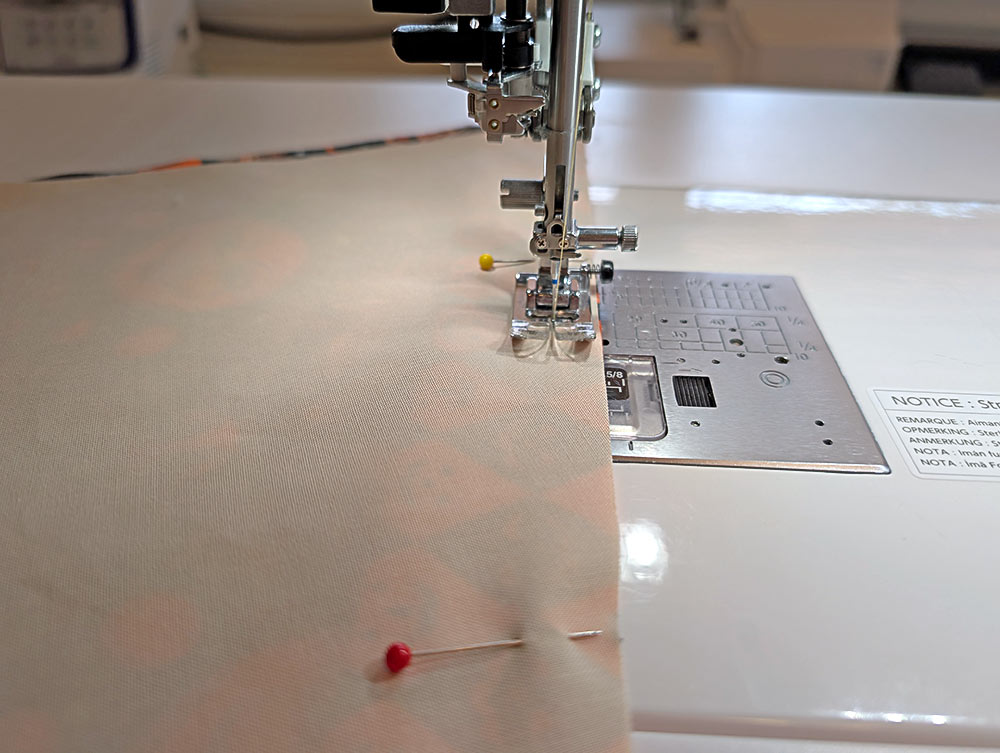
- Find one pocket lining panel and place it right sides together with the sewn exterior panel and binding, aligning the top edge of the lining panel with the remaining raw edge of the binding strip. Pin in place.
- Using a ½” seam allowance, stitch together.

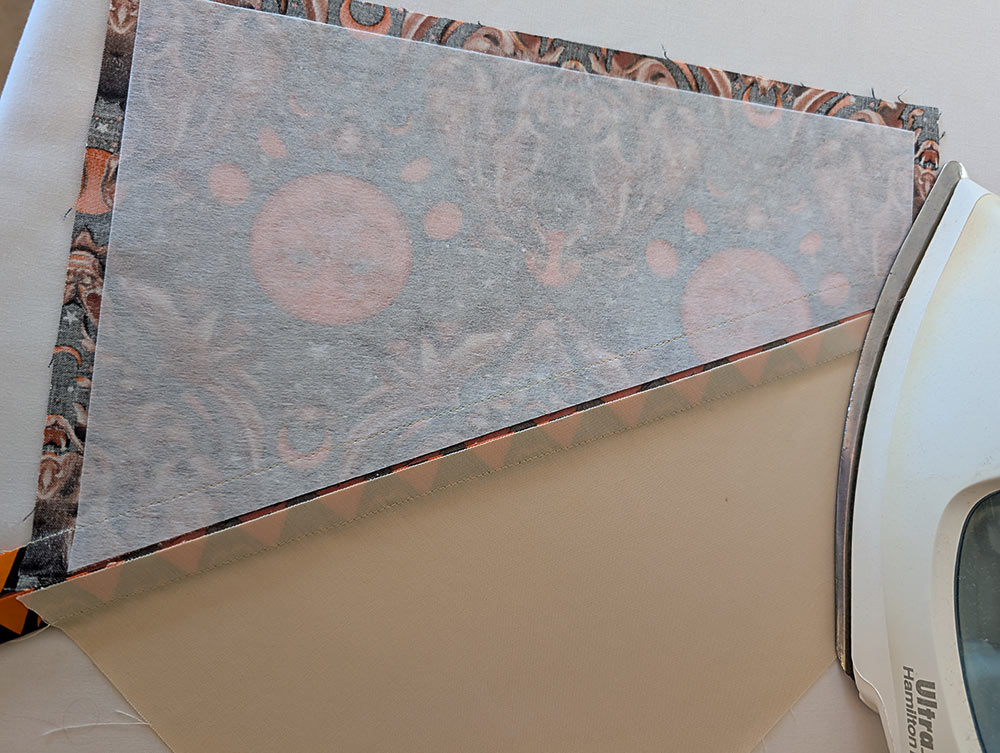
- Also press this seam allowance together and toward the binding strip, which means the raw edges of the two seam allowances meet together at the center of the binding strip.

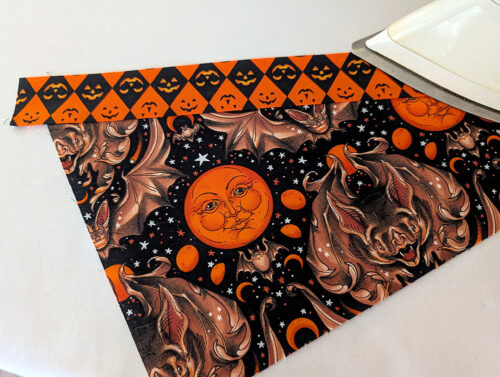
- Where the two seam allowances touch is your fold line. Fold the exterior and lining wrong sides together. The sides and bottom raw edges of the two layers should be flush and the top edge of the binding should be a pretty folded edge that reveals the horizontal “pumpkin faces.” Press well.

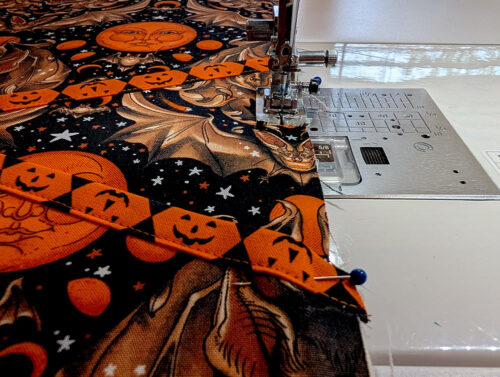
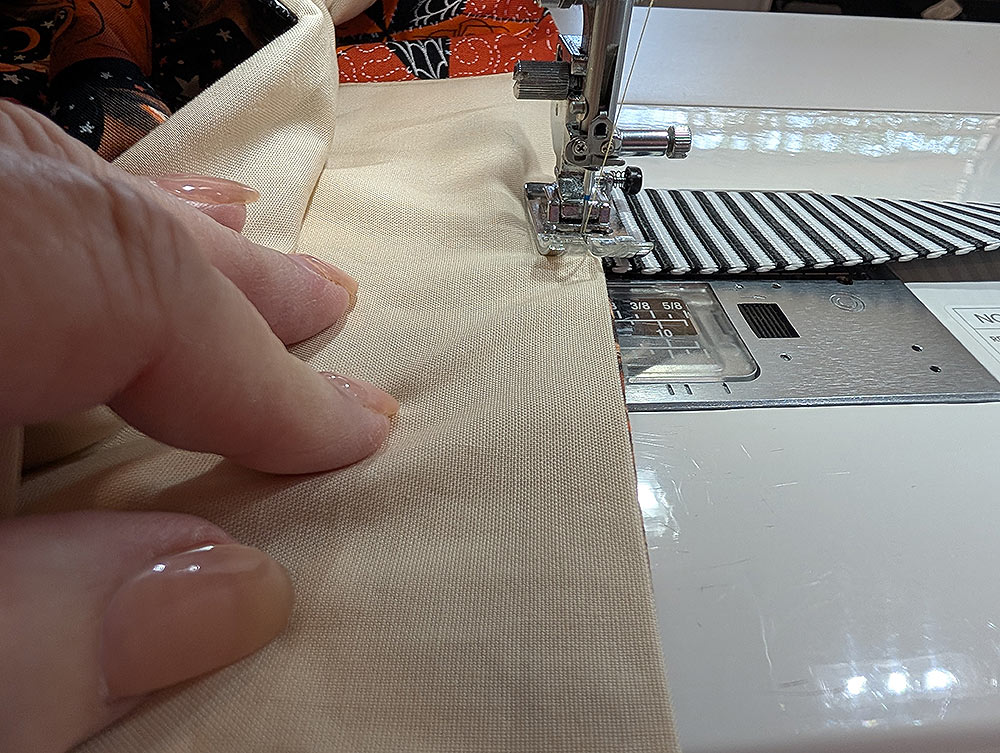
- Attach a Blind Hem foot if possible and edgestitch along the inner edge of the binding through all the layers. The Blind Hem foot is a great option because you can run the foot’s flange along the binding/pocket panel seam. We also moved our needle position to the right (6.0mm).
- We took the time to re-thread with orange thread in the top and black thread in the bobbin for the best match to our binding front and back.
- Repeat to finish the second pocket in the same manner.
- Trim the excess binding flush with either side of each pocket.


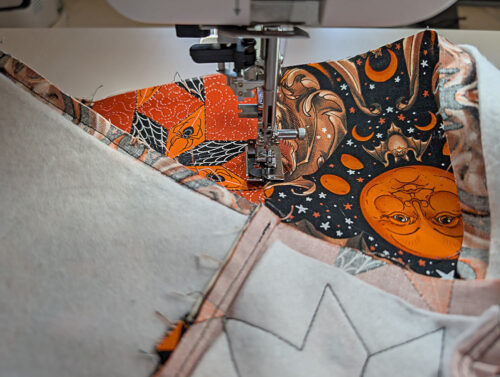
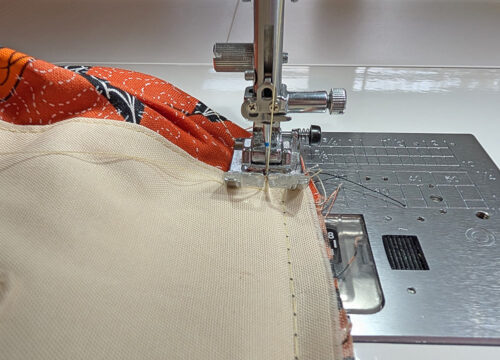
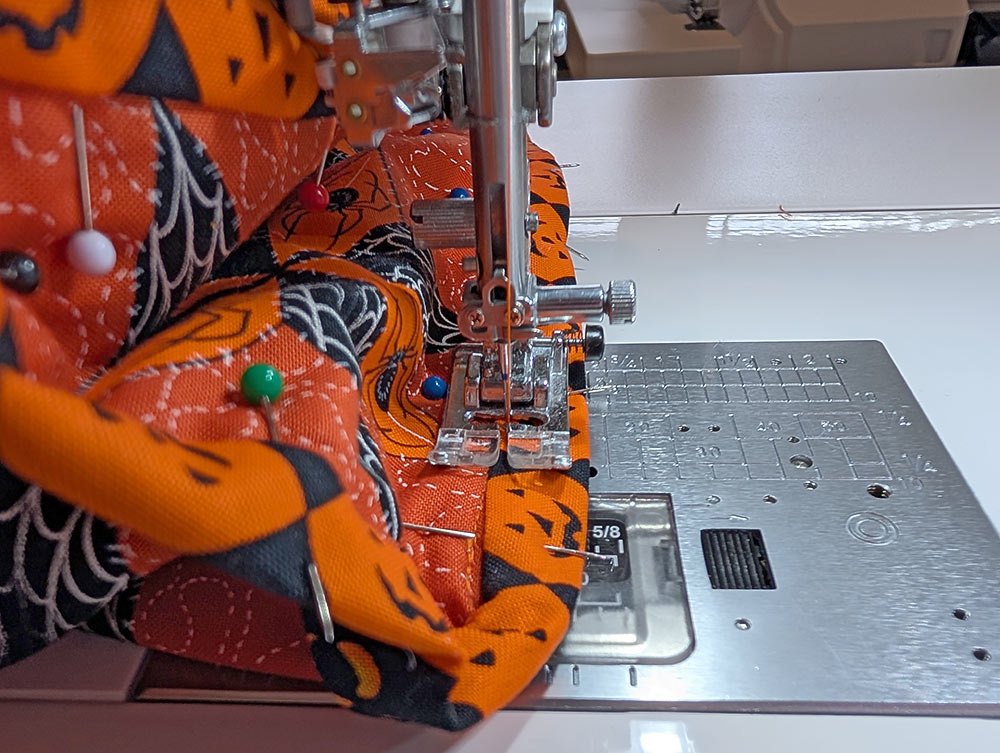
Attach the crossover pockets to the main panel
- Find the main front exterior panel. If you fussy cut following our directions above, at this point both your front and back panels are identical. Simply choose your favorite to be the front panel. Place the panel right side up and flat on your work surface.
- Layer the two crossover pockets, also right side up, into position so the side and bottom raw edges are flush on all layers. The left pocket crosses over the right pocket.

- Re-attach a standard presser foot and re-set for a standard straight stitch. Re-thread with thread to best match the fabric in the top and bobbin.
- Machine baste along each side and across the bottom to secure the pockets in position.
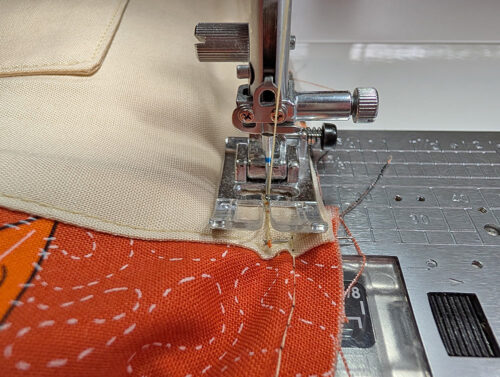
- At the center point of the pockets crossover, draw a vertical line. You’re working on the right side of your fabric so remember to make sure your marking tool is one that will easily wipe away or vanish with exposure to the air or the heat of an iron.
- Slightly lengthen your stitch, and sew along the drawn line through all the layers dividing the pocket panel into three sections: two large openings and one smaller front opening on the right. At the top of the pockets, use a lock stitch for the neatest finish. If not possible, leave your thread tails long, pass them through to the back with a hand sewing needle, and hand knot to secure.

- Set aside the front panel.

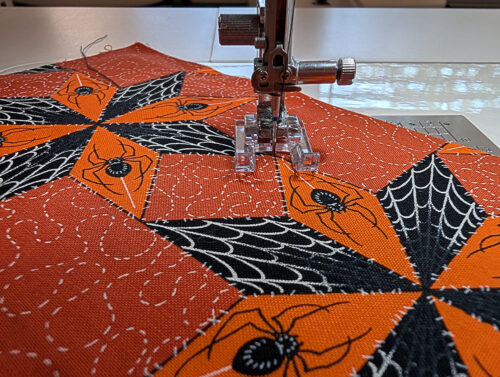
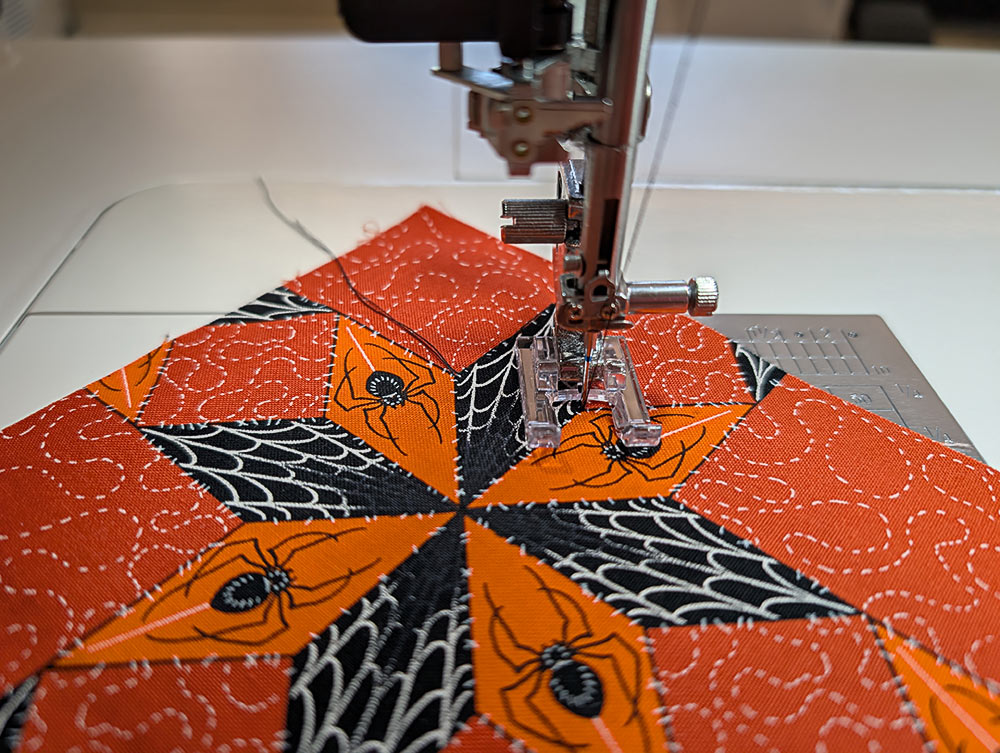
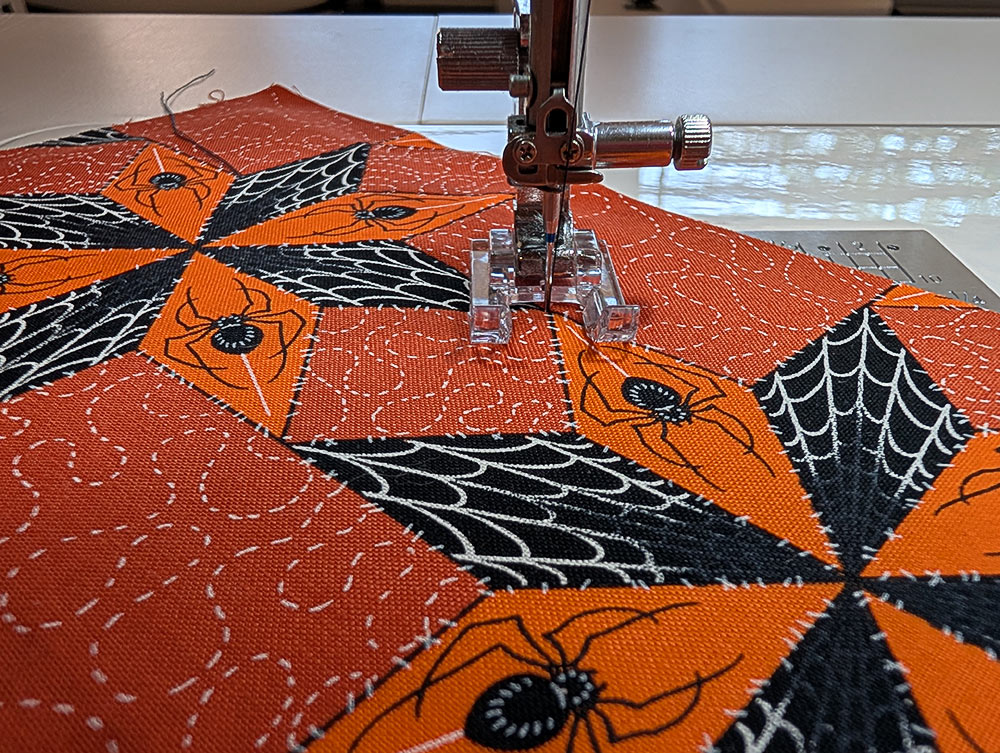
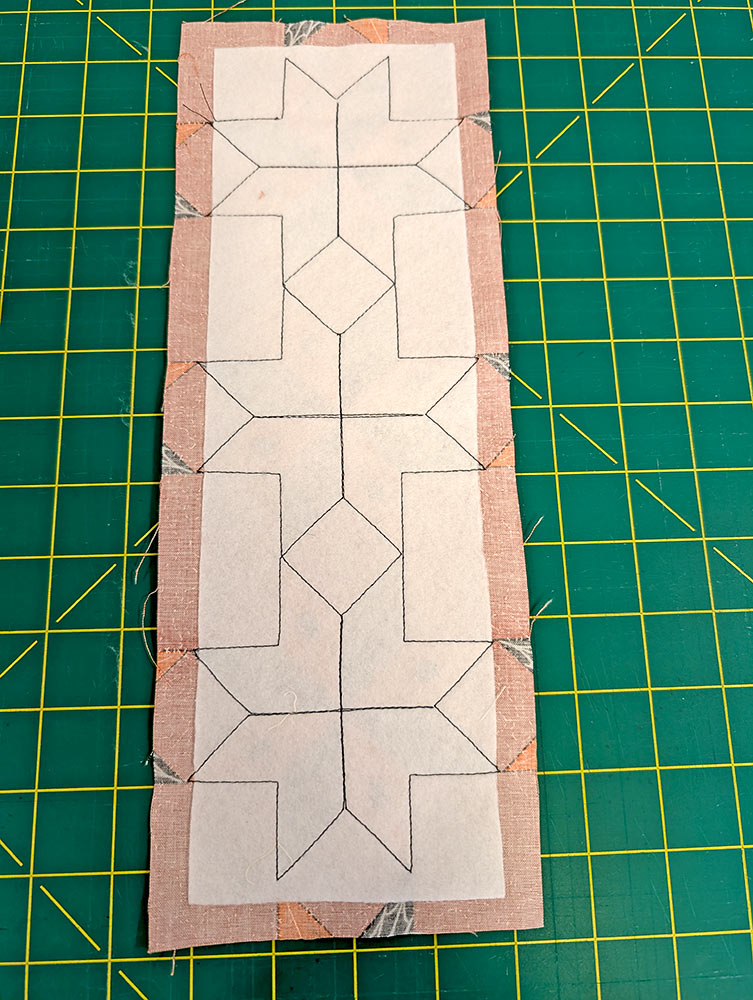
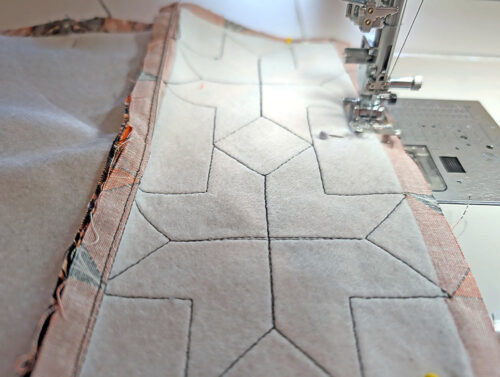
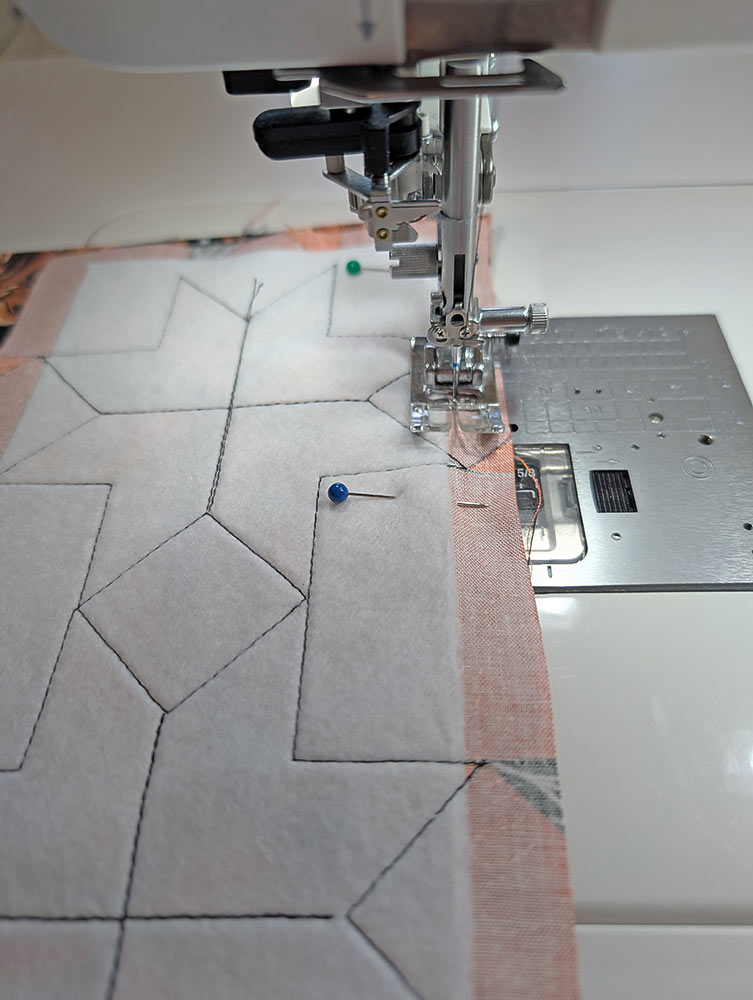
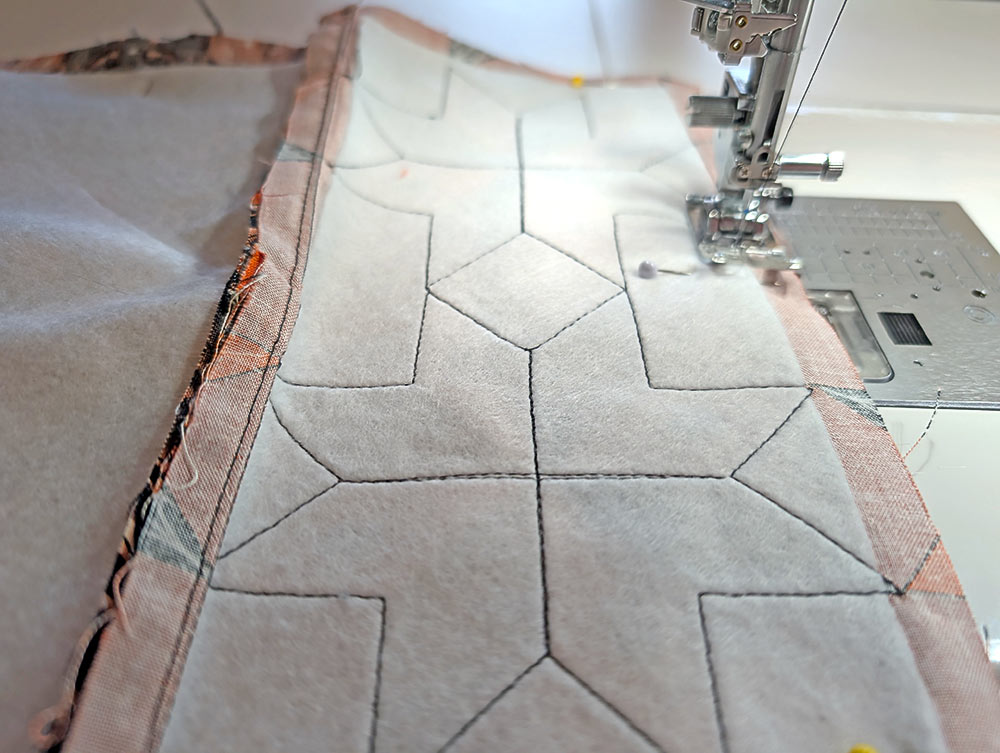
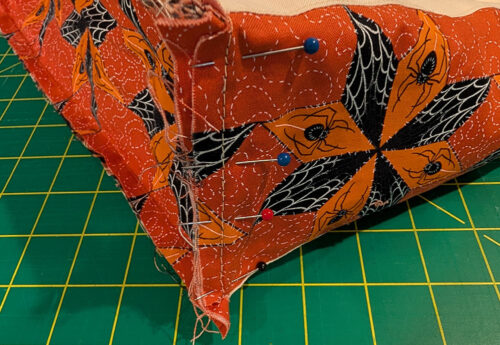
Add the quilting stitches to the side panels and base panel
- Collect two side panels and one base panel, all of which should have their fleece panels already fused in place.
- Re-thread the machine to best match your fabric’s motif. We used black.
- Attach an Open Toe Satin Stitch foot or similar so you can clearly see where you’re going while you stitch.
- Re-set for a slightly lengthened straight stitch.
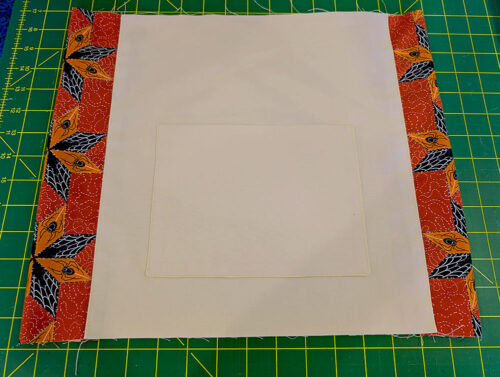
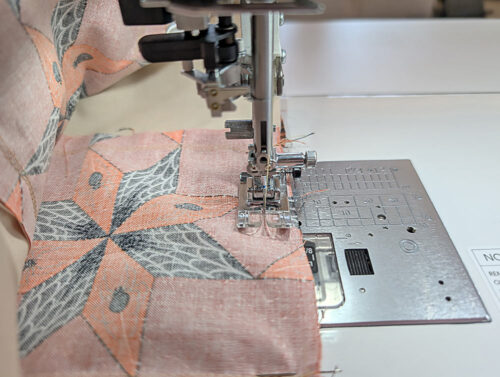
- Stitch along the main outline of your side panel motif, stopping with your needle in the down position and pivoting as needed.

- Keep your stitching continuous if possible, following the lines and angles to best showcase each motif.
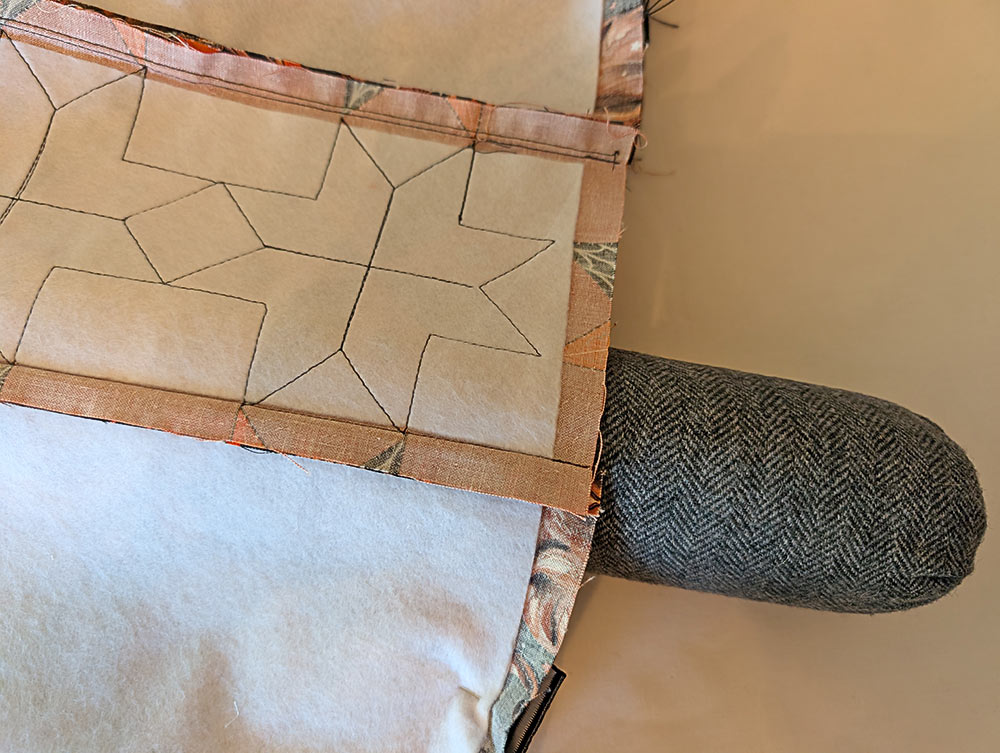
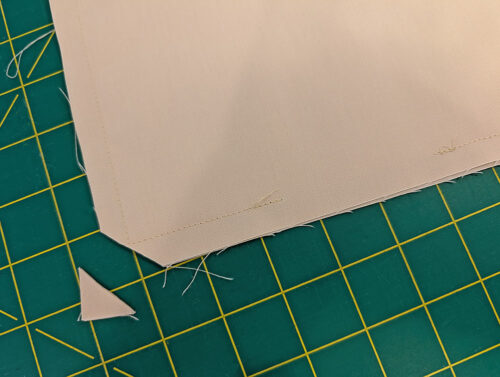
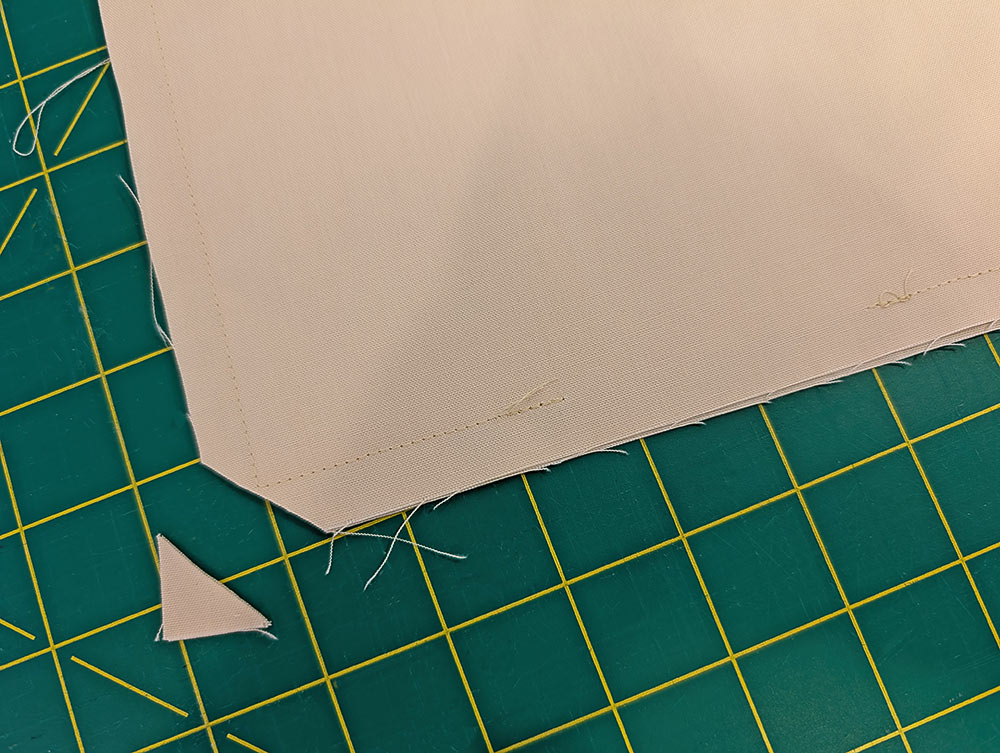
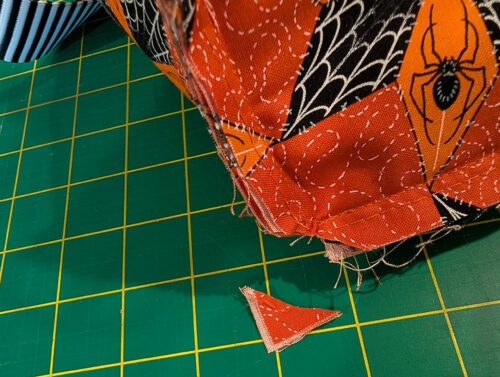
- When viewed from the back, you can get a better idea of our outlining.
- Repeat on each side panel as well as the base panel
NOTE: Quilting is most often done with a three-piece “sandwich,” including a top cotton layer, a fleece/batting layer, and a bottom cotton layer. We wanted the lining of our tote to be completely smooth and so opted to stitch through just the top cotton layer with its fused fleece. Thanks to the amazing feeding on our Janome machine, we had no problem at all with the “scratchiness” of the fleece moving through the machine. If you are worried about your own machine’s feeding (first step – get a Janome), you could use a full “sandwich” with the side panel lining layer – just remember that now the stitching will show on the inside of the tote.
Assemble the panels to create the exterior tube and place the handles
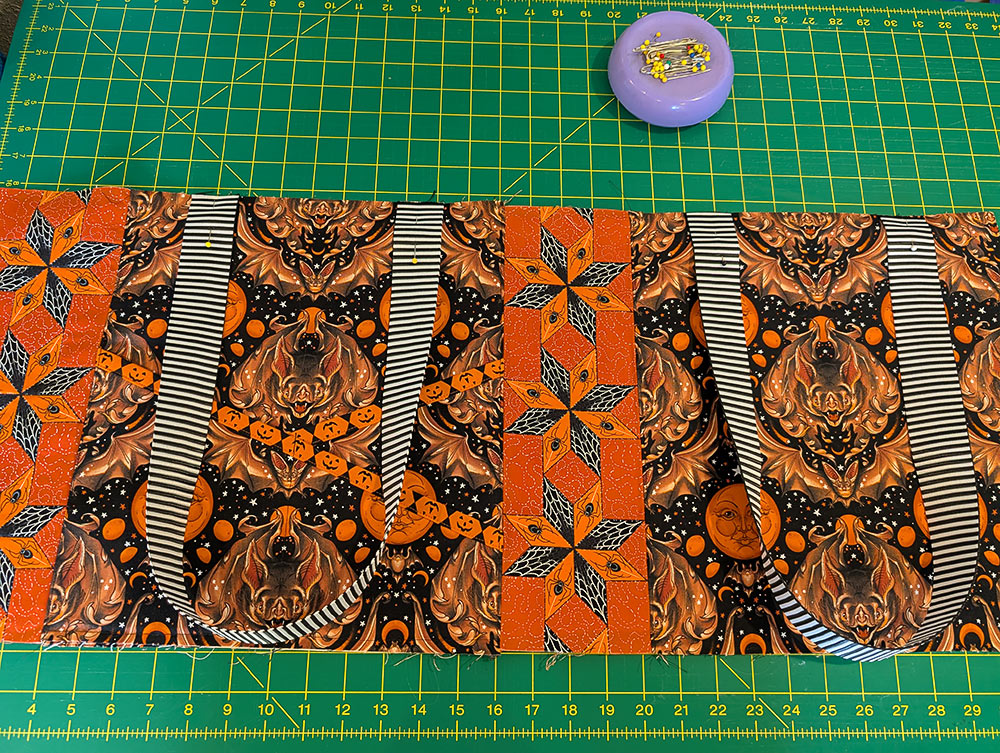
- Find the four exterior panels and the two handle lengths.
- Re-attach a standard presser foot and re-thread with thread to best match the fabric if necessary. Set-up for a standard straight stitch.
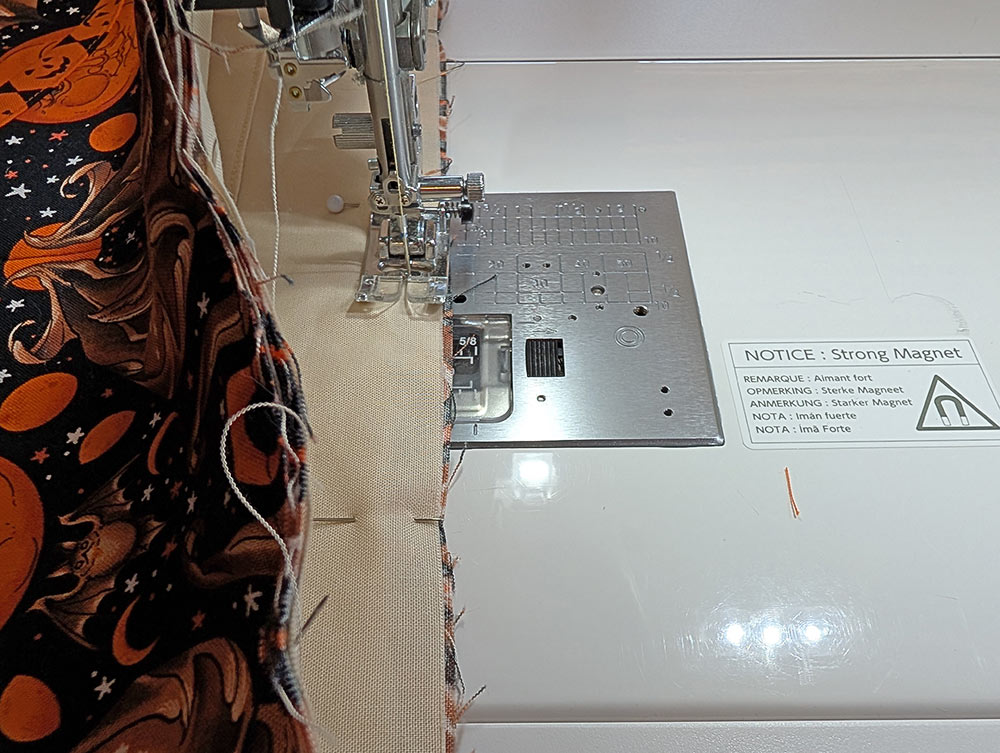
- Place a side panel right sides together along either side of the front panel. Pin in place.
- Using a ½” seam allowance, stitch each side seam. This means you are stitching along but not on the fleece.
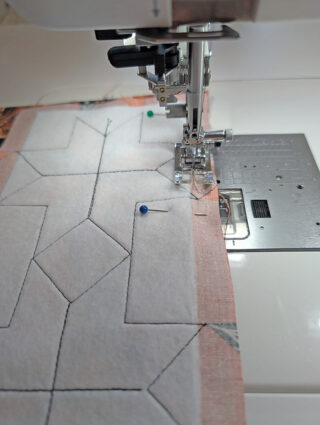
- Press the two seam allowances together and towards the front panel.
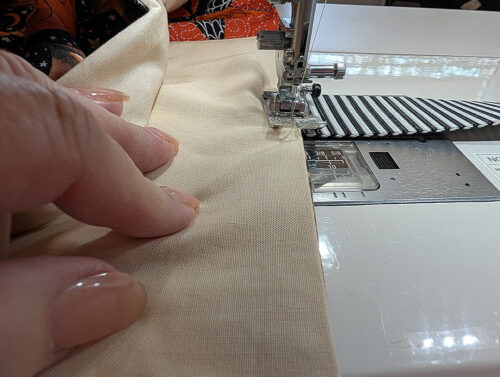
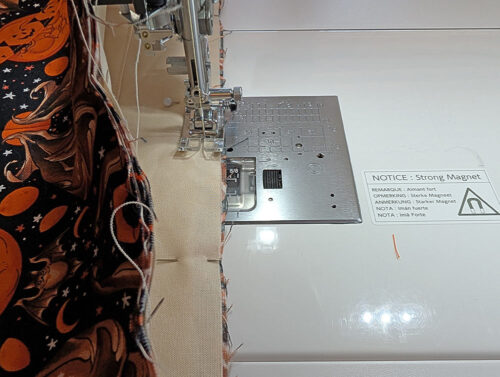
- Flip over the panel and edgestitch along each seam line within the front panel. As above with the binding, we switched to our Blind Hem foot and re-set for a slightly lengthened stitch to keep a beautiful straight line of edgestitching along each seam.
- Switch back to a standard presser foot and add the back panel in the same manner, attaching it to the remaining raw edge of the right side panel (right as you are looking down at the tote) so you now have all four panels stitched together in a row. Press this seam allowance towards the back panel and edgestitch (switching back to the a Blind Hem foot with a lengthened stitch) within that panel as you did with the front panel.
- Place the assembled flat exterior panel right side up and flat on your work surface.
- Find the two lengths of webbing. Form each into a loop and center a loop on the front and the back main panels. The raw ends of the webbing should be flush with the top raw edge of the panels with the loops hanging down. There should be 5” between each pair of handle ends, measuring from the inner edges. Pin the handles in place. Machine baste in place for extra security.

- Bring the remaining raw vertical edges right sides together to form a tube. Using a ½” seam allowance, stitch together, using a standard presser foot and standard stitch settings.
- Since you now have a tube, it can be a bit trickier to press this last seam allowance together and toward the back. A pressing ham is a handy tool to help. A rolled-up hand towel is another good option.

- Turn the tube right side out to complete the final line of edgestitching within the back panel, flattening it as you move it under the presser foot. We again switched to a Blind Hem foot and lengthened our stitch for this step.
- Set aside the completed exterior tube.


Make and place the lining pocket
- Find the lining pocket, which should have its interfacing already fused in place. Refold the pocket panel in half again, but this time it should be right sides together. Pin along both sides and across the bottom, leaving an approximate 2-3” opening at the center of the bottom seam for turning.
- Re-thread with thread to best match the lining fabric in the top and bobbin. Re-set for a standard straight stitch.
- Using a ½” seam allowance, stitch along both sides and across the bottom. Remember to pivot at each bottom corner and to lock the seam at either side of the opening left for turning.
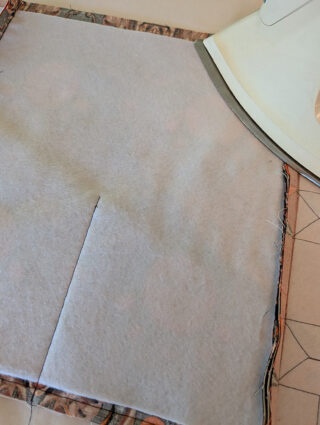
- Clip the corners then press open the seam allowance.
- Turn the pocket right side out through the bottom opening.
- Using a long blunt tool, gently push out the corners so they are as sharp as possible. A knitting needle, chopstick or point turner are all good options. Press flat, pressing in the seam allowance at the bottom opening so it is flush with the sewn seam.
- Find the back lining panel (both lining panels are the same, simply choose one to be your back panel).
- Place the pocket into position. The folded edge is the top of the pocket. The interfaced side of the pocket should be facing out. Center the pocket side to side and 2” up from the bottom raw edge of the panel. Pin in place along both sides and across the bottom.
- Edgestitch along both sides and across the bottom, pivoting at the corners. This seam closes the opening left for turning. Some people like to do a substantial back-tack at both upper corners to start and end the seam. These are stress points and the extra stitching can help stabilize them.

Assemble the panels to create the lining tube
- The lining tube is created in the same manner as the exterior tube, starting with adding the side panels.
- And continuing through all the steps, including the edgestitching within the front and back panels to flatten and secure the seam allowances.

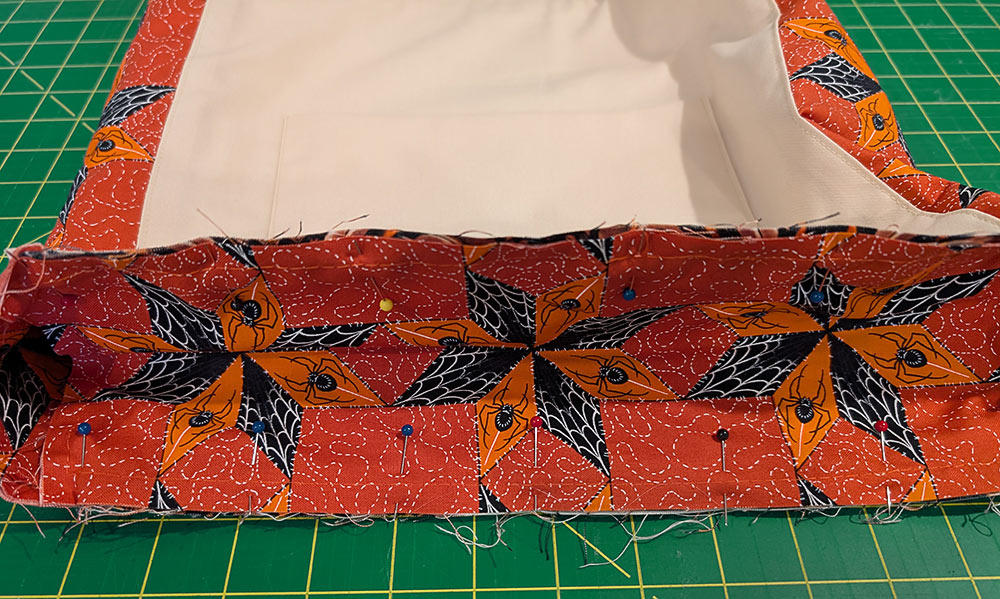
Assemble the exterior and interior tubes
- Start with the lining tube right side out and the exterior tube wrong side out.
- Slip the lining inside the exterior so the two tubes are now right sides together.
- Align the side panel seams of the the two layers and make sure the top and bottom raw edges of all the layers are flush. The handles should still be hanging down, and they are sandwiched between the layers.
- Pin all the way around the top through all the layers.
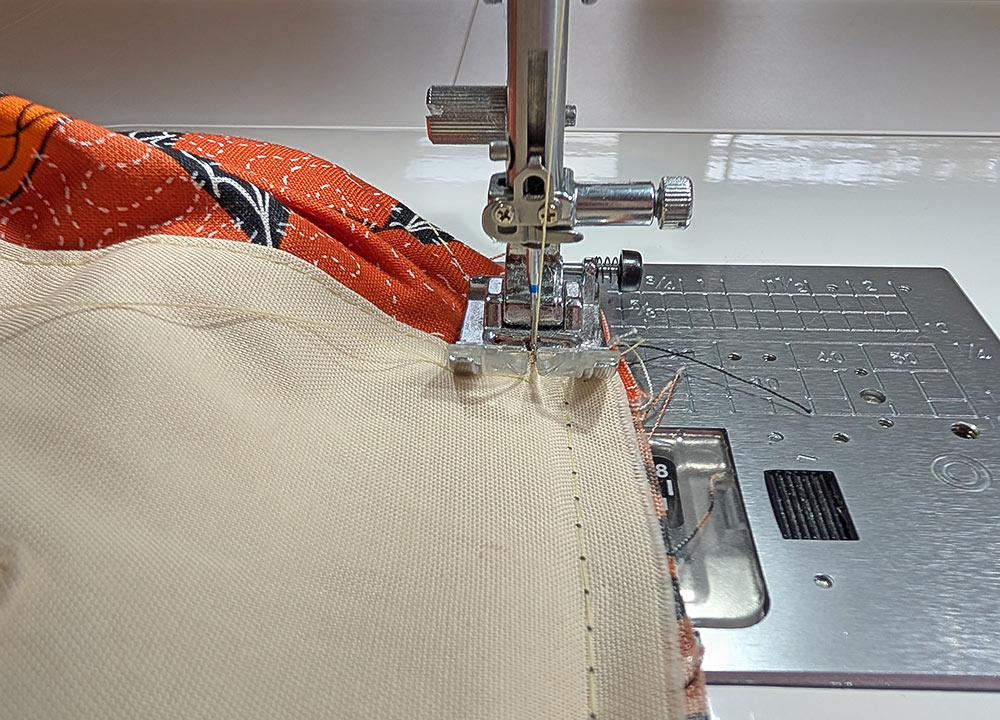
- Using a ½” seam allowance, Stitch all the way around the top through all the layers.
- Turn the tube right side out through the open bottom, pulling the handles out into position.
- Press the seam allowance down towards the exterior section, then push the lining down into the exterior so the layers are now wrong sides together. Press well all around the top.
- We opted to work with the lining facing up and so re-threaded the machine with thread to best match the lining in the top and to best match the exterior in the bottom. Slightly lengthen the stitch.
- Edgestitch all around the top through all the layers. We ran our edgestitching ⅛” from the top of the tote.
- We also machine basted around the open bottom of the tote at this point as well to help keep those bottom layers flat and secure through the rest of the construction.
- You are ready to finish.


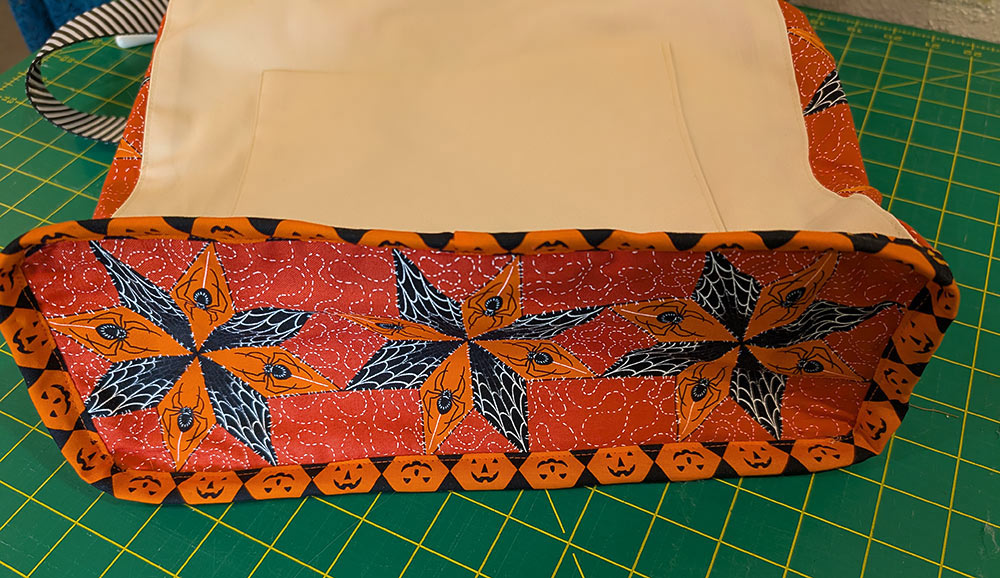
Insert the base panel and bind the inside seam allowance
- The base panel for this bag follows the same method for any project that inserts a rectangular base into a tube. We’ve summarized the steps here, but if you are brand new to the technique, we have a full step-by-step tutorial you can review prior to starting.
- The first step is to find the center points along each side of the base panel as well as along the bottom of the tote.
- For the base panel, it’s easy – just measure to find the center along the two 5” ends and the two 13” sides.
- For the bottom of the tote, the front and back panels are now 12” in width so the center point is 6” from each side panel seam. The side panels are now 4” in width so the center point is 2” from each seam.
- You can also think of these quadrant points like the quarter hours on a clock: 12:00, 3:00, 6:00, and 9:00.
- With your quadrant points marked with pins or small notches, turn the tote wrong side out.
- Set the base panel into the “tube” of the tote so the base panel and the tote are right sides together. It’s a bit like placing a lid upside down into a box.
- Using the quadrant point notches/pins, align the base with the bag. Pin at the marked points first, then fill in all around.

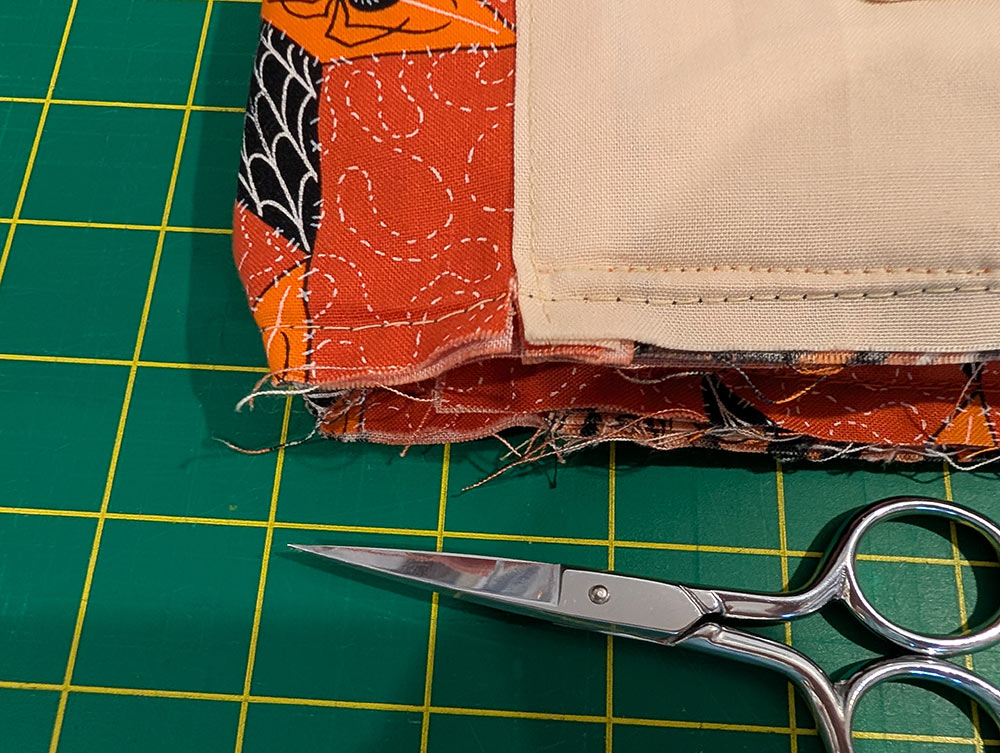
- We used our standard presser foot and standard straight stitch settings. Start in one corner, dropping your needle ½” in from the actual corner of the fabric.
- Using a ½” seam allowance, stitch along the first side, stopping the seam at the opposite corner ½” in.
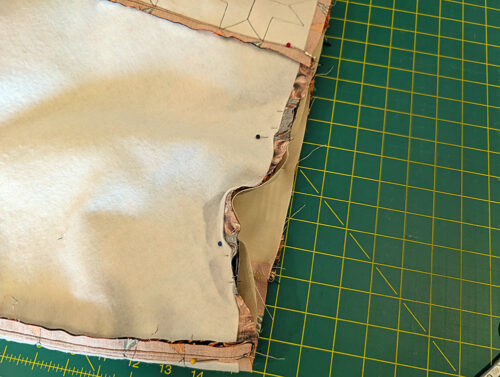
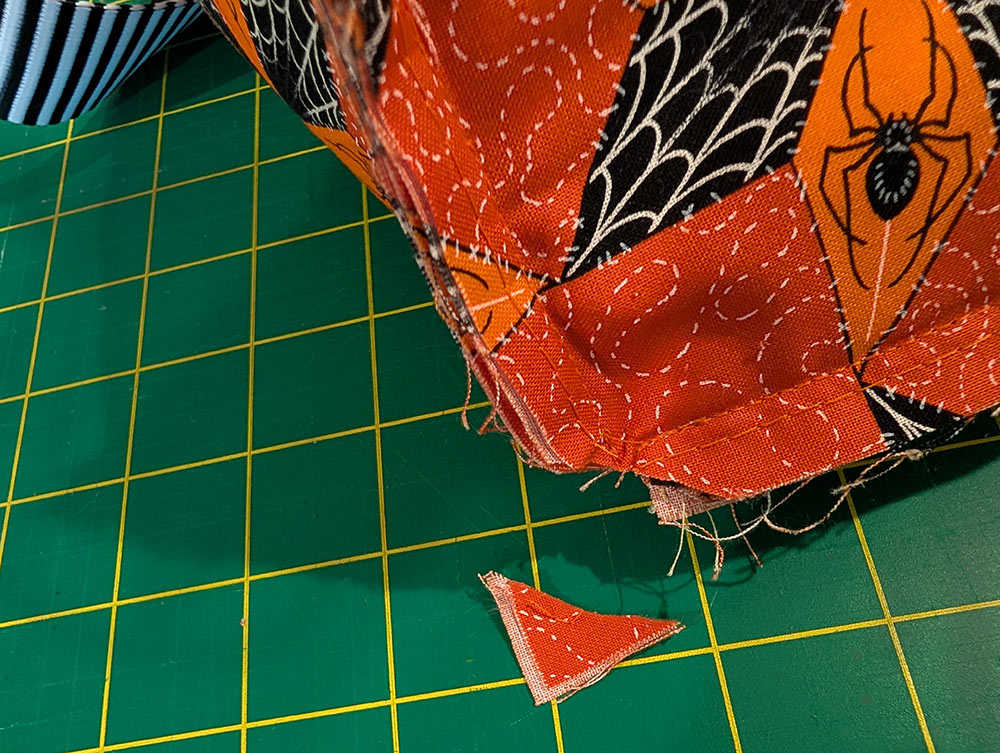
- Remove the project from the machine. Clip into each corner on the bottom of the tote – not too deep, just about ⅜” is good. This allows the tote to spread out and more easily turn the corner to match the base.

- Pin and stitch the side of the tote.
NOTE: We took the time to change thread colors for each side of the tote. This is optional but a nice pro secret.
- Stitch each side in the same manner.
- Clip the corners when done. If need be, you can trim the seam allowance slightly to even out the raw edges.
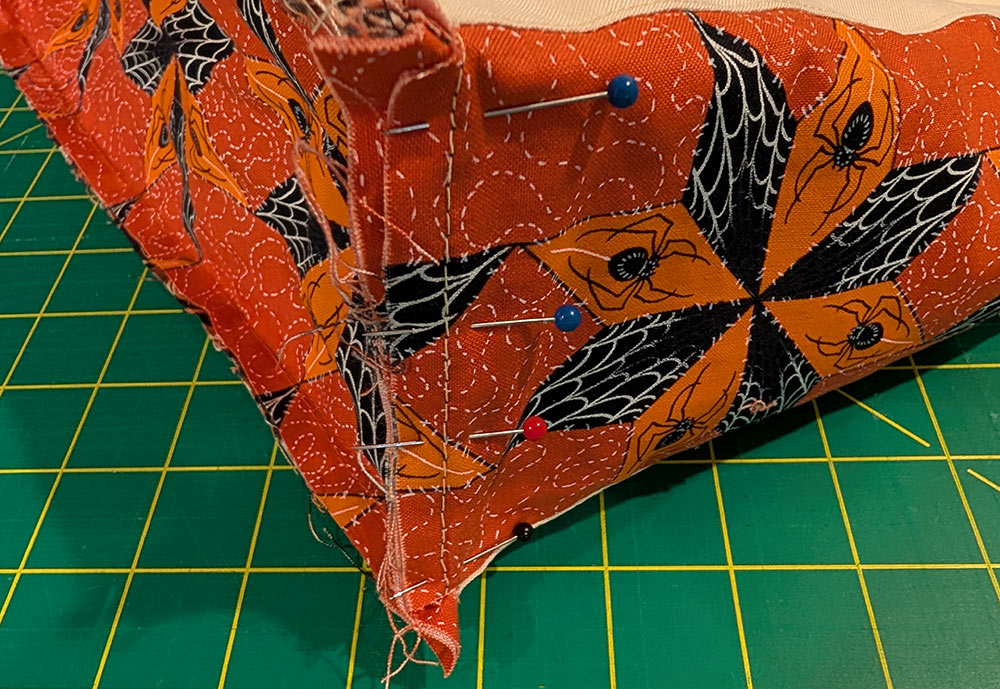
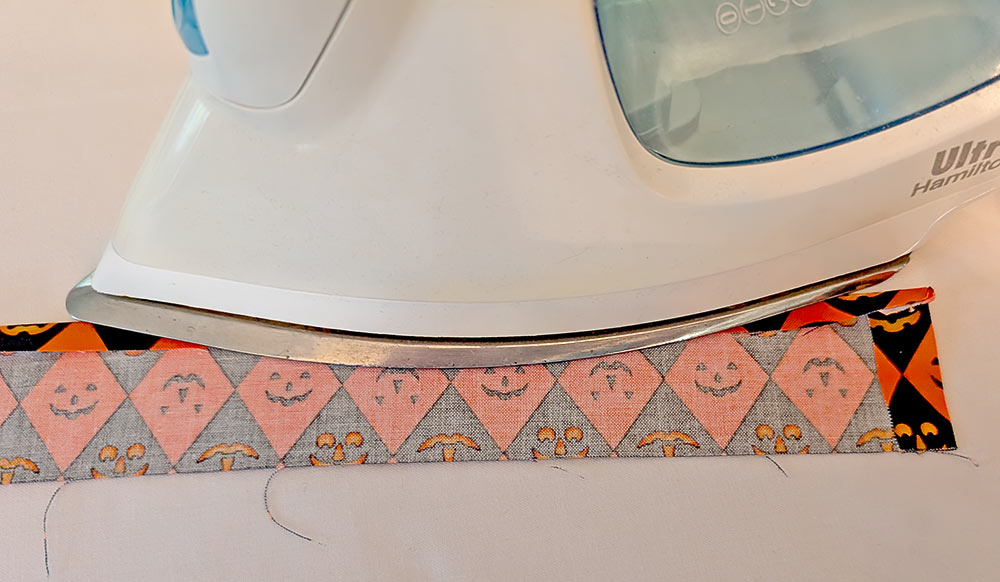
NOTE: Remember, if you are brand new to the technique, we have a full step-by-step tutorial you can review prior to starting. - Find the 2” x 36” binding strip. Fold in one end ½” (the starting end) and fold along one side ⅜”

- The tote should still be wrong side out with the seam allowance showing.
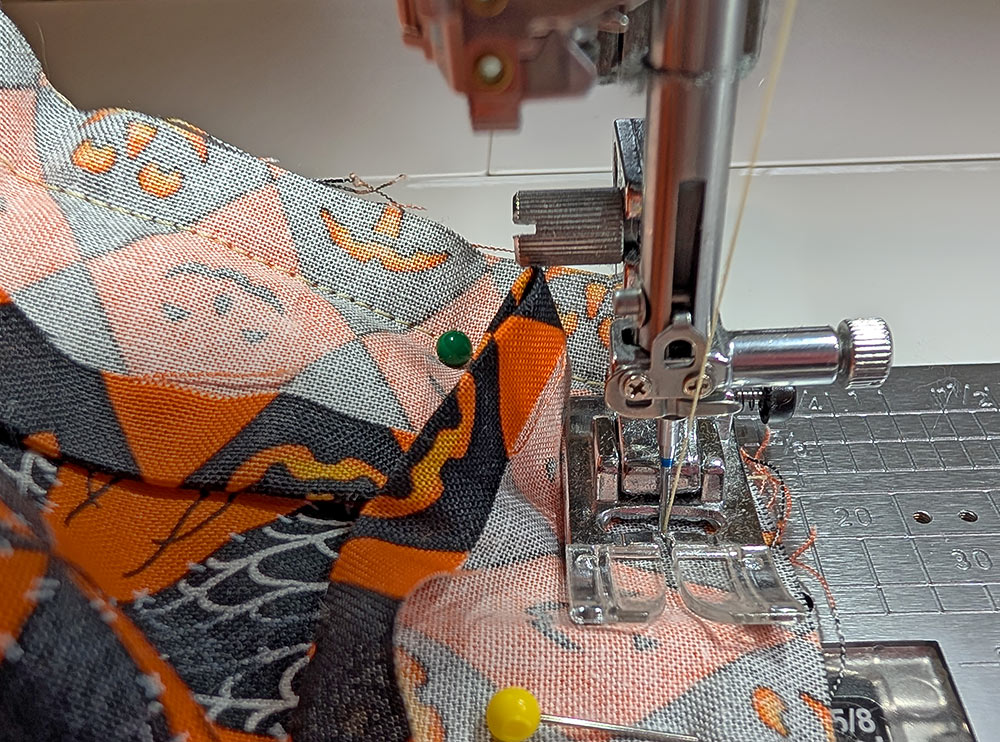
- Leaving an inch or two loose at the start, place the binding strip against the seam allowance, aligning the raw edge of the strip with the seam allowance. Pin in place. Remember… you are only working with the seam allowance; do not pin or stitch into the body of the tote.
- Re-thread the machine with thread to best match the binding strip in the top and bobbin.
- Stitch all the way around the base panel, staying close to the original seam line. And, we’re reminding you again because it’s important: you are stitching through the binding strip and the seam allowance only – do not stitch into the body of the tote.

- At the corners, make a little pleat in the strip to allow you to more easily make the turn.

- We used a simple overlap of the folded end over the raw end to finish, trimming away any excess from the raw end. Once overlapped, you can complete that final ending section of the seam.
- Wrap the folded edge around the seam allowance, encasing the edges to create your beautiful bound finish. Pin in place.

- Stitch in place through all the layers to secure the binding.

- Once again… this is all just about the seam allowance, do not stitch into the tote. You could certainly used standard packaged double fold bias binding for this step… but where’s the fun in that?!


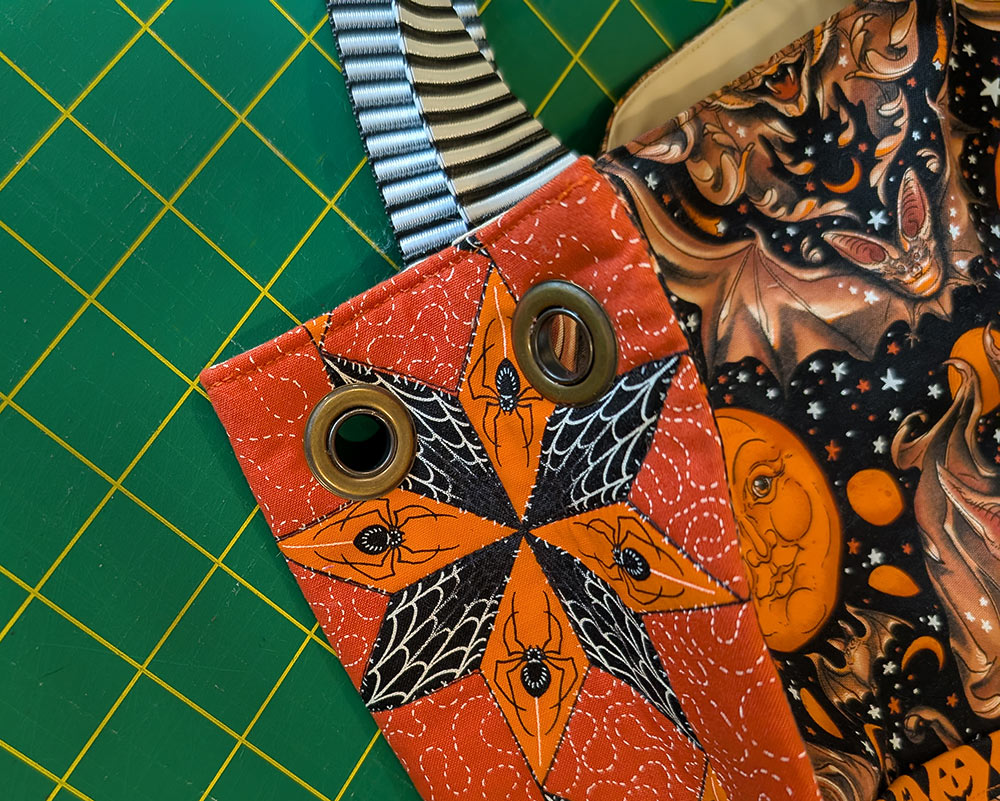
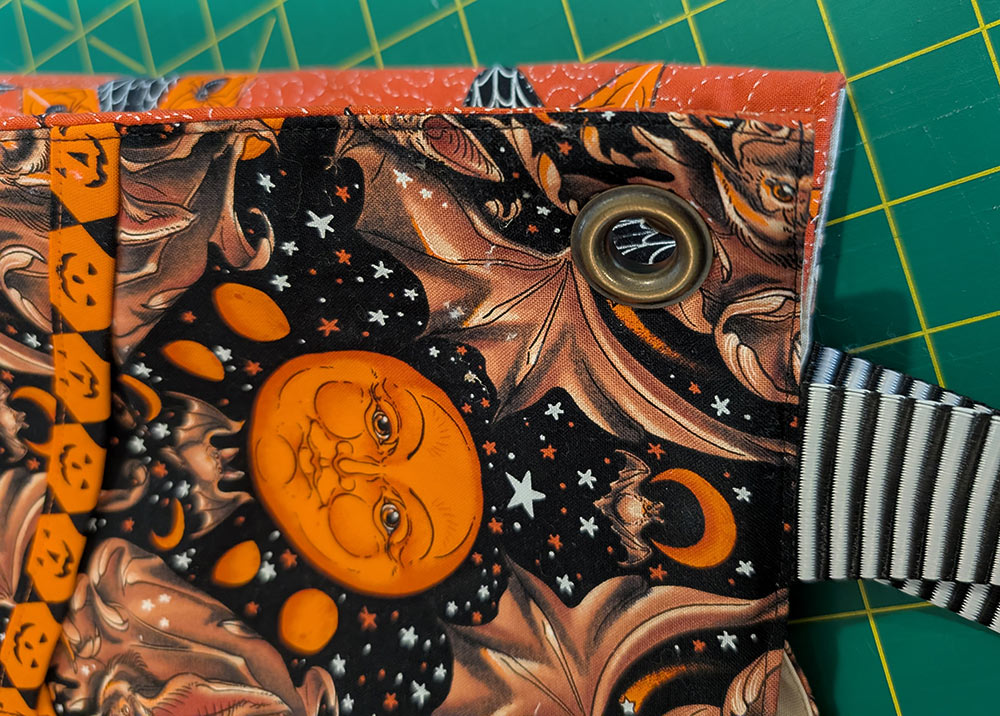
Insert the grommets
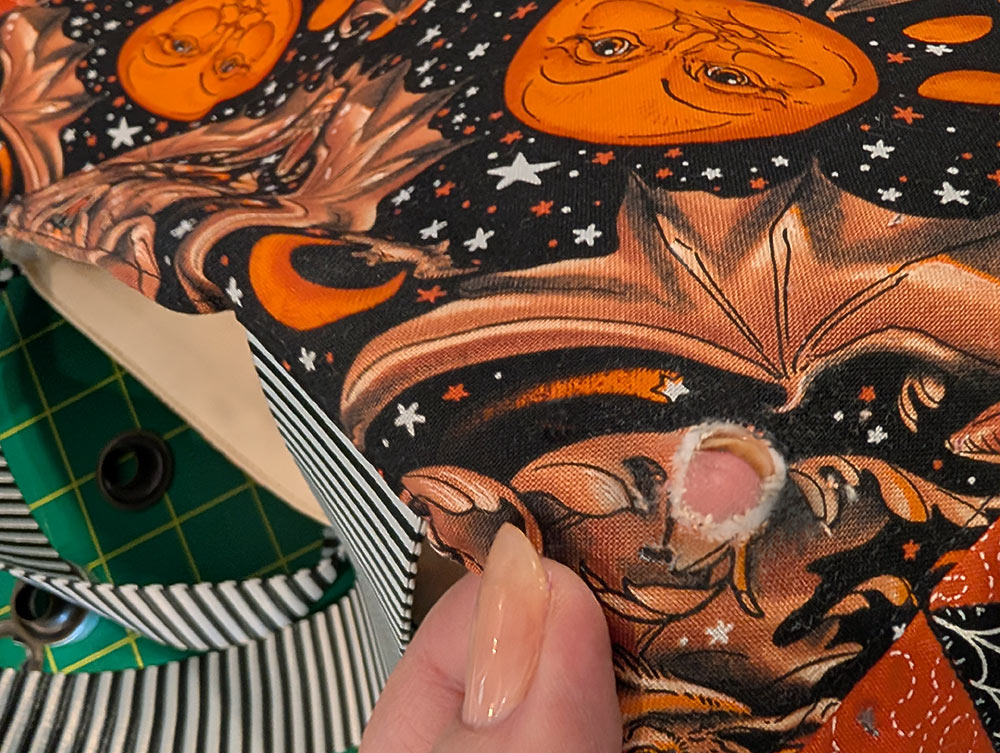
- You will make eight holes, but will insert just four grommets because the grommets go through multiple layers to form the unique side pleats.
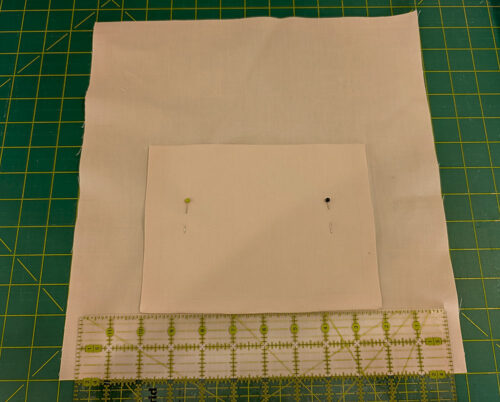
- The grommets are placed 1” down from the upper edge and 1” from each side seam. When you measure for a grommet, you are measuring to the center hole of the grommet. For example, 1” from the top edge of the bag to the center of the hole of the grommet. Refer to the drawing below.
- Use a grommet as a template to trace each hole with a fabric pen or pencil. Then use a pair of small, sharp scissors to cut out each hole.

- We often suggest using a bit of seam sealant around the cut hole.
- To create the side pleats, simply align the holes to either side of each side seam and insert the grommet through all the layers.
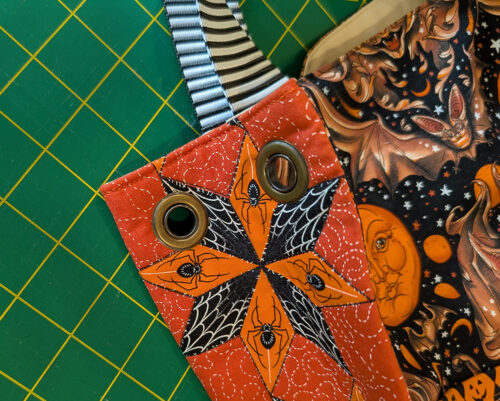
- If you’re new to this technique, we have a full tutorial you can review on setting grommets and eyelets for all the easy steps. Our number one hint is to do your setting on a very hard surface, like a granite counter. It will allow the two parts of the grommet to seat properly with just a couple firm swings of your hammer. That’s the top tip, but the full tutorial has many more!


Make the ties
- Find the two folded 27” strips. Open up each strip so it is wrong side up and fold in each long raw edge so the two raw edges meet in the middle.
- Fold again along the original crease line to create a little mini binding. The ends remain raw.
- We inserted two 27”lengths of yarn into each folded strip to add a bit more “oomph” to the finished tie. This is optional.
- Re-thread if necessary with thread to best match the fabric in the top and bobbin. Re-set for a slightly lengthened straight stitch.
- Stitch the length of the strips along the side with the flush folded edges.
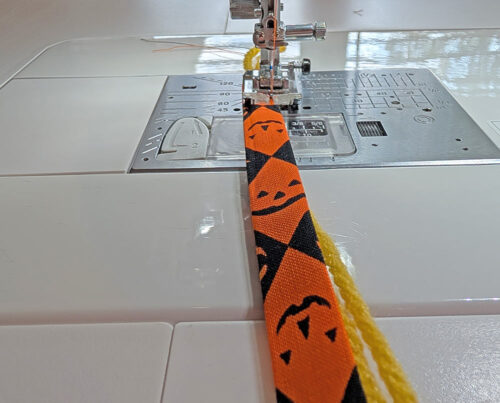
- Insert a tie through the set of grommets on each side and make a small bow or square knot to secure. We also tied a small knot at the end of each tail and added a dot of seam sealant.

Project Design: Anne Adams
Sample Creation and Construction Notes: Michele Mishler