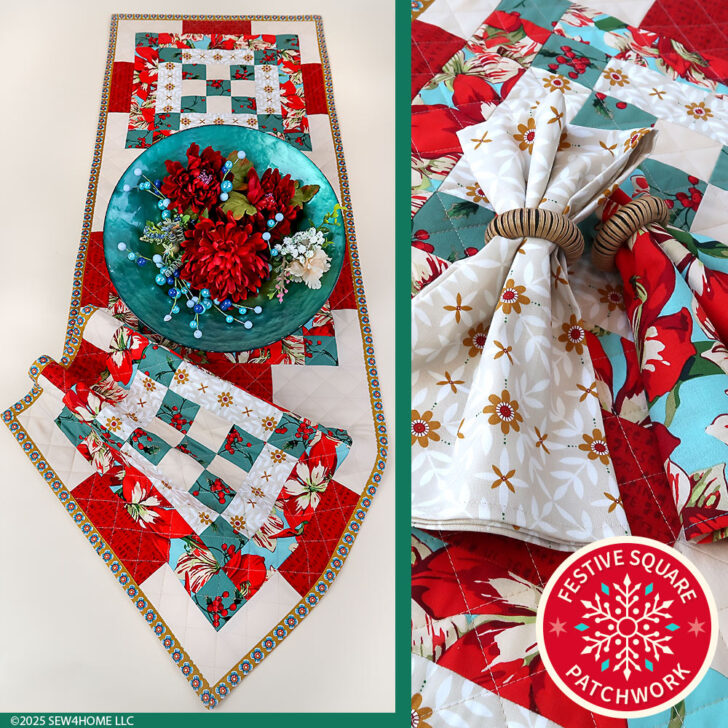
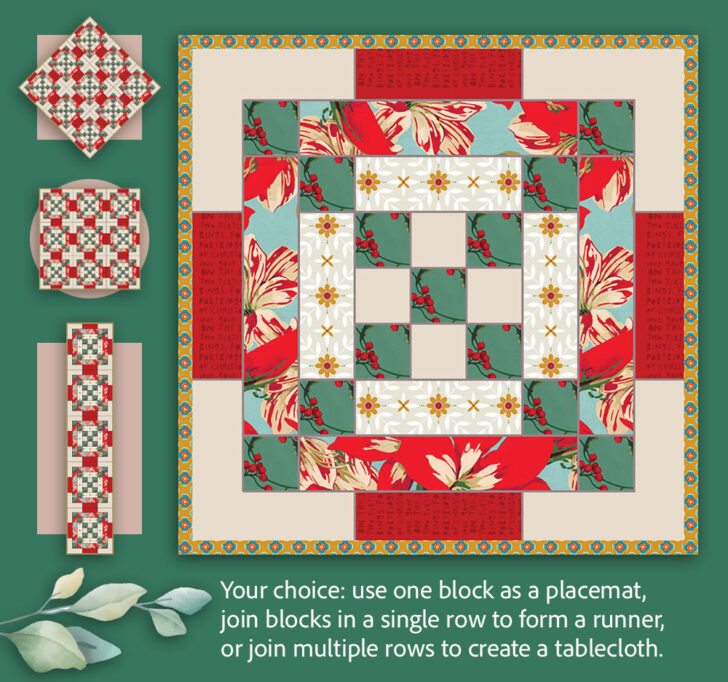
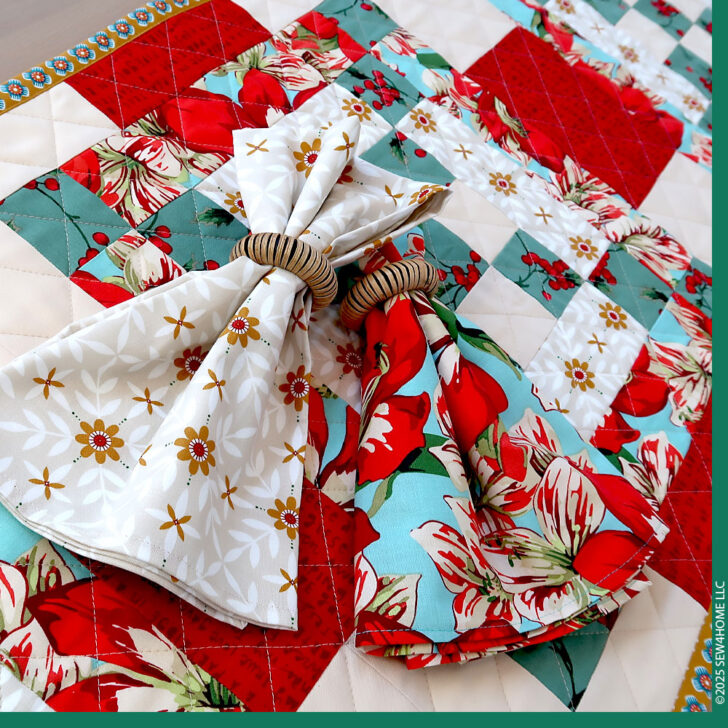
No matter the time of year, we all love planning for holiday decorating, and setting a beautiful table is often a focal point. Our Festive Square Patchwork block is designed to stand alone as a placemat, to duplicate in a row as a runner or to build into a square as the centerpiece of a tablecloth.
In patchwork and quilting, the need for precision in your fabric feeding, seam allowances, and stitch settings is paramount. These features are exactly why we love being a Janome Exclusive Studio. The Janome Skyline S9 is the machine we chose for this project, and although we didn’t incorporate its embroidery capability, we relied heavily on its AcuFeed™ Flex built-in fabric feeding system, the variety of available presser feet, and the ability to precisely set our stitch width and length and our needle position for seaming as well as the final diamond quilting.
The entire Janome Skyline line is one of our favorites, and the 10th Anniversary sleek redesign of the sewing-only models, the S7, S6 and S3, is very cool. If you are in the market for a new machine, Janome is always our first choice – and our number one recommendation is to check them out for yourself at a local Janome dealer. Stitching on a machine is always the very best way to know if it is right for you. A dealer can also give you a tour of the machine’s top features and stitches, and they can answer questions about how a model will address your particular sewing challenges.
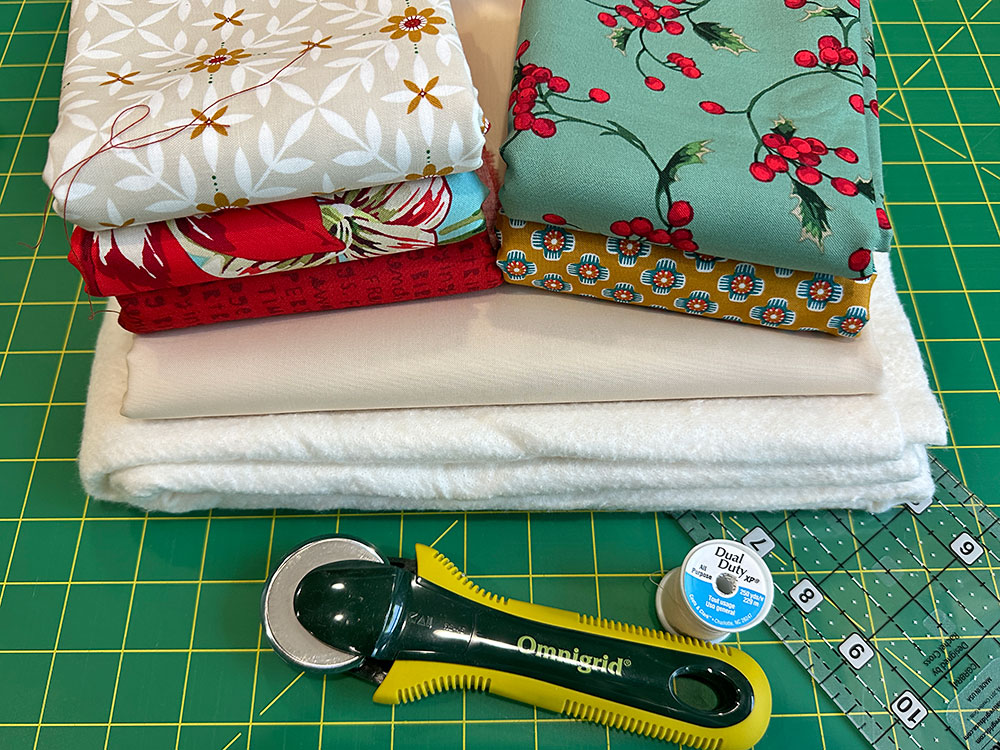
We originally used two fabrics from within the Holly Day collection by Martha Negley for FreeSpirit Fabrics and three fabrics from within the 12 Days of Christmas collection by Cori Dantini for FreeSpirt Fabrics. Both collections are new for the 2025 holiday season and available now at your favorite in-store and online independent quilt shops. Remember to shop early as the newest, most beautiful collections, like the two we chose, can sell out quickly.
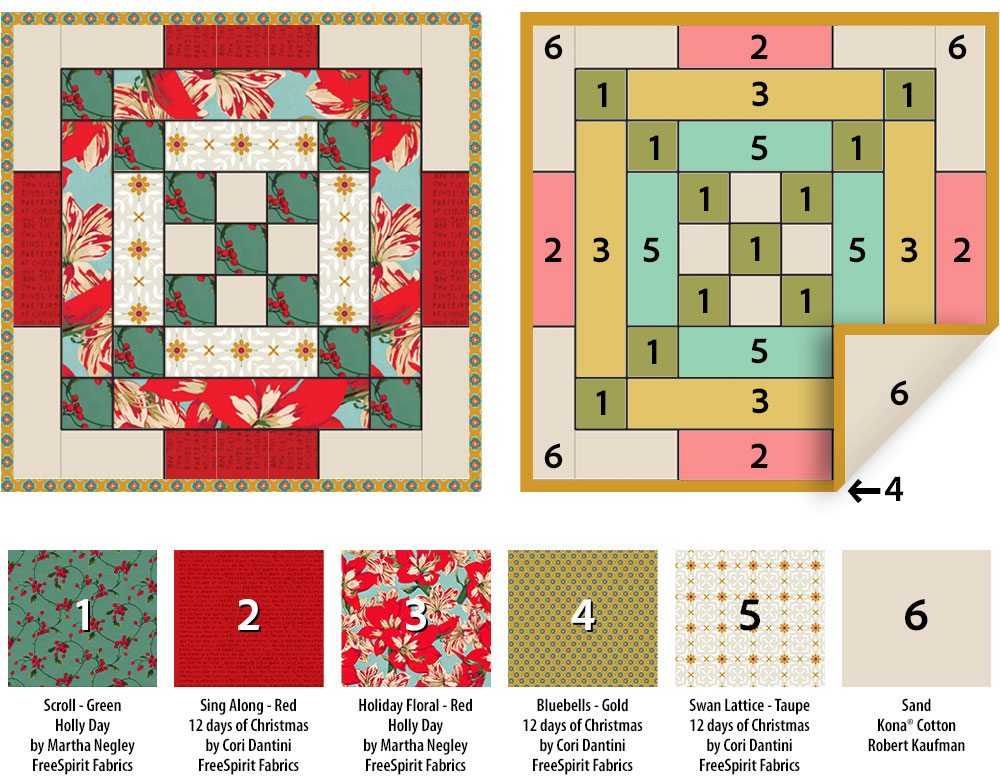
Four prints are used within the patchwork along with a coordinating neutral solid, which is also used as the backing. The fifth print becomes the binding. All the fabrics are broken out below so it’s easy to follow along, using these exact prints or your own selections. We started with full yard cuts of each of our fabrics, but you could also use pre-cut bundles, such as Fat Quarters.
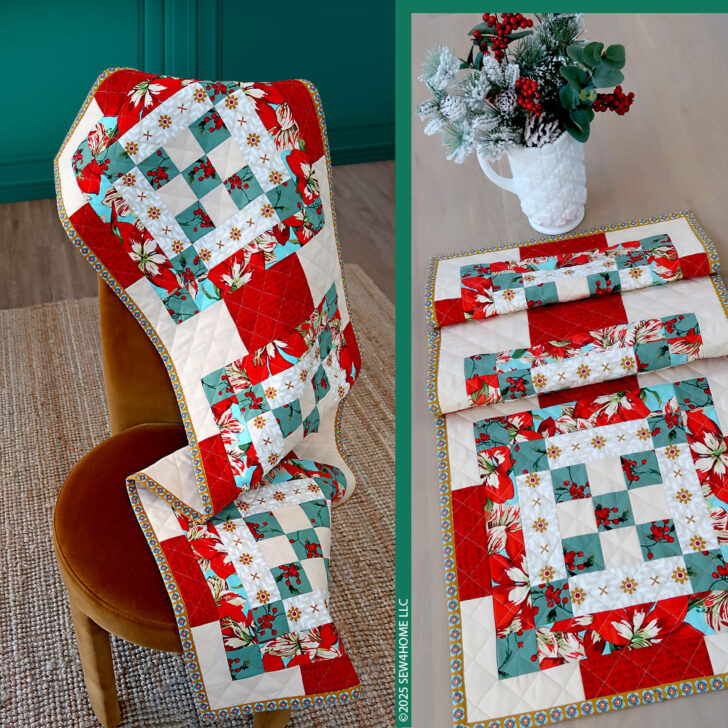
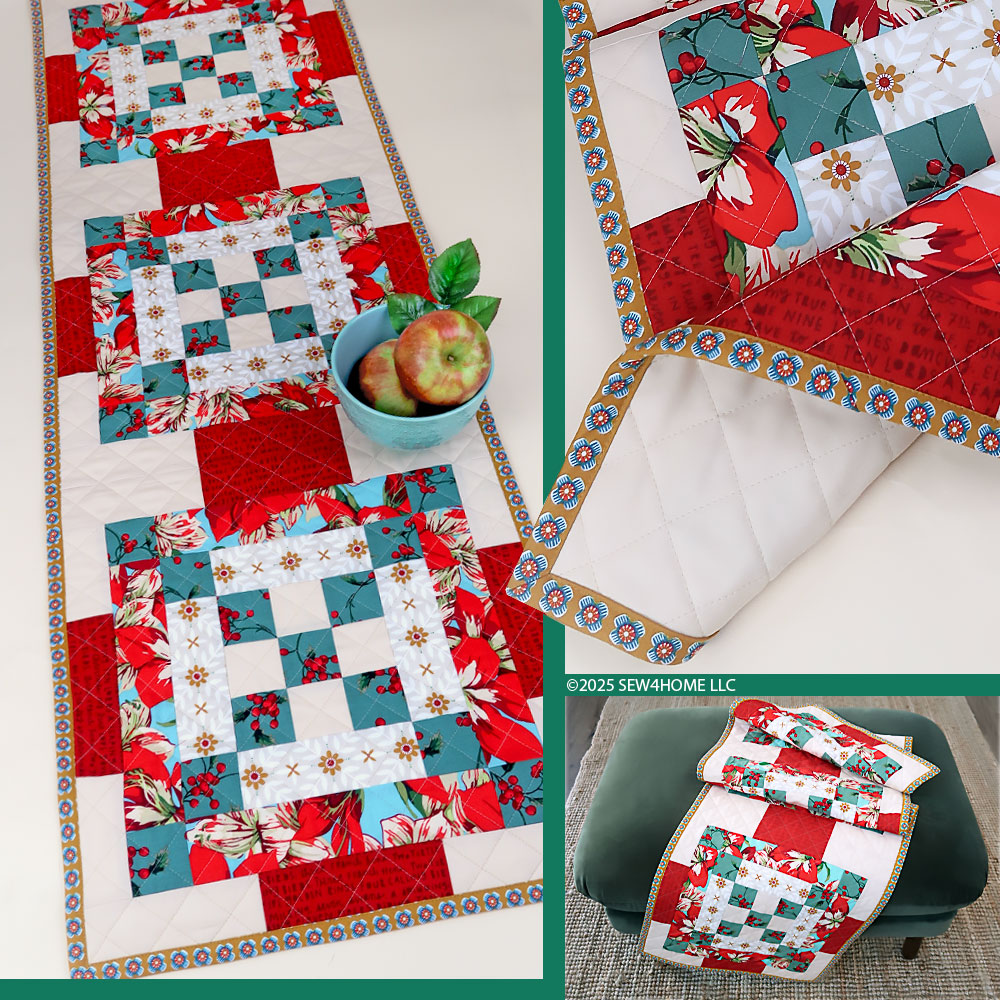
In the Supplies list, we outline the yardage required for one 18” block. Simply multiply these yardages to figure out the amounts required for multiple placemats, a runner or a tablecloth. We’ve also included specific details for the backing and binding yardage we used to create our pretty three-block table runner as a good example of that multiplication.
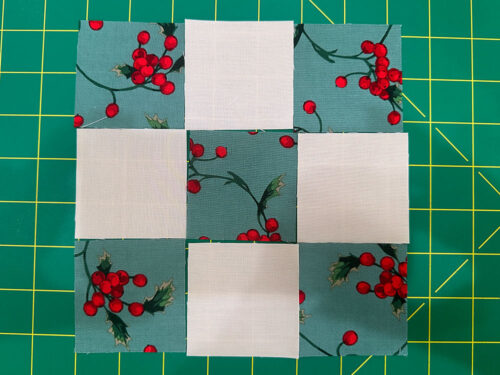
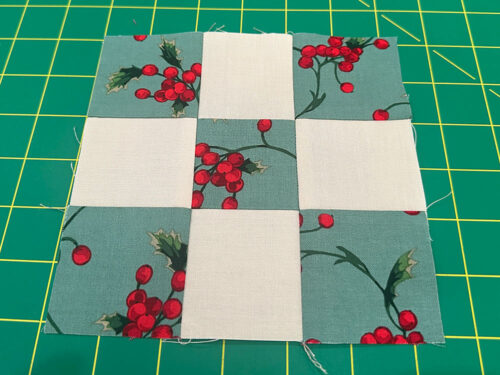
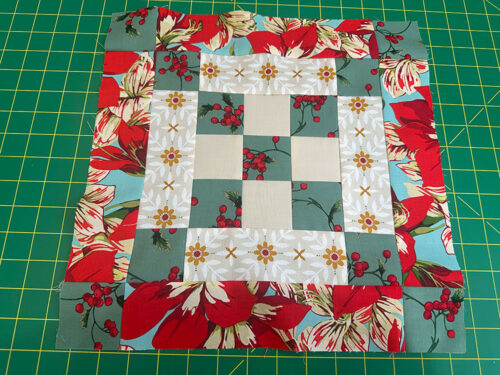
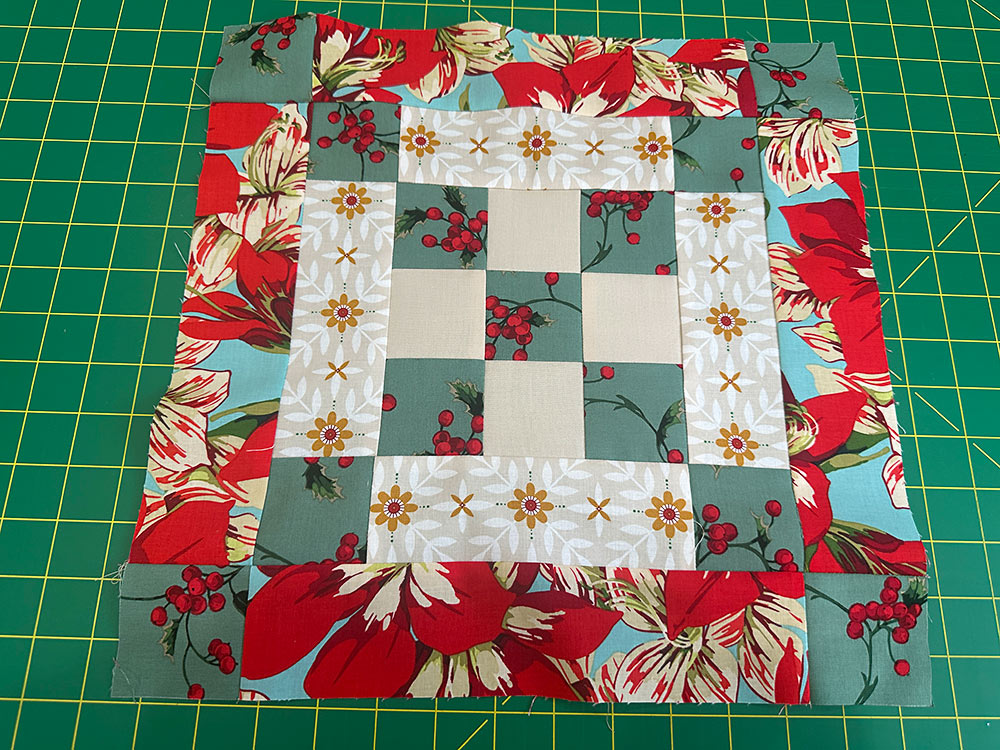
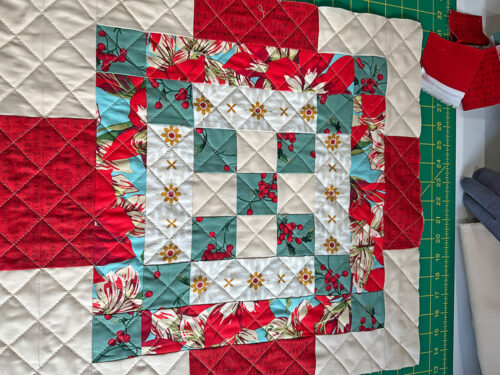
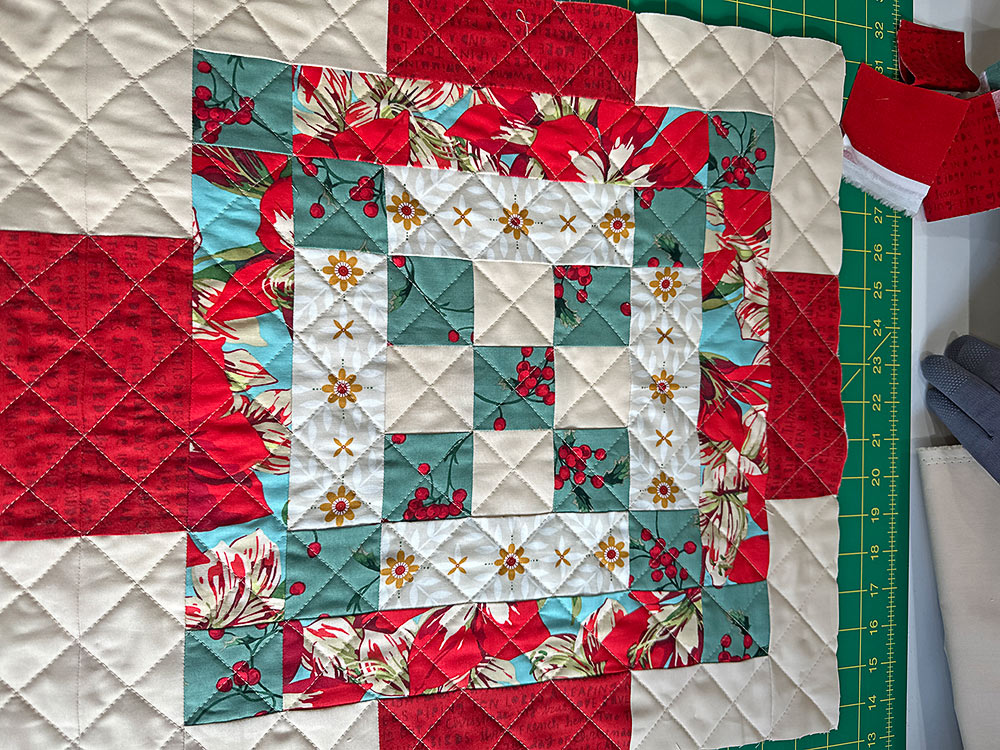
The structure of our 18” block contains a standard nine-patch center surrounded by two traditional corner block frames with a double fabric border frame to finish it off. We’ve broken out the piecing steps in detail below. If you’re a pro, you can speed right through, but even if you are brand new, our step-by-step process ensures you can have success.
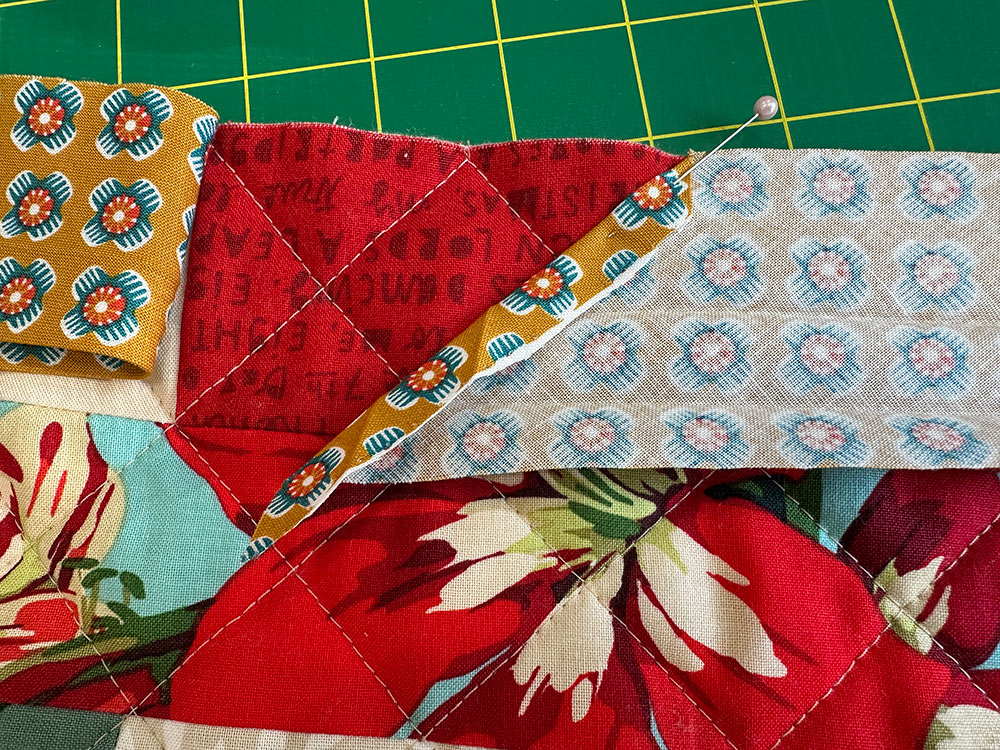
We did fussy cut the Swan Lattice print, which makes up the sides of the inner frame, but all the other pieces are random cuts. You can cut each of your pieces to exactly match block to block, or vary the position of the cuts within each fabric’s motif to give every block a unique yet still coordinated finish.
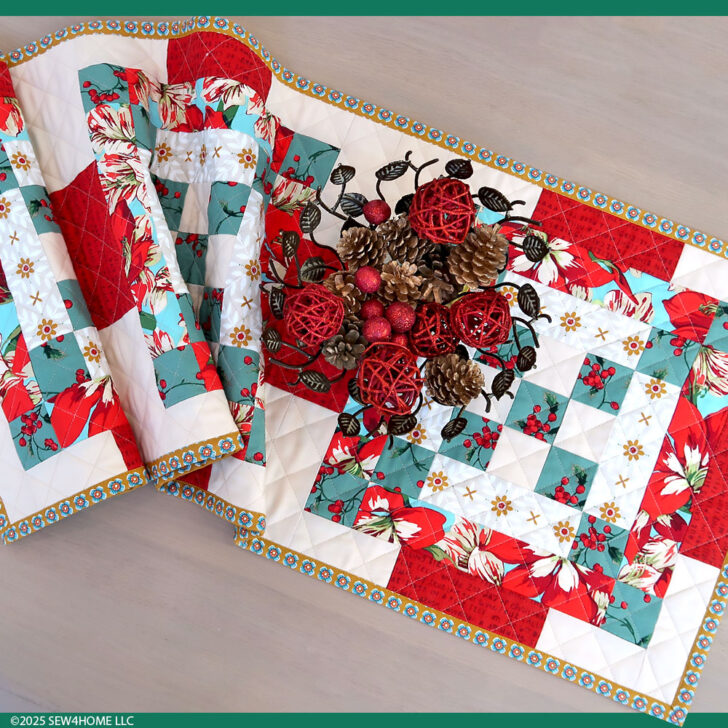
We show you the steps to create the diamond quilting pattern we chose to finish our runner. As always, the final quilting design is always up to you. Try simple straight line quilting or free motion swirls at the edges with stitch-in-the-ditch lines in the center.
Because we started full one-yard cuts of these beautiful fabrics from FreeSpirit Fabrics (thank you, FSF!), we had a bit left over. That’s a great opportunity to make matching napkins. Check out our free basic napkin project, which includes a link to our favorite narrow hem with clean corners technique.
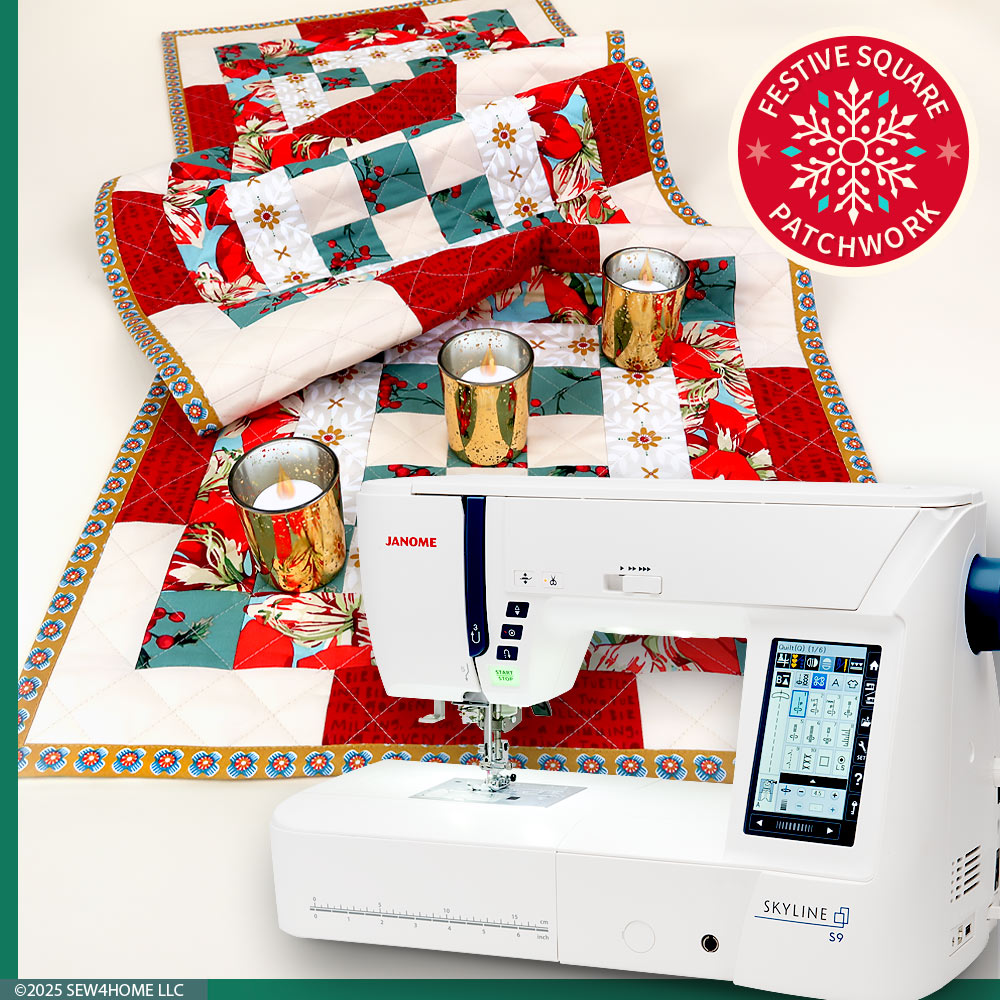
Our thanks go out to Janome America for sponsoring this project to give you some beautiful inspiration to start on your holiday sewing. If you’re looking for your next machine, we invite you to visit a local Janome dealer for an in-person test stitch on the models we consider to be the best in the industry. To find out more before you go, visit the Janome website and follow them on social media.
As mentioned, this block finishes at 18” x 18” and can stand alone as a placemat or be duplicated to create a runner or tablecloth. Our three block sample runner finished at approximately 18” x 54”.
Sewing Tools You Need

- Sewing Machine and standard presser foot
- Quarter Inch Seam foot
- Quilting Guide Bar; optional but helpful for the final quilting lines
- Even Feed/Walking foot or engage your machine’s built-in feeding system; we used the Janome AcuFeed™ Flex built-in fabric feeding system
Fabric and Other Supplies
NOTE: Supplies listed below are for ONE block, which finishes at approximately 18″ x 18″. Because this block is designed to be flexible, detailing a single set-up allows you to multiply the yardages and cuts needed to best fit your finished item: multiple single block placemats, a table runner or a tablecloth. However, we do give you additional information on our specific three-block runner sample should you which to duplicate it exactly.
- SIX 44” + wide quilting weight cottons; we originally used two fabrics from the Holly Day collection by Martha Negley for FreeSpirit Fabrics, three fabrics from within the 12 Days of Christmas collection by Cori Dantini for FreeSpirt Fabrics, and a coordinating solid for both the patchwork as well as the backing (Kona Cotton in Sand). Below is drawing of the block with our chosen fabric along with a drawing showing just color blocks with fabric numbers. A key to the fabrics is shown just below these drawings.
NOTE: If you decide to do specific fussy cutting, go up to the next most common cut to give yourself enough fabric to work with. For example, opt for ¼ yard rather than ⅛ yard – ½ yard rather than ¼ yard.
|
Yardage for ONE BLOCK |
|
|
Fabric 1 |
ONE fat quarter or a 2½” x 39” strip of fabric or ⅛ yard |
|
Fabric 2 |
ONE fat quarter or a 2½” x 28” strip of fabric or ⅛ yard |
|
Fabric 3 |
ONE fat quarter or a 2½” x 44” strip of fabric or ⅛ yard |
|
Fabric 4 |
75” of 2½” binding is required; get ½ yard if cutting on the bias – ¼ yard if not, we recommend cutting on the bias |
|
Fabric 5 |
ONE fat quarter or a ½” x 28” strip of fabric or ⅛ yard |
|
Fabric 6 |
⅔ yard for both the patchwork and the backing |
|
Batting |
ONE 20” x 20” panel or ⅝ yard |
|
Yardage for OUR THREE-BLOCK RUNNER |
|
|
Fabric 1 |
¼ yard |
|
Fabric 2 |
¼ yard |
|
Fabric 3 |
¼ yard |
|
Fabric 4 |
apx. 150” of 2½” binding is required; we cut on the bias and wanted a specific fussy cut and so worked with a full yard; you could get away with ½ to ⅔ yard based on your fabric motif and cutting style |
|
Fabric 5 |
¼ yard |
|
Fabric 6 |
1⅔ yards for both the patchwork and the backing, this allows the backing to be cut as one 56” panel |
|
Batting |
ONE 20” x 56” panel – batting can be pieced, although for a runner, we traditionally recommend cutting it as a single panel to avoid any bumps; it can be sourced at very wide widths – look for a 60” wide option, which would need just a ⅔ yard cut |
Additional Supplies
- All-purpose thread to best blend with all fabrics for construction as well as one additional thread color of your choosing for the quilting, we used a dark tan to stand out against our chosen solid fabric
- See-through ruler
- Fabric pen or pencil
- Iron and ironing board
- Scissors
- Rotary cutter and mat
- Seam gauge
- Seam ripper
- Straight pins
Getting Started
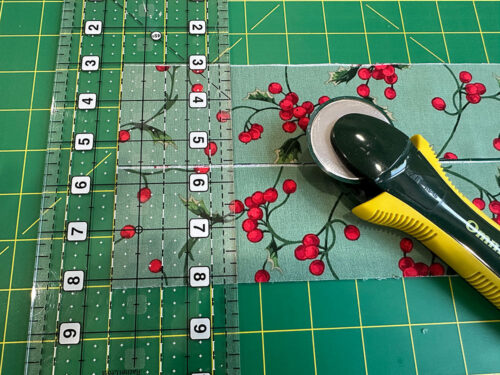
- When working with yardage and pieces that are similar in size, we recommend first cutting width of fabric (WOF) strips and then sub-cutting. For example, cut one WOF strip of Fabric 1 at 2 ½” …
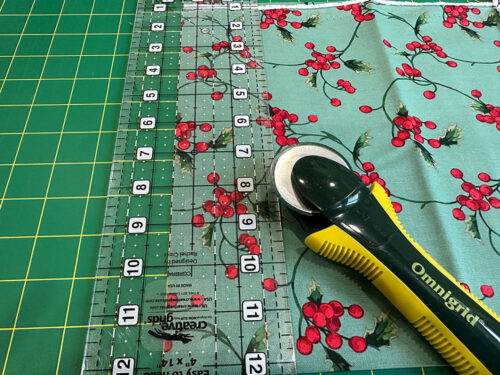
- …then sub cut that strip into your individual thirteen 2½” squares.


FOR EACH BLOCK:
- From fabric 1: Scroll in Green from Holly Day, cut THIRTEEN 2½” squares.
- From fabric 2: Sing Along in Red from 12 Days of Christmas, cut FOUR 2½” x 6½” rectangles.
- From fabric 3: Holiday Floral in Red from Holly Day, cut FOUR 2½” x 10½” rectangles.
- From fabric 4: Bluebells in Gold from 12 Days of Christmas, cut apx. 75” of 2½” binding strips; as mentioned, we recommend cutting on the bias. If you are new to working with bias binding, you can review our full tutorial on this technique prior to starting. There are more binding notes at the end of the instructions.
- From fabric 5: Swan Lattice from 12 Days of Christmas, cut FOUR 2½” x 6½” rectangles.
- From fabric 6: Kona 1323 Sand, cut the following:
ONE 20” x 20” panel for the backing
FOUR 2½” squares
FOUR 2½” x 4½” rectangles
FOUR 2½” x 6½” rectangles - From the cotton batting, cut ONE 20” x 20” panel
FOR OUR THREE-BLOCK RUNNER:

- From fabric 1: Scroll in Green from Holly Day, cut THIRTY NINE 2½” squares.
- From fabric 2: Sing Along in Red from 12 Days of Christmas, cut TWELVE 2½” x 6½” rectangles.
- From fabric 3: Holiday Floral in Red from Holly Day, cut TWELVE 2½” x 10½” rectangles.
- From fabric 4: Bluebells in Gold from 12 Days of Christmas, cut apx. 150” of 2½” binding strips; as mentioned, we recommend cutting on the bias. As mentioned, if you are new to working with bias binding, you can review our full tutorial on this technique prior to starting.
- From fabric 5: Swan Lattice from 12 Days of Christmas, cut TWELVE 2½” x 6½” rectangles.
- From fabric 6: Kona 1323 Sand, cut the following:
ONE 20” x 56” panel for the backing
TWELVE 2½” squares
TWELVE 2½” x 4½” rectangles
TWELVE 2½” x 6½” rectangles - From the cotton batting, cut ONE 20” x 56” panel
At Your Sewing Machine & Ironing Board
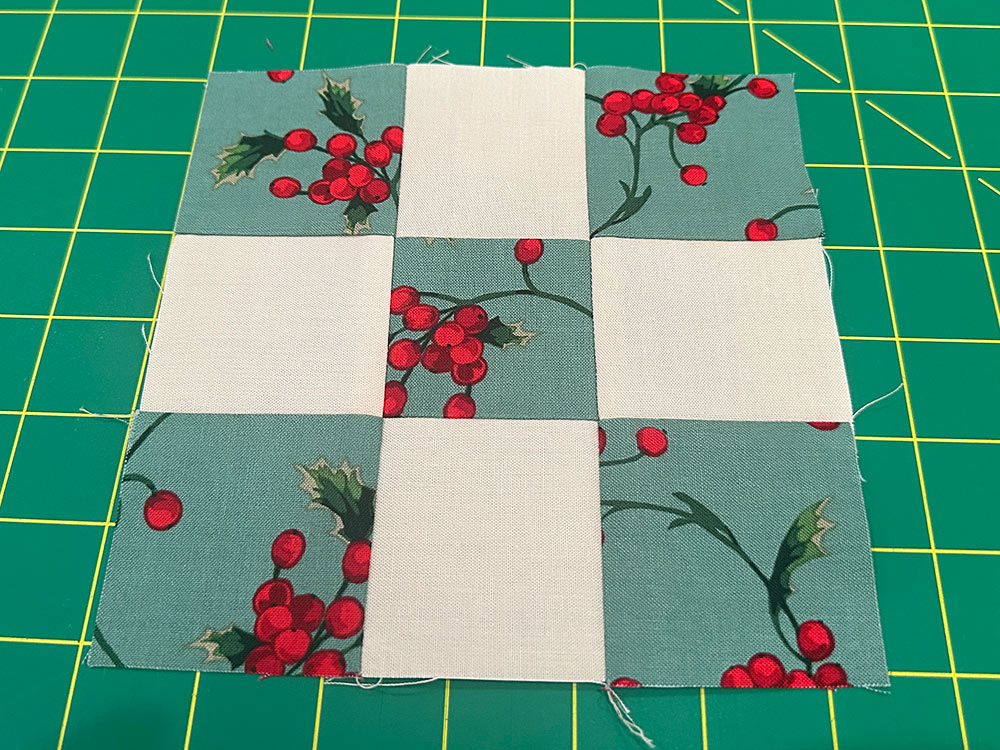
Building the center 9-patch
- Gather up all your pieces and lay them out In block order.
- We’ll be working from the inside out and using ¼” seams throughout.
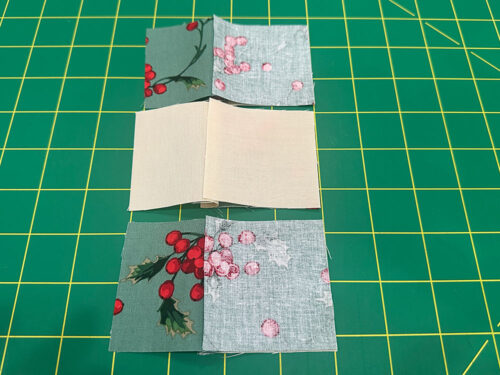
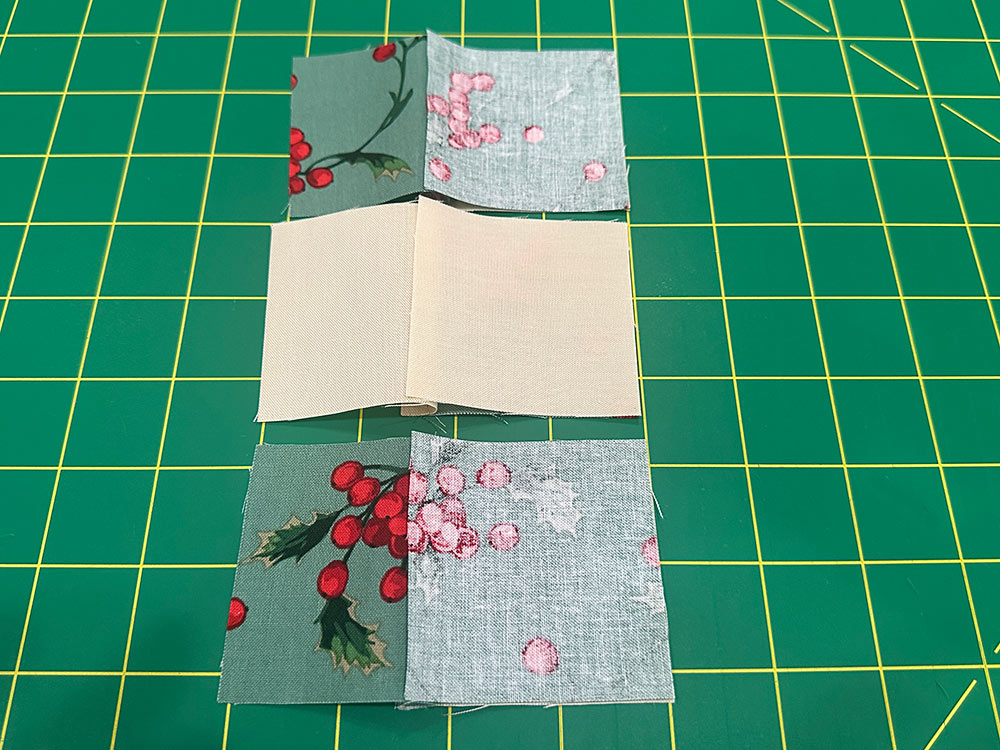
- Find FIVE 2½ “ squares in Fabric 1 and FOUR 2½“ squares in Fabric 6. Lay them out in order for the center 9-patch.
- Place the squares of the left column right sides together with the squares of the middle column, aligning all the raw edges.
- Using a Quarter Inch Seam foot, stitch together each pair of blocks individually…
- … or chain piece each of the three sets of pairs. If you are new to chain piecing (the term quilters use for sewing multiple pairs together without taking time to stop between each pair), take a look at our Five-Part Quilting Basics Series.
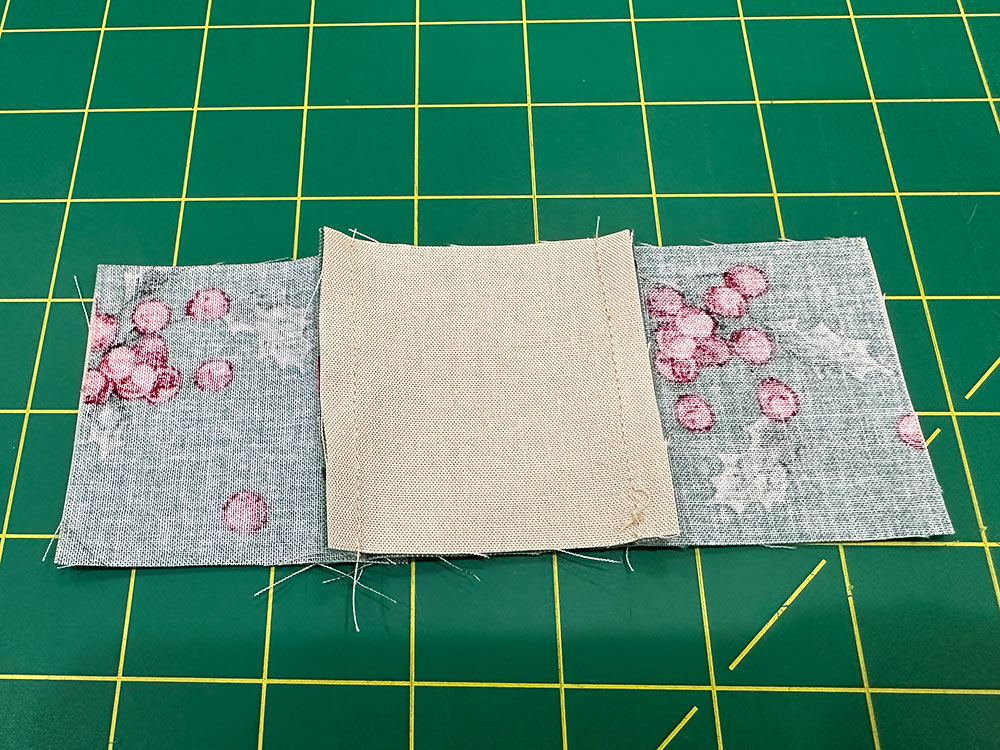
- Press each seam towards Fabric 1 and line up your three sewn pairs with the remaining single squares.
NOTE: Pressing your seam allowances in alternating directions (one to the right, next to left, next to the right… etc.) is important to make sure all the seams nest together correctly and you end up with perfect points in all your corners.
- Flip over those single squares so they are aligned with the remaining raw edges of the middle column.
- Stitch together in the same manner as above. Again, remember to alternate your seam allowances when pressing.
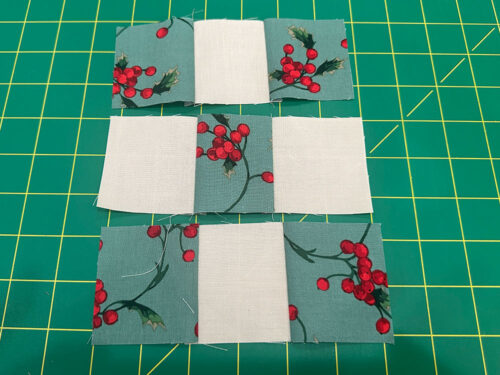
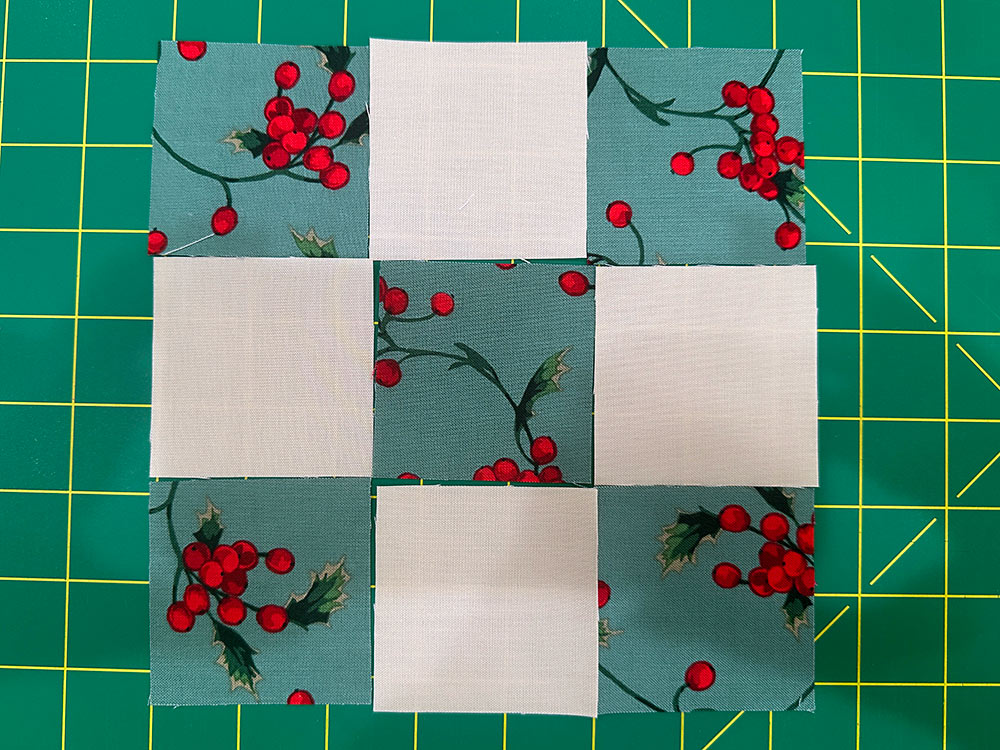
- You now have your three finished rows.
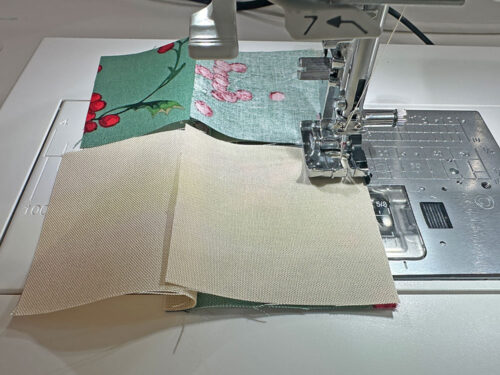
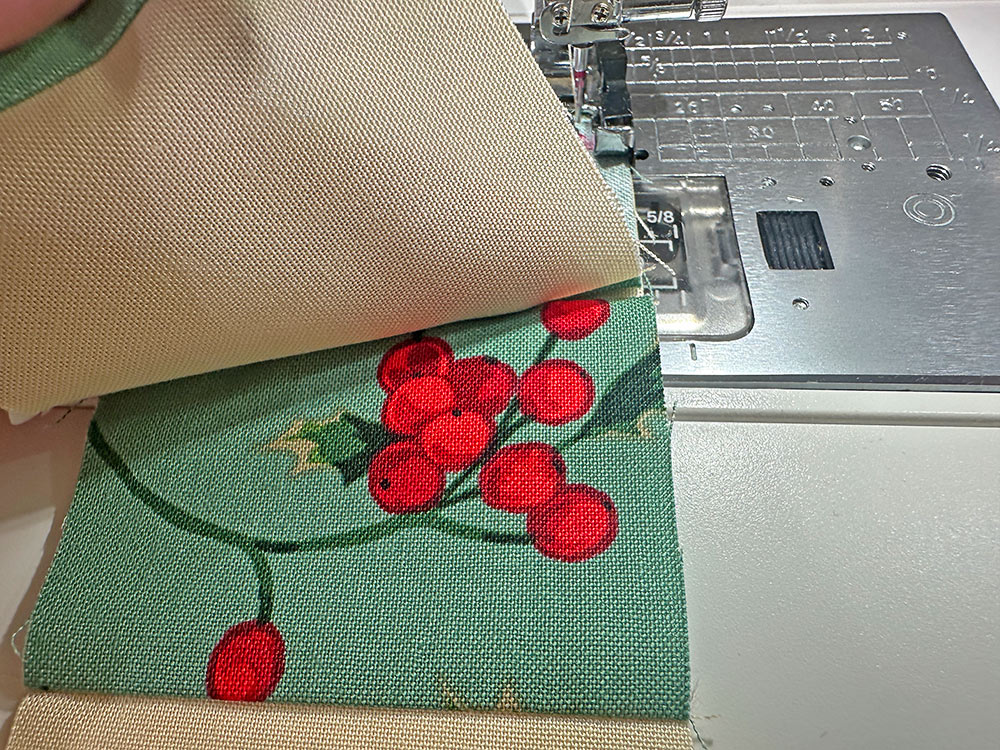
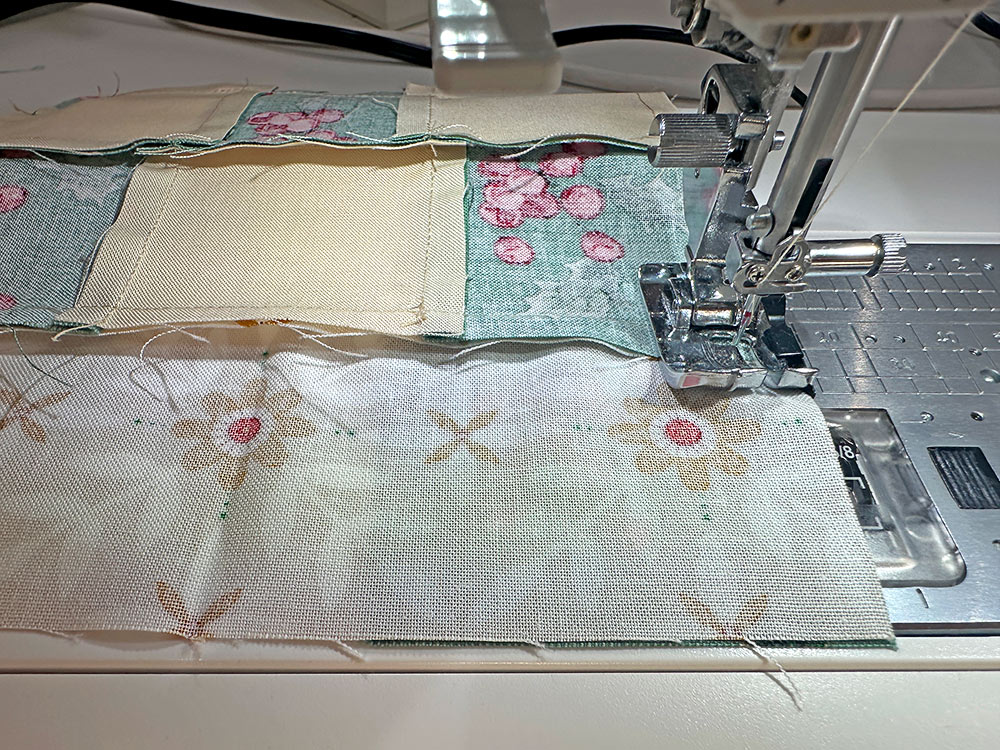
- Place the top row and middle row right sides together, aligning all the raw edges.

- Stitch together. Remember, all our seam allowances are ¼”.

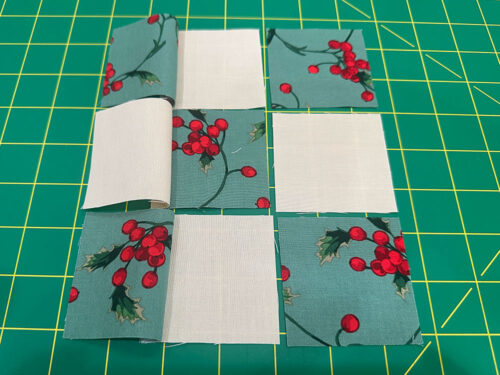
- Repeat to add the bottom row in the same manner. You can see those alternating seam allowances in the photo below.
- Press well from both the front and the back and admire all your pretty corner points.


Adding the first frame
- Find FOUR 2½” x 6½” rectangles in Fabric 5 and FOUR 2½” squares in Fabric 1.
- Line up one Fabric 5 rectangle to either side of the finished center 9-patch.

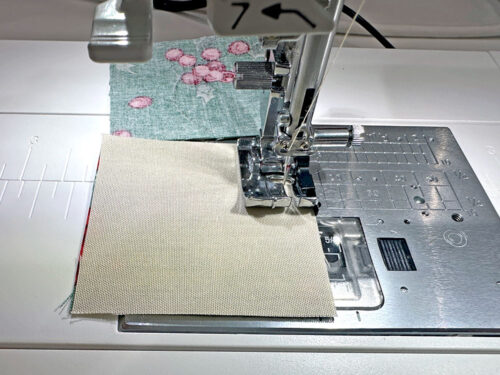
- Place the rectangles and the center 9-patch right sides together and stitch together along each side. We like to work with the 9-patch facing up so we can insure all the seam allowances stay flat. Press the seam allowances towards the center 9-patch.
- The corner squares go, right sides together, on either end of the two remaining 2½” x 6½” rectangles.
- Stitch each of the four corners blocks in position. Press the seam allowances towards the corner blocks.
- The corner block rows go above and below the center 9-patch, which has its side rectangles already sewn in place.

- Place these top and bottom rows right sides together with the center.
- Stitch together and press the horizontal seam allowances towards the outer raw edges of the frame.


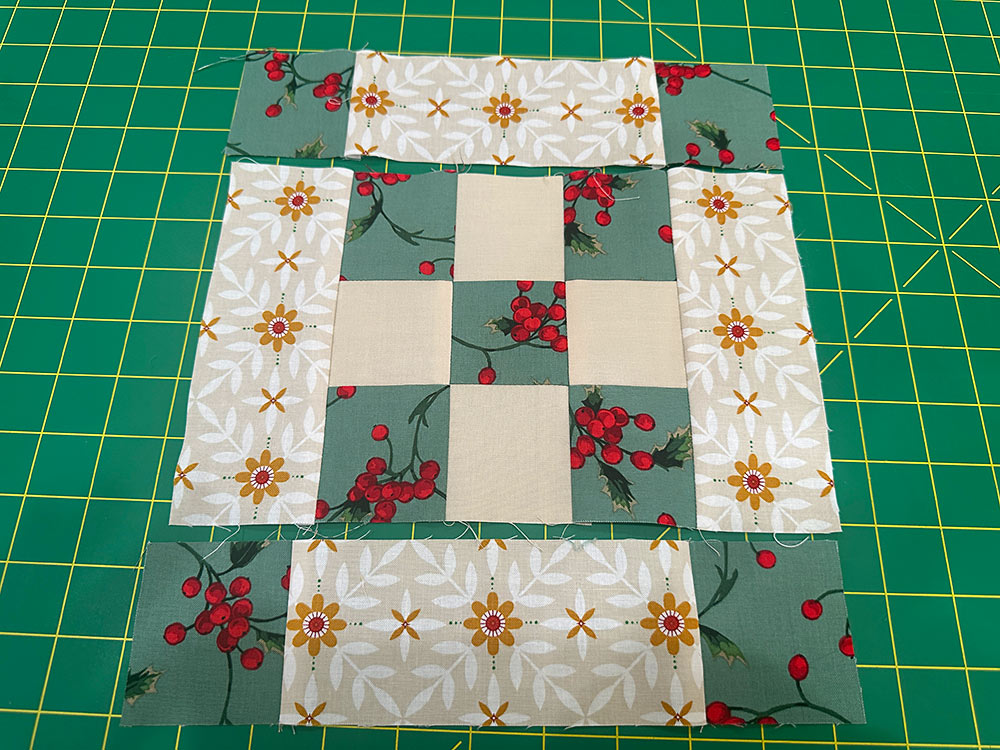

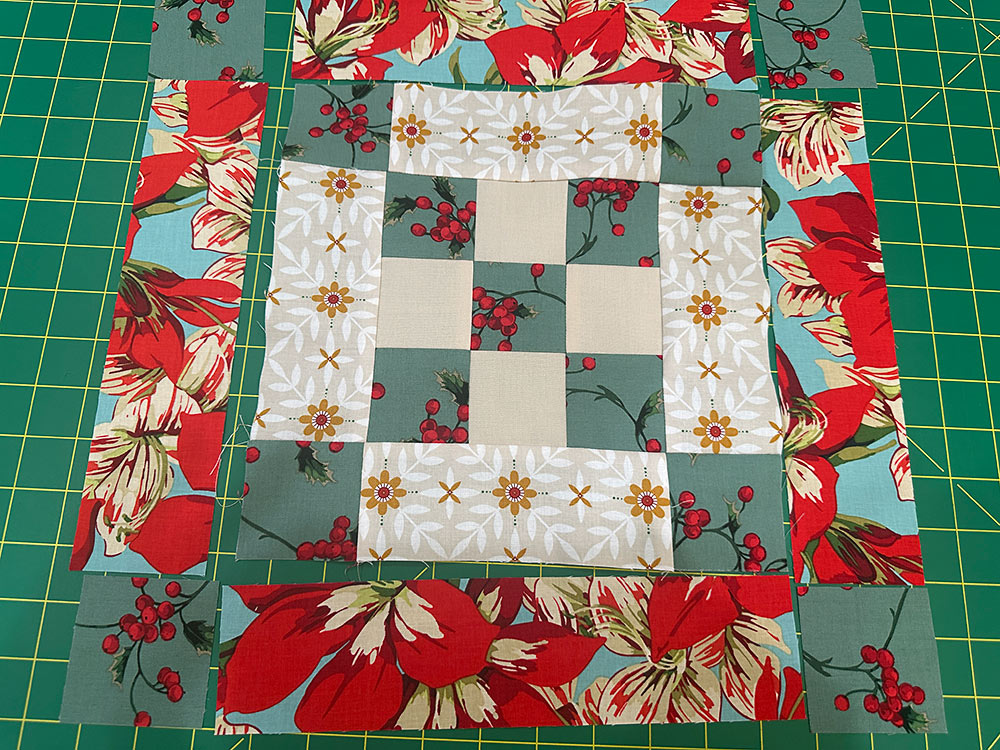
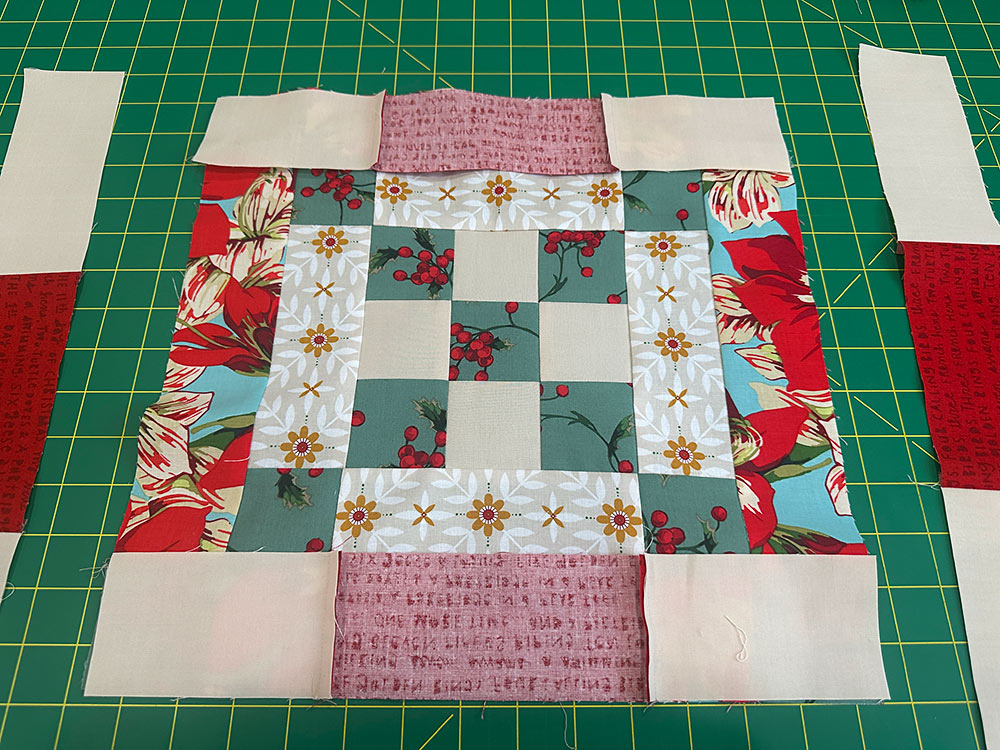
Adding the second frame
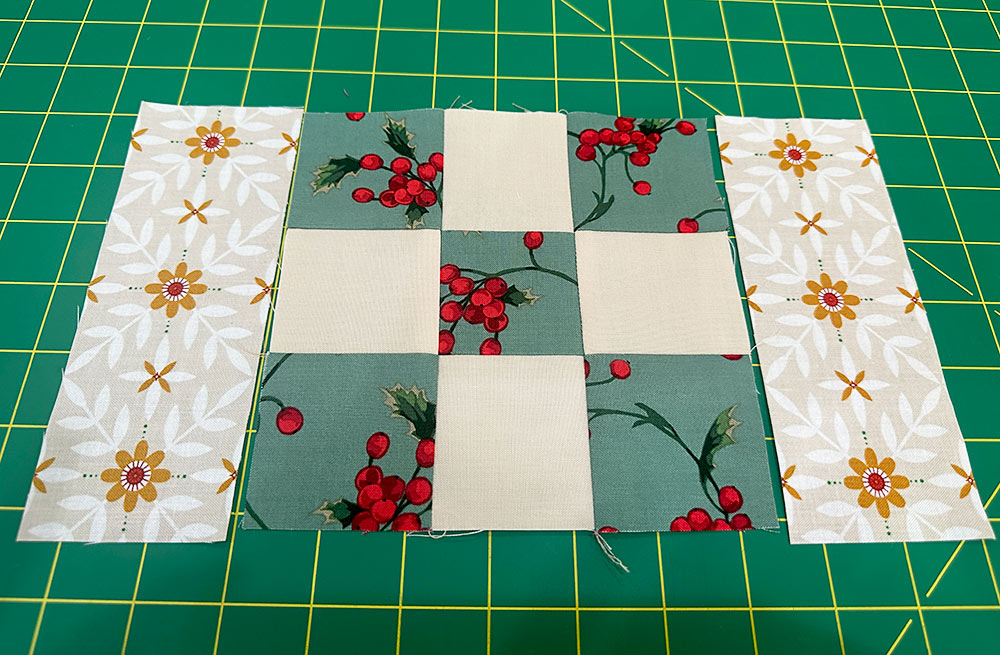
- This frame is done in same manner as the first frame just with the larger 10½“ rectangles in Fabric 3. The corner blocks are the same 2½” squares in Fabric 1.

- Add the side rectangles first, pressing the seam allowances towards the side rectangles. Then match up a corner block to either end of the top and bottom rectangle. These seam allowances should also be pressed towards the rectangle.
- Add the top and bottom rows to the new sewn center.
- Press well to finish. The top and bottom horizontal seam allowances should be pressed towards the outer raw edges of the frame.
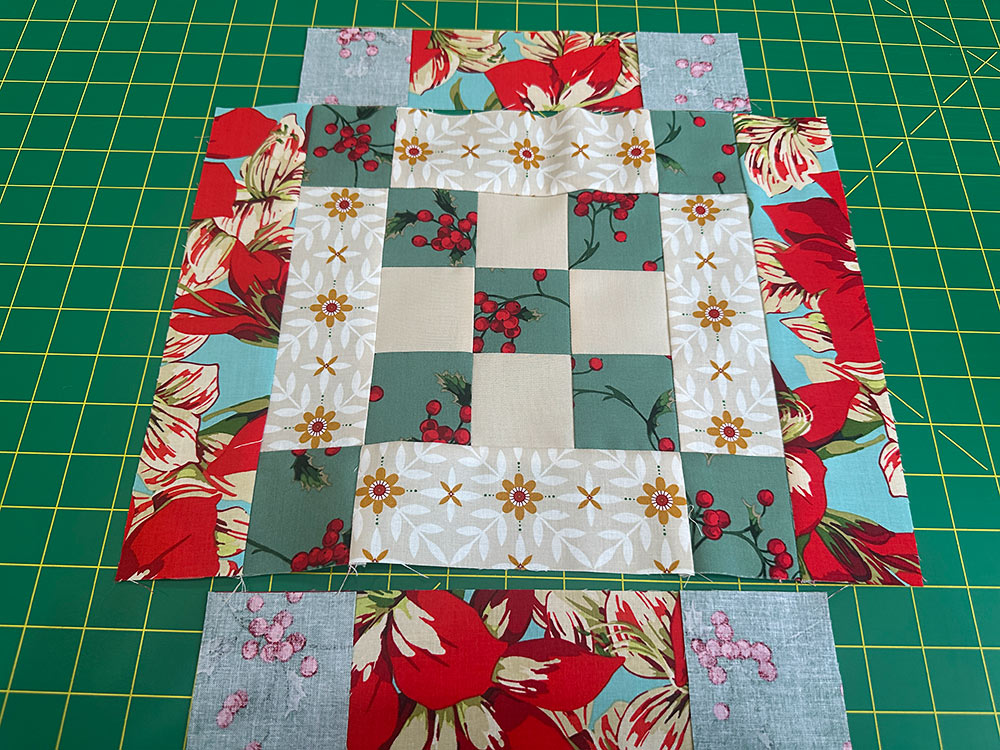
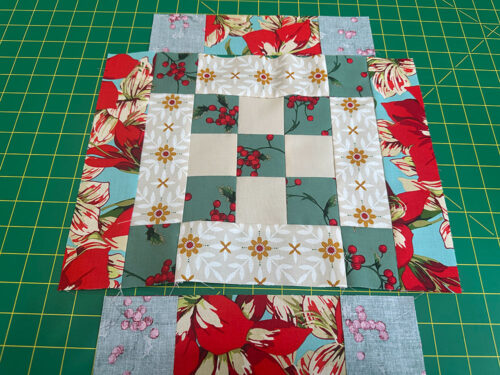
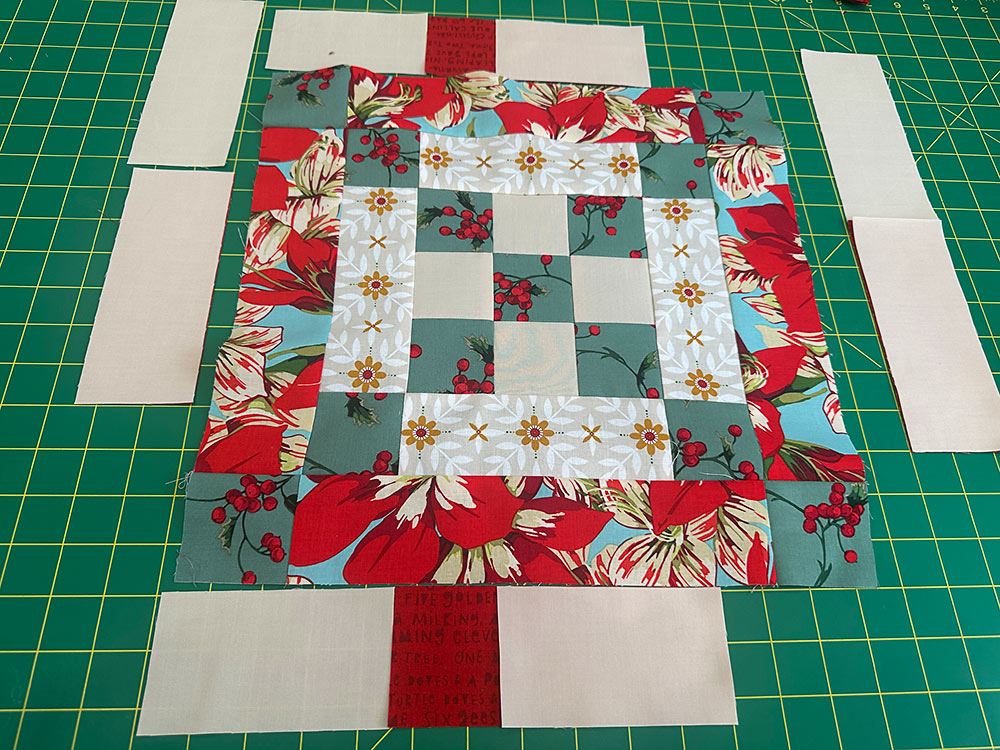
Adding the outer border
- The final border frame is also done in a similar fashion; you are simply working with all rectangles.
- Find the FOUR 2½” x 4½” rectangles and the FOUR 2½” x 6½” rectangles in Fabric 6 along with the FOUR 2½” x 6½” rectangles in Fabric 2.
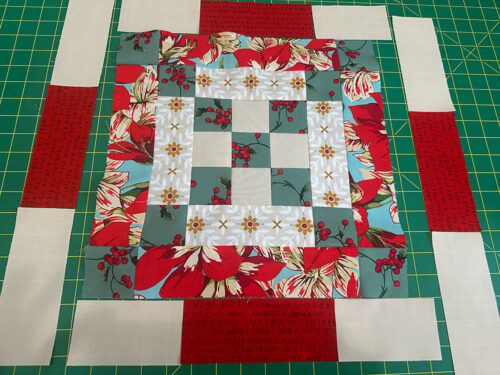
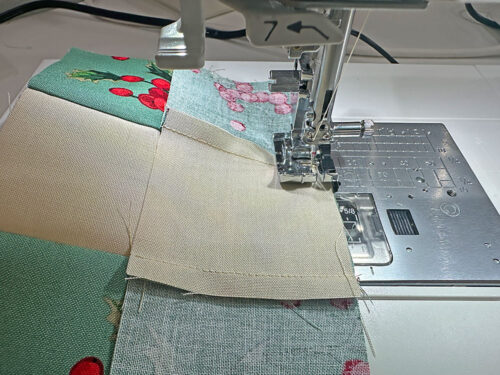
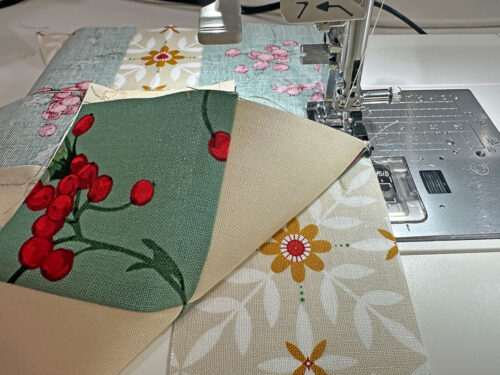
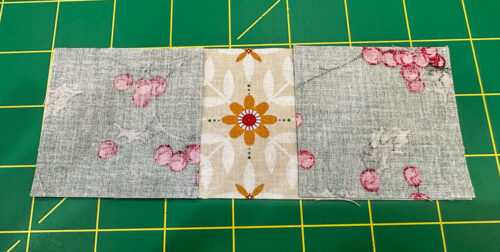
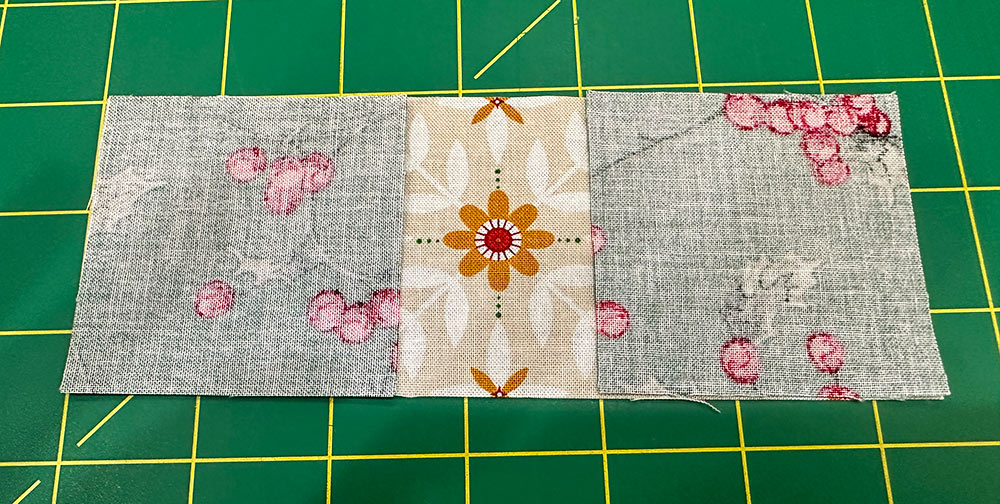
- For this border frame, the top and the bottom rows as well as the both sides are all made up of three pieces sewn together. Place each three piece set right sides together.

- Stitch together. This is another good opportunity to use chain piecing. All seam allowances should be pressed towards Fabric 2 (the darker fabric).
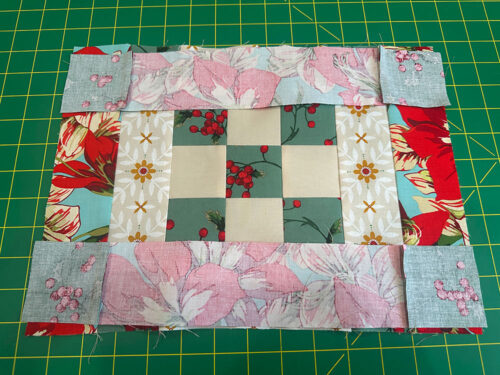
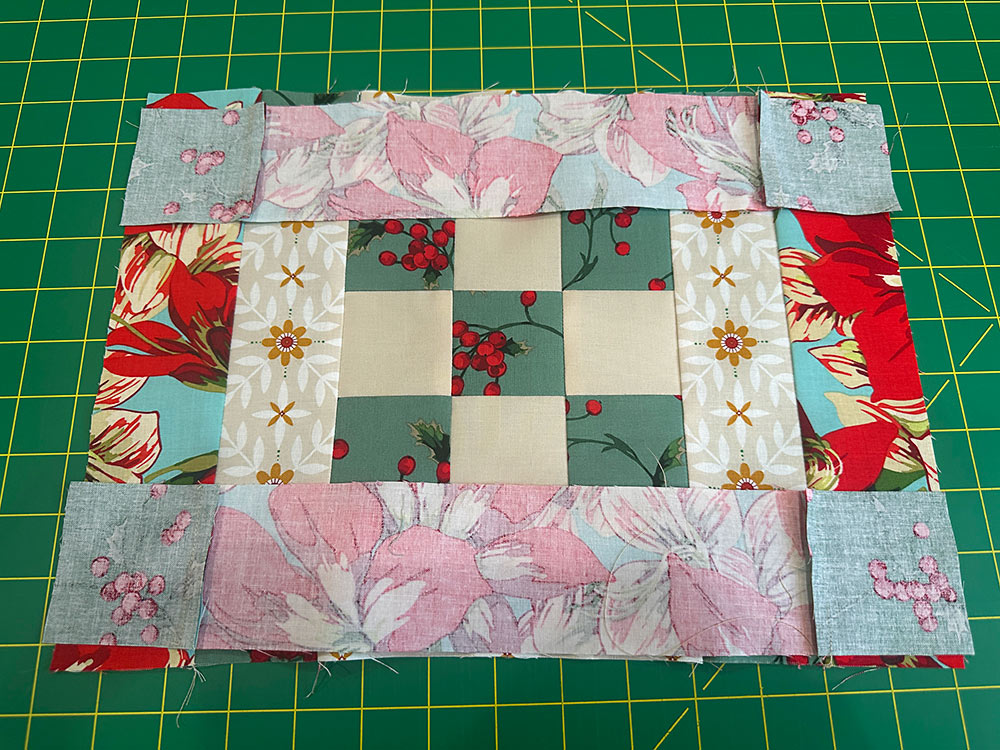
- This time you’ll start by attaching the top and bottom rows first (not the sides as above).
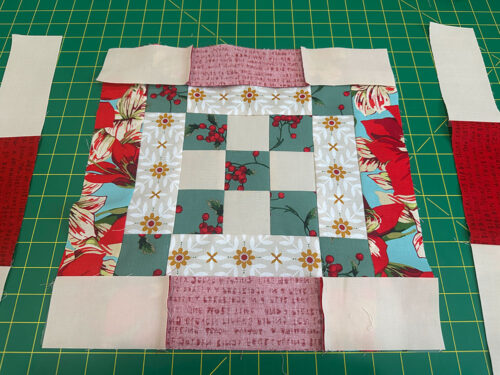
- Stitch together and press each horizontal seam allowances towards the outer raw edges of the frame.
- Add the sides in the same manner, once again pressing the seam allowances towards the outer raw edges of the frame.
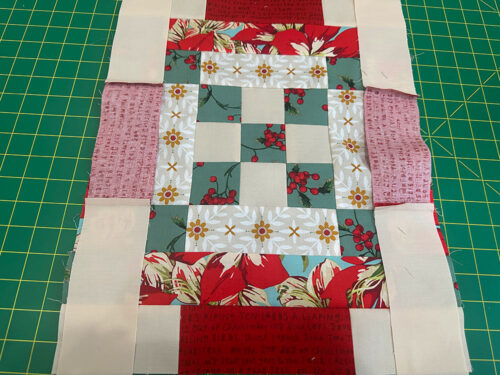
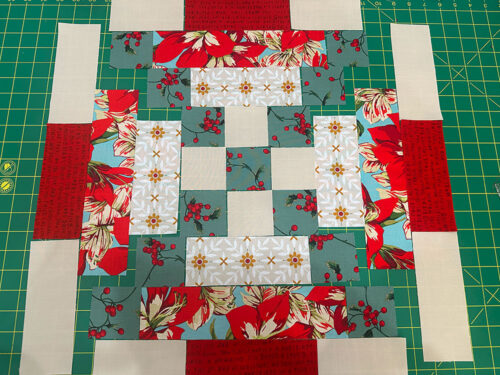
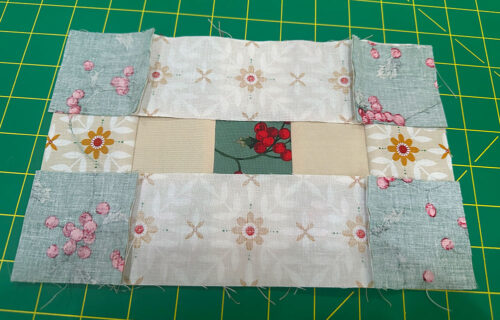
- Press well from both the front and back. Your block is complete.
- If you are making multiple blocks for a runner or tablecloth, align the center Fabric 2 blocks in a row and stitch together using a ¼” seam allowance.


Layering and basting
NOTE: The photos within these final instructional sections feature our three-block table runner, but the steps would be similar for any final shape or size you are making. These are the same standard steps used in traditional quilting projects: layering the top, batting, and batting – basting the layers – quilting the layers – and binding.
- Place the backing panel right side down (wrong side up) and flat on your work surface.
- Layer the batting panel on top of the backing panel.
- Layer the completed block(s) right side up on top of the batting. The backing and batting are cut slightly oversized to allow a bit of extra room for quilting, which tends to cause fabric to shrink up a bit. All the layers will be cut flush prior to binding.
NOTE: As mentioned above, the photo below shows the blocks in our runner; the layering, basting and binding is the same for any configuration.
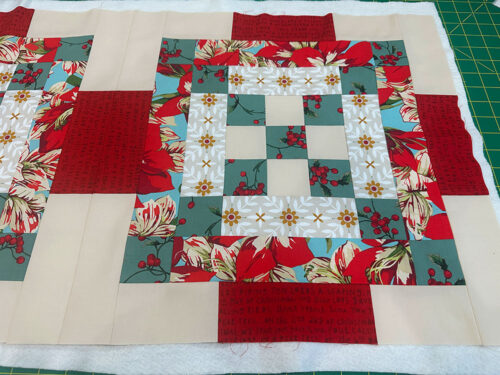
- Baste all three layers together. You can use pins, a temporary spray adhesive or a long running stitch with needle and thread for this step. We opted for pins. You should at least baste all around the outer edge, but depending on the size of your project, you may also want some basting through middle.

Quilting
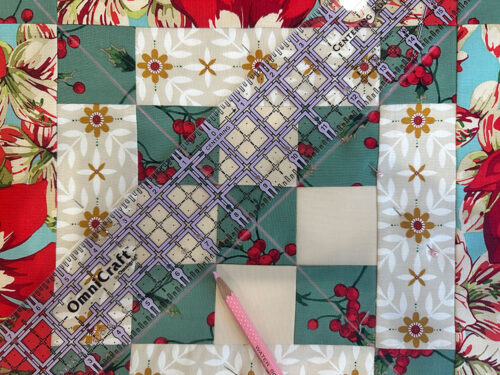
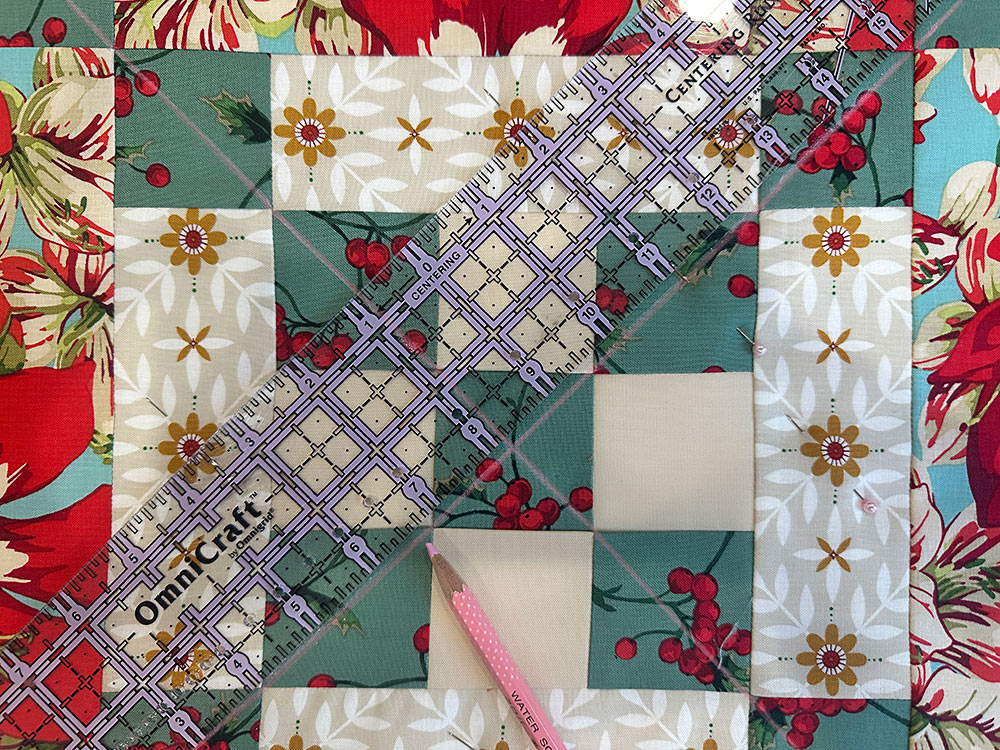
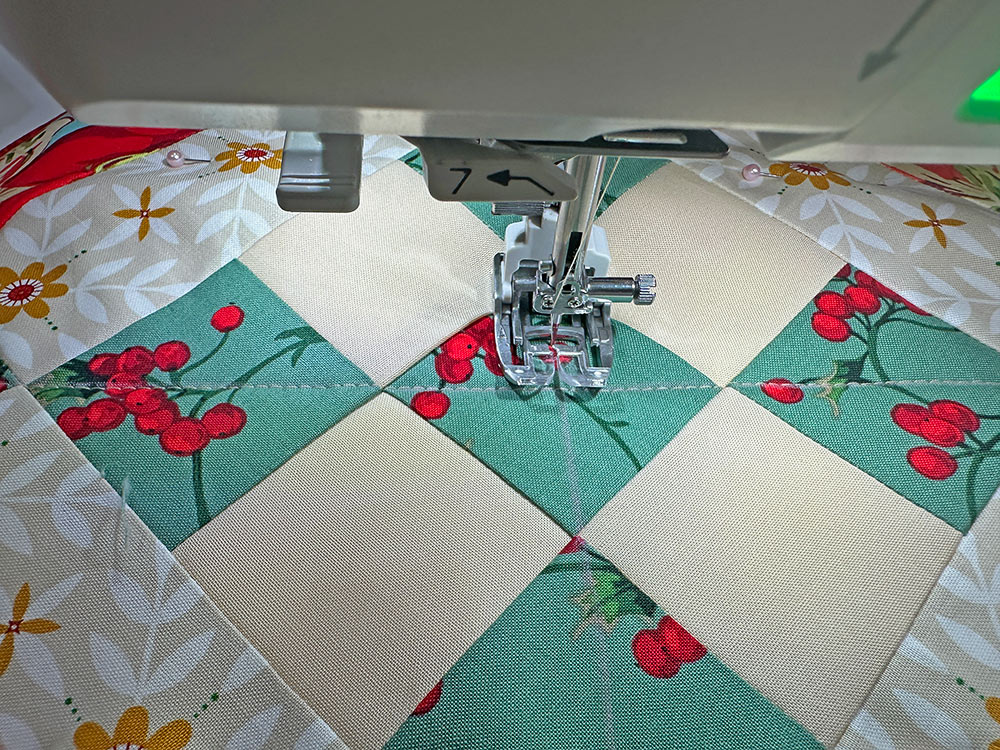
- Using your ruler and marking pencil, mark your quilting guide lines, starting through the exact center of the center 9-patch. Your line should go edge to edge.
NOTE: As always when working on the right side of the fabric, make sure your marking tool is one that will easily wipe away or vanish with exposure to the air or the heat of an iron.
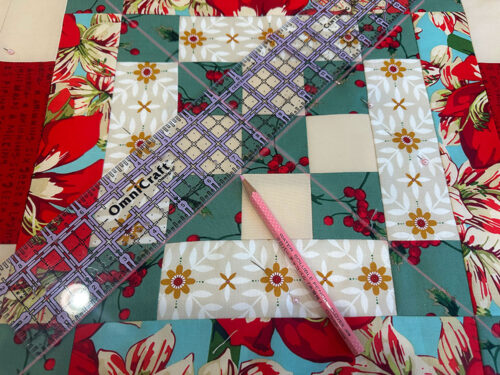
- Repeat to add a second guide line in the same manner, but in the opposite direction, creating a large X.
NOTE: We used a quilting guide bar set at 1¼” to maintain precise stitching for our diamond quilting. If you do not have this option, consider drawing in guide lines for ALL the lines of quilting.
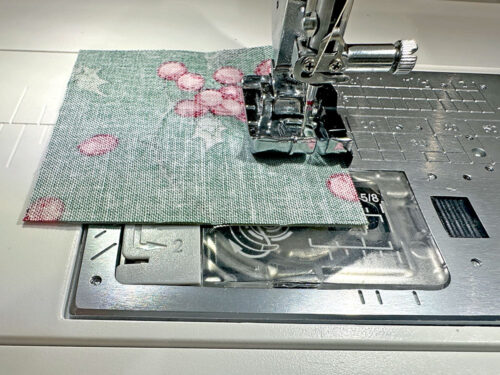
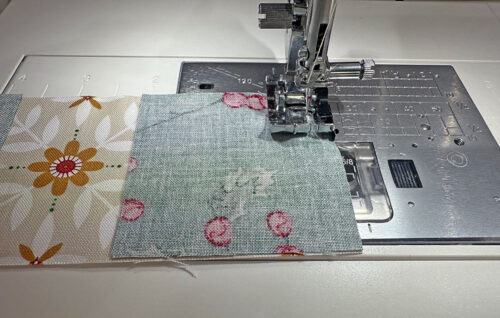
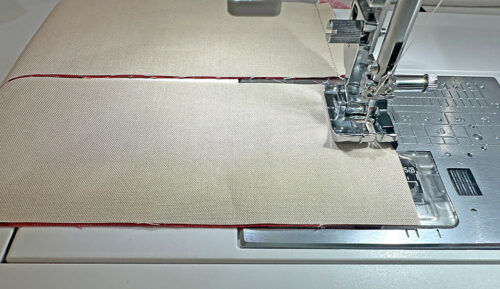
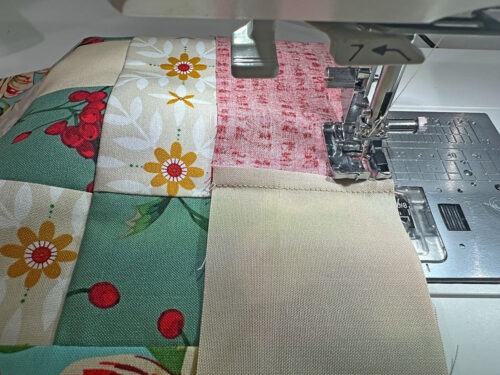
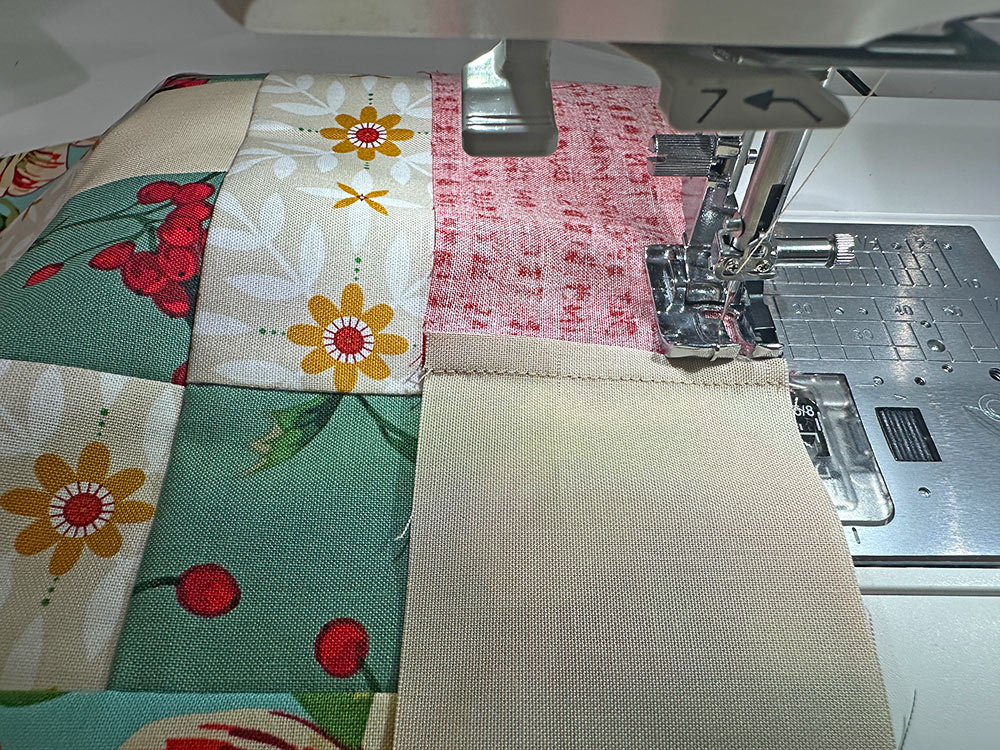
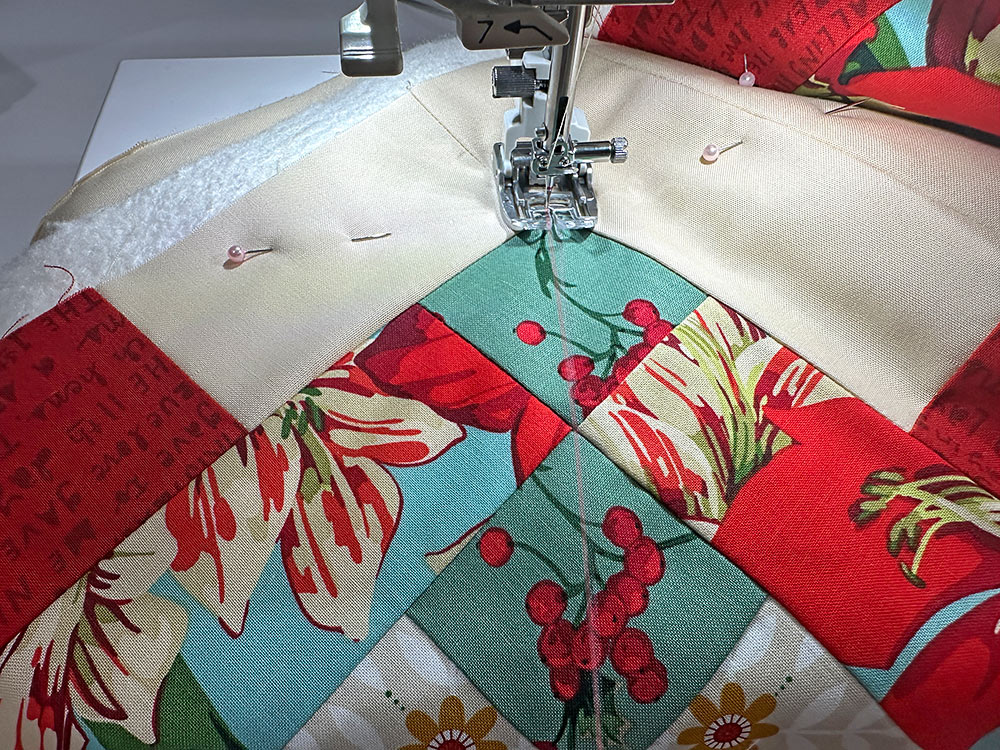
- If possible, attach an Even Feed Walking foot to your machine or engage your machine’s built-in fabric feeding system, such as the AcuFeed™ Flex system we love to use on our Janome studio machines. Your machine should be threaded with your chosen quilting thread color in the top and bobbin. We used a tan just slightly darker than our solid fabric. Set up for a slightly lengthened straight stitch.
- Start at the edge of block and stitch along your first drawn guide line. In the photo below, it may appear we are starting at the corner of the center 9-patch, but that is because you cannot see the stitching behind the foot. You should indeed start at the very edge of the border frame and stitch all the way along your drawn line to the opposite edge.
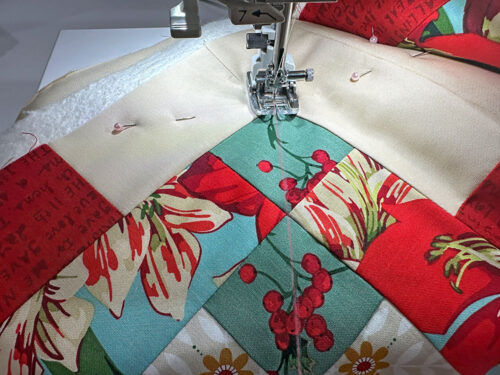
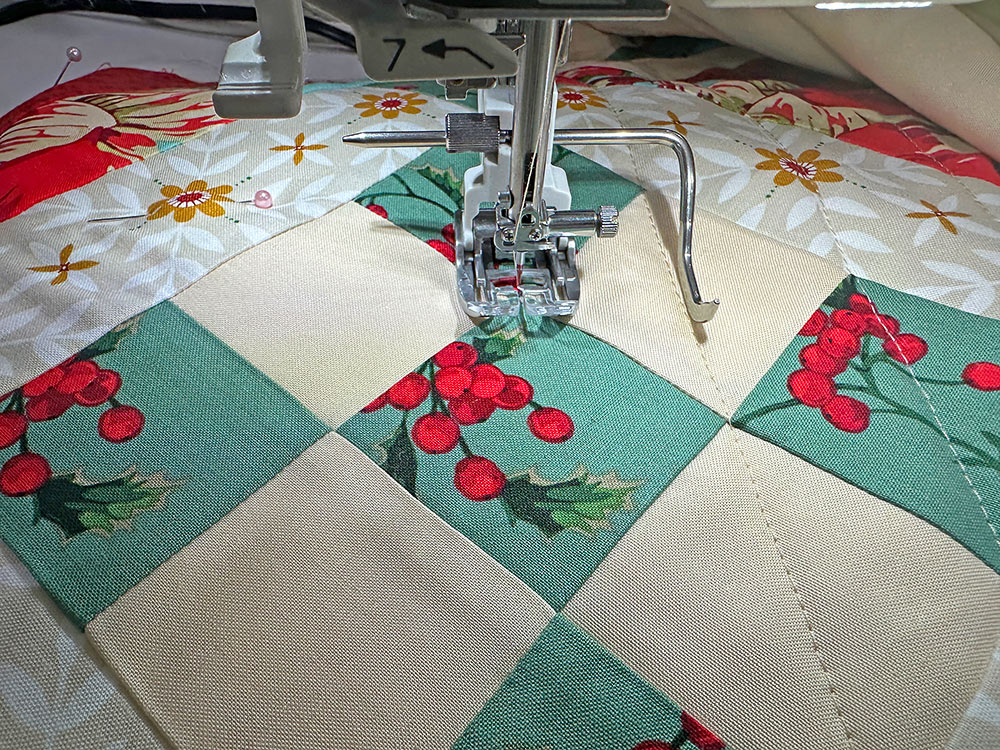
- Remove the project from your machine, rotate it, and quilt along the drawn guide line in the opposite direction.

- As mentioned, we used a quilting guide bar set at 1¼” to maintain precise stitching for our diamond quilting. If you do not have this option, consider drawing in guide lines for ALL the lines of quilting.
- Starting at one center diagonal line, stitch parallel diagonal lines at intervals of 1¼” from the center out to the left. Keep going until you reach the edge.
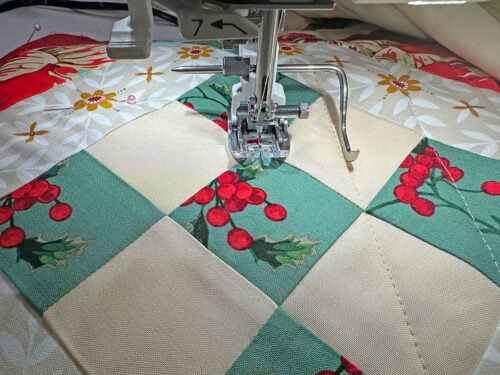
- When complete, re-set back at the center line and stitch parallel diagonal lines at intervals of 1¼” from the center out to the right.
- Then rotate the block to repeat these lines from the opposite direction, creating a diamond pattern.
- Repeat for each block.
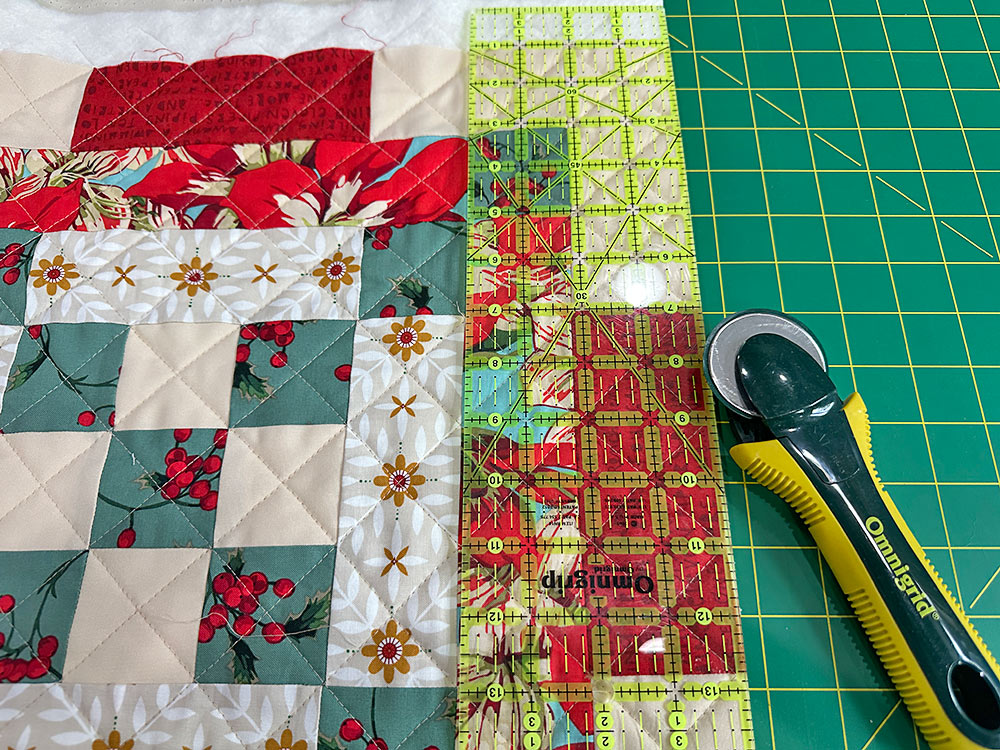
NOTE: This was our chosen quilting pattern. You can, as always, choose a different pattern and/or spacing. - When the quilting is complete, trim away the excess batting and backing so it is flush with the top.

- Done and ready to bind!

Binding
- Find the 2½″ binding strips in Fabric 4. The number of strips you have will depend on the size of the item you are binding.
- Pin the strips right sides together, end to end. Stitch in place with a ¼” seam allowance to create one long strip. Press the seam allowances open and flat.
- Fold the completed binding strip in half so it is now 1¼”, wrong sides together, and press to set a center crease.
- Open up the binding wrong side up so the crease line is visible. Fold in each raw edge ½” and press well. Re-fold again, wrong sides together, along the original center crease line, aligning the folded edges and press once again. When opened flat, wrong sides up, there should be three visible crease lines.
- Re-fold one outer edge, leaving the rest of the binding open so two crease lines are visible.
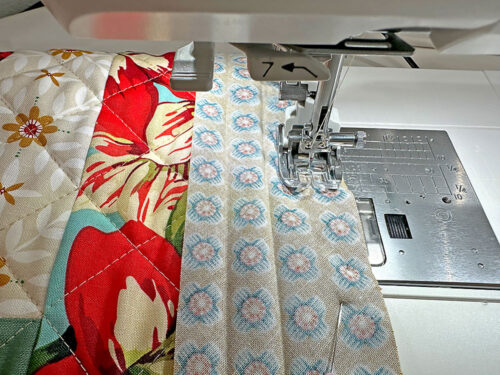
- Starting at the center bottom of your block, pin the unfolded length of bias binding, right sides together, around the entire perimeter of the block. You are aligning the raw edge of the binding with the raw edges of the block.

- When you’ve gone all the way around, at the head of the binding, turn under the end ¼”. Overlap the tail of the binding with this folded edge, and trim the end of the tail to align. You want to binding to lay nice and flat all around. Don’t be afraid to use lots of pins.

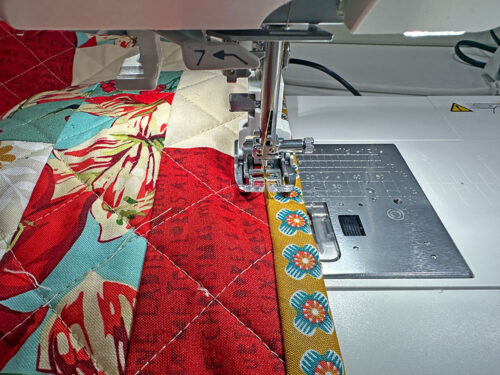
- Stitch the binding in place, running the seam just to the right of the visible crease line.
- Bring the folded edge of the binding up and over to the backing side. Press the binding in place and pin well all around. This folded edge of the binding should completely cover the existing perimeter seam.
- Edgestitch the binding in place on the right side of the block. Remember, in binding work, the number one rule is “slow and steady wins the race.” For the cleanest finish, stop and start your final seam at the center bottom where the binding overlaps.


Bias binding notes of you are new to the technique
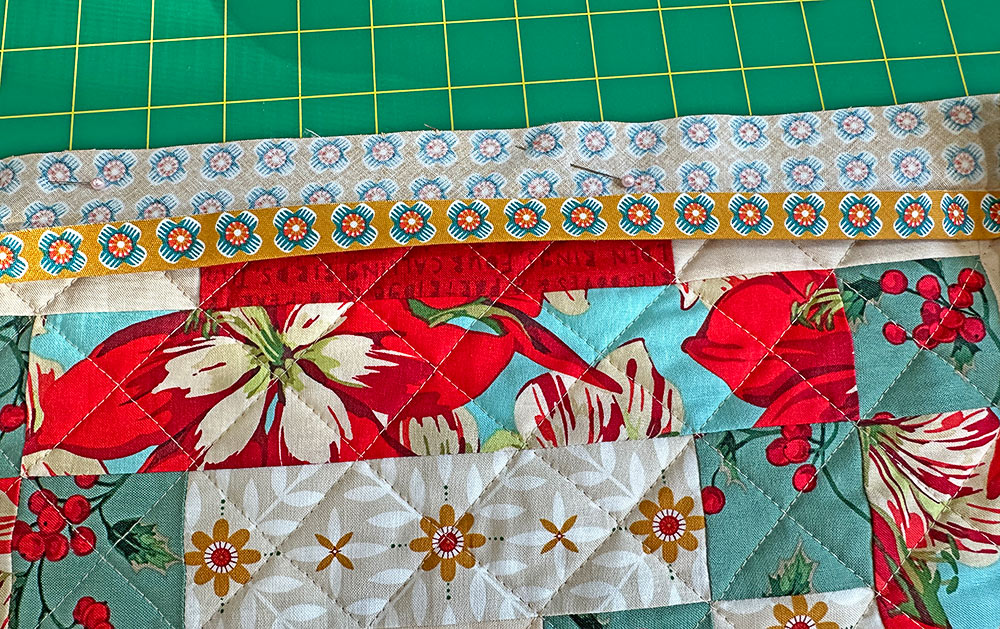
- We chose this method of binding, which is referred to aa single fold bias binding because we wanted a very specific motif reveal on the front and back of our block, which is easiest to do with a flat piece. You can see on our finished runner that there is a pretty line of flowers rimming the perimeter. Our finished binding width was ⅝”.
- If you have a more random motif and are not as concerned about a precise reveal, you could opt for the more traditional double fold bias binding, which means first folding your binding in half then pinning and stitching this double layer in place, and wrapping to the back to finish. If you prefer this method, but what the same ⅝” finish, start with a 3½” strip and use a ½” seam allowance to stitch it in place.
- If you are new to quilt-style binding, we have two detailed tutorials you can review prior to starting the project, both of which include information and instructions for measuring, cutting, attaching and finishing. Bias Binding – The Basics + Beyond and Binding Basics for Quilts, Blankets + Throws.
Project Design: Anne Adams
Sample Creation: Debbie Guild