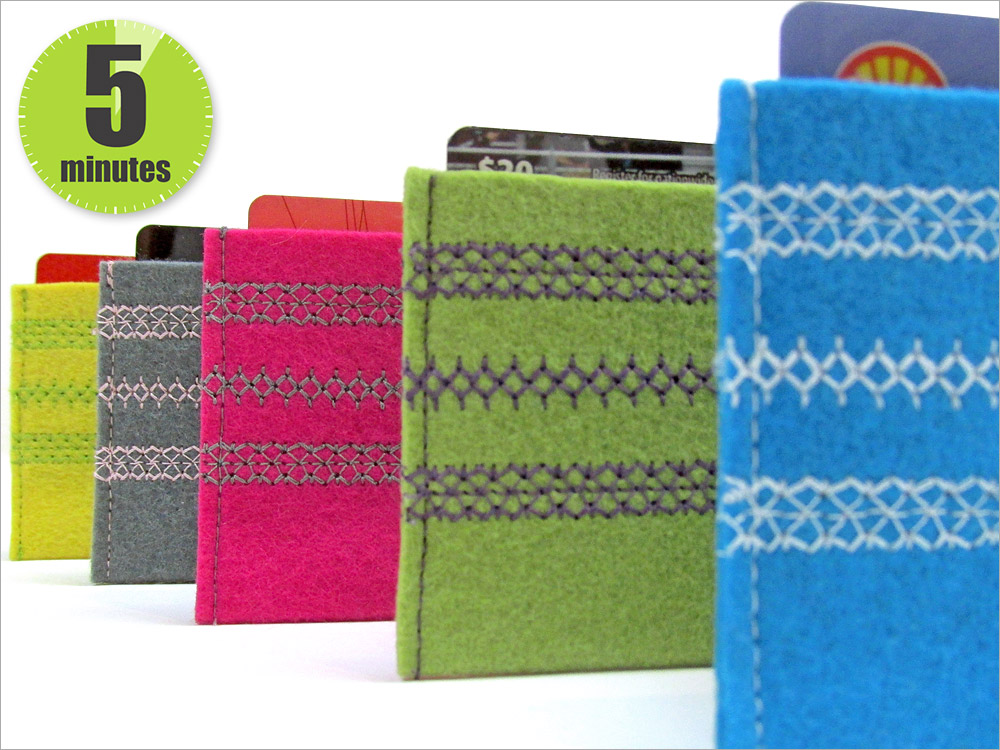
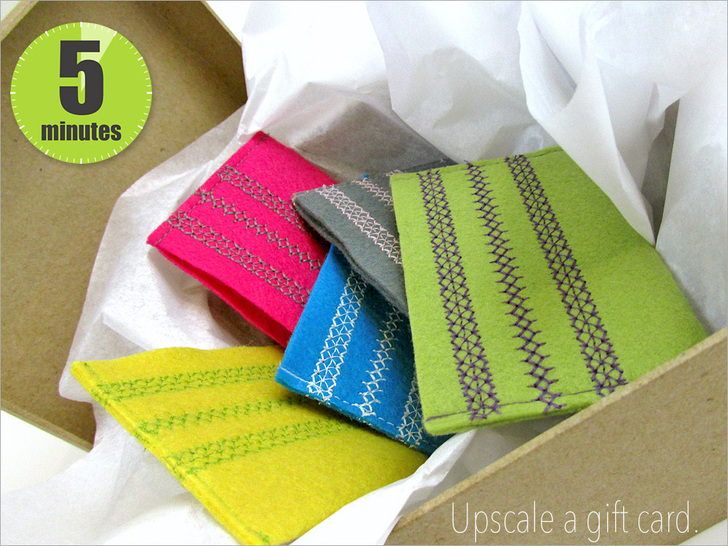
Fast, meet fabulous. Together, you’re going to turn an ordinary gift card into a personalized present. With a little bit of felt and a few rows of pretty decorative stitching, you can whip out a cute-as-a-button sleeve in which to slip a gift card in about five minutes flat. We show you several options for marking and stitching. Need to finish in under five minutes? Just add the stitching along the front and leave the back plain. Either way, it’s one very pretty little pocket.
We used a heavy wool/rayon blend felt, which is a great substrate for decorative stitching (it doesn’t require stabilization) and comes in a rainbow of colors. But you could use any thicker woven fabric as well. But do make sure you test first to see if a tearaway stabilizer is necessary to get the most beautiful stitching.
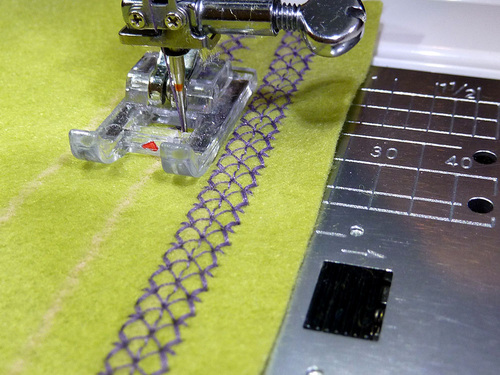
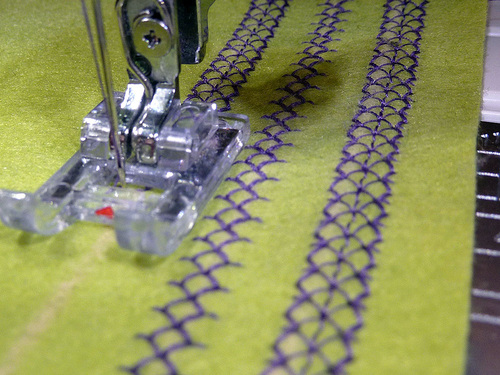
For the best results on felt, we recommend a dense stitch pattern. The denser the stitch, the more unlikely there will be any raveling at the cut lines. As noted below, you can also use a little seam sealant along the edges to be completely sure.
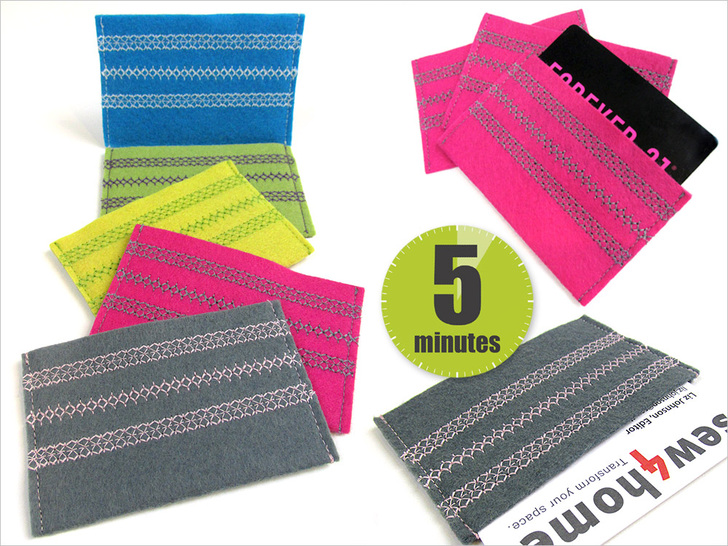
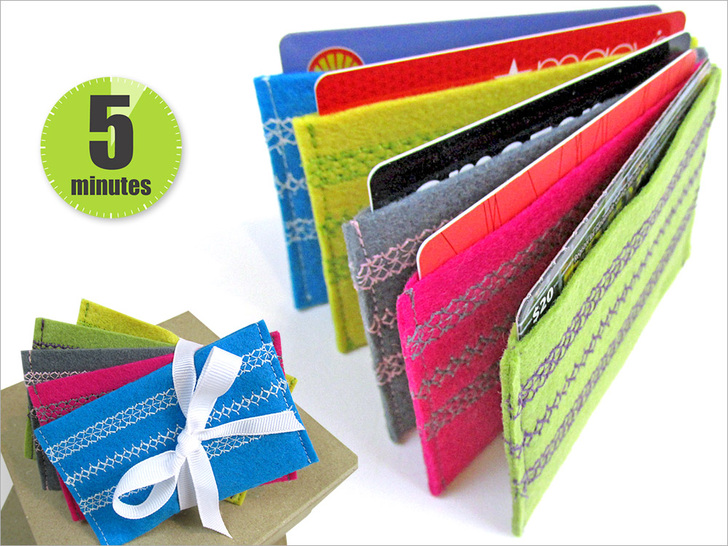
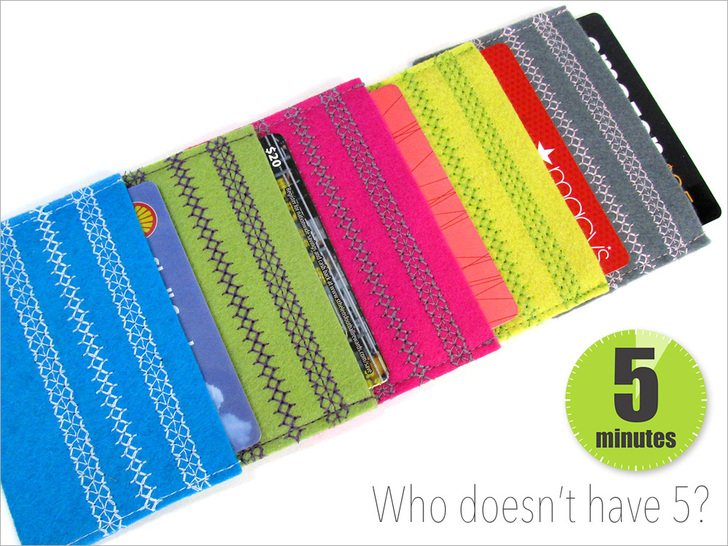
Make single sleeves in a variety of color combinations or cut a larger piece of felt and set-up an assembly line process to create multiple matching sleeves lickety-split.
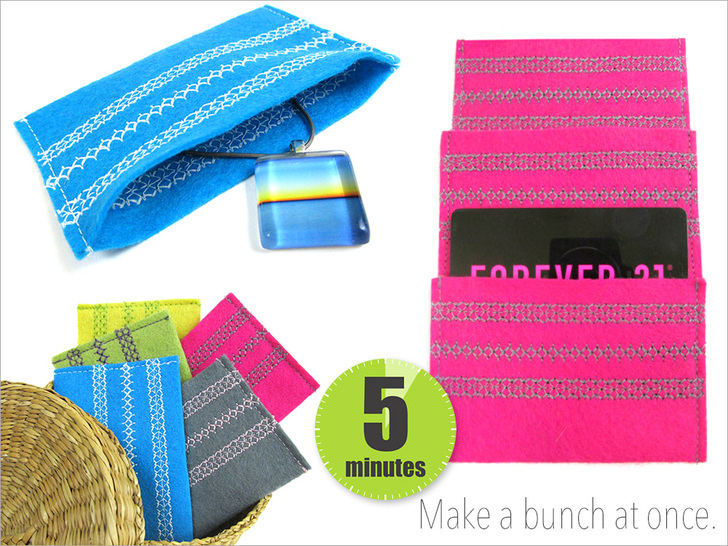
Our sleeves are sized to be a perfect fit for a standard gift or credit card. They finish at approximately 2½” high x 3⅞” wide with an actual seam-to-seam opening of about 3⅝”.
This is also a great size for other tiny trinkets, such as jewelry, beads or crystals. And, they can be re-used to hold business cards after the gift-giving in done.
Our thanks to Janome for providing all our Sew4Home studio machines. The Janome stitch quality and variety is what gives us our love of decorative stitching.
Sewing Tools You Need

- Sewing Machine and standard presser foot
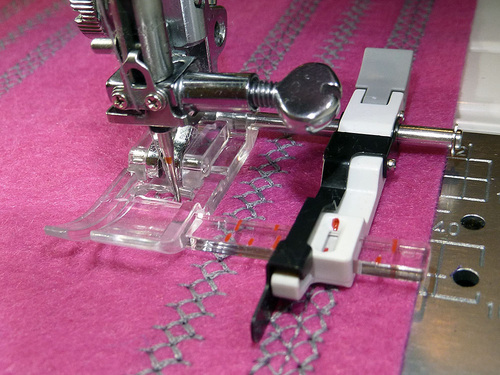
- Decorative Stitch foot; we used the Janome Satin Stitch foot
- Quarter Inch Seam foot; optional but helpful to make quick, accurate work of the final side seams
- Sliding Guide Foot; optional, but super cool and it eliminates the need for marking guide lines
NOTE: We also have a full article on this great foot.
Fabric and Other Supplies
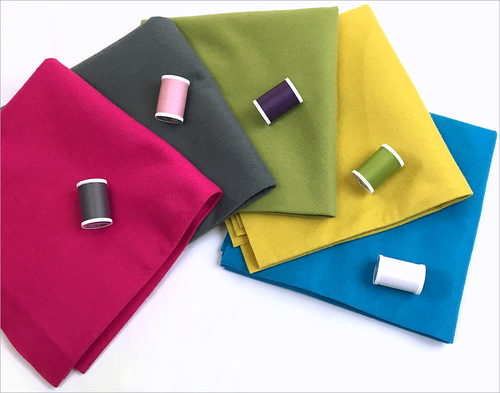
- ¼ yard of 36″+ wide heavyweight felt or a heavyweight felt sheet – each single sleeve requires a 4″ x 5″ cut, more length is required if doing the assembly line method
- All purpose thread to best contrast with each felt color; we used all-purpose thread; you could also use a shiny rayon embroidery thread, or our favorite: 40wt Aurifil Cotton Thread
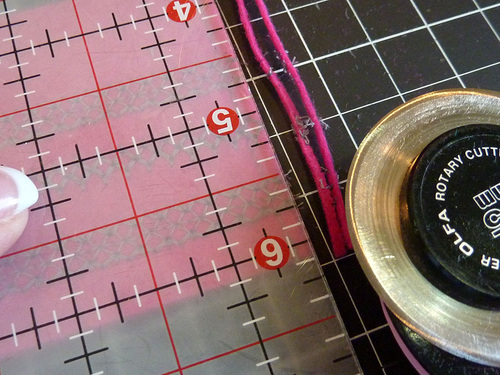
- See-through ruler
- Seam gauge
- Seam ripper
- Fabric pen or pencil
- Iron and ironing board
- Scissors
- Straight pins
- Pressing cloth
- Seam Sealant; we used Fray Check
Getting Started
- If doing single sleeves, cut a 5″ high x 4″ wide rectangle from each felt color.
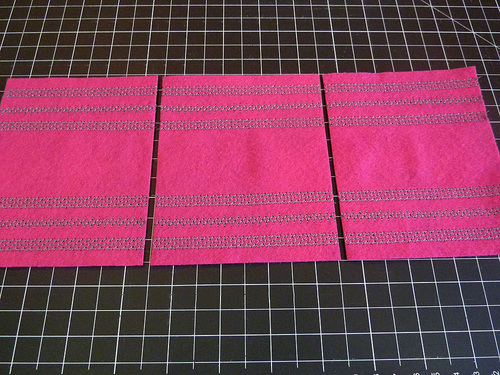
- If doing multiple sleeves from one color, cut a strip 5″ high x any-multiple-of-4″ wide. For example, we made three sleeves from our Fuchsia felt, so our starting cut was 5″ high x 12″ (3 x 4″) wide.
- From the felt scraps, test out several stitch combinations to find the pairing you like best. For the best results, we recommend a dense stitch pattern. As mentioned above, the denser the stitch, the more unlikely there will much if any raveling at the cut lines.
Drawn-in guidelines
- Stitch testing is also important to determine the exact width between the rows. This will vary depending on the width of your chosen stitches. For our 7mm wide stitch patterns, we drew in six guidelines: three along the top of the rectangle and three along the bottom.
- The first line is ½” in from the top and bottom cut edge (the 4″ edges).
- The second line is ½” from the first, and the third line is ½” from the second.
- For our chosen stitches, this resulted in ¼” between each row.
At Your Sewing Machine & Ironing Board
Decorative stitching with drawn-in guidelines
- Thread the machine with the contrasting thread in the top and bobbin.
- Attach a Satin Stitch foot (also know as a decorative stitch foot). Select the outer decorative stitch.
- Center the presser foot over the first drawn guideline along the top edge.
- Create the first line of stitching. Make sure you stitch edge to edge.

- Flip the felt rectangle and stitch the first drawn guideline long the bottom edge.
- When complete, select the inner decorative stitch. Stitch the top and bottom middle stitch rows.
- Re-select for the outer decorative stitch and stitch the third rows top and bottom.
Decorative stitching with the Sliding Guide Foot
- The basic steps are the same as above, but because you are using the spiffy Janome Sliding Guide foot with its adjustable flange, there’s no need to draw lines.
- Simply set the first measurement for the top and bottom lines of stitching, lock the foot’s guide into place, and stitch the row.
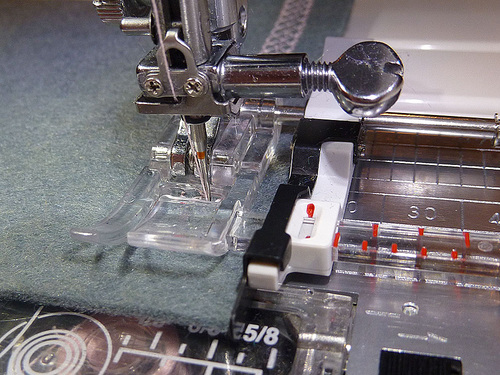
- Slide to re-set for the remaining rows. We used the center point of the previous stitch to confirm our spacing.
- Re-set again for the final lines of stitching.
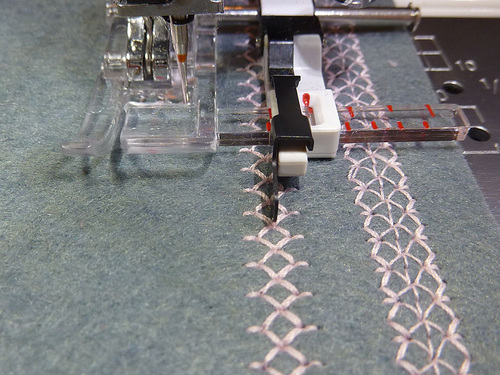
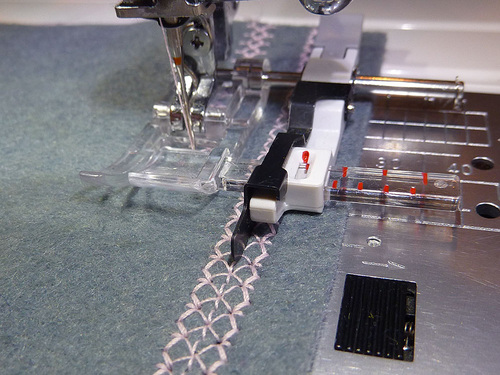
Assembly line decorative stitching
- For our long strip of felt, we chose to continue using the Sliding Guide foot.
- The steps are the same, you are simply stitching a much longer row each time.
- To further speed up the process, you can set the Sliding Guide foot to ½” for the first rows. Then slide it to 1″ and stitch the THIRD rows on both the top and bottom. This way you don’t need to change the stitch selection. Finally, re-set back to ½”, centering the foot’s flange on the previous stitch line, and stitch the center rows.
- When all six rows are complete on the longer strip, cut the strip down into individual 5″ x 4″ rectangles.
NOTE: Decorative stitching can slightly alter the overall dimensions of the base fabric. You may want to re-measure the completed strip prior to dividing it into individual rectangles in case you need to adjust the cuts slightly in order to evenly divide.
Fold, stitch, and finish
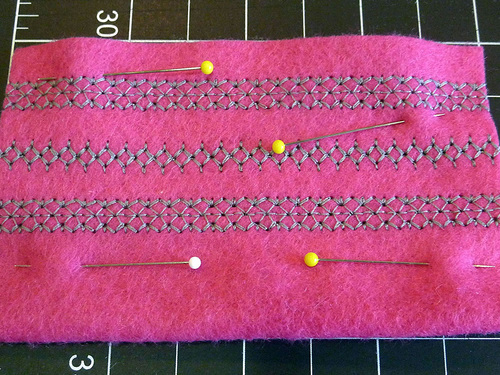
- Fold each rectangle in half, wrong sides together, carefully aligning the two sets of three rows of decorating stitching. Pin in place.
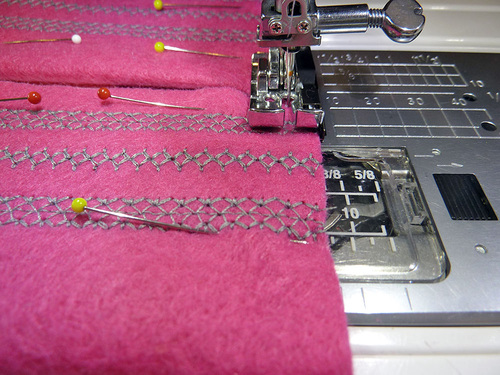
- Re-thread the machine if necessary to make sure you have the correct contrasting thread to match the decorative stitching in both the top and bobbin.
- Using a ¼” seam allowance, stitch along both sides. We used our Janome Quarter Inch Seam foot. We stitched our assembly-line sleeves all at one time, like chain piecing in quilting.
- Trim the seam allowances back by ⅛” to create a tidy edge along both sides.
- Using a pressing cloth to protect the felt and the thread, press the sleeve flat from the front and the back.
- As an option, you can add a dab of seam sealant along the cut edges.
Project Design: Alicia Thommas
Sample Creation and Instructional Outline: Debbie Guild
Great idea…I can also use
Great idea…I can also use up the rest of those holiday charm squares…..perfect….
I can do this. Thank you.
I can do this. Thank you.
@ GLaVonne – Yes you can!
@ GLaVonne – Yes you can!
Just found this fabulous site
Just found this fabulous site and still in time to make the pouches for hard to please teens who prefer gift cards.
Thank you.
@Louise42 – Welcome aboard –
@Louise42 – Welcome aboard – so glad you found a winner right away. Come back often – and bring all your friends!