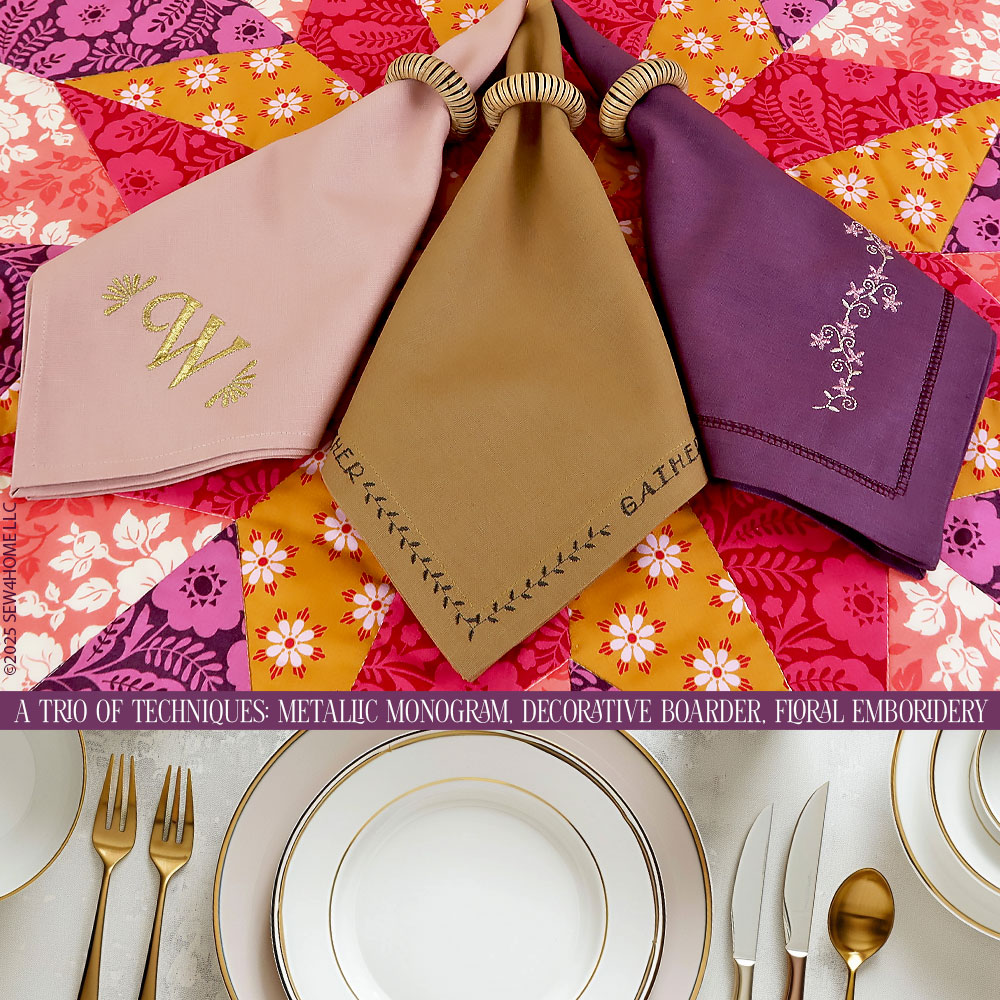
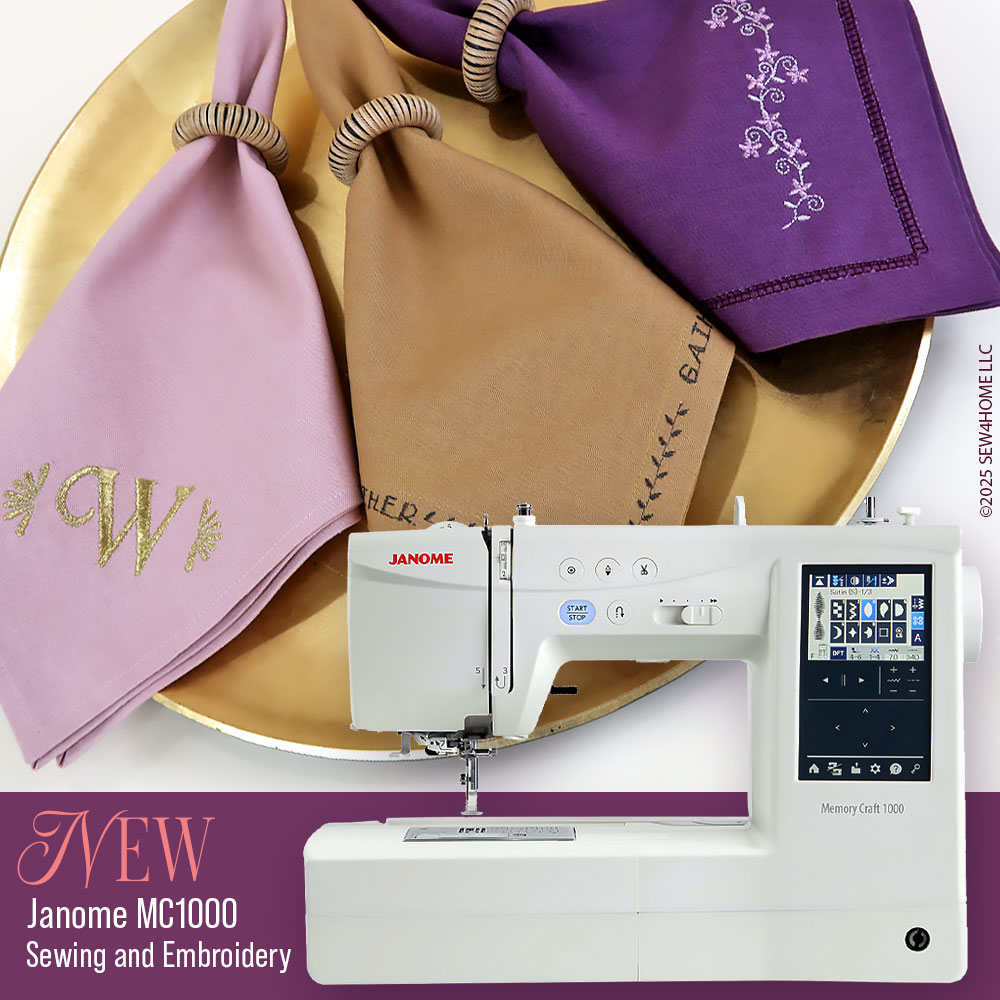
We’ve created three unique napkin designs to start you on your way to an insta-worthy table top. To execute the designs, we had fun – and success – using the new Janome MC1000 sewing and embroidery machine, putting it through its paces for ordinary sewing, decorative stitching, and machine embroidery. Although the techniques shown here are doable on many different machines, we show specifics for the MC1000. And, we encourage you to visit a local Janome America dealer in your area if possible for a full test stitch on this powerful, affordable model.
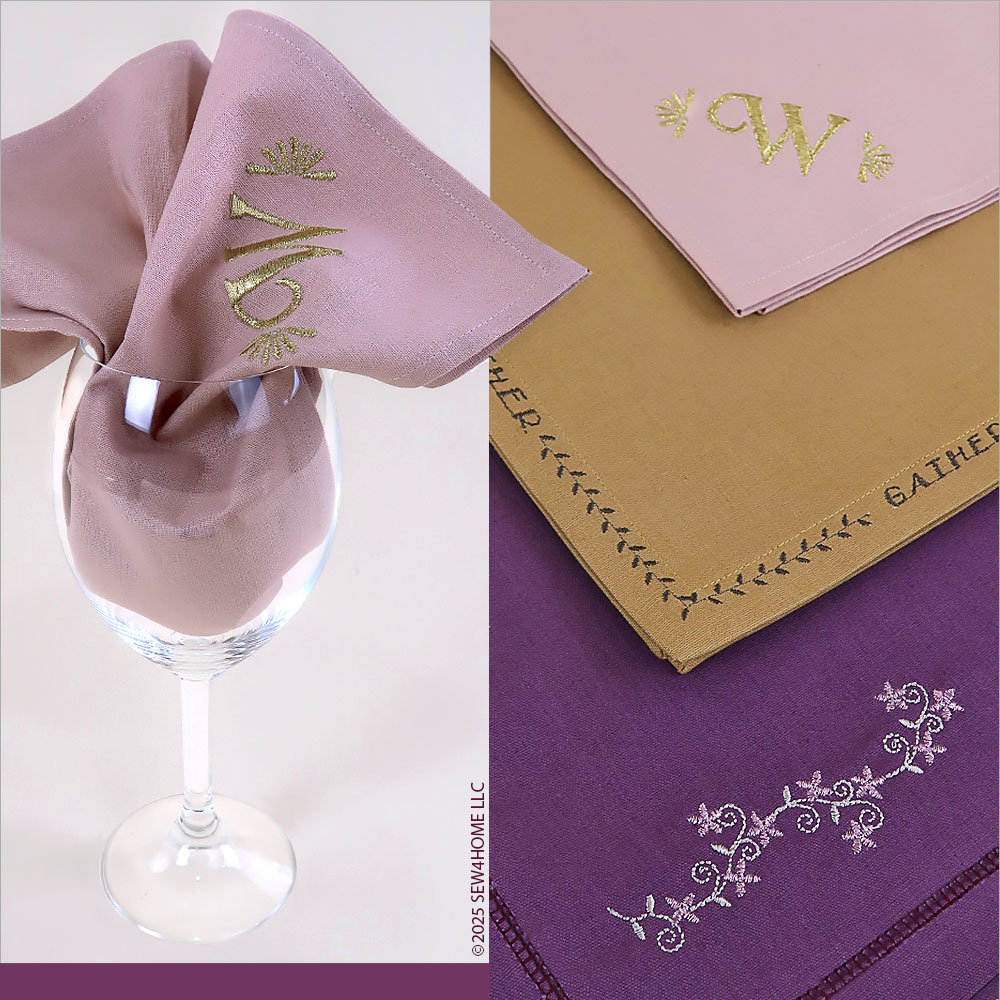
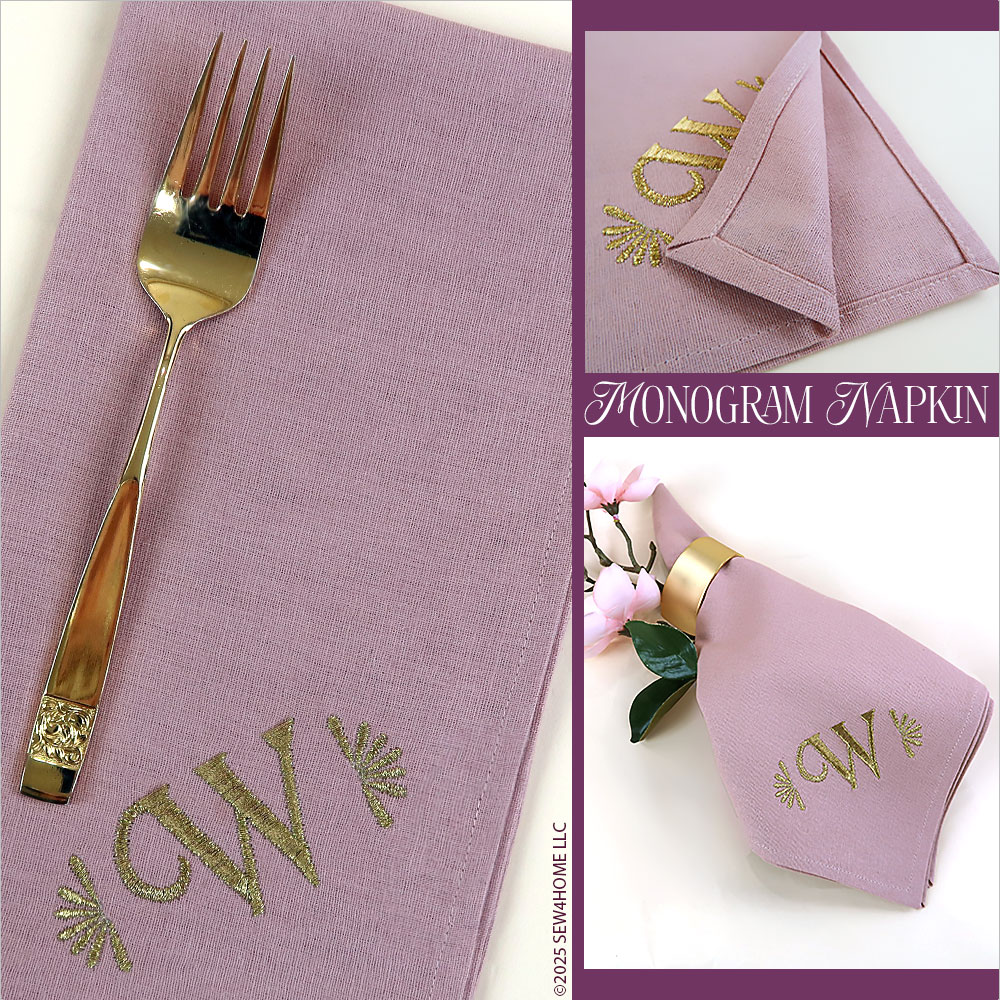
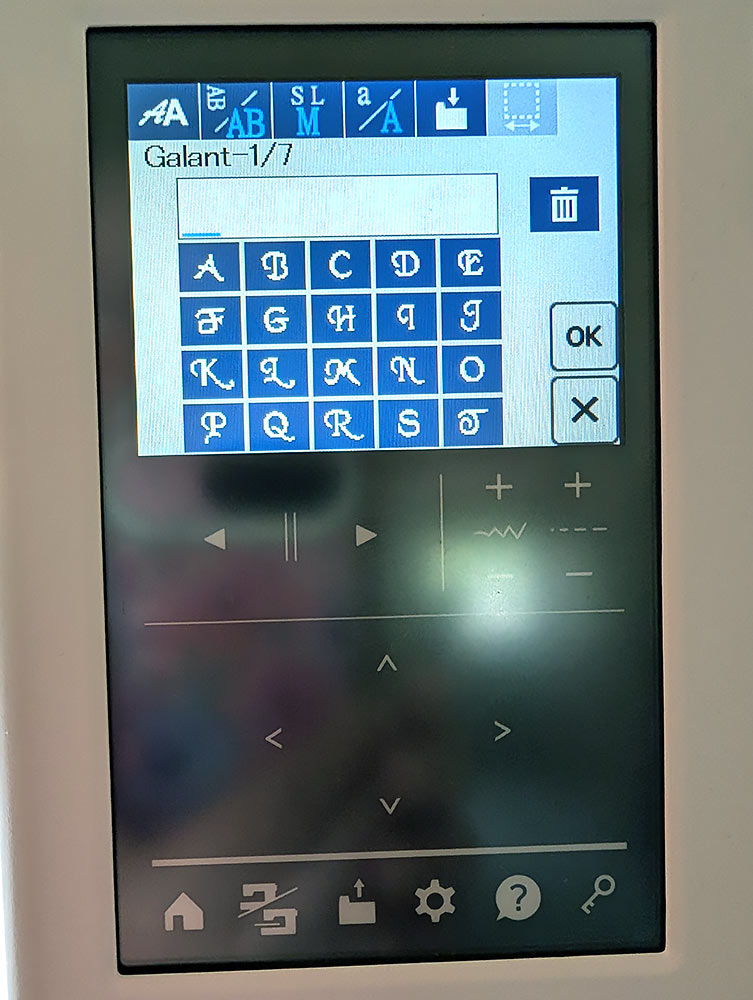
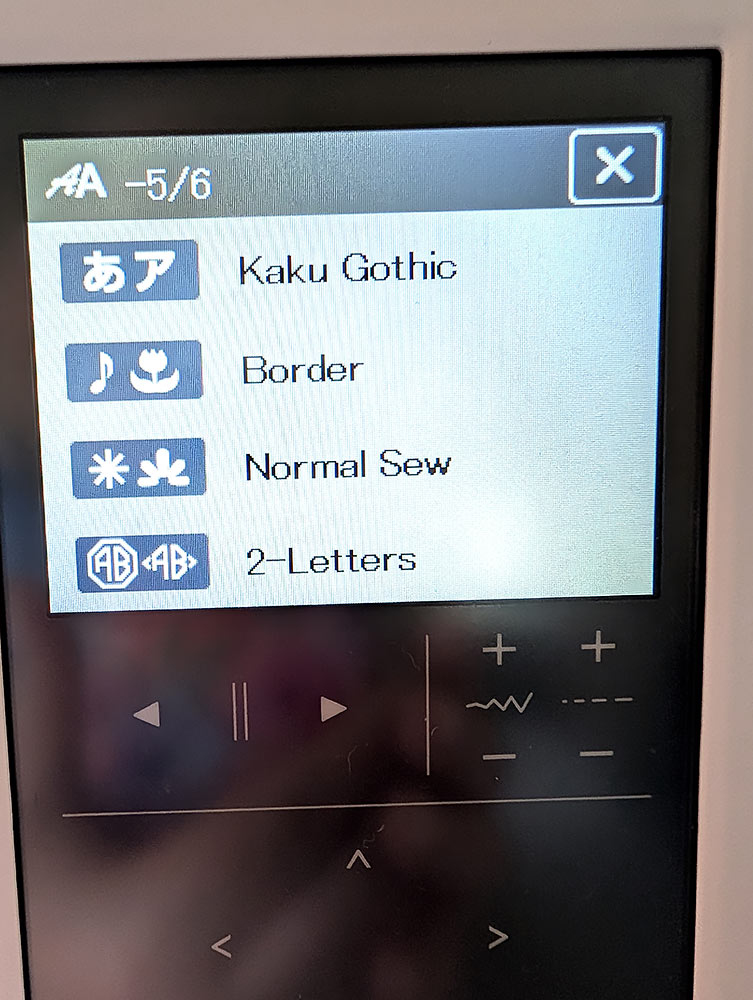
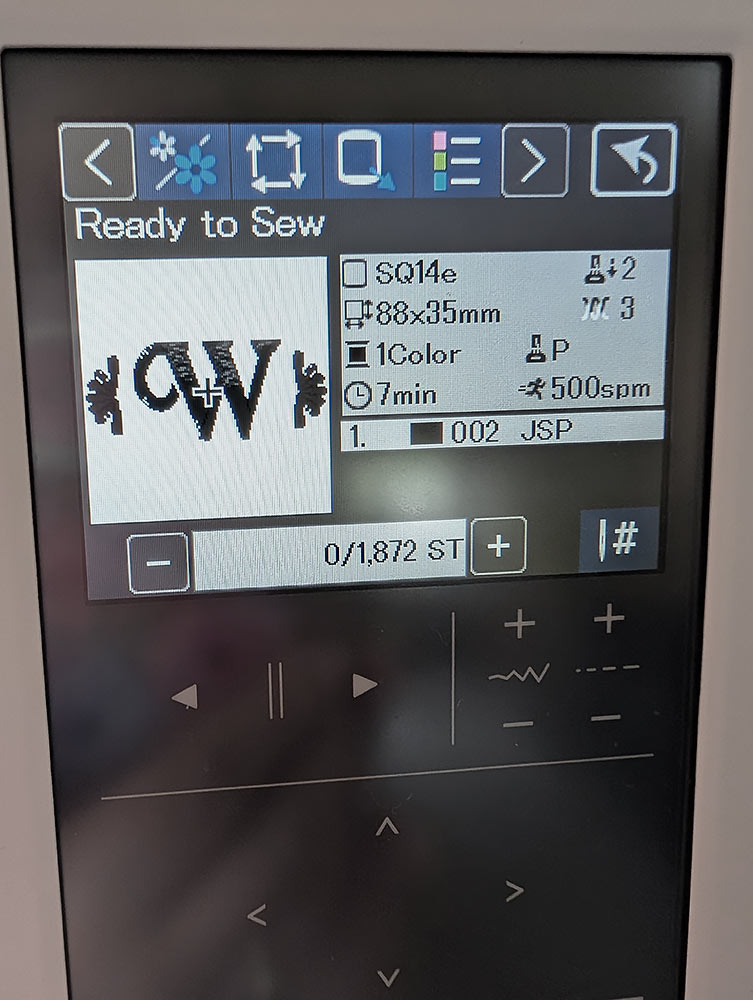
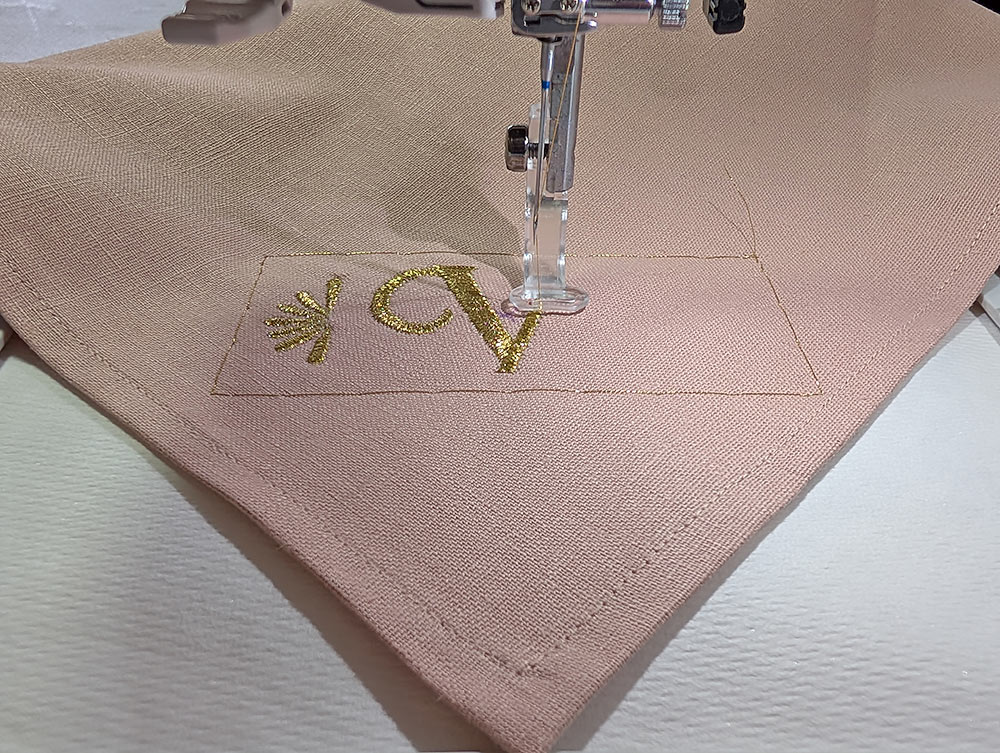
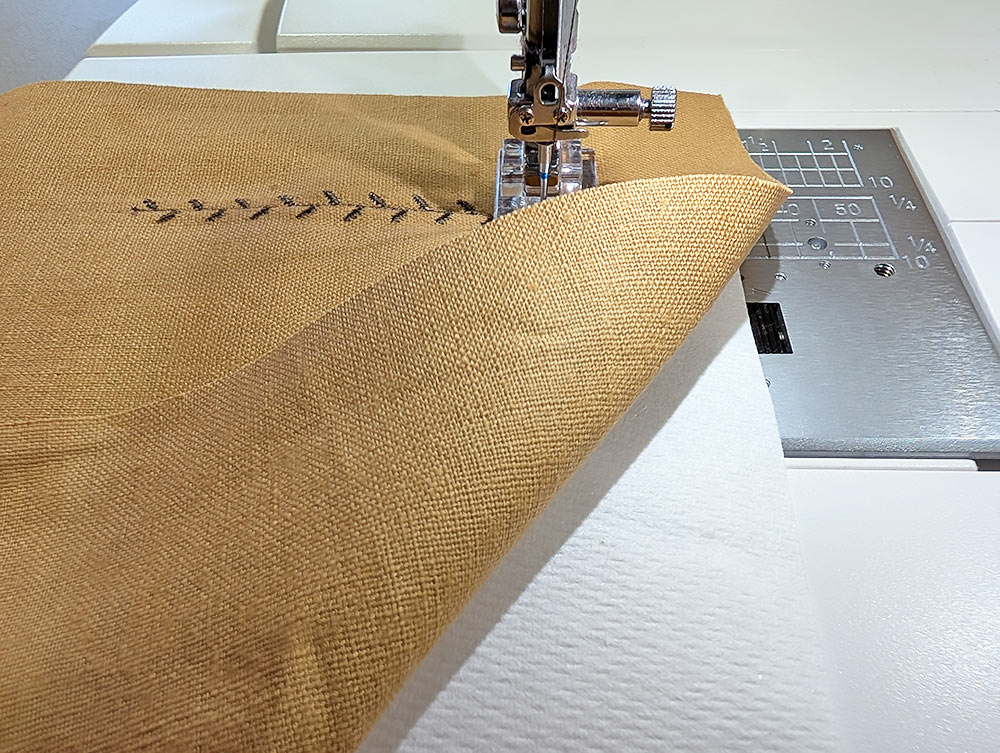
Our first napkin features a custom monogram in a warm gold metallic thread in one corner. A narrow hem with pretty diagonal point corners is a sweet finish. Most embroidery machines have at least some built-in monogram options, but we were especially impressed with the variety on the Janome MC1000. It has a standard collection of pre-built 2-3 letter monograms with frames as well as a wide selection of other monogram embroidery fonts you can use to build your own look. This was the path we took, selecting a single letter in a unique style. We then dipped into one of the MC1000’s two collections of individual accent stitches, adding a flourish to either side of the letter.
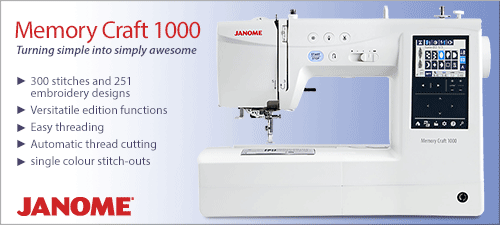
Using the new Janome MC1000 made all three techniques easier, and we were so happy with the results of the precision stitching and embroidery. There are a ton of features packed into this compact model. And, actually, “compact” is one of the reasons we were excited to use and talk about the machine. Many of us have smaller sewing spaces, often it might be just a desk or the corner of the kitchen table. The MC1000 can fit that lifestyle, and its built-in, swing-out-and-lock embroidery arm makes setting up for embroidery fast and easy.
Our thanks again to Janome America for their support of this project and many of the other most popular projects across the S4H site. To find out more before you go, visit the Janome website and follow them on social media
Sewing Tools You Need
- Sewing Machine and standard presser foot
- Embroidery foot
- Zipper foot
- 80/12 Universal needle for the construction stitching
- 90/14 Universal needle for the stitching with metallic thread
- 100/16 Wing needle for the hemstitching
Fabric and Other Supplies
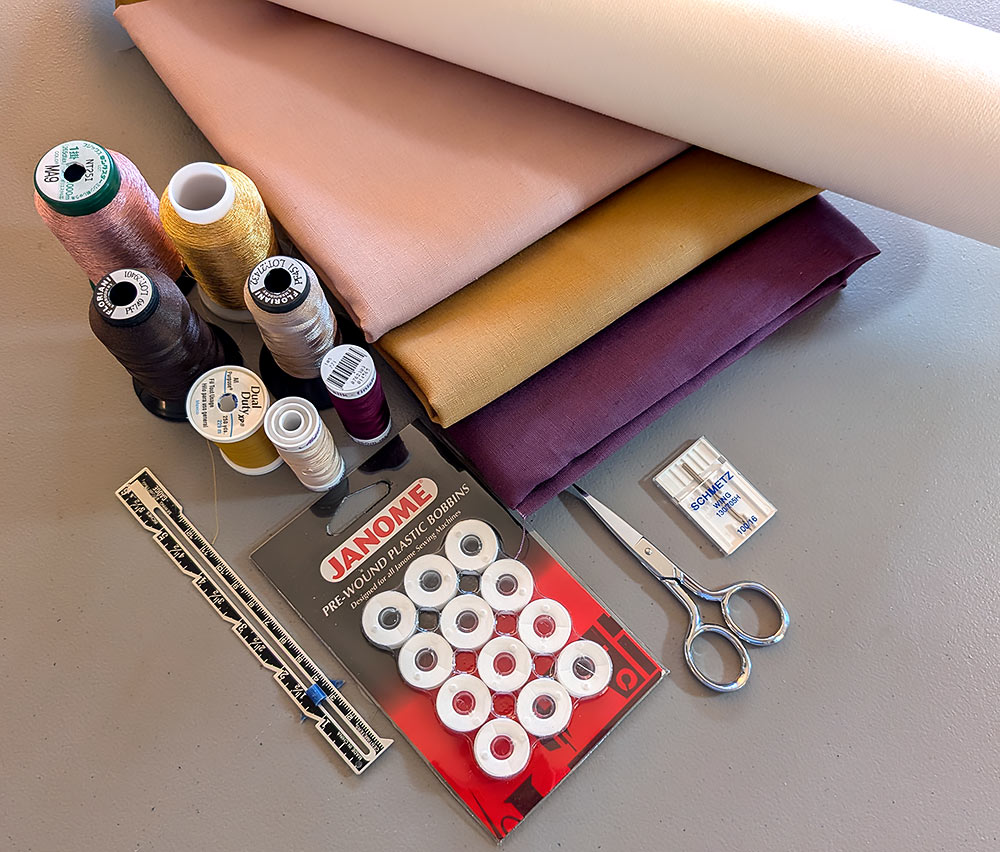
- ¾ yard of 44”+ wide linen or linen blend fabric for EACH napkin; we used Essex cotton/linen blend from Robert Kaufman Fabrics in Rose, Plum, and Leather
- 1 yard of 20”+ wide wash away stabilizer for EACH napkin
- All purpose thread to match fabric for construction
- 40wt Rayon and/or Metallic thread for the embellishment; color and texture are always up to you when creating your desired finish – we used a warm gold metallic on the Rose napkin, light tan and rose gold metallics on the Plum napkin, and a dark chocolate rayon for the embellishment on the Leather napkin — all in a 40wt
- Bobbin thread or Janome Pre-Wound bobbins; pre-wound bobbins are our favorite for embellishment
- See-through ruler
- Measuring tape
- Fabric pen or pencil
- Iron and ironing board
- Scissors
- Rotary cutter and mat
- Seam gauge
- Seam ripper
- Straight pins
We are deviating slightly from our standard format and bundling the set-up, cutting, and sewing instructions for each napkin. This allows you to pick your favorite and work through the steps start to finish. Of course, we think it will be fun for you to try all three.
ROSE NAPKIN
Getting Started
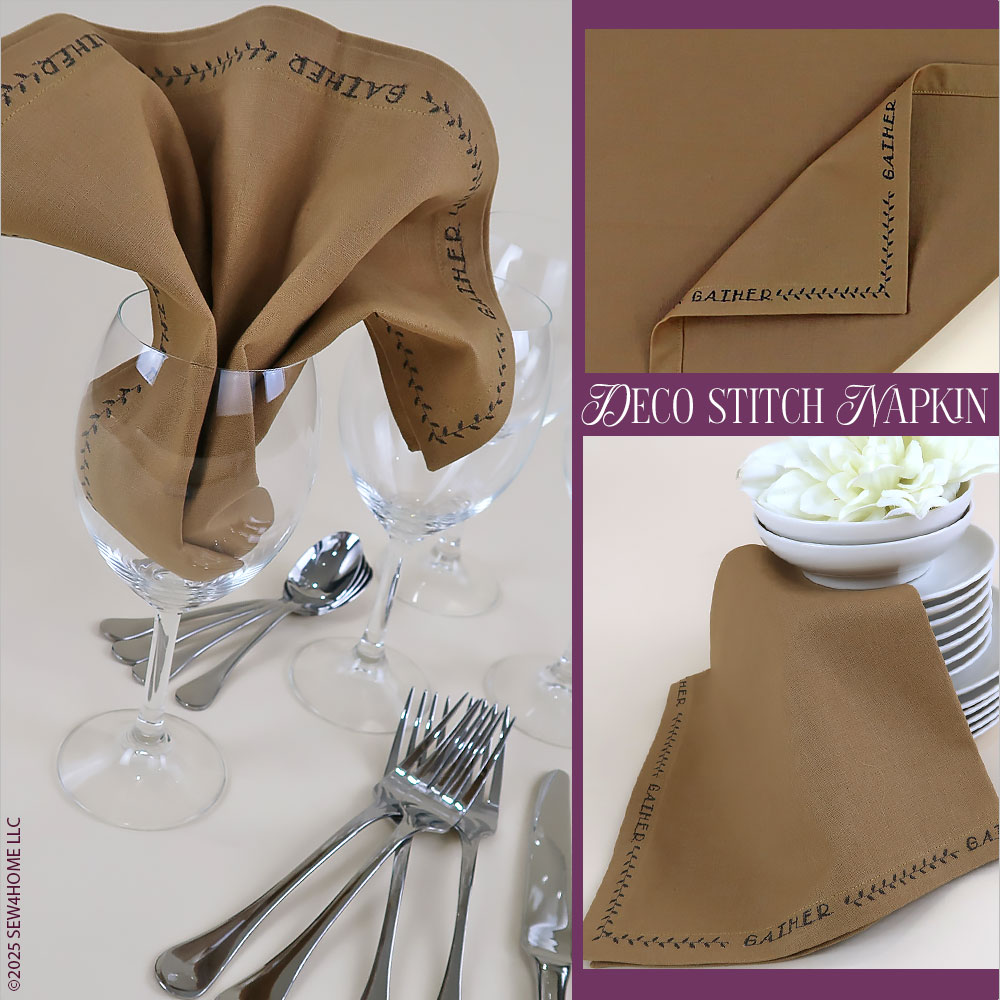
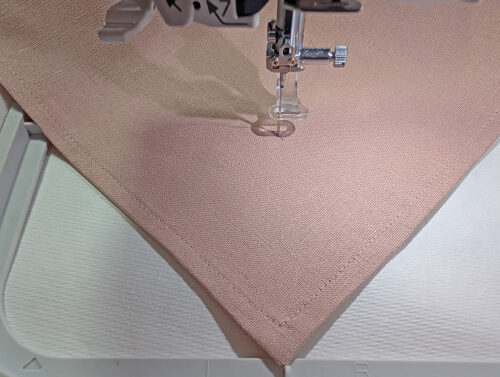
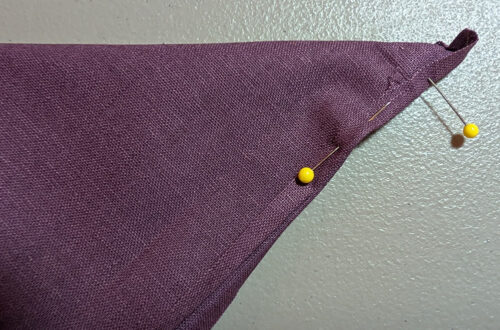
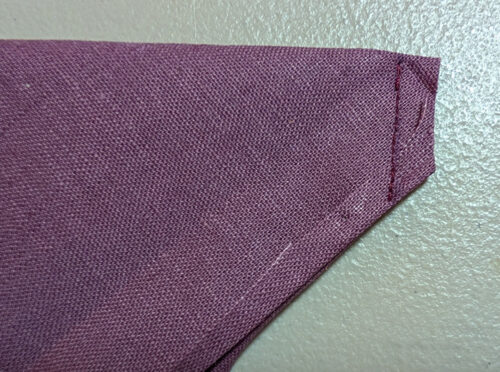
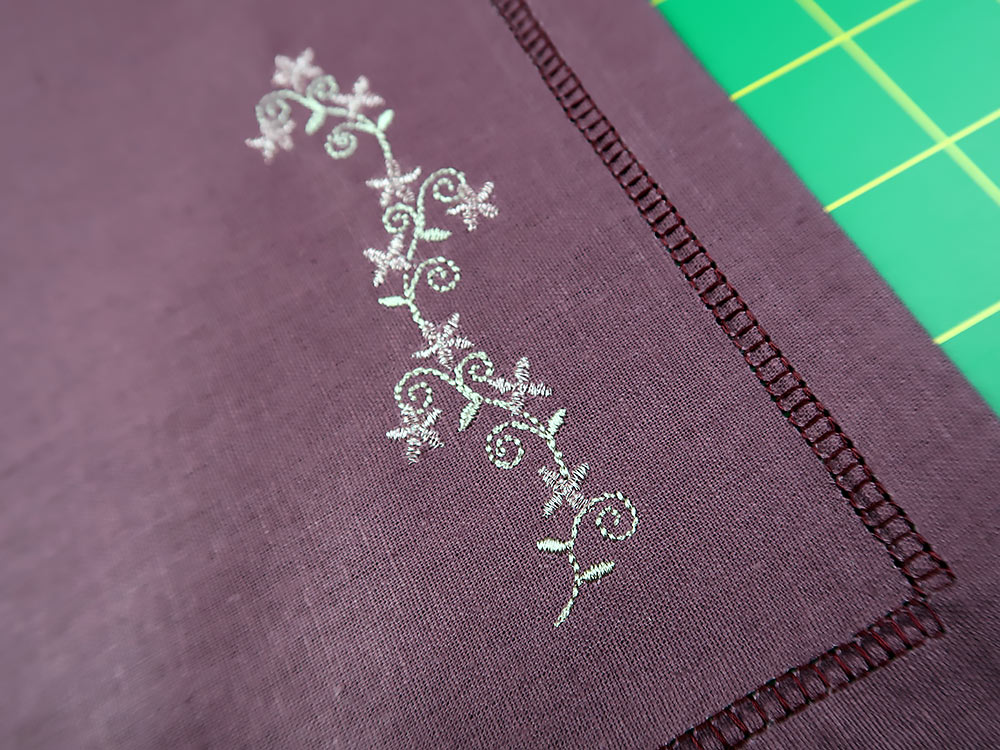
- The Rose napkin has a ¼“ double-turn hem with clean, diagonal point corners. One corner features an embroidered monogram created with a single letter bordered by medallion style accents from the Normal Sew collection available on the Janome MC1000.
- Pre-wash and press your fabric.
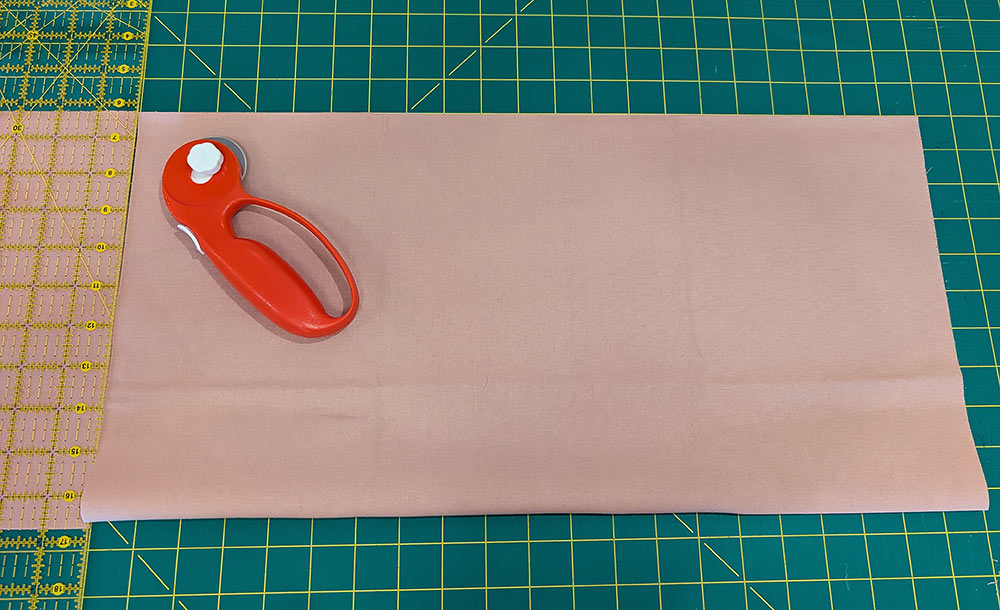
- For the 20” x 20” finished napkin, cut a 21” x 21” square, being especially careful to make sure your cuts are straight and your corners are true 90˚ angles.

Hemming
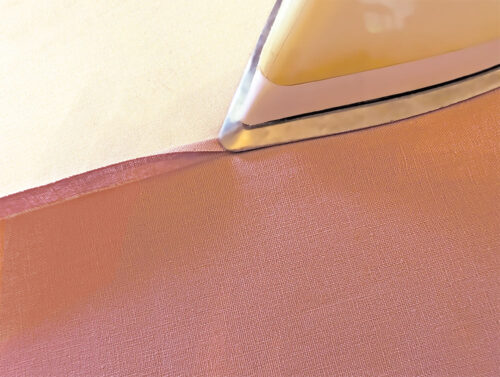
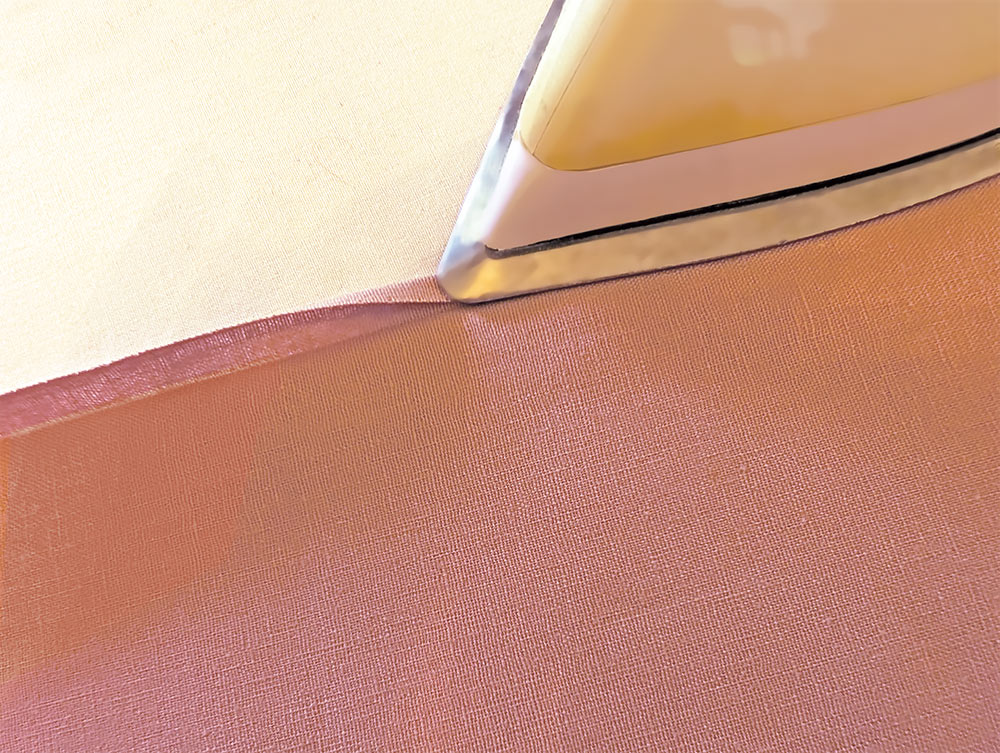
- Press an even double turn hem along each raw side edge. To do this, fold back the raw edge ½” and press well to set a crease.
- Unfold the hem so its crease lines are visible.
- Then, fold in the outer raw edge to align with the original crease line and press again, firmly enough to set another crease line.
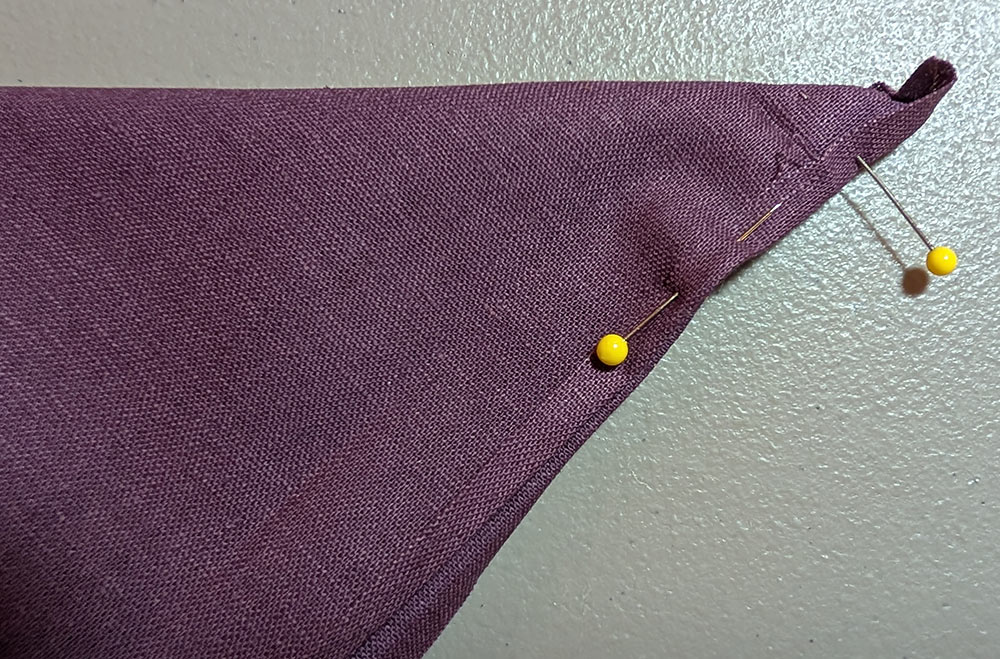
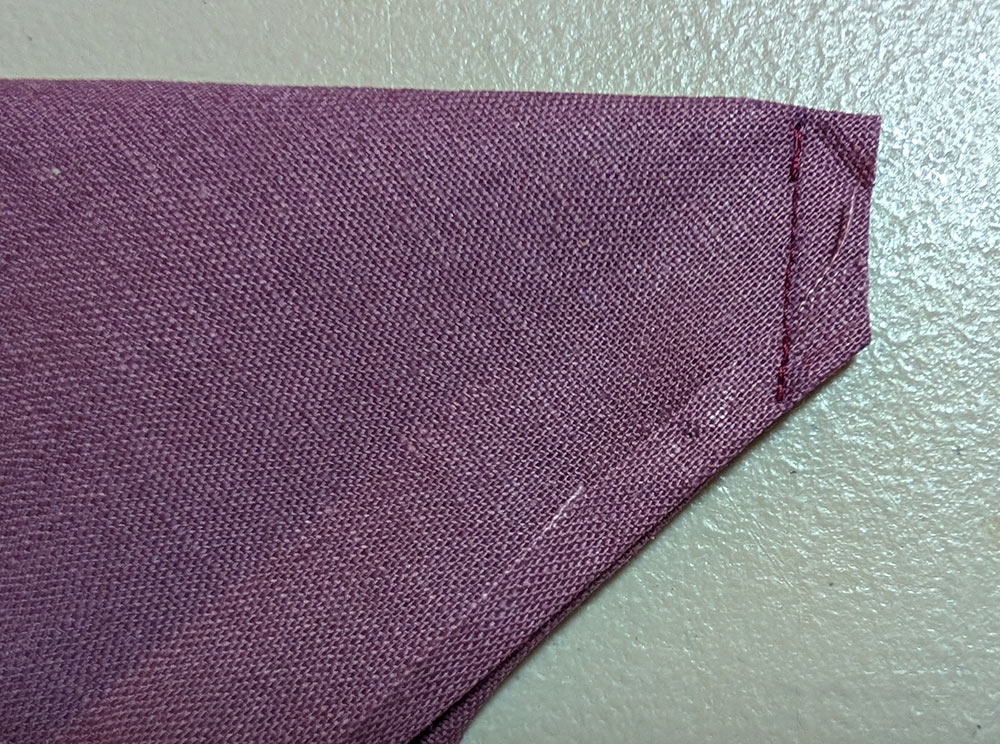
- The two folds will create criss-cross crease lines at each corner. These become the guide lines for folding the pretty diagonal corner.
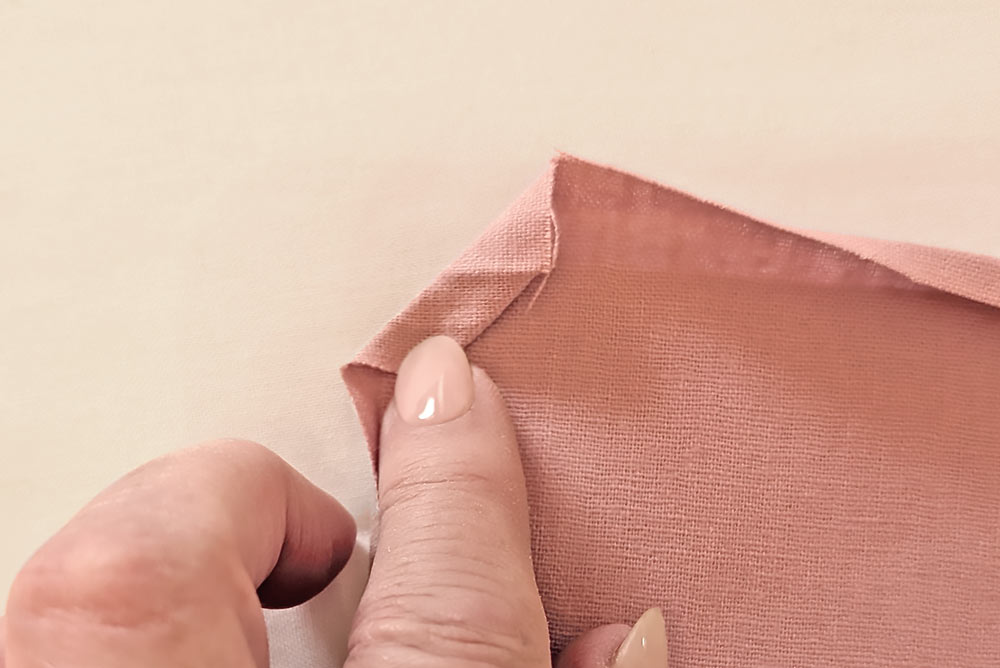
- Unfold the first corner so your fabric lays flat, wrong side up. You should be able to see the crease lines of both folds.
- Fold in the corner at a 45˚ angle so the point of the corner lines up with the intersection of the inner set of crease lines. Press.
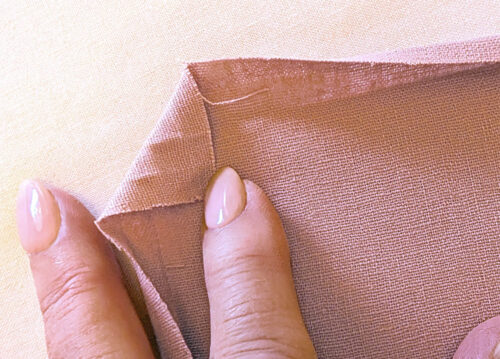
- Fold in the corner a second time; you are folding again at ¼” and at a 45˚ angle. The outer edges of this second fold should line up with your first set of crease lines. Press.

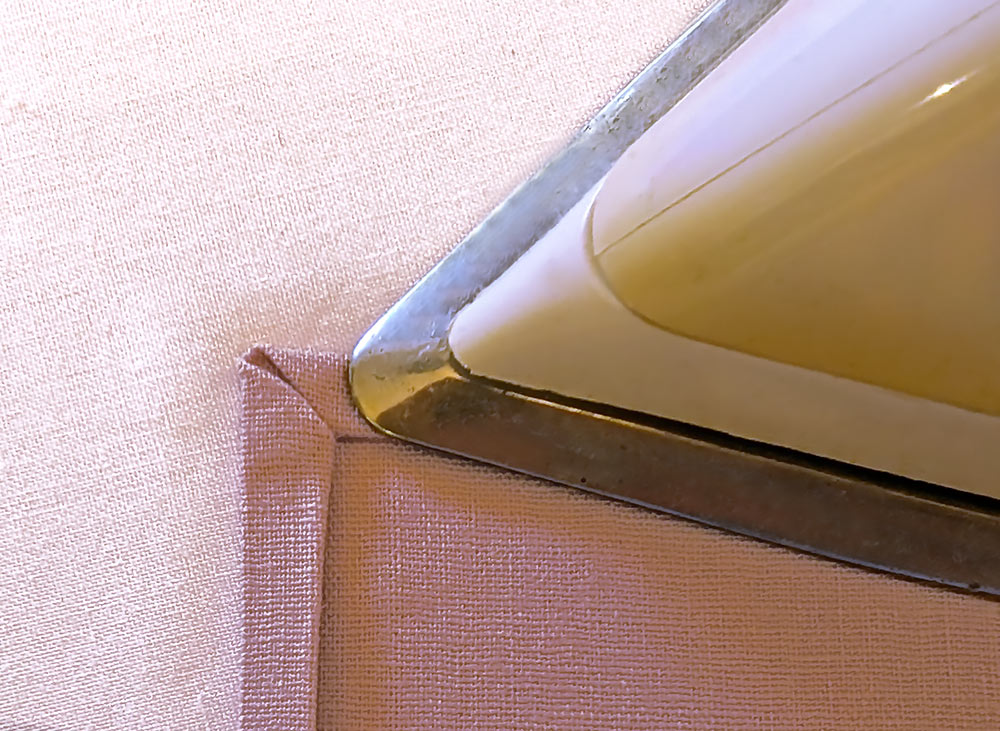
- Re-fold the sides along the second set of crease lines and press well (the outer ¼” fold). Then re-fold along your first set of crease lines and press well (the inner ½” fold). These two re-foldings will create a diagonal line where the two finished edged meet, making a very pretty corner.

- Press and pin in place and repeat at each of the remaining three corners.
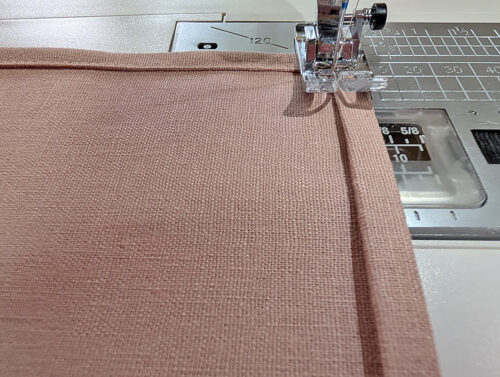
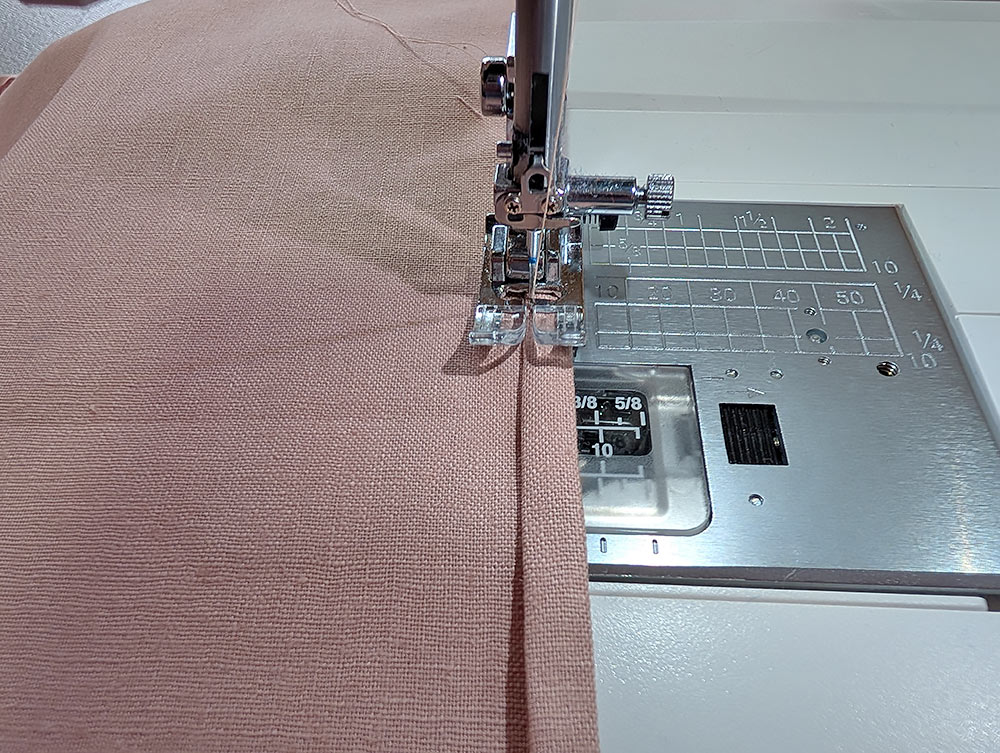
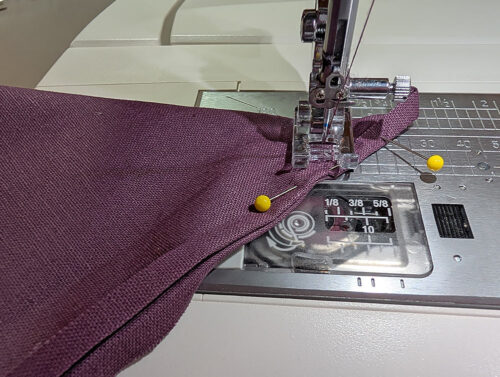
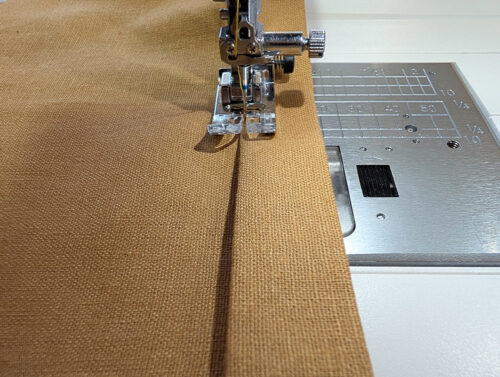
NOTE: If you are new to making this type of corner, you’ll find it be a great finish for a lot of projects. We have a full tutorial with additional illustrations. The tutorial shows a narrow ¼” hem as we’ve done here, but the finish can be used with any width as long as the hems of the intersecting sides are equal. - Set up your machine for ordinary sewing with a straight stitch. Thread the machine with all purpose thread to match the fabric in the top and bobbin. Slightly lengthen the stitch. On our MC1000, we inserted the Yellow Dot Bobbin Case. The machine comes with two bobbin cases to deliver the proper tension for embroidery (white dot) and ordinary sewing (yellow dot).
- Edgestitch the hem, starting the stitching in the middle of one side.
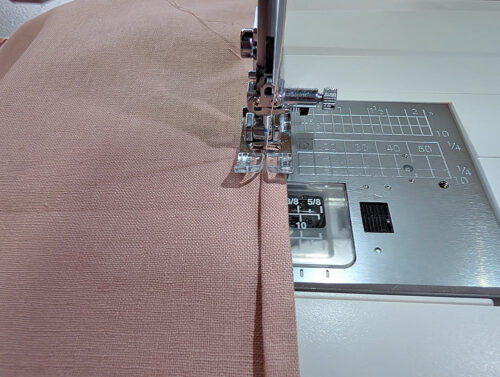
- As you approach the corner, hold the diagonal corner in place. Pivot at the center line of the diagonal and stitch onto the next side. Continue stitching in the same manner all around.
- Finish by carefully overlapping the stitching. Press well around all four sides.


Embroidery
- Set up your machine for professional style embroidery. We chose a metallic thread for our embroidered monogram and so changed to a 90/14 Universal needle. The larger eye of this needle helps prevent the delicate metallic thread from shredding. Janome makes convenient pre-wound bobbins for embroidery; we used them for all our embroidery and decorative stitching. That means: metallic thread in the top, bobbin thread in the bobbin. We also switched to White Dot Bobbin Case on our MC1000.
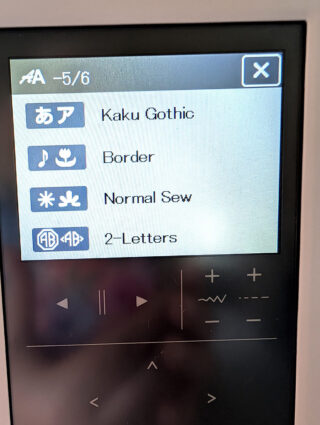
- Most embroidery machines have a number of built-in fonts, and the Janome MC1000 is no exception! There is a standard collection of pre-built 2-3 letter monograms with frames as well as a wide selection of other monogram embroidery fonts you can use to build your own look (this was the direction we chose). In addition, there are two collections of individual accent stitches, which can be added to any monogram font.
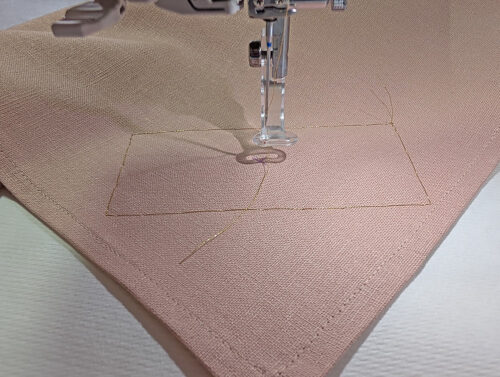
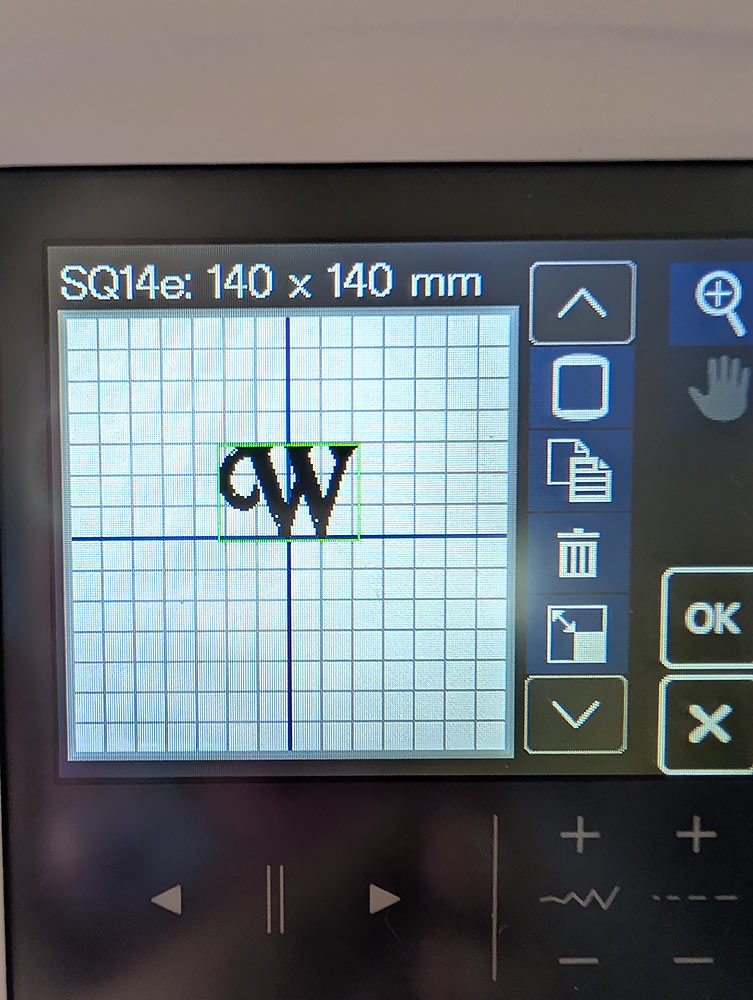
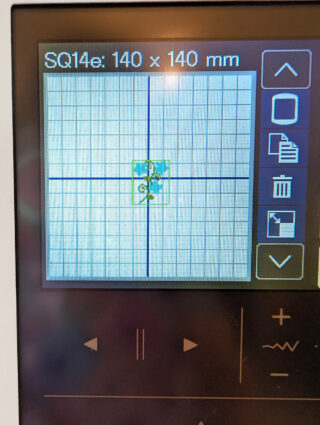
- To create our monogram, we started at the Edit Screen, selecting Monograms, and choosing a W in the Galant font in a Large size and a horizontal orientation.

- The chosen letter will appear on the screen of the standard 5½” x 5½” square hoop.

- Returning to the Edit Screen, we then selected the Normal Sew collection and chose an individual accent stitch to
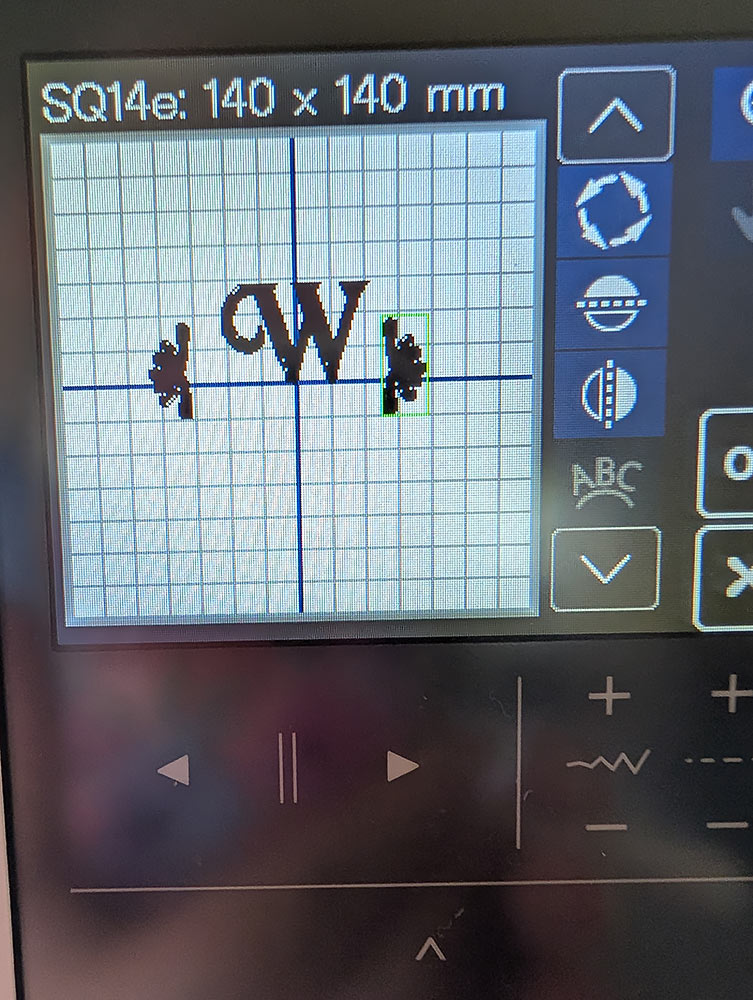
- Using the powerful on-screen editing tools on the MC1000, we duplicated the accent stitch, rotating and mirroring the design in order to place an accent on either side of letter.

- It is easy to then group and center the final arrangement, before sending it to the main embroidery screen.

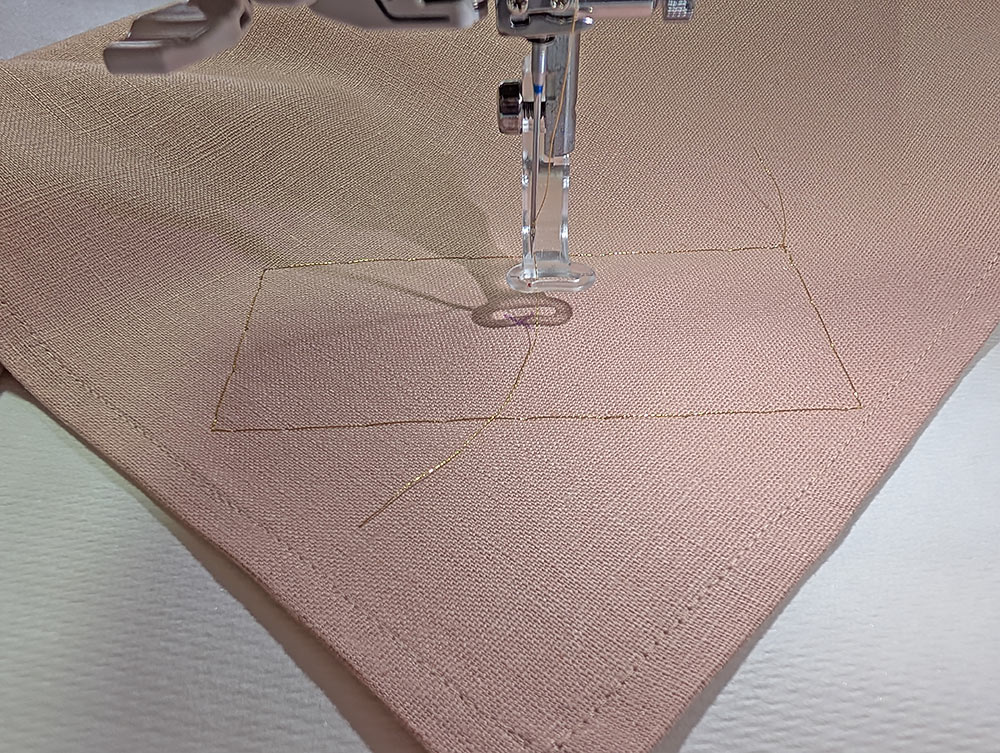
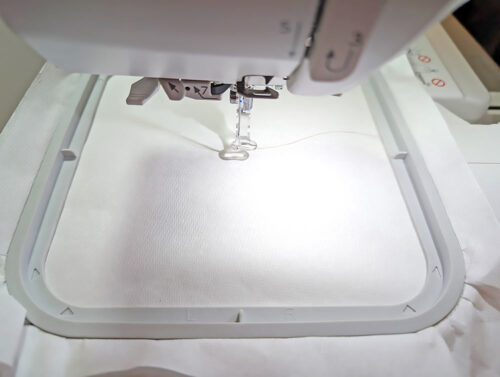
- With the design ready to go, place stabilizer in the hoop. We used two layers of a wash away stabilizer. Place the hoop on the machine. Hooping the stabilizer instead of the fabric itself is the best practice when adding a small bit of embroidery in a specific area. We love how easy it is to use the compact, swing-out-and-lock embroidery arm on the MC1000.
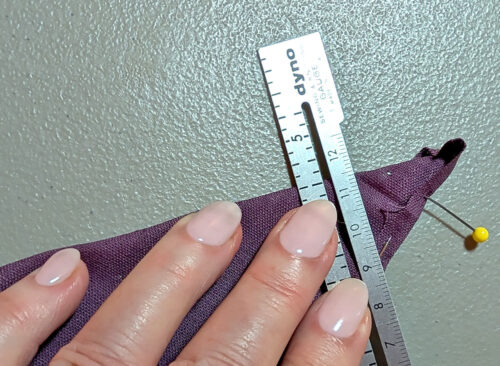
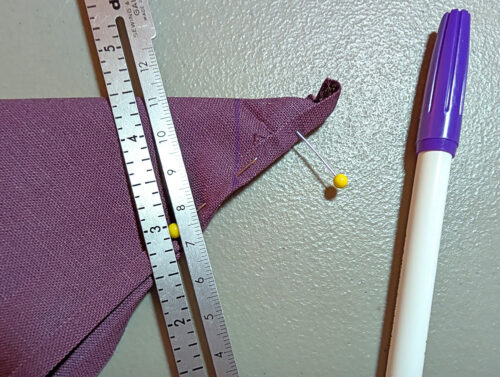
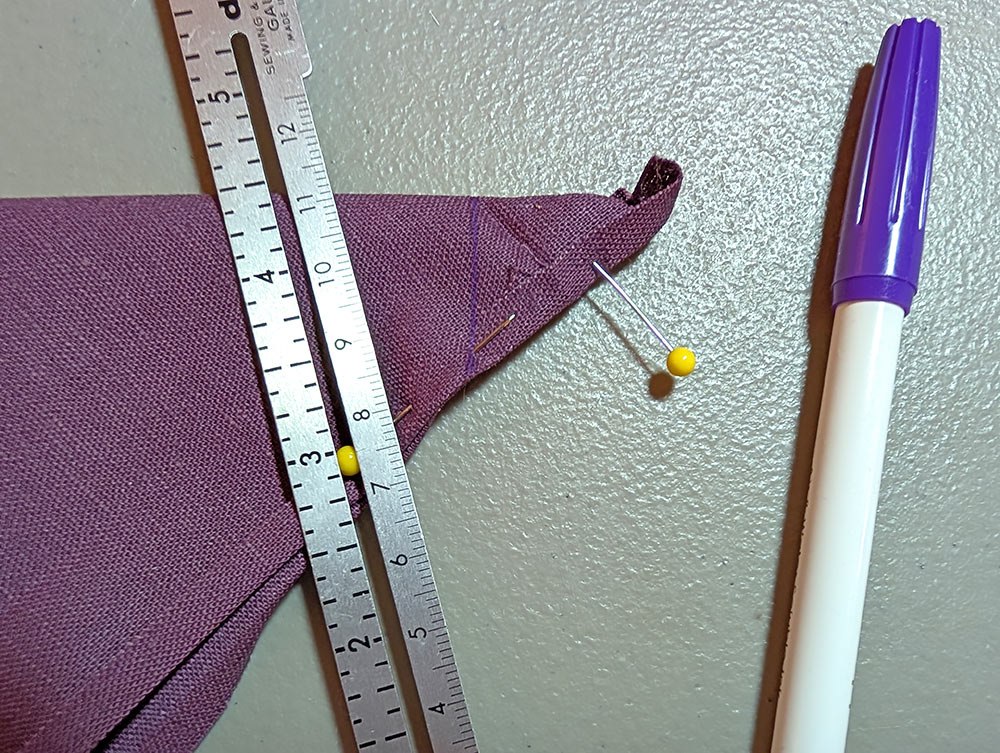
- Find the hemmed napkin and mark one corner for the monogram placement. You want the monogram arrangement to be centered above the point of the napkin’s corner. For our sample, we measured 2⅜” in from each side to create our center crosshairs.

- Place the marked corner of the napkin over the hoop on the diagonal, with the corner pointing toward the front of the hoop and the point of the needle centered directly over the crosshairs.
- Use the baste function to secure the napkin in place.
- Start the embroidery. We chose to embroider our monogram as a single color, which is the most traditional look, so there was no need to re-thread – simply watch in amazement as the beautiful design stitches out.

- When the design is complete, remove the hoop from the machine. Remove the excess stabilizer from the embroidery and press from the wrong side.
- Prior to setting your table, you can certainly wash and iron the napkin(s) to remove the last remnants of the wash away stabilizer.


PLUM NAPKIN
Getting Started
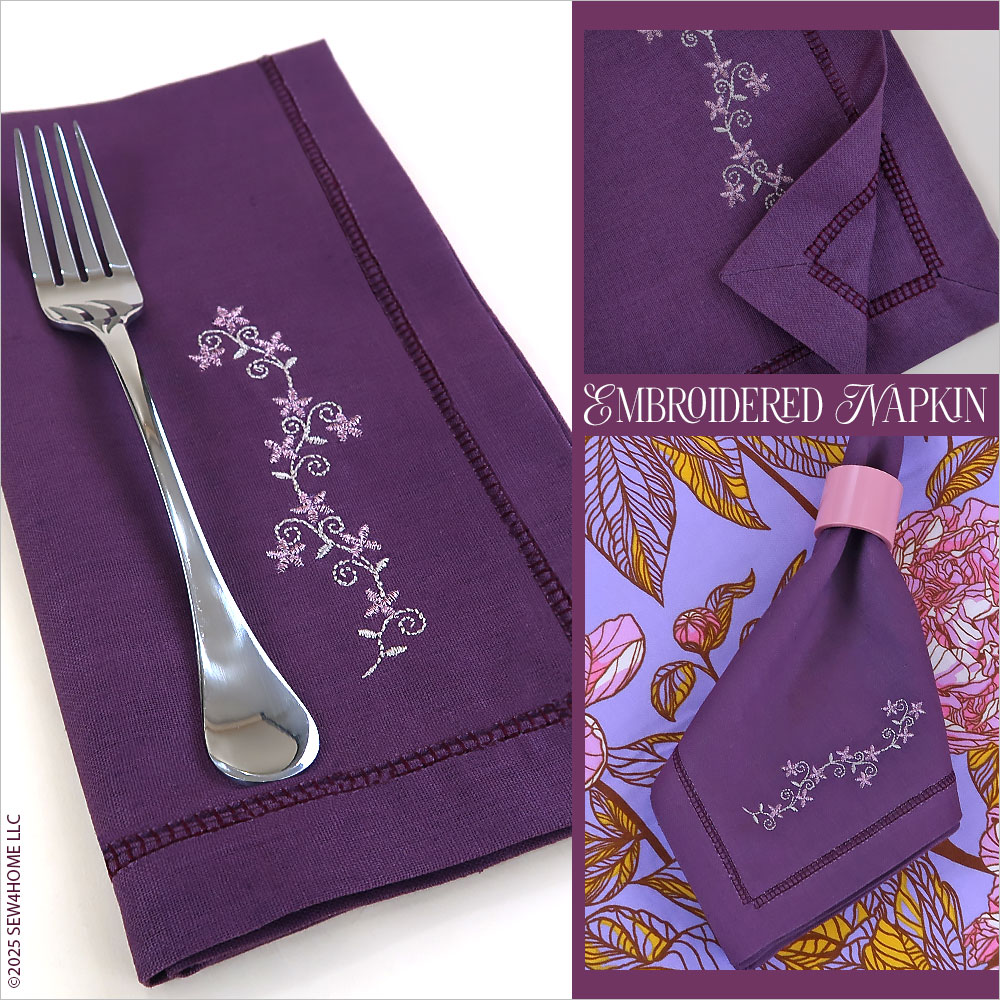
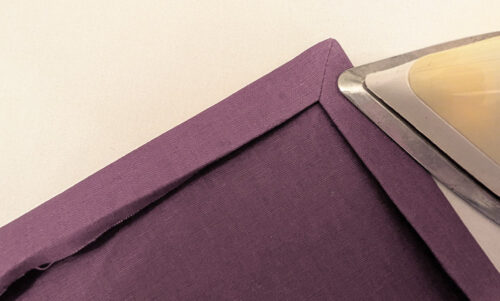
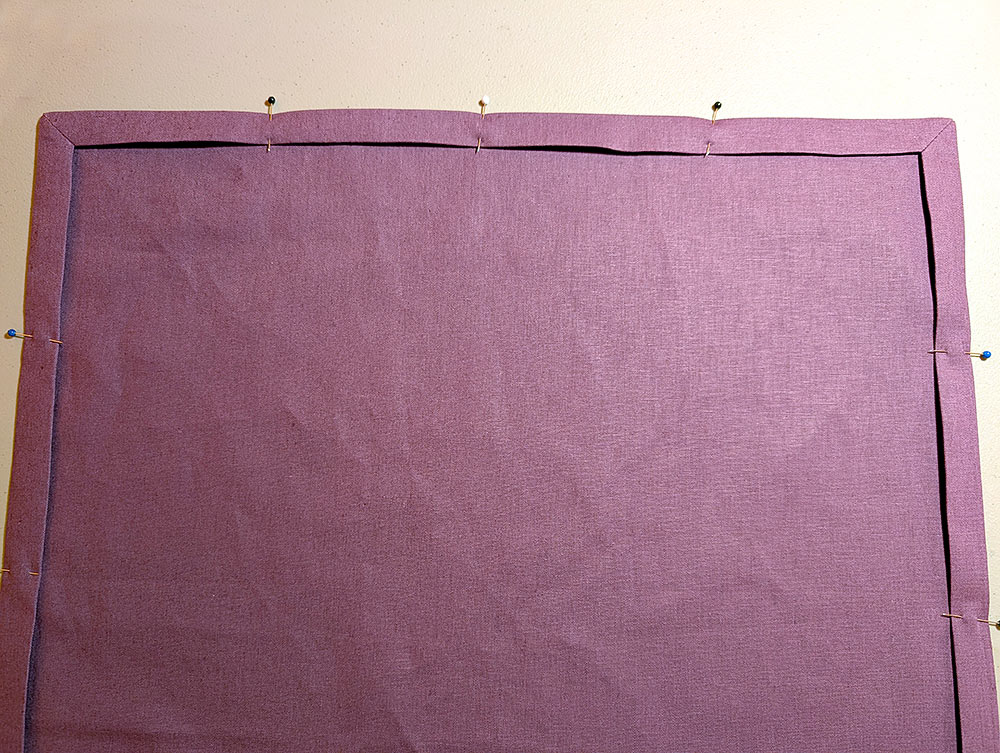
- The Plum napkin has a ¾“ true mitered hem with a hemstitched finish. One corner features a embroidery arrangement, which we created using one of the small built-in floral designs available on the Janome MC1000.
- Pre-wash and press your fabric.
- For the 20” x 20” finished napkin, cut a 22” x 22” square, being especially careful to make sure your cuts are straight and your corners are true 90˚ angles.
Hemming
- Press in 1″ along each side of the square.
- Open up this first fold and make a second fold, turning the raw outer edge ¼“. Press well. These two folds will create criss-cross crease lines at each corner.

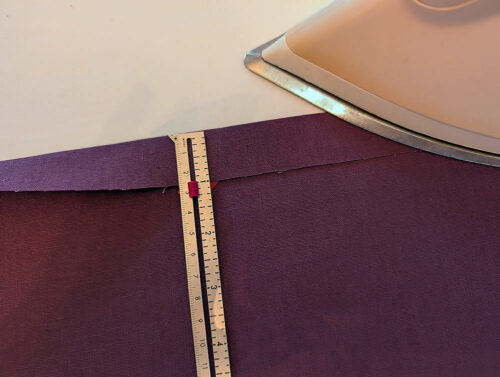
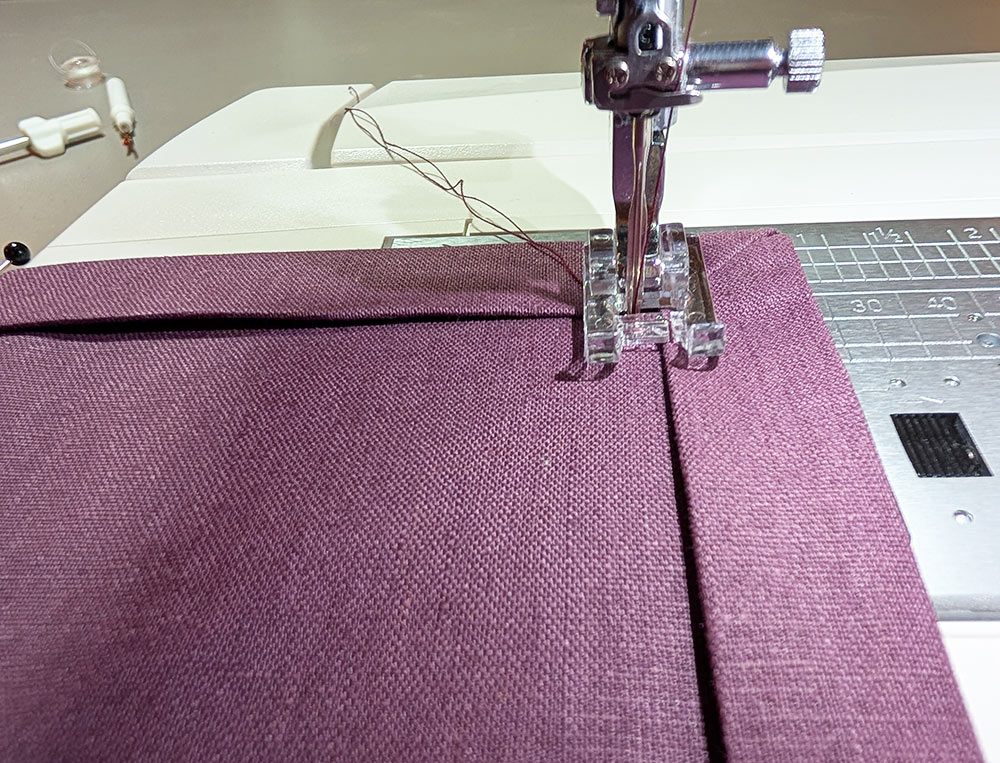
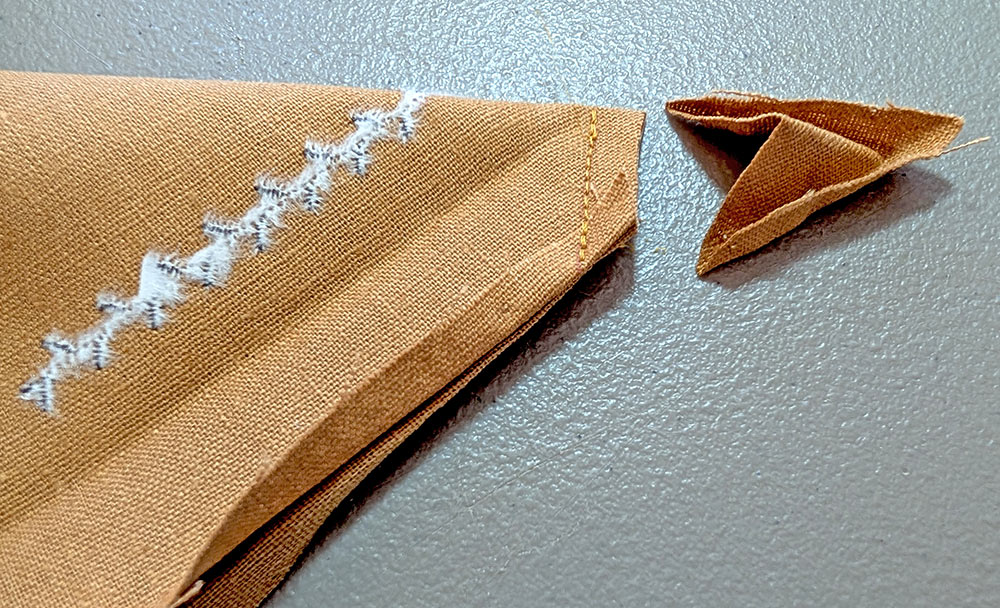
- To create a mitered corner, fold the corner on the diagonal with right sides together. Match the outer edge of the
- When folded, you will be able to see your original 1” crease line. Position a ruler (we used our seam gauge) so it
- Draw a straight line to the outer edge.
- Fold, pin, and mark each of remaining three corners in the same manner.
- Set up your machine for ordinary sewing with a straight stitch. Thread the machine with all purpose thread to match the fabric in the top and bobbin. As mentioned above, the MC1000 comes with two bobbin cases to deliver the proper tension for embroidery (white dot) and ordinary sewing (yellow dot). We inserted the Yellow Dot Bobbin Case.
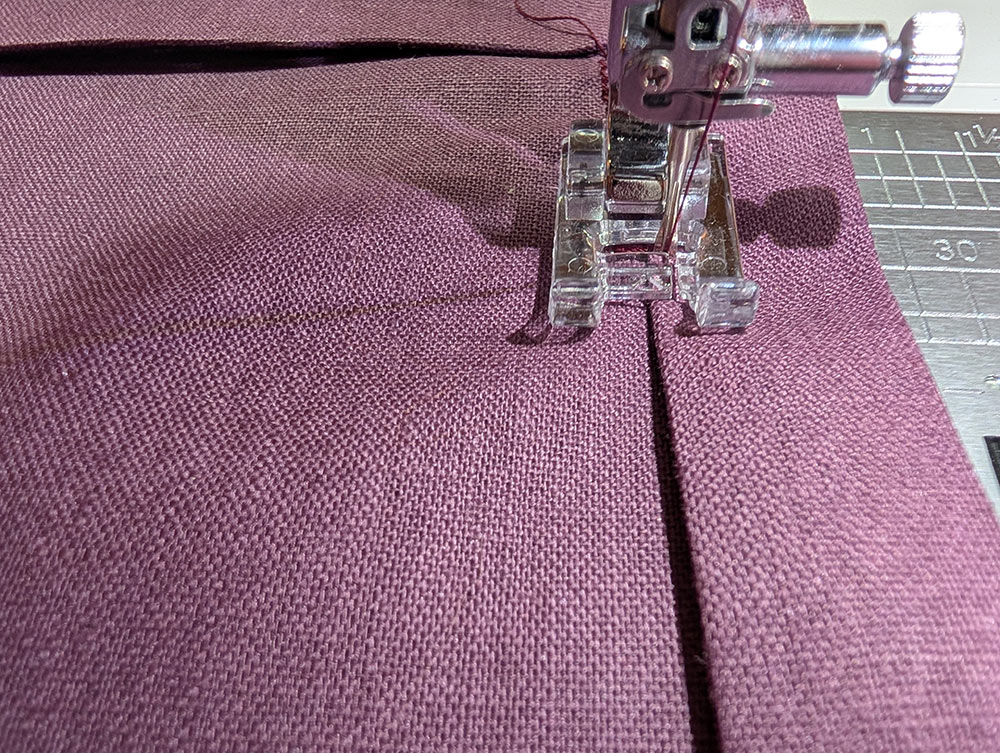
- Stitch along each of the four marked corner lines.
- Trim each corner ¼“ from the stitching.
- Finger press one little seam allowance open. Holding the seam flat with your fingertips, flip the corner right side out, and smooth to make the mitered corner.
- Flip each corner in the same manner. Press the hem in place all around and pin.

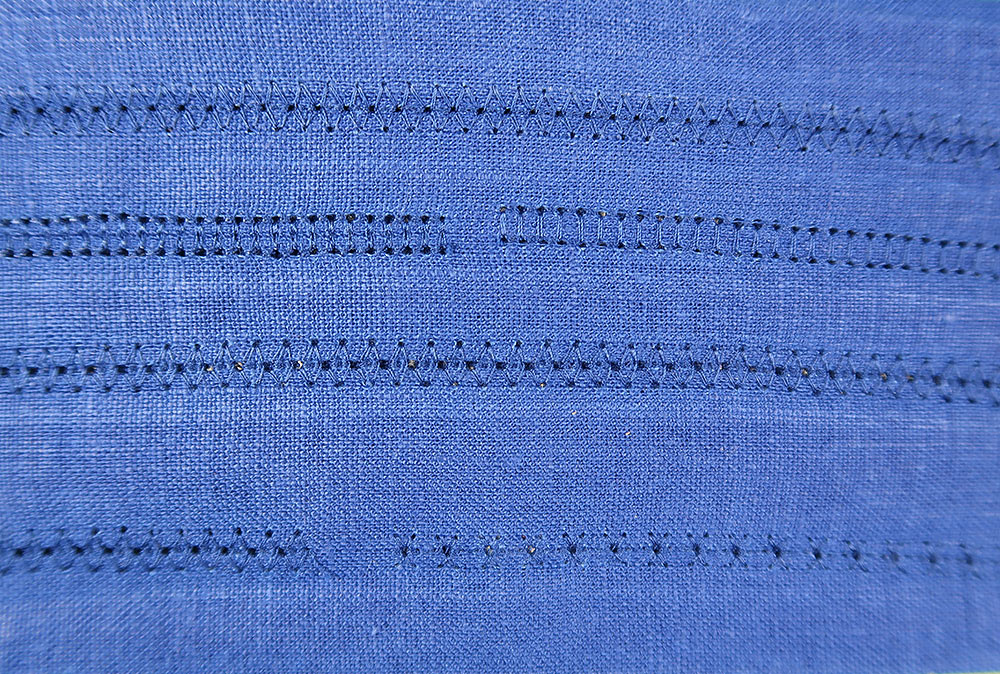
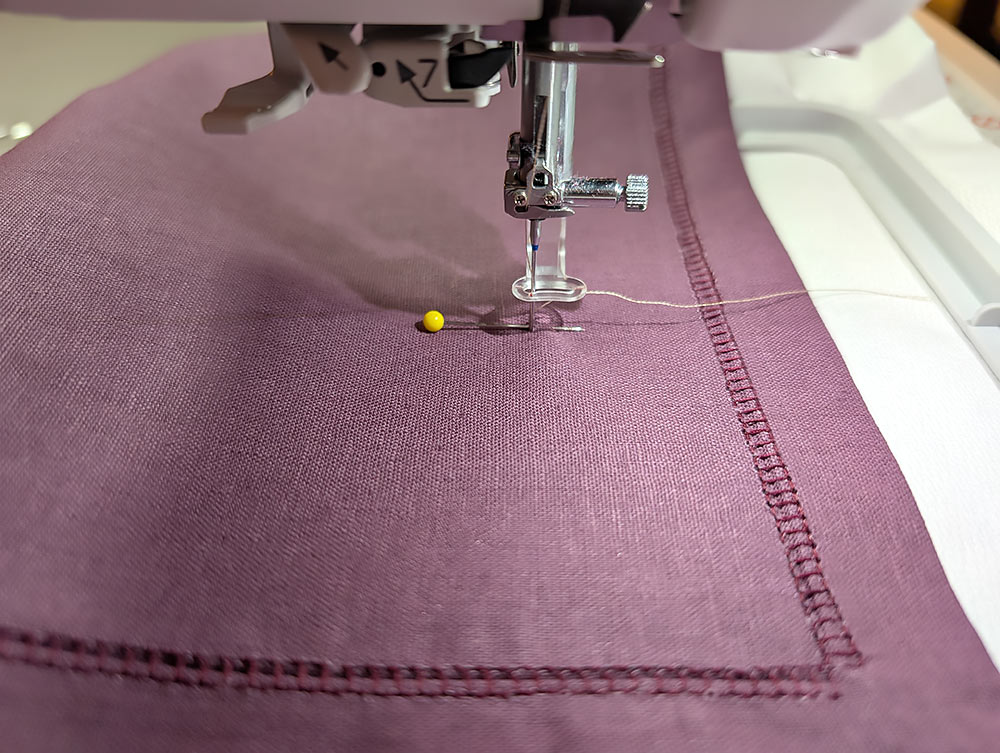
- We used a 100/16 Wing needle for the hemstitching and selected a decorative stitch from the group of Heirloom Decorative Stitches available on the MC1000. We did a number of test sews before selecting Stitch #6. We cannot recommend strongly enough how important it is to test, test, and test again when working with decorative stitching. The photo below shows a few of our attempts to get just the right look.

- The stitch width and length were pre-set, but we did make adjustments to the tension setting until we had a balanced stitch both front and back. You will be stitching the hem from the wrong side of the napkin.
- Start the hemstitching at a corner. The goal is to catch the edge of the hem with the right swing of the needle, with the left swing of the needle going into the single layer of napkin fabric.

- As you stitch slowly along the first side of the napkin, watch the steps of the needle as it forms its stitch pattern.

- When you approach the mitered corner, the goal is to end the stitching with the needle swing to the left at the center diagonal line of the miter. Stop with the needle in the fabric and pivot.
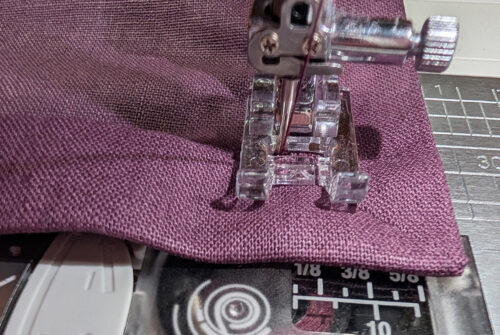
- Once pivoted for the next side, re-start your stitching. Continue sewing and pivoting at the corners until you reach your starting point. Press the Reverse key to lock the stitches. DO NOT USE THE CUTTER – you do not ever use an auto thread cutter with a Wing needle.
- Raise the presser foot and needle, and pull the fabric away from the machine. Trim the threads close to the stitching.

- The steps here are quite detailed, but for even more information, check out our full step-by-step tutorial on mitered corners.
NOTE: One thing to remember about decorative stitches is that the stitches automatically lock at the beginning. To lock stitches at the end of a line of stitching, you have two options on Janome machines. The first option allows you to end in the middle of a pattern. Press the Reverse key and the machine will immediately stop and lock stitches. The second option is use the Lock key. This allows the machine to complete the pattern, then lock the stitches.


Embroidery
- Set up your machine for professional style embroidery. We chose a metallic thread for the small garland in our embroidered arrangement. Replace the Wing needle with a 90/14 Universal needle. As with the Rose napkin above, the larger eye of this needle helps prevent the delicate metallic thread from shredding. Use bobbin thread in the bobbin (we used a Janome pre-wound bobbin) and the first color of metallic in the top (the light tan metallic in our sample – the “vine” of the garland stitches first). We switched back to the White Dot Bobbin Case.
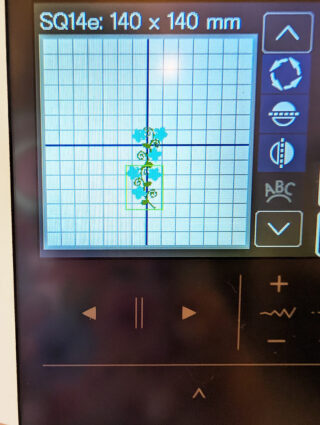
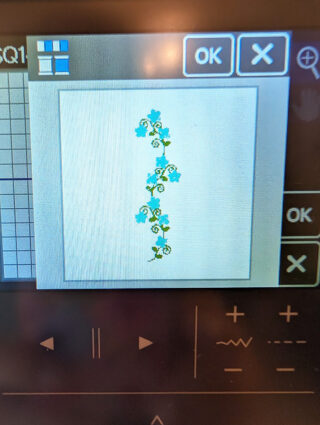
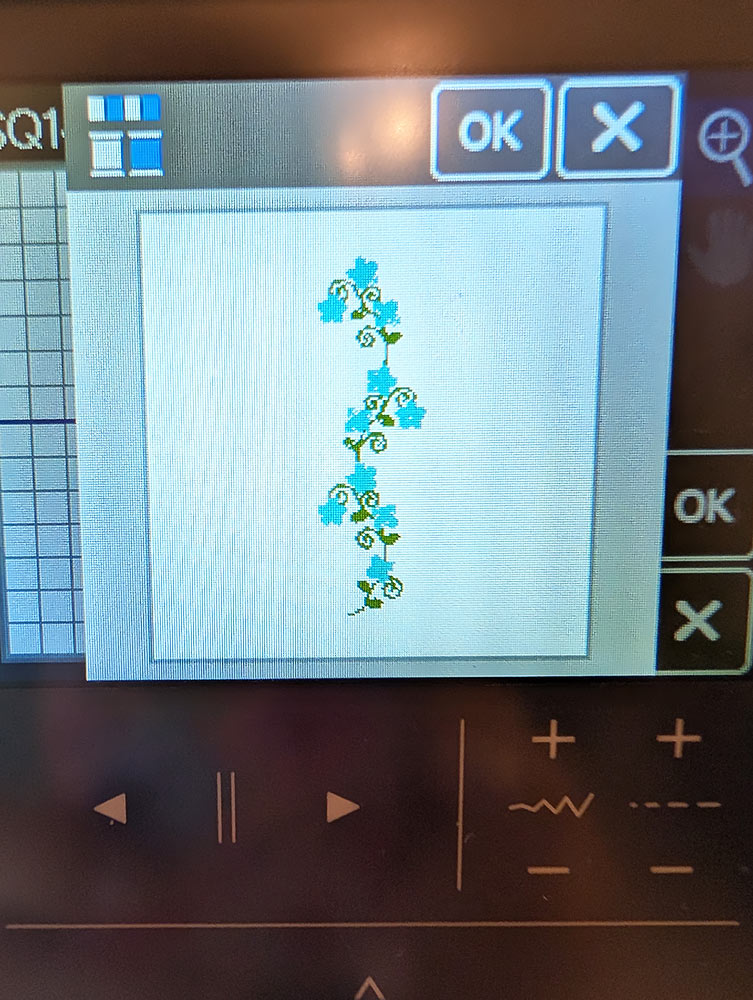
- To create our arrangement, we started at the Edit Screen, selecting the Floral and Garden collection from the built-in design options. Within that collection, we chose Design #4 and Design #6.
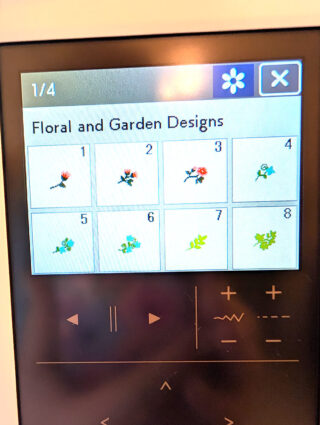
- We started with Design #6, which has three blooms.
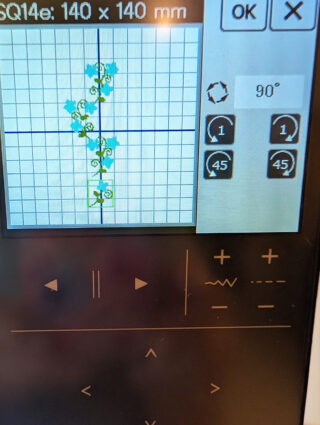
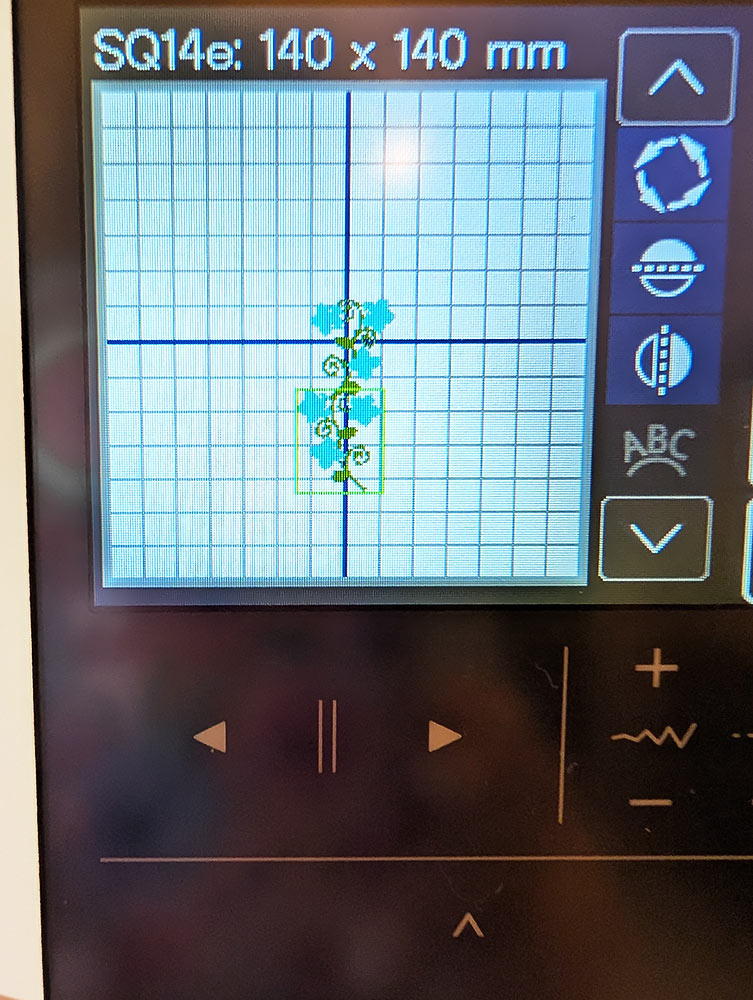
- Once again using the MC1000’s powerful on-screen editing tools, we duplicated, rotated, and mirrored this design.
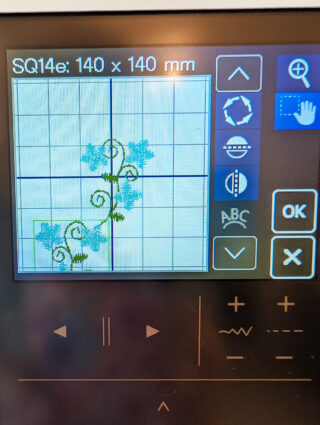
- You can zoom in to insure you have a perfect match of one design to the next.
- We stacked three designs, then brought in the single bloom Design #4, flipping and rotating it, before moving it into position to complete the garland.
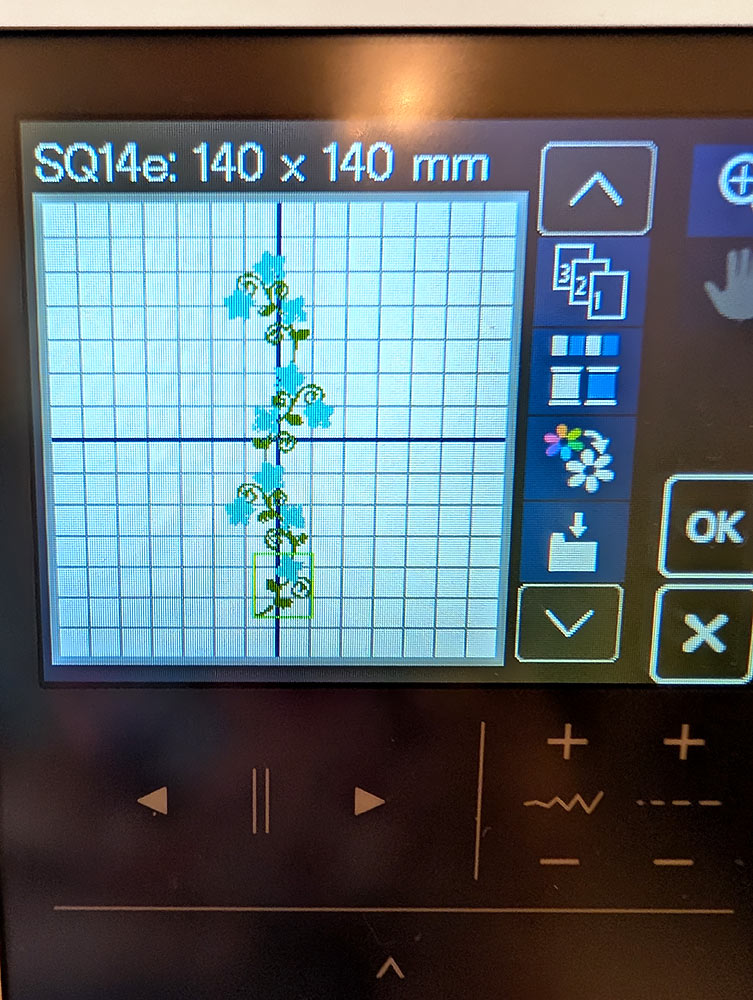
- With a few simple clicks, we grouped and centered our arrangement.

- And finally, we did a color sort to reduce the number of thread changes before sending it to the main embroidery screen.
- As above with the Rose napkin, you’ll hoop stabilizer rather than hooping the actual fabric. This is the best practice when adding a small bit of embroidery in a specific area. We used two layers of a wash away stabilizer and placed the hoop on the machine.
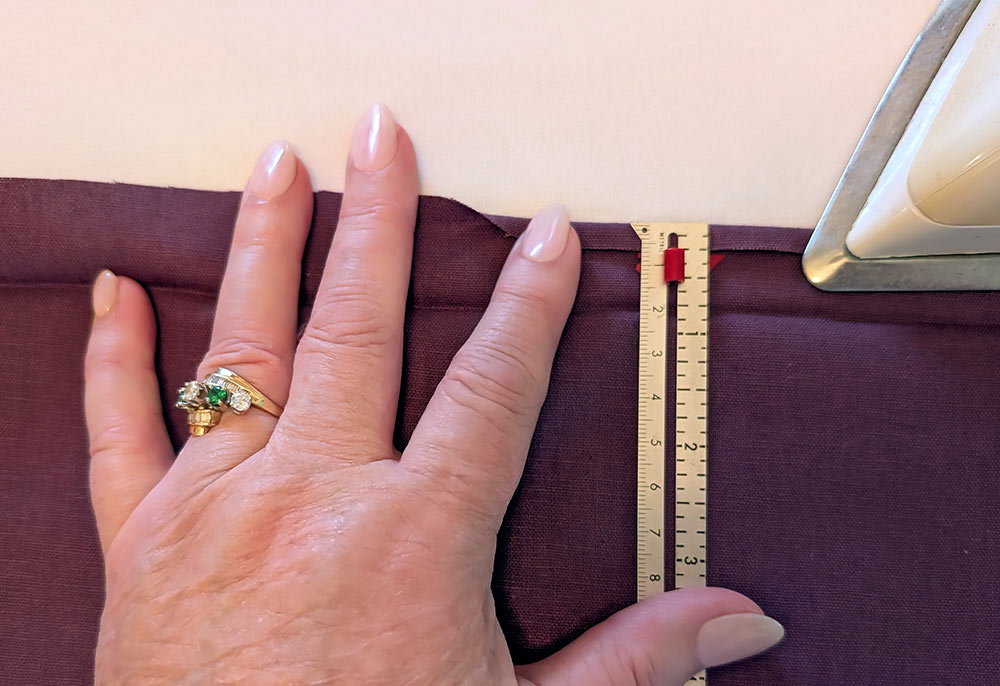
- Find the hemstitched napkin and mark one corner for the embroidered garland. You want the arrangement to be centered in one corner parallel with the side of the napkin. For our sample, we measured 1⅜” in from the side and 3” up from the bottom to create our starting crosshairs.
- Place the marked corner of the napkin over the hoop with the corner facing the front of the hoop and the sides of the napkin parallel to the sides of the hoop. The point of the needle should be centered directly over the crosshairs.

- Use the baste function to secure the napkin in place.

- Start the embroidery.

- When the “vine” has finished stitching, change out the thread to the color for the blooms (rose pink metallic in our sample). When the entire design is complete, remove the hoop from the machine. Remove the excess stabilizer from the embroidery and press from the wrong side.

- Prior to setting your table, you can certainly wash and iron the napkin(s) to remove the last remnants of the wash away stabilizer.


LEATHER NAPKIN
Getting Started
- The Leather napkin has ¾“ true mitered corners with decorative stitching and lettering enclosed in the finished hem.
- Pre-wash and press your fabric.
- For the 20” x 20” finished napkin, cut a 22” x 22” square, being especially careful to make sure your cuts are straight and your corners are true 90˚ angles.
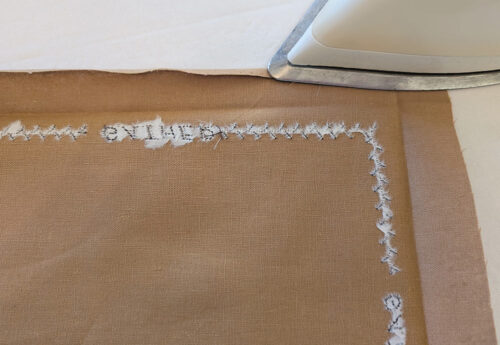
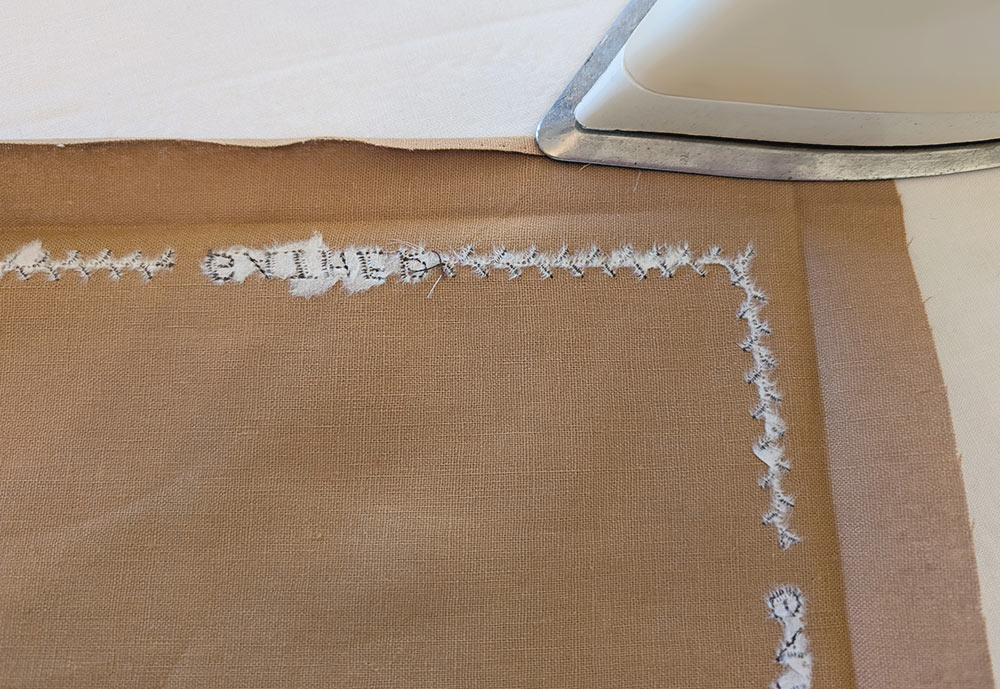
Decorative Stitching + Lettering
- Set up your machine for ordinary sewing with a standard presser foot. Thread the machine with 40wt embroidery thread in the top (we used a chocolate brown rayon) and bobbin thread in the bobbin (we used a Janome pre-wound bobbin). For our MC1000, the manual (Yes! We do read our manuals.) suggests switching to the White Dot Bobbin Case any time you’re using bobbin thread, so this is what we did.
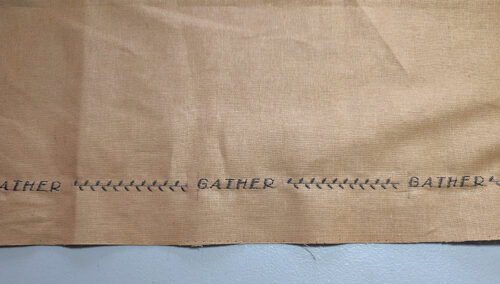
- Our napkin design called for a line of decorative stitching broken up by lettering spaced evenly around the outer edge. We did a number of test sews before selecting both the decorative stitch as well as the lettering font. As we mentioned above, you really, really, really have to test in order to get the best finish.
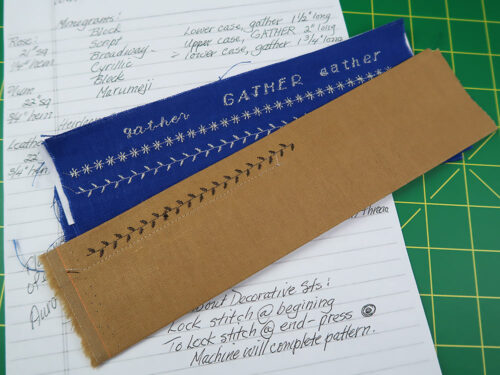
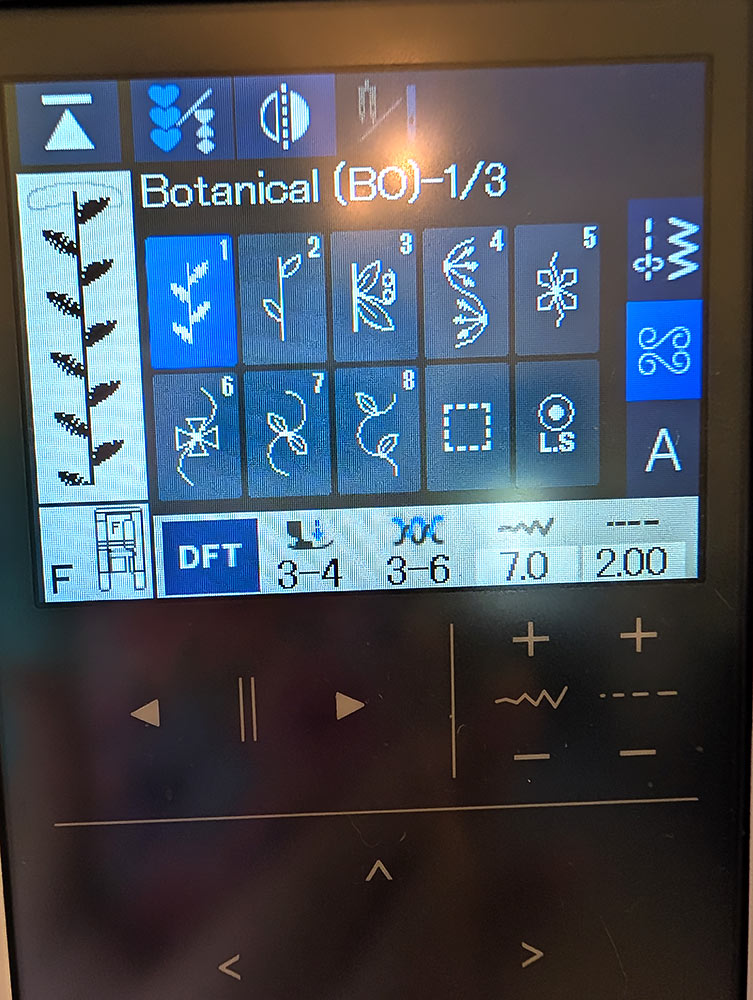
- From your testing, measure the length of the selected font. We chose uppercase Broadway for the font and the word “GATHER”. Our word measured 2”.
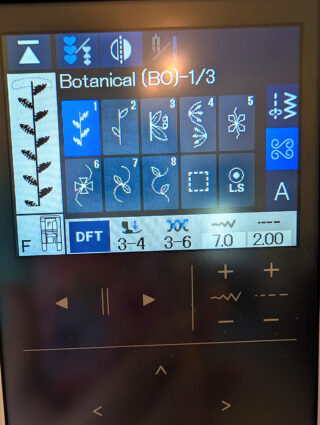
- Next, test sew a number of decorative stitches. We chose Stitch #1 from the Botanical collection on the MC1000. From your testing, you should also make note of how many stitches happen prior to a repeat. For our stitch, the repeat happened at ¼”.
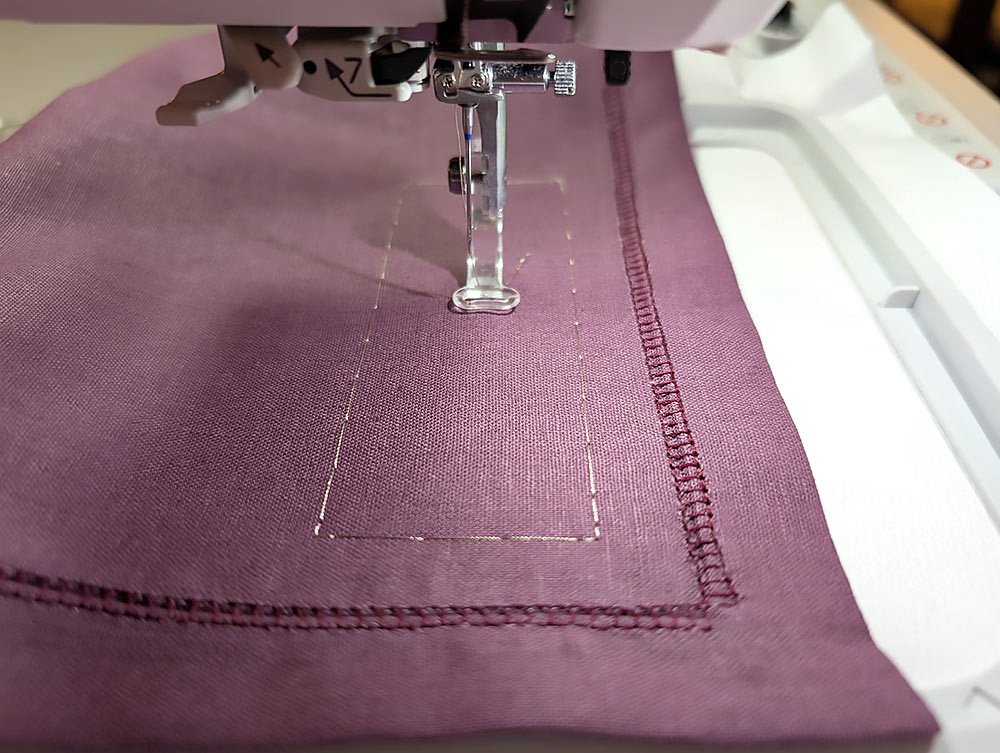
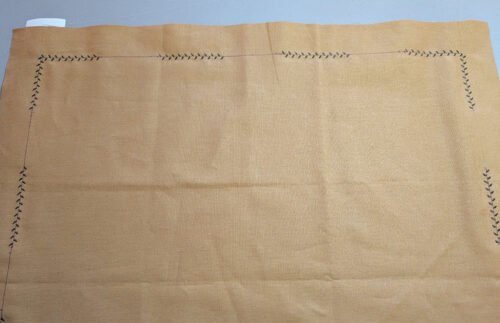
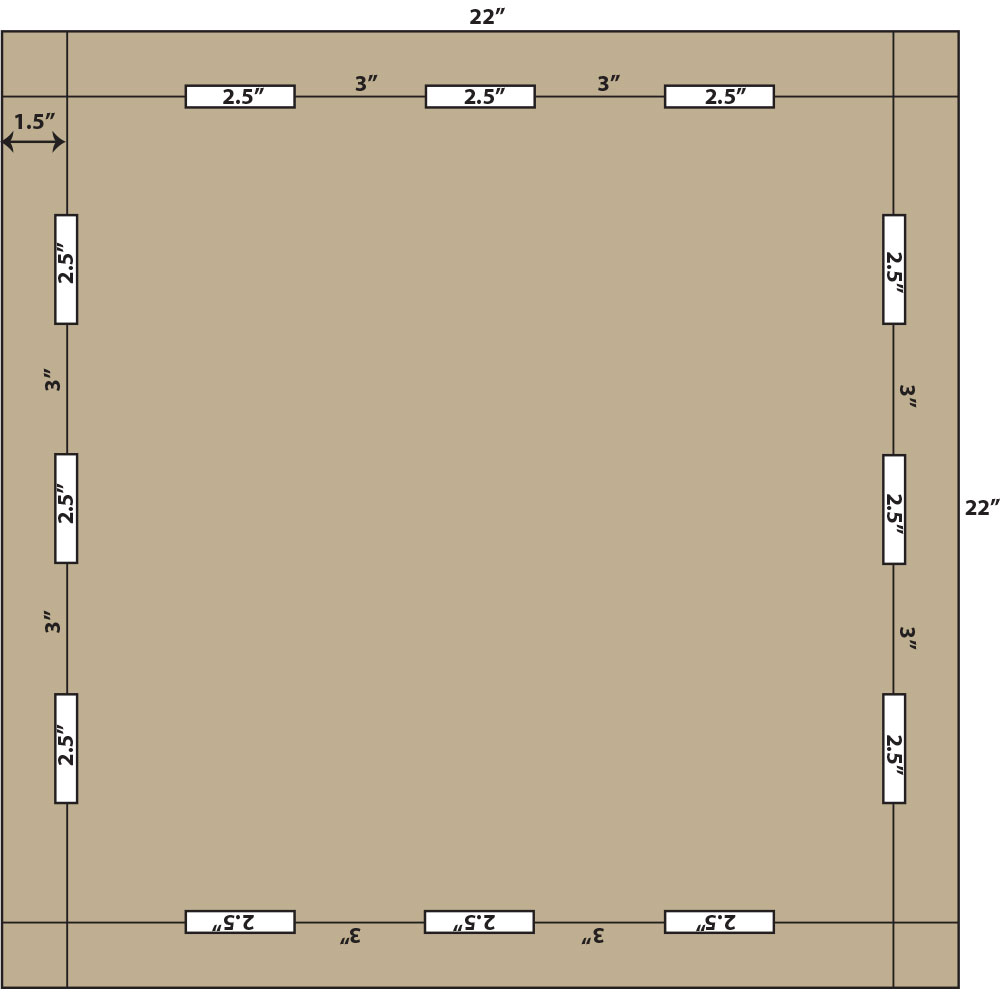
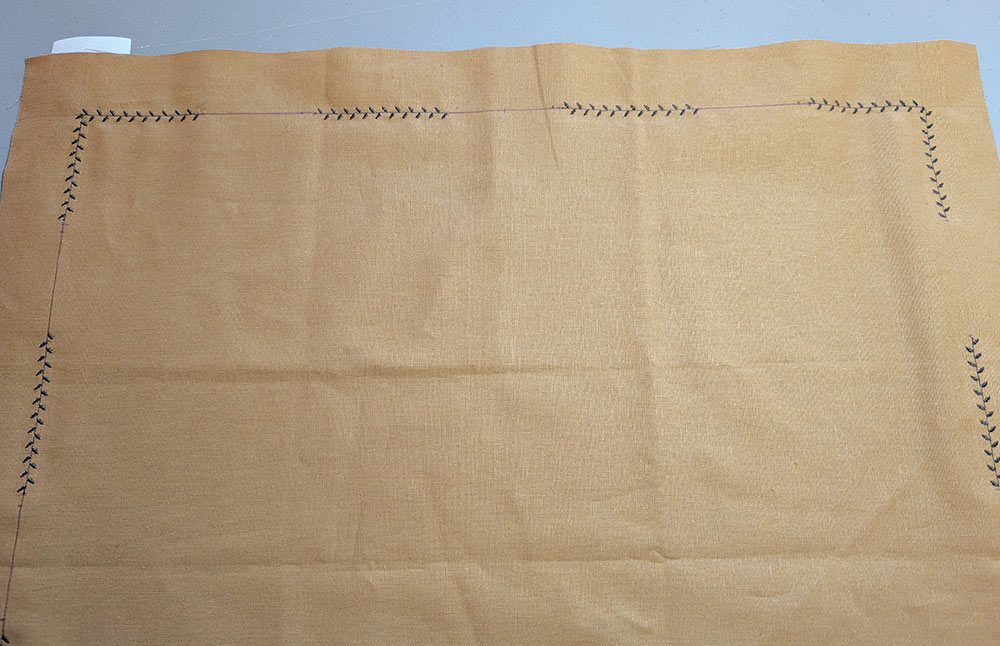
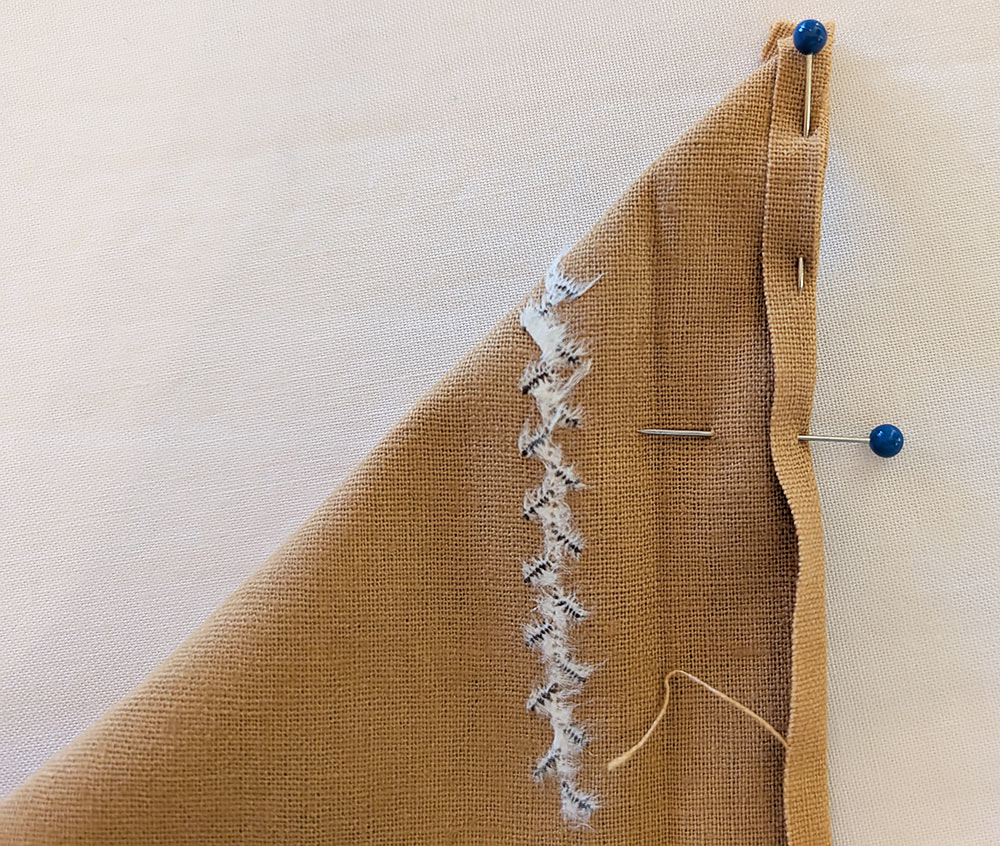
- Place the 22” square right side and flat on your work surface. With a fabric marking pen, draw a line 1½“ in from each side of the napkin. The lines should intersect at the corners.
NOTE: Anytime you’re working on the right side of your fabric, make sure your marking tool is one that will easily wipe away or vanish with exposure to the air or the heat of an iron.
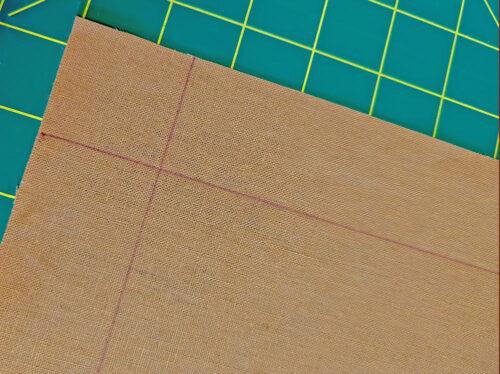
- Mark start/stop lines for the placement of the lettering. Our lettering measured 2”. To that we added a ½“ for spacing for a final measurement of 2½“. We first marked a 2½“ space at the center of each side of the napkin. We then marked a 3” space for the decorative stitching to either side of the lettering, and another 2½” space closer to each corner. This pattern insures each side will have three centered words with decorative stitching to either side, and it leaves the corners free for the final decorative stitching. The length of stitching around each corner can vary slightly to make the best/easiest turn without impacting the overall spacing along each side.
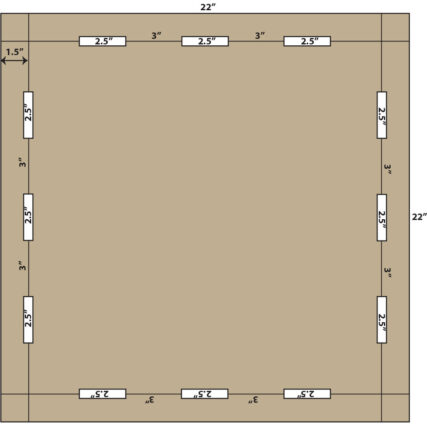
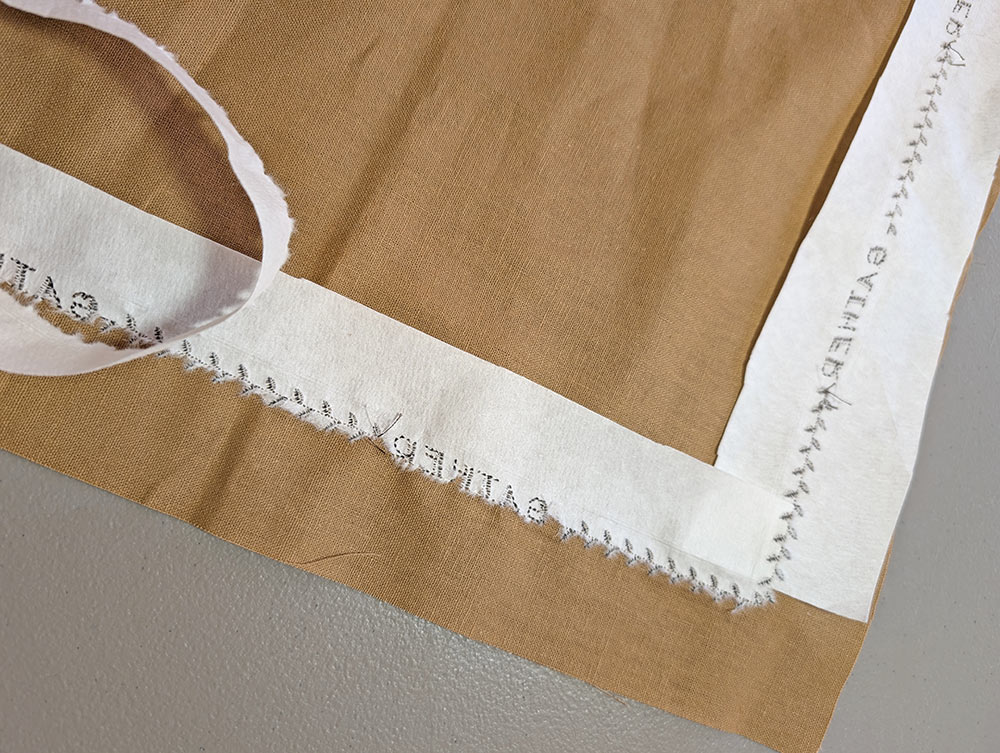
- Find the wash away stabilizer and cut four 2” x 22” strips.
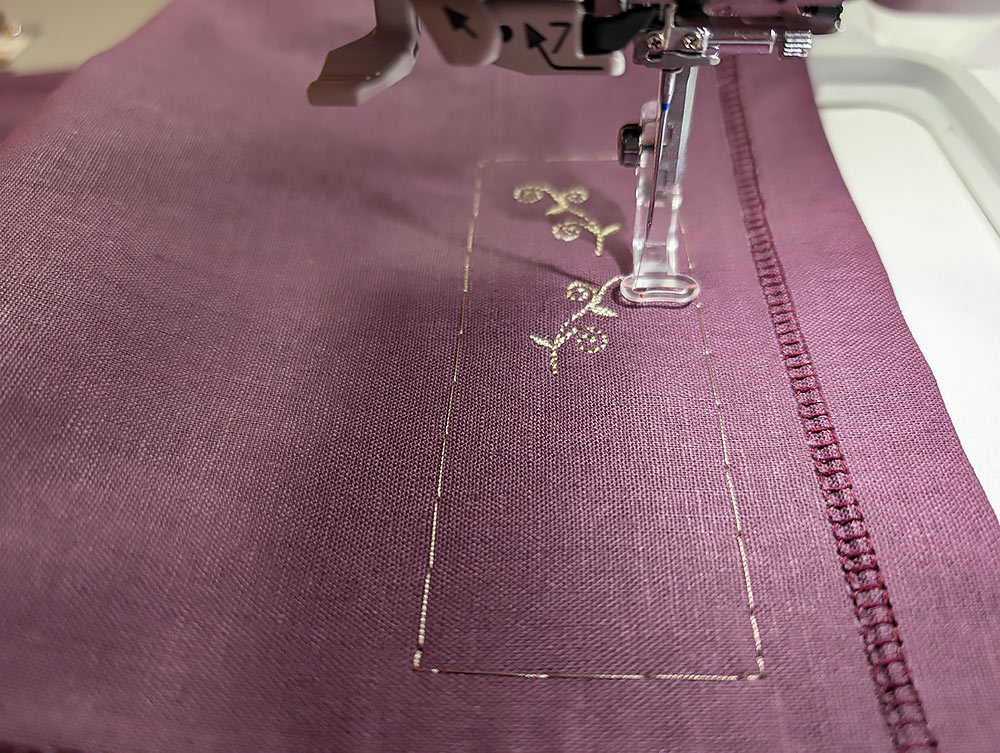
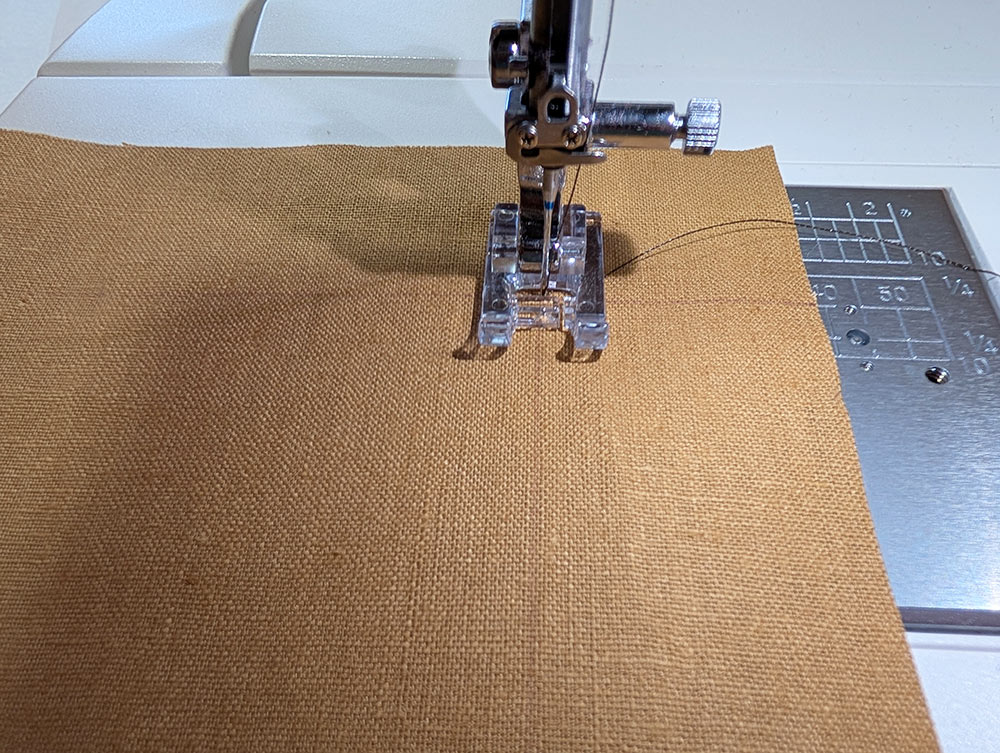
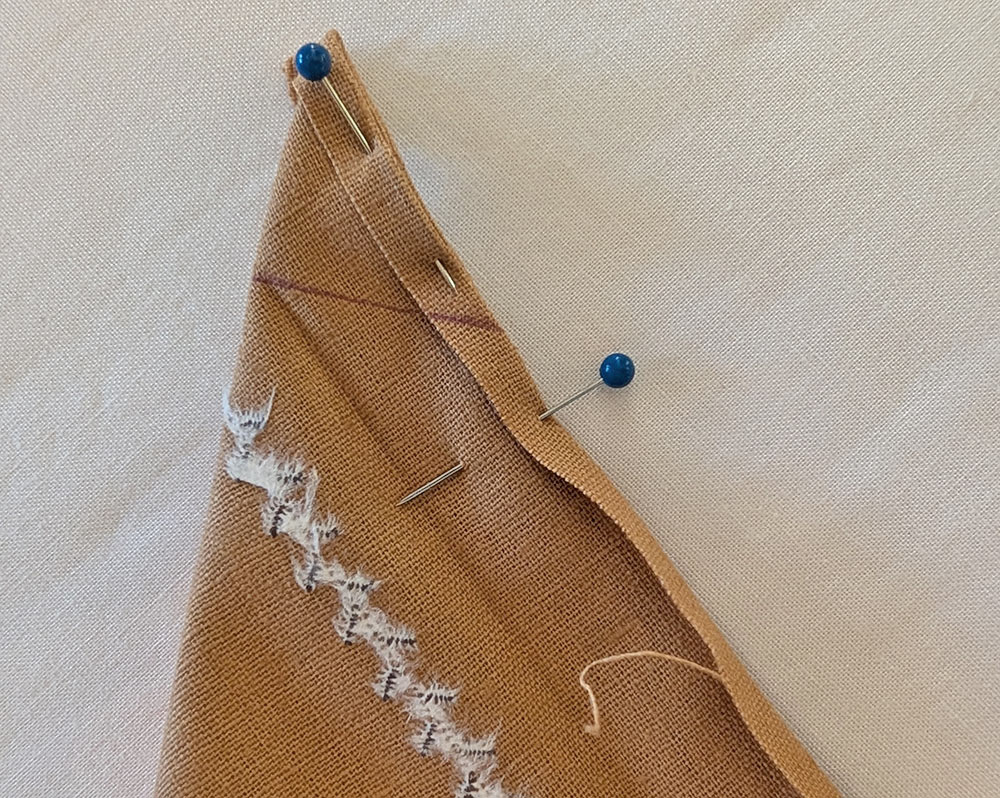
- Place the marked napkin under your presser foot then slide a strip of stabilizer underneath so it is sitting under the marked guide line. Start in one corner, adjusting your placement so the needle drops in at the exact intersection of the corner markings.

- Select the decorative stitch( Botanical Stitch #1 on the MC1000 on our sample).
- Start stitching along your drawn guide line. When you approach the mark for the end of that section, use the Lock key to complete the pattern and end the stitching.
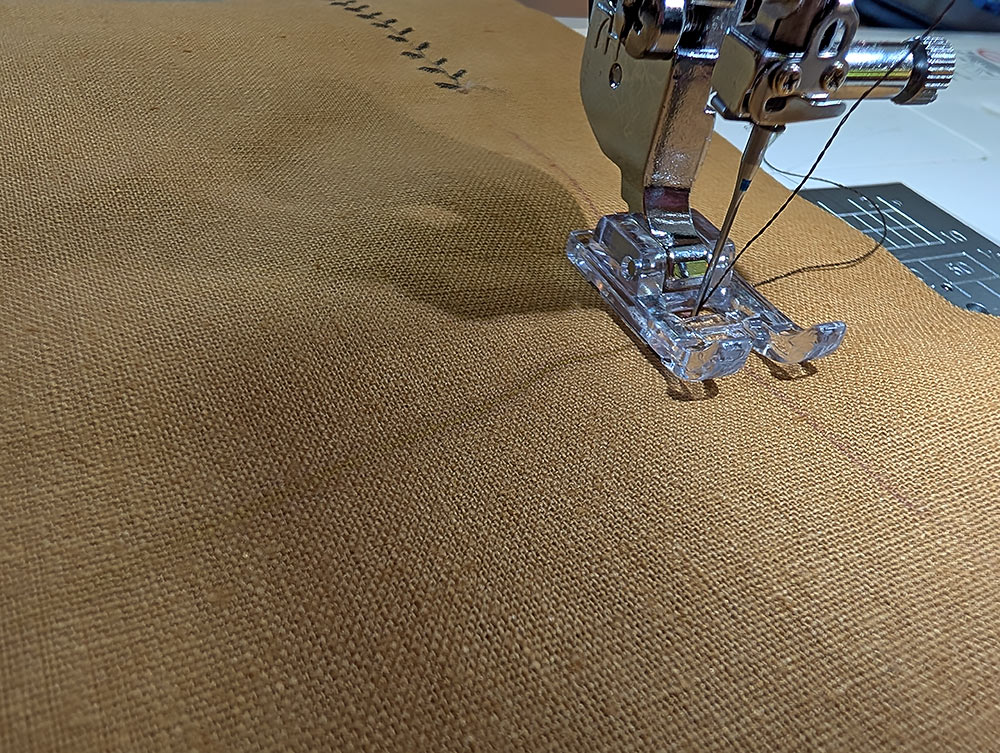
- Cut the thread, skip over the marked space for the lettering, and continue the decorative stitches along the guide line. Stop and hop over each marked 2½” lettering space.

- Finally, pivot at the corner to prepare for the next side. Remember to slip a strip of stabilizer into position along each side.
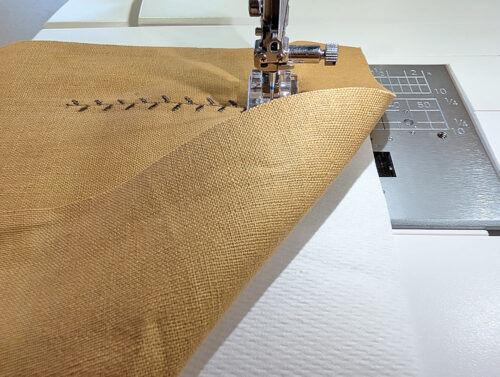
- Continue around the napkin, hopping over each “lettering empty space,” and pivoting at each corner.
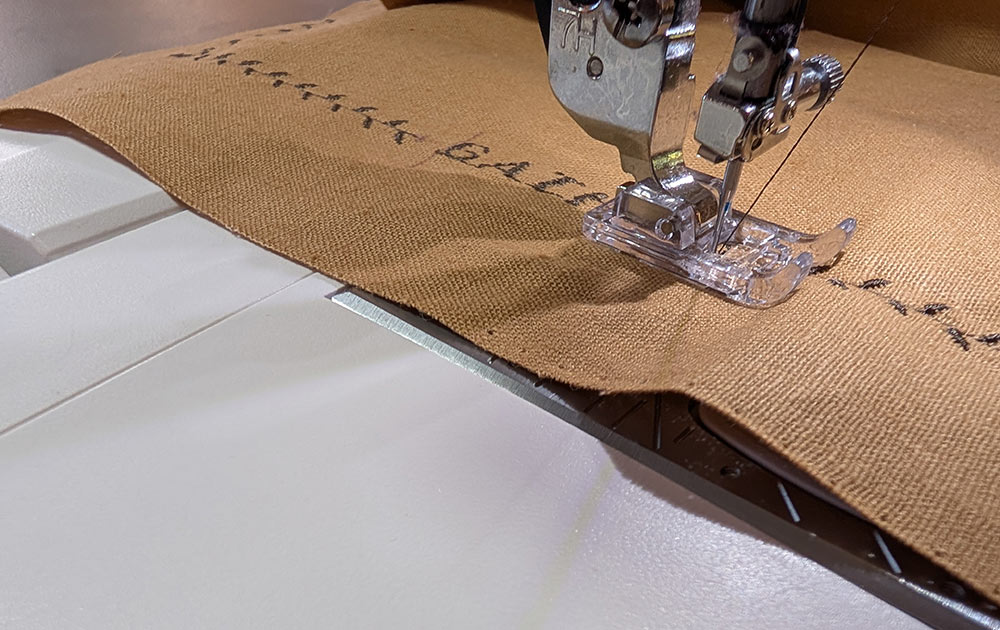
- Select the desired font and create your word (GATHER in our sample).
- Start the stitching ¼” from the end of the decorative stitches, following the marked line. Place a word in the empty space.
NOTE: For the best look when the napkin is folded and sitting on the table, you want the lettering to face the outer edge of the napkin. This means the lettering needs to be sewn with the edge of the napkin positioned to the left.

- Repeat to fill in the words all around the napkin. There are 12 words, three along each side.
- When all the decorative stitches and lettering are complete, remove the excess stabilizer and the markings. Press the napkin from the wrong side.


Hemming
- The hem on the Leather napkin is done in the same manner as above for the Plum napkin. We’ve summarized the steps again here; you can refer to the more detailed steps above and can also check out our full step-by-step tutorial on mitered corners.
- Fold back the raw edge 1″ along each side, pressing well to set a visible crease line.
- Unfold and press back the raw edge ¼”, creating the criss-cross crease lines at each corner.
- Fold the corner on the diagonal with right sides together, aligning the ¼” folded edges. Pin in place.
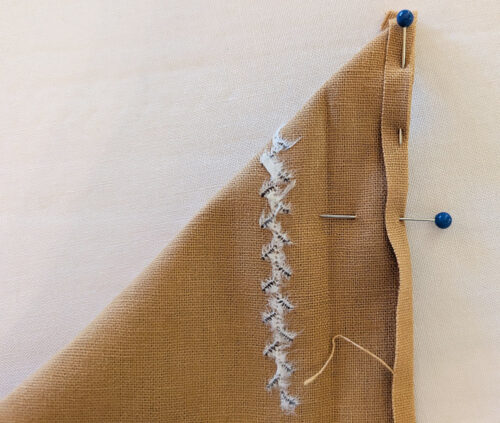
- Draw a straight line from the point of the crease to the outer folded edges.
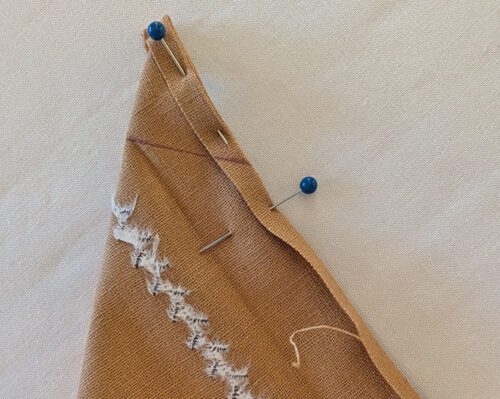
- Re-thread the machine with all purpose thread to match the fabric in the top and bobbin. We switched back the the MC1000’s Yellow Dot Bobbin Case.
- Stitch along the drawn line, then trim back the point to ¼” from your stitching.

- Finger press the seam open. Holding the seam flat with your fingertips, flip the corner right side out, and smooth to make the mitered corner.
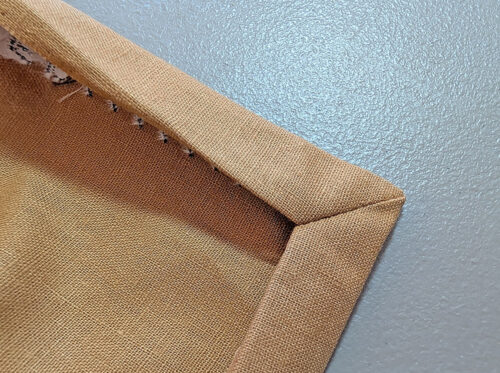
- Fold, mark, stitch, and flip each corner of the napkin in the same manner.
- Press the hem in place all around and pin.
- Using a straight stitch, edgestitch to hold the hem in place. The back of the decorative stitching is now fully enclosed within the hem.


Project Design: Anne Adams
Sample Creation, Design Input + Testing, and Construction Notes: Michele Mishler