The elements that go into a great bag design include fabric selection, accent choices, hardware considerations, stabilization decisions, and more. Here at S4H, the list also must include, “ease of construction” because we want you to have success from start to finish.
Making yourself a beautiful bag is a DIY delight. It’s unique to you; absolutely no one else will be able to match your individuality. The process might sometimes seem like a challenge, but with our signature step-by-step instructions and lots of detailed photos, we’re not only confident you can do it – we’re confident you’ll be so proud when it’s done.
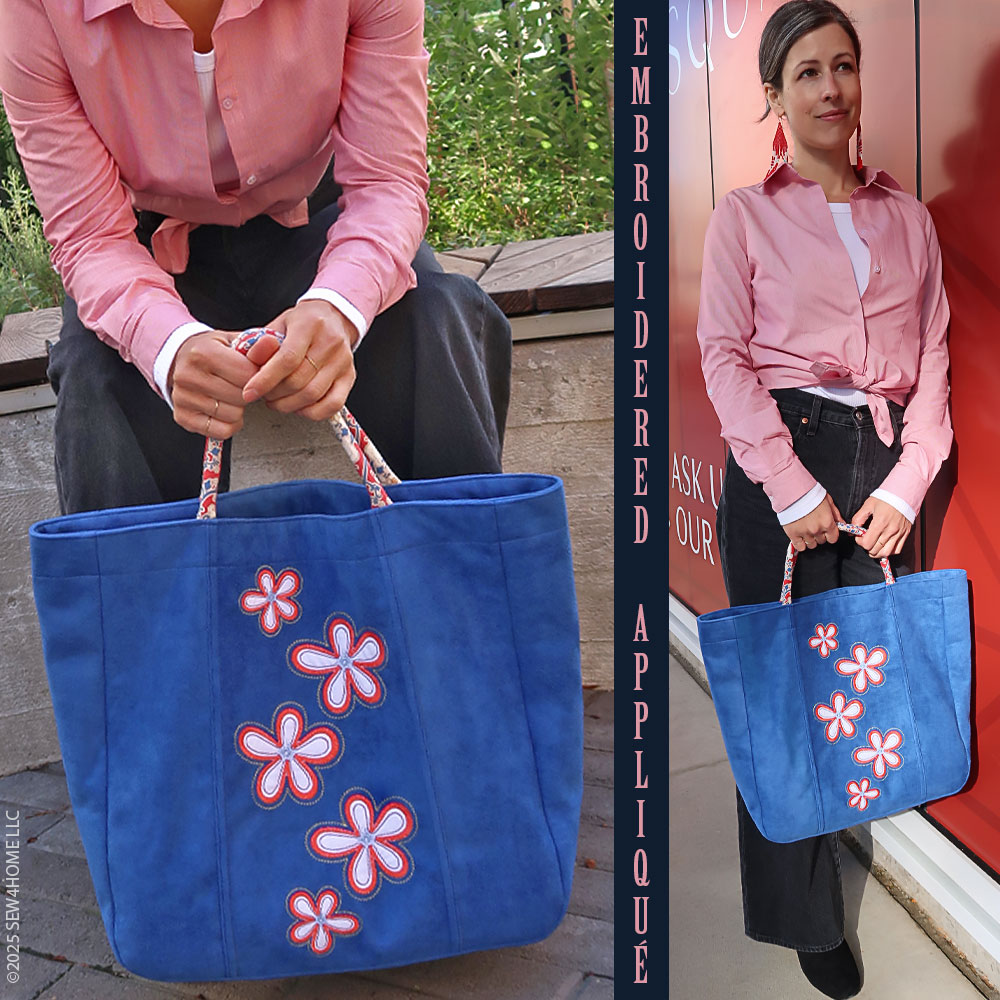
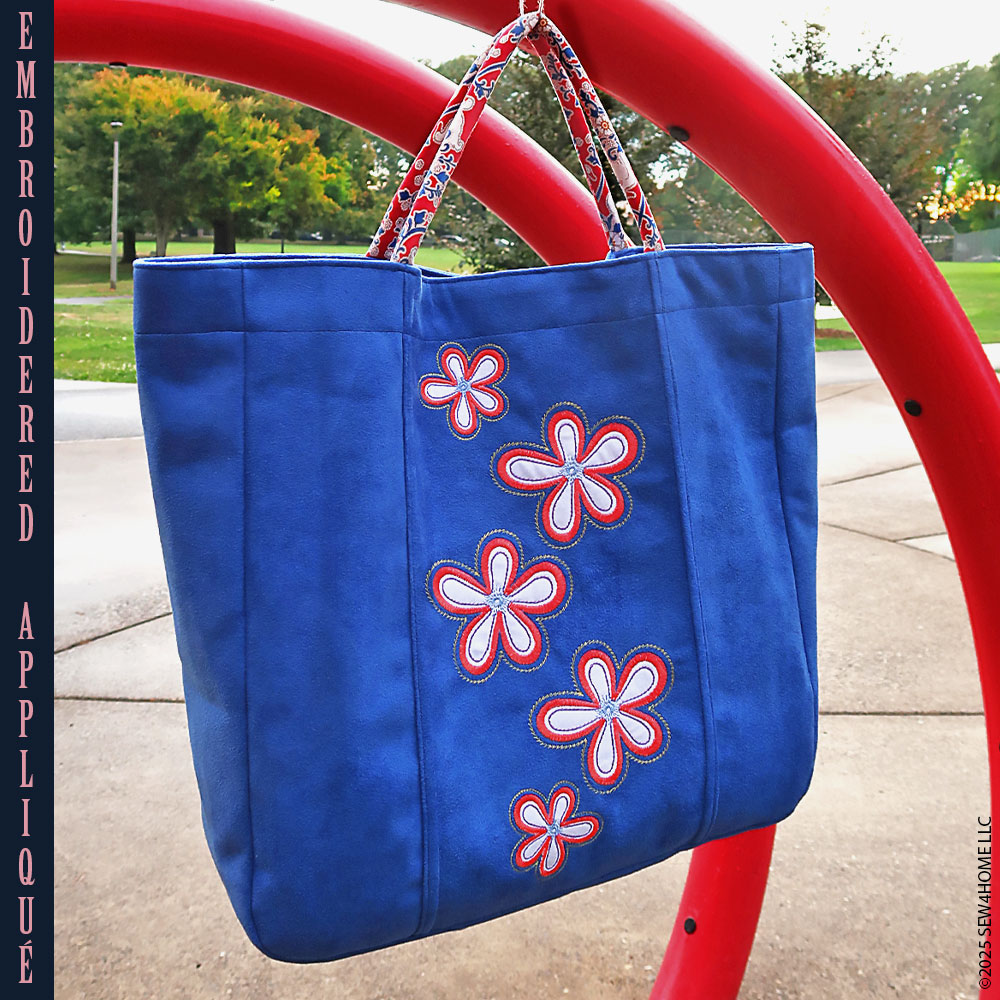
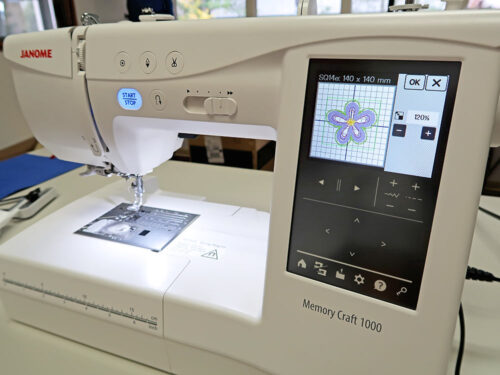
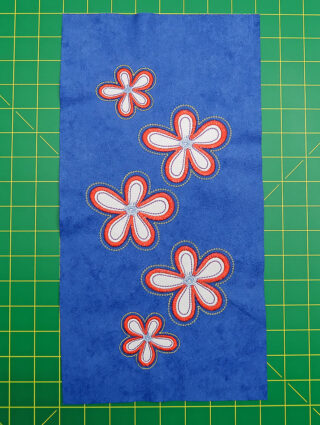
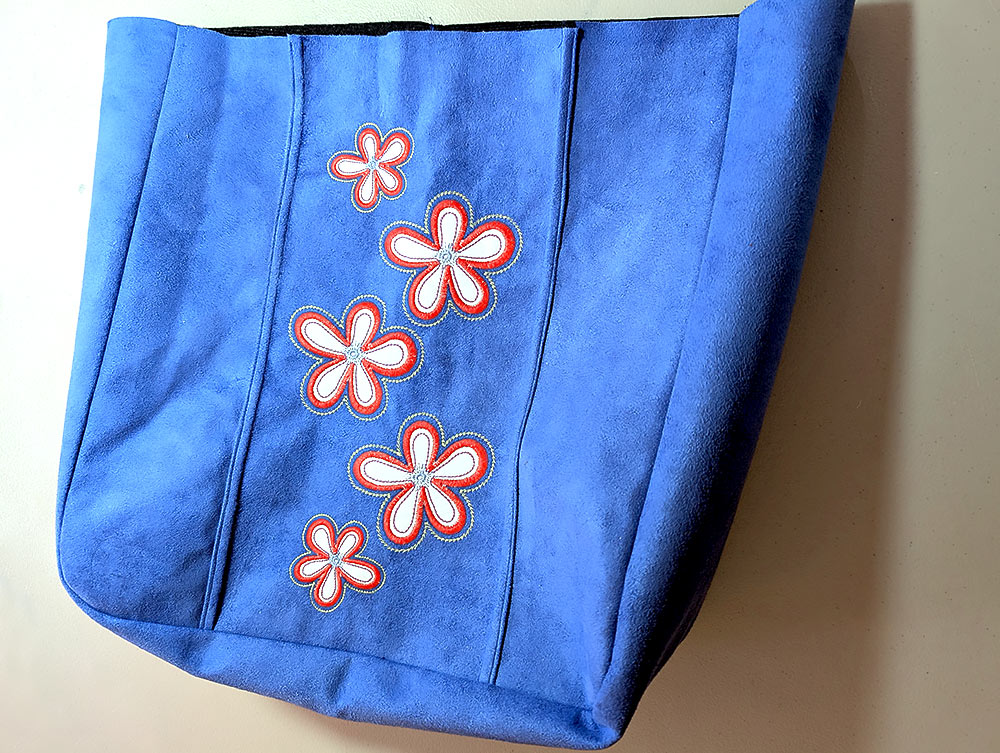
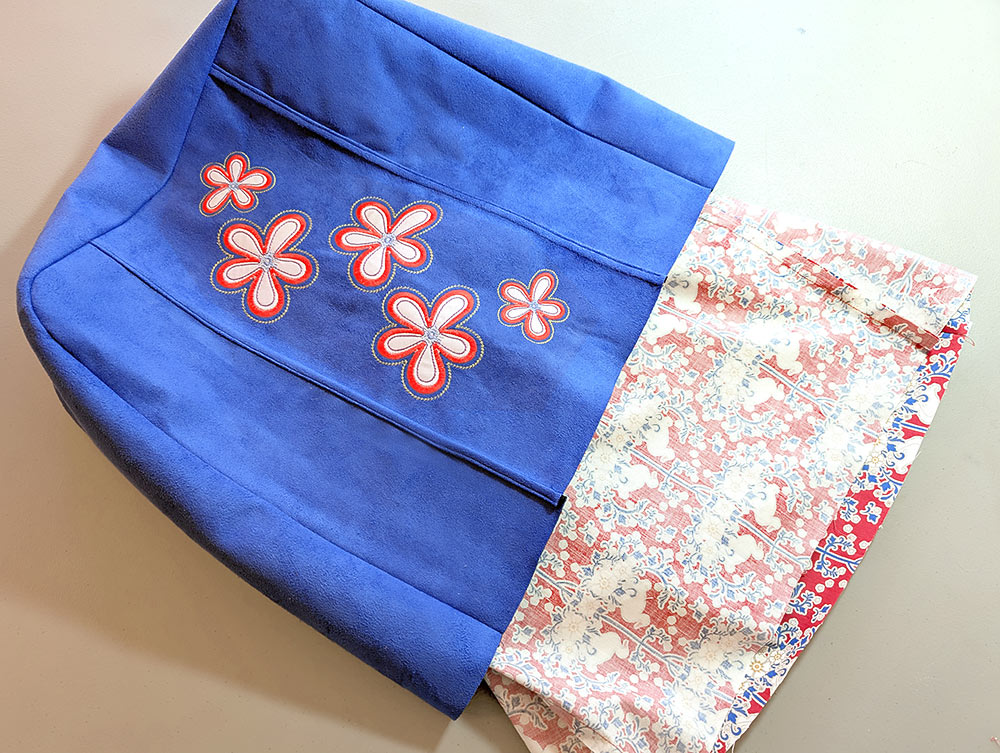
This Curved Sidewall Tote is a classic style with an eye-catching splash of embellishment on the front panel. We were excited to get to use the new Janome Memory Craft 1000 sewing and embroidery model to put it all together. It is smooth and quiet, the stitches are gorgeous, and maybe best of all, at least for those of us with limited space, it is very compact with a built-in, swing-out-and-lock embroidery arm. It fit on our smallest work table! But, don’t let the small size fool you, it is packed with high-end features. From the first stitch, through the embroidered appliqué, to the flat felled seams and inset sidewall – this machine was a dream to work with.

There’s a free template to download below so you can get accurate placement of our arrangement. It’s a lovely cascading grouping that fits perfectly on the center front panel. We have very detailed steps to take you through the process on the Janome MC1000.
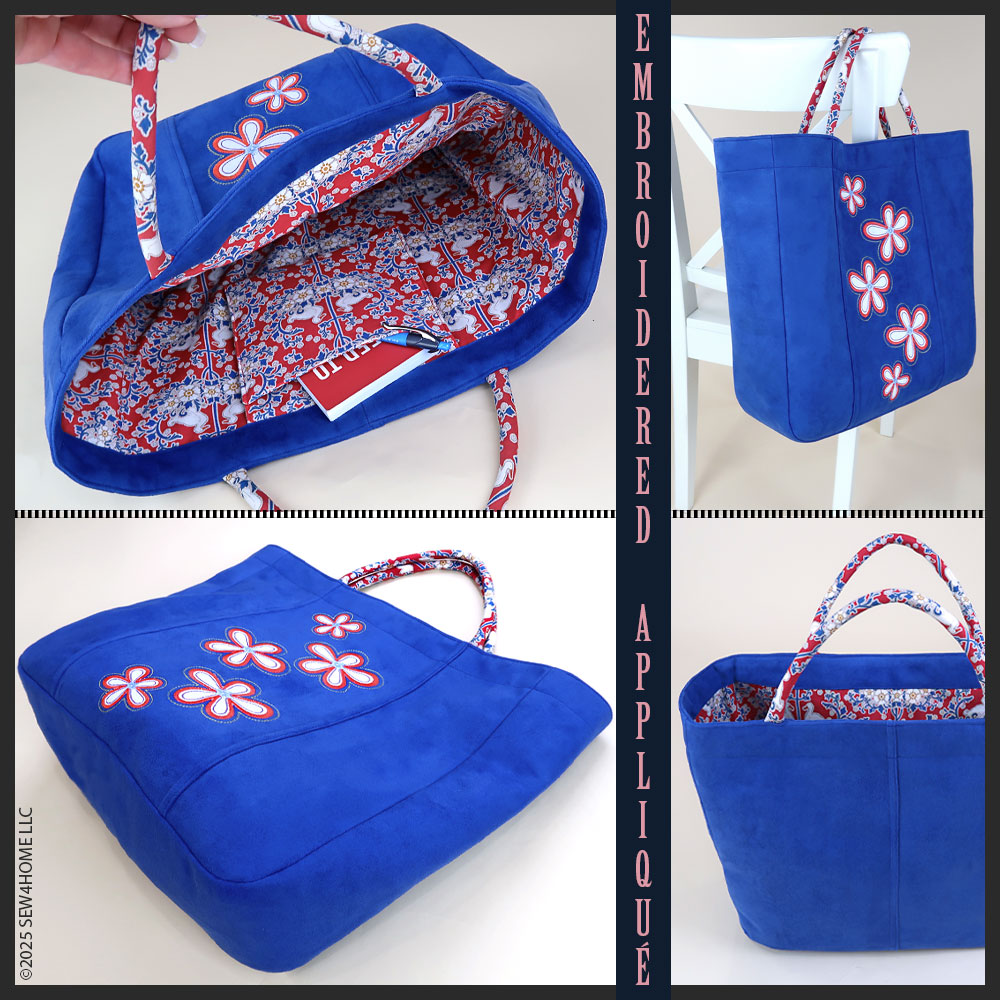
Our fabric choice was an upholstery weight faux suede in a rich royal blue. The lining is a fun quilting cotton that adds a pop of color to the inside and is also used to wrap the loop handles. Look for a lining fabric that picks up the colors of your front embellishment.
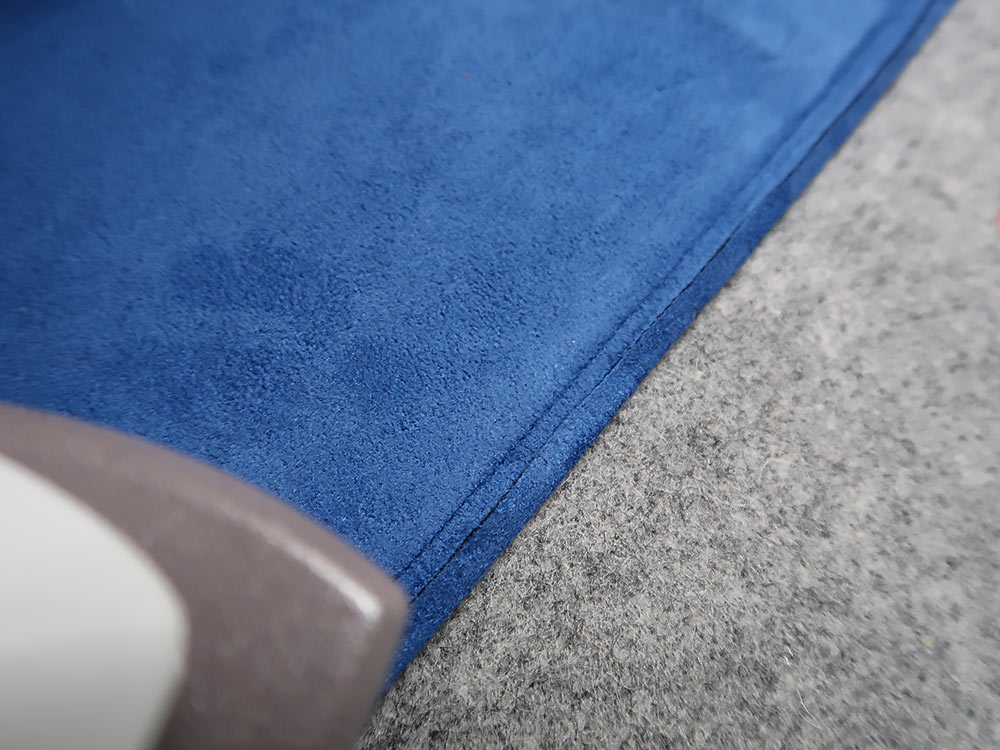
There’s also a full, free pattern bundle to download, covering every element of the tote and insuring all those beautiful curves come together perfectly. The steps to inset the sidewall are covered in detail as are the flat felled seams featured on the front and back of the tote. With a thicker fabric, like our faux suede, an outside flat felled seam is not only a secure choice, it adds interesting dimension and texture to the surface of the fabric. You’ll also learn the steps to create custom corded handles, including an easy way to pull them right side out for an extra smooth finish.

We’ve created a project that highlights some our favorite features on the MC1000, but we’ve really only scratched the surface. We encourage you to visit a local Janome Dealer for a full test drive to browse through the 300 decorative stitches, see how easy it is to thread, and take a look at all the available embroidery designs (241 + fonts and monograms). It really is an amazingly affordable way to add embroidery to your sewing space.
Our thanks again to Janome America for their support of this project and many of the other most popular projects across the S4H site. To understand more about why we are a Janome Exclusive Studio, we invite you to visit a local Janome dealer for an in-person test stitch on the MC1000 or any of their other models – we consider them to be the best in the industry. To find out more before you go, visit the Janome website and follow them on social media.
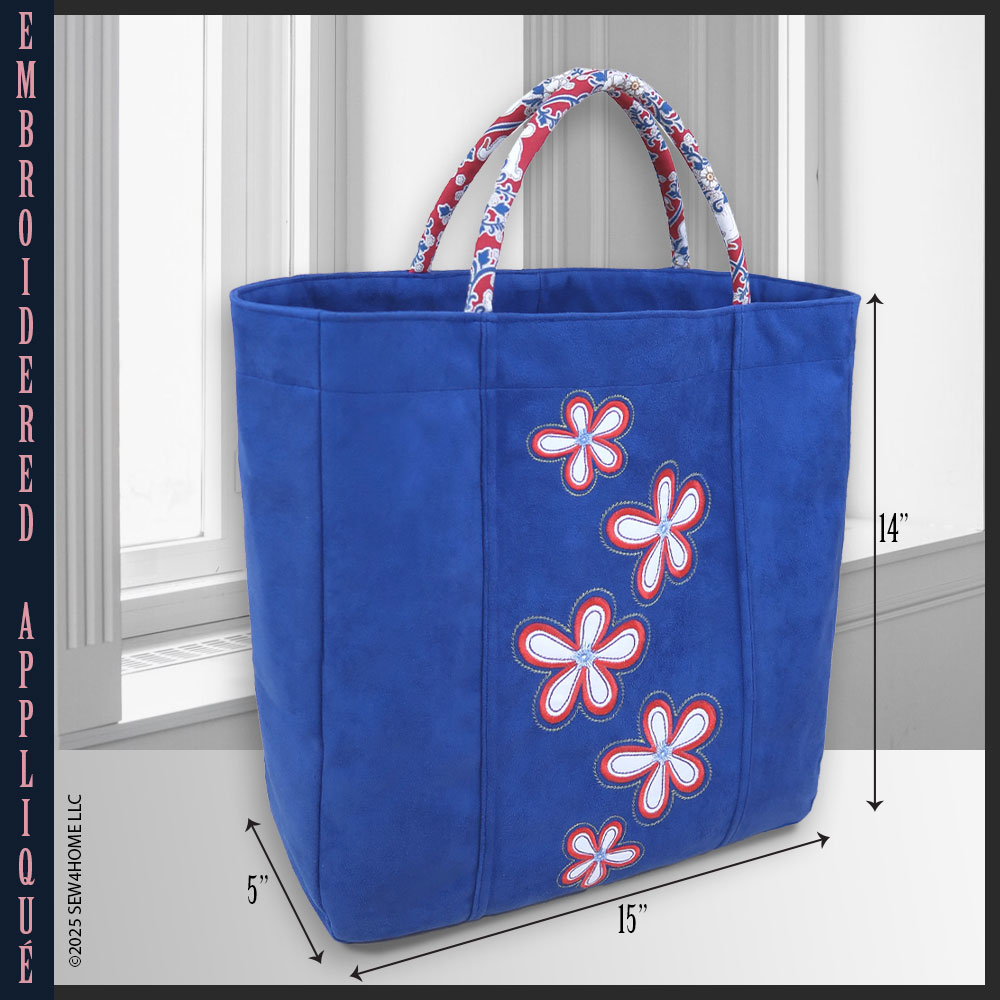
Our Curved Sidewall Tote with Embroidered Appliqué finishes at approximately 15” wide x 14” high with a 5” sidewall two loop handles.
Sewing Tools You Need

- Sewing Machine and standard presser foot
- Embroidery foot
- Zipper foot
Fabric and Other Supplies
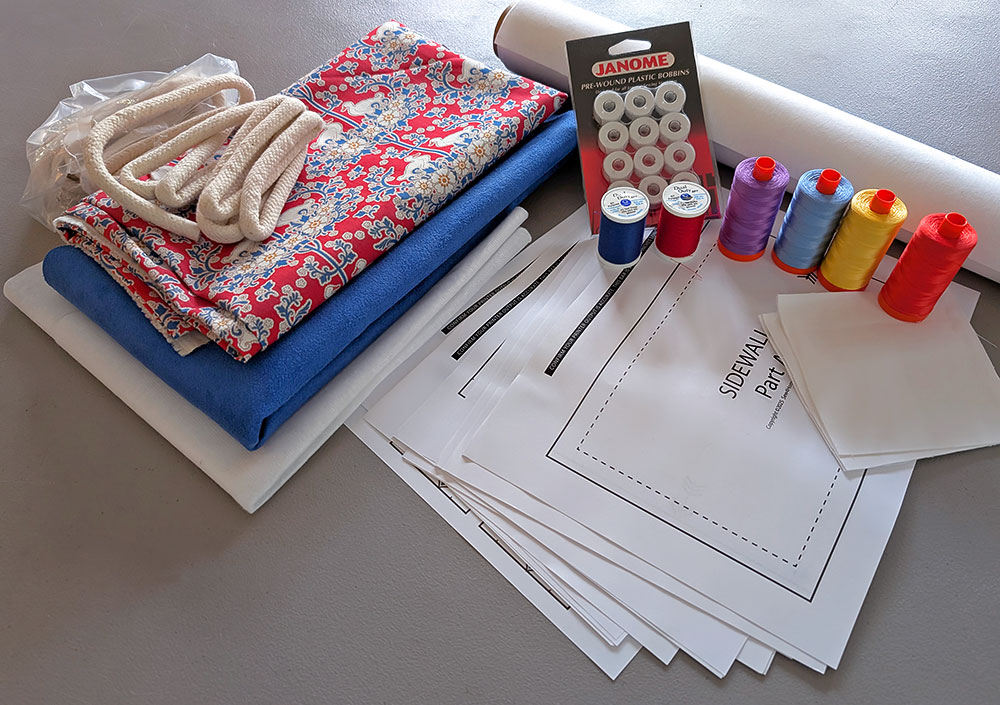
- ¾ yard of 45”+ wide faux suede for the exterior; we used an upholstery weight faux suede in royal blue
NOTE: You need a minimum of 44” in width in order to cut the tote’s sidewall as a single panel. We do strongly recommend a mid-weight substrate similar to a faux suede. It will not only give the tote its proper structure with minimal interfacing, it will also provide an excellent surface for the embroidery. The amount shown above is enough to accommodate placement of the pattern to insure the nap of a faux suede is all running in the same direction on all the pieces. - 1 yard of 45”+ wide quilting weight cotton for the lining and handles; we used Duck Nest in Red from the Jubilee collection by Tilda
- ¼ yard of 45”+ wide quilting weight cotton for the embroidered appliqué; pre-cuts are another option – we used five 5” x 5” charm squares in Bella Porcelain by Moda Fabrics – you need just enough to completely cover each of your chosen embroidery designs
- 1¼ yards of 20”+ wide lightweight fusible interfacing; we used Pellon Shape Flex – it is a woven interfacing, which is our recommendation for this project
- One roll of stabilizer for the embroidery; we used OESD Ultra Clean & Tear
- 2 yards of ⅜” piping cord for the handles
- Thread for exterior embroidered appliqué; we used FIVE colors of Aurifil 50wt cotton thread: 2024 (white), 2277 (red), 2540 (purple), 2720 (light blue), and 1135 (yellow)
- All-purpose thread to match fabrics; we do recommend a slightly lighter color thread than your exterior fabric so the flat felled seam stitching shows up well
- Janome Pre-Wound bobbins; our favorite for embroidery
- See-through ruler
- Measuring tape
- Fabric pen or pencil
- Iron and ironing board
- Scissors
- Rotary cutter and mat
- Tiny, sharp scissors to trim the appliqué;
- Seam gauge
- Seam ripper
- Straight pins and clips; we prefer using clips for thick substrates like the faux suede
Getting Started and Pattern Download
Pattern Assembly
- Download and print out our TWENTY-THREE pattern sheets, which have been bundled into one PDF to make the download easier. These elements will assemble into the EIGHT different pattern pieces; the first page of the PDF is an assembly guide to make it easy to see how everything comes together.

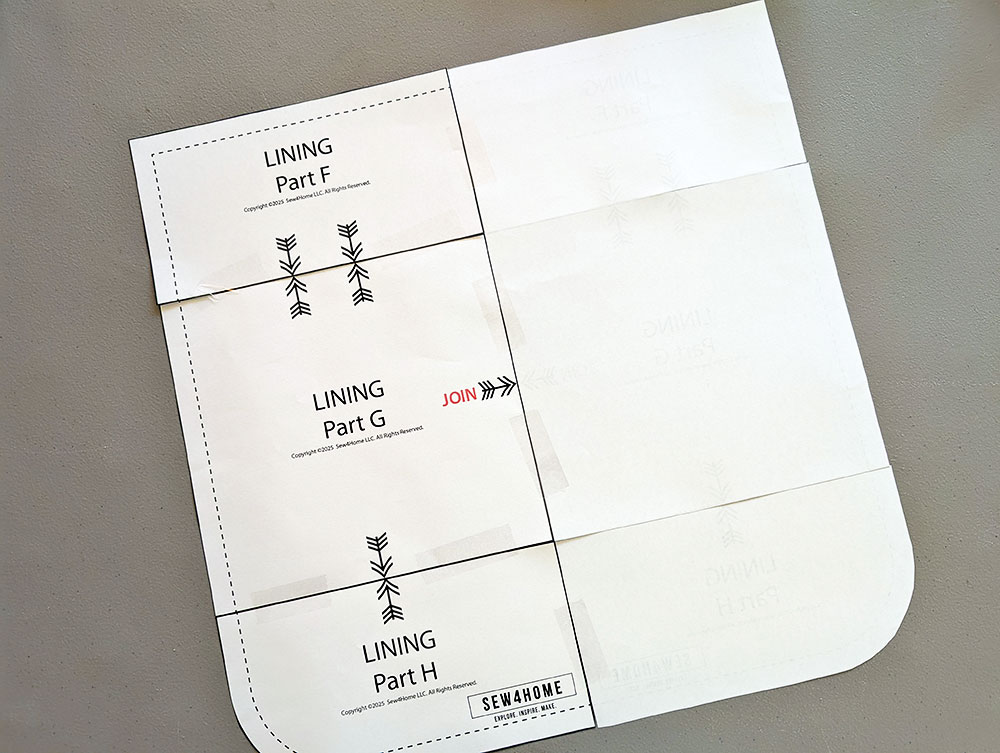
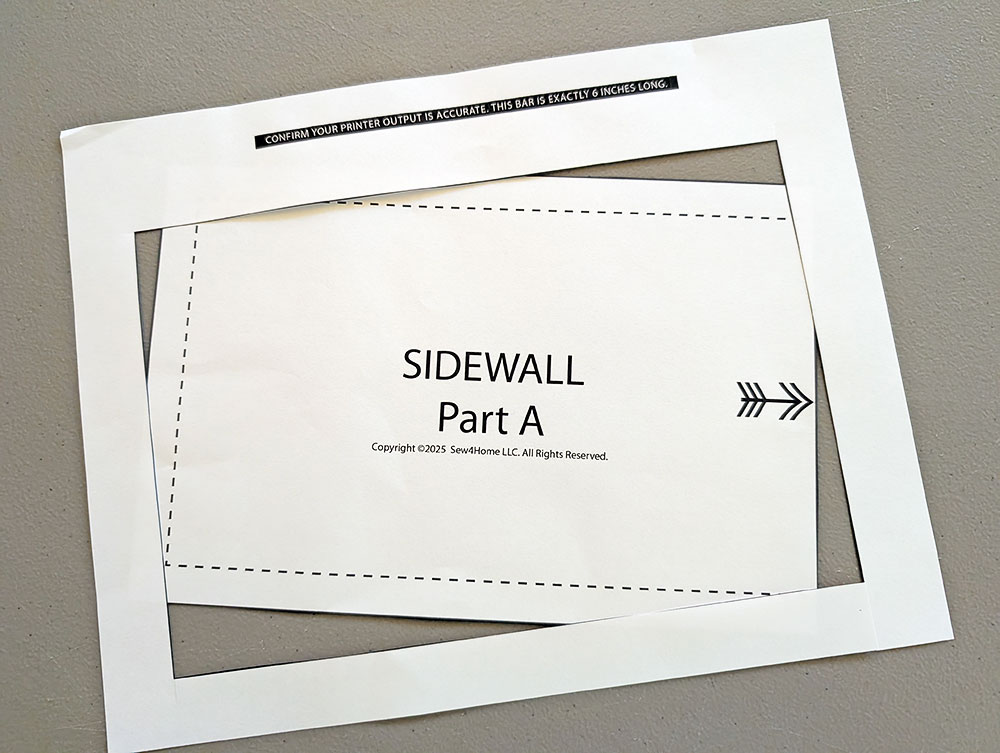
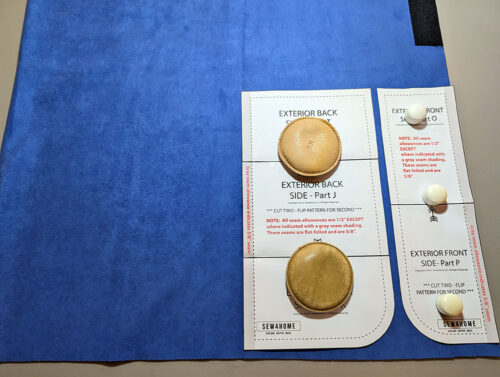
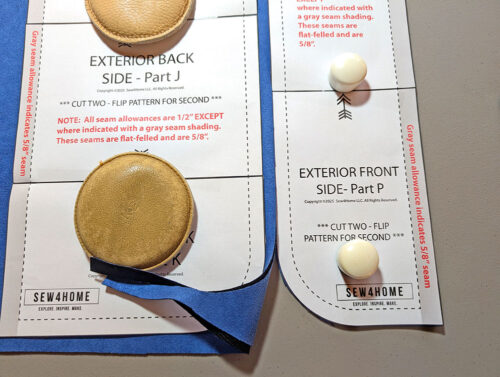
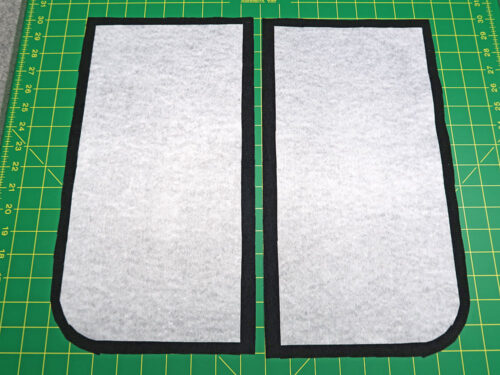
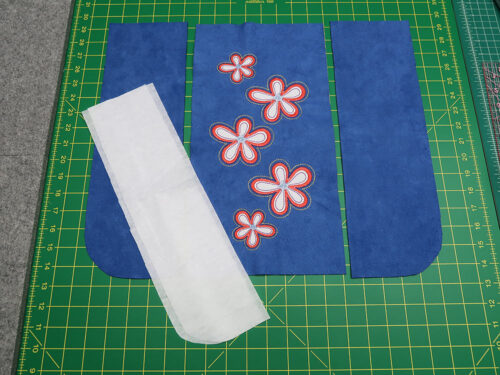
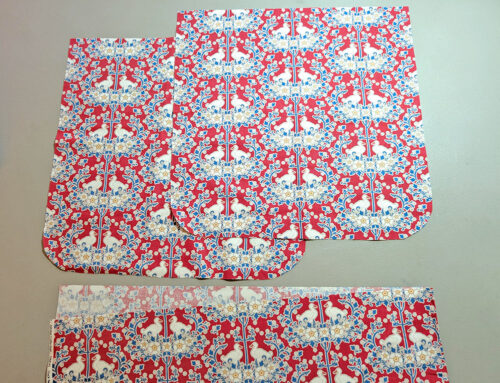
IMPORTANT: Each pattern page is ONE 8½” x 11″ sheet. You must print the PDF file at 100%. Make sure your printer is set up for “borderless printing” as several pages do print at nearly edge-to-edge. DO NOT SCALE to fit the page. There is a guide rule on each page so you can confirm your final printout is to scale. Print horizontally (landscape). - Print TWO FULL SETS of the pattern bundle. The duplicate set allows you to have extra pieces to trim and use to cut the interfacing panels, as well as to cut the lining as a full piece with one half flipped, as shown below:
- Cut out each pattern piece along the solid line.
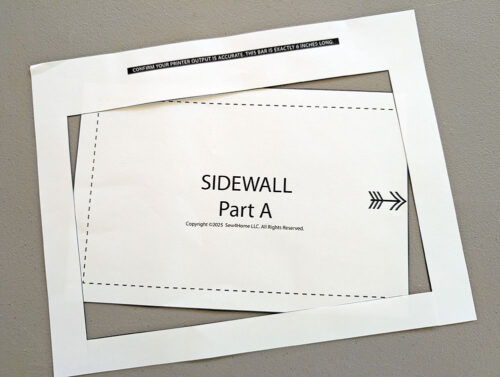
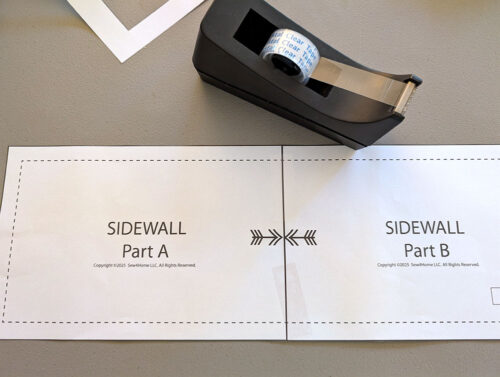
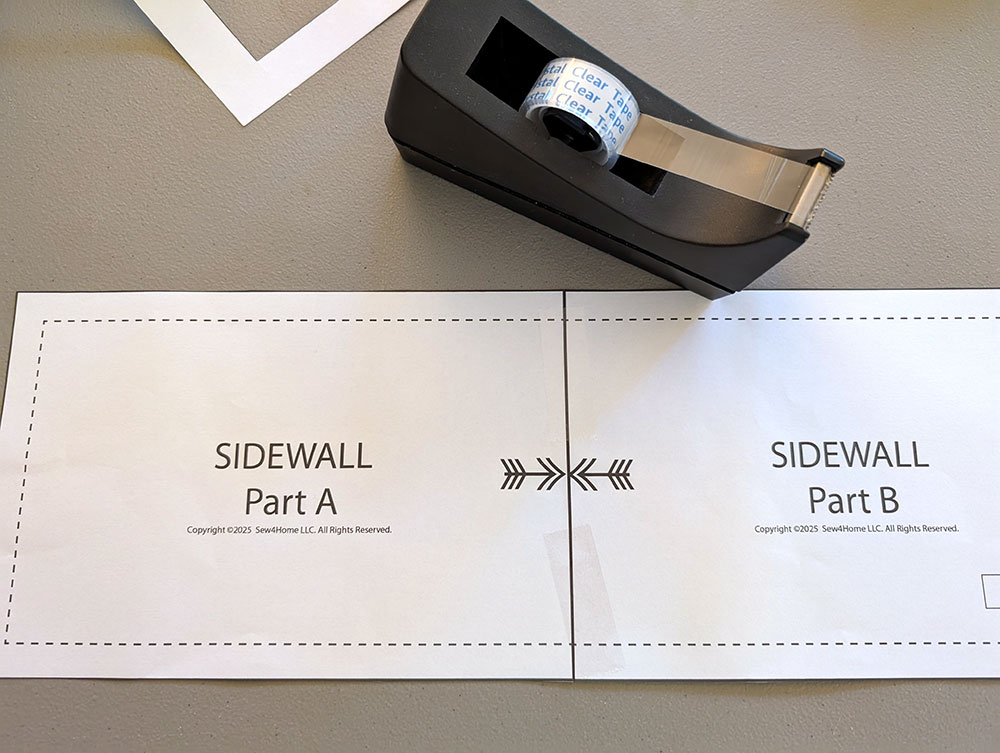
- Following the Pattern Assembly Guide as well as the arrows printed on the individual pieces, assemble parts A, B, C, D, and E into the full Sidewall pattern.
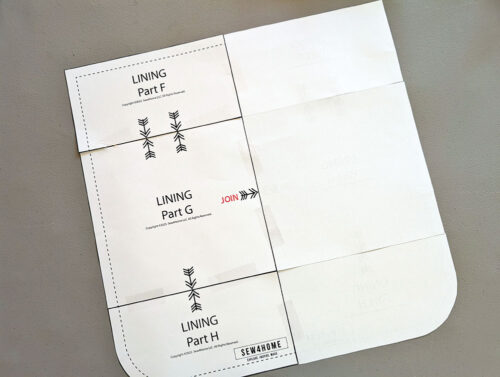
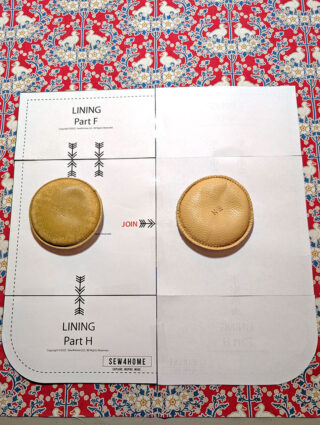
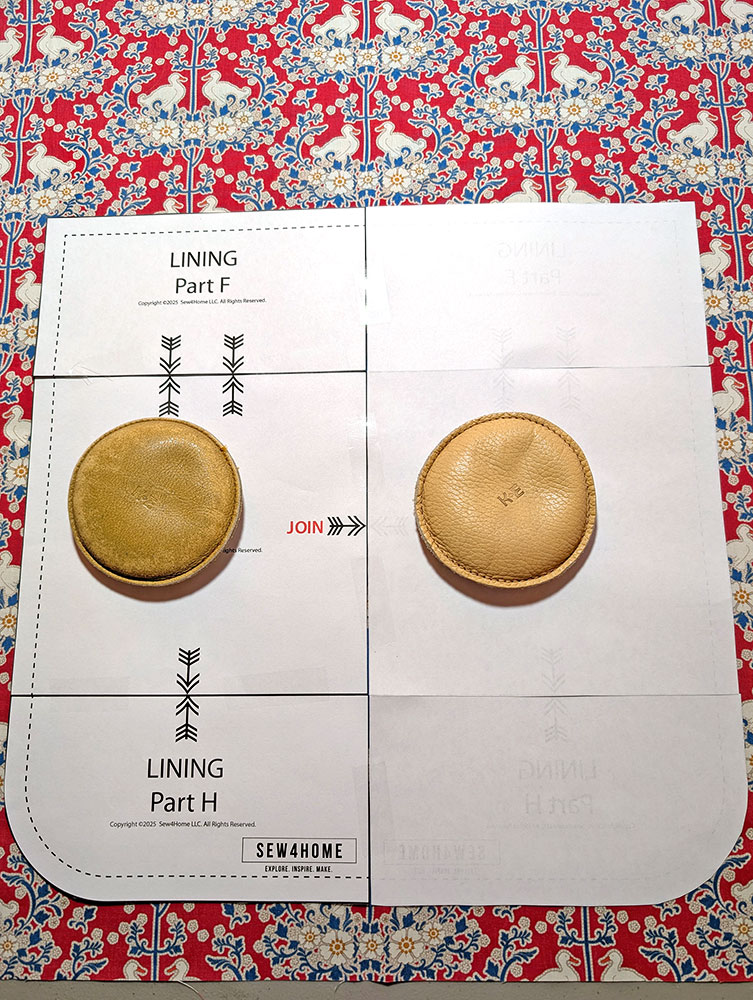
- Following the Pattern Assembly Guide as well as the arrows printed on the individual pieces, assemble parts F, G, and H into the full Lining pattern.
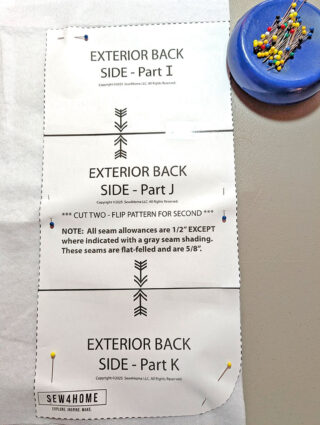
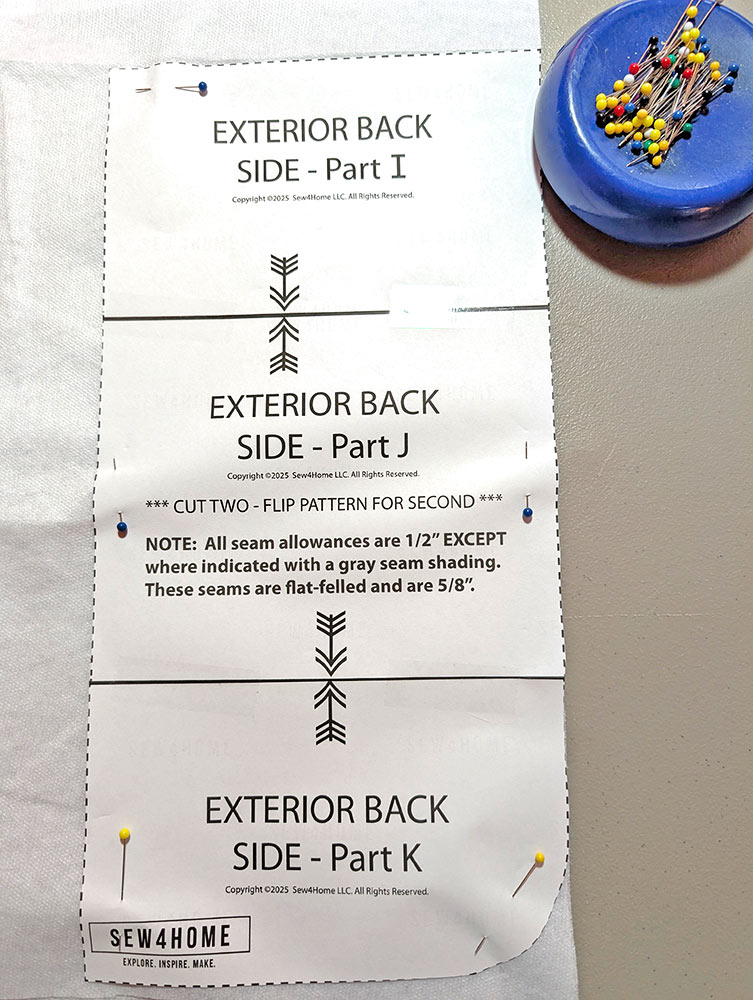
- Following the Pattern Assembly Guide as well as the arrows printed on the individual pieces, assemble parts I, J, and K into the full Exterior Back pattern.
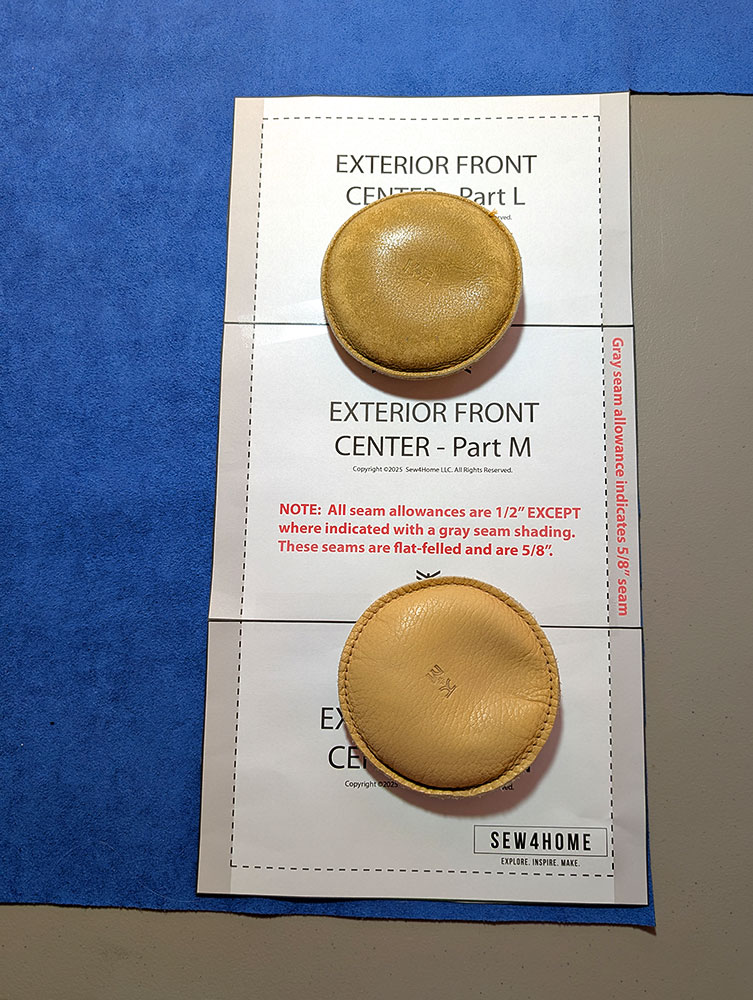
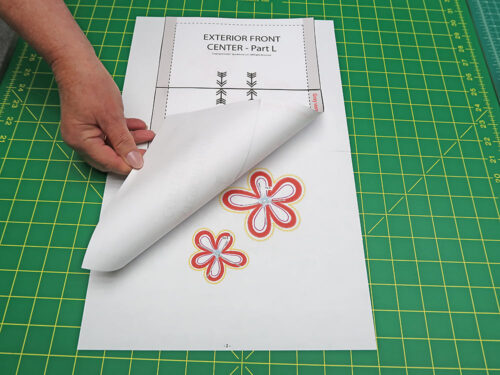
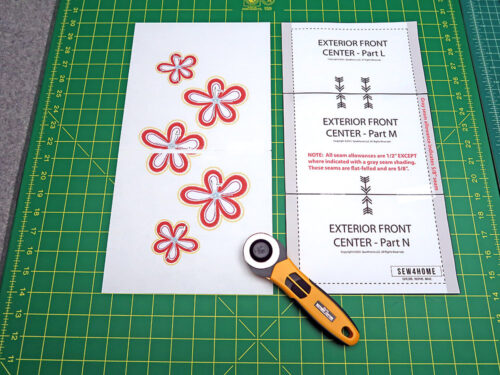
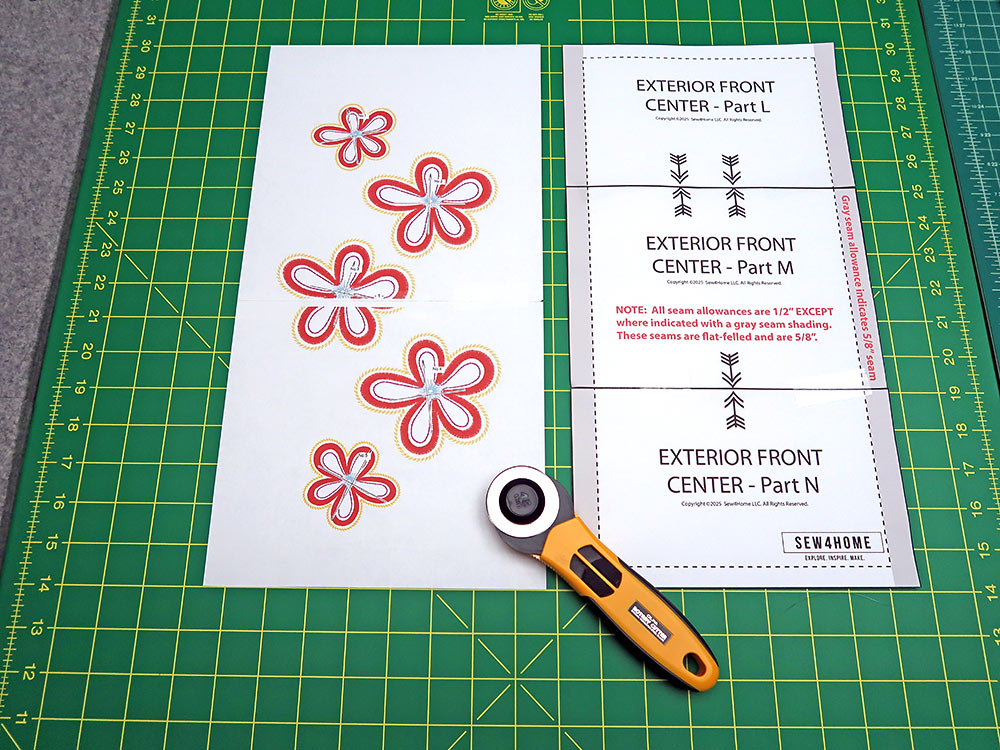
- Following the Pattern Assembly Guide as well as the arrows printed on the individual pieces, assemble parts L, M, and N into the full Exterior Front Center pattern.
- Following the Pattern Assembly Guide as well as the arrows printed on the individual pieces, assemble parts O and P into the full Exterior Front Side pattern.
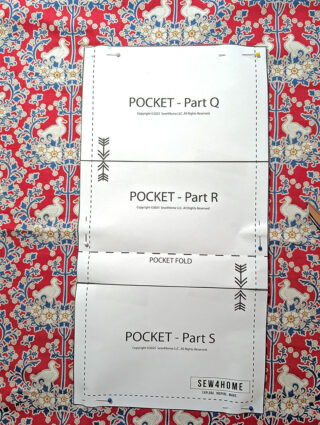
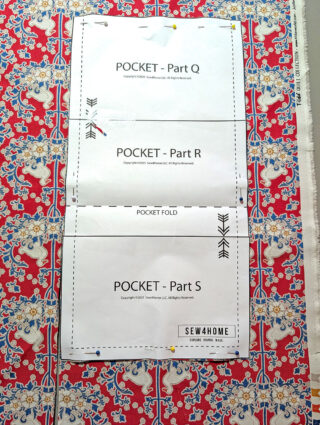
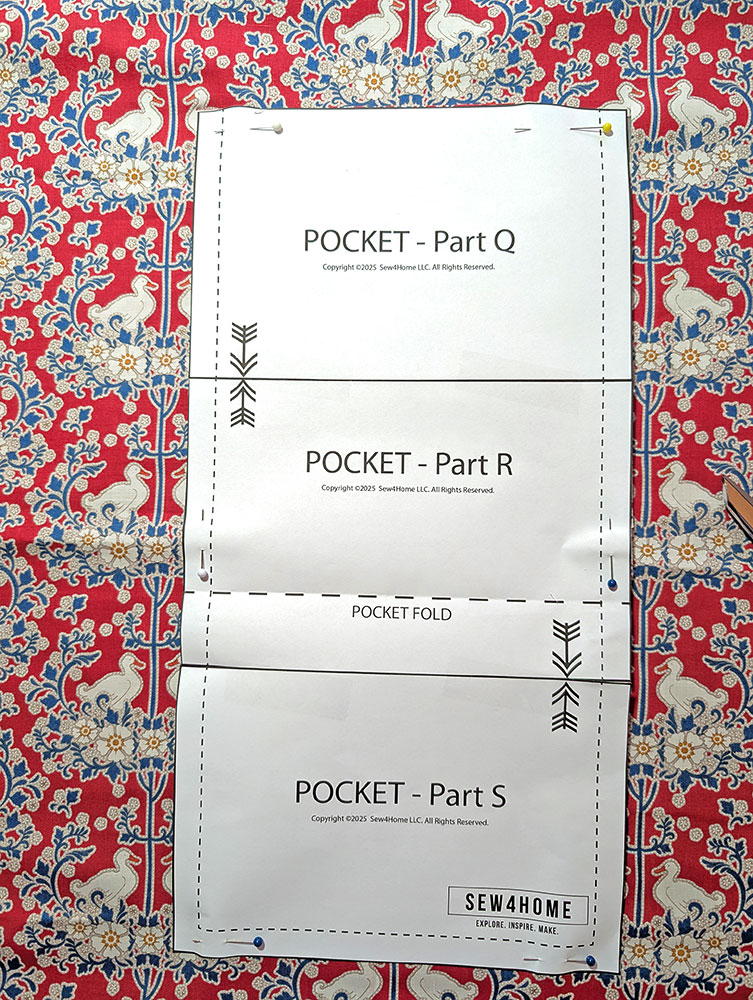
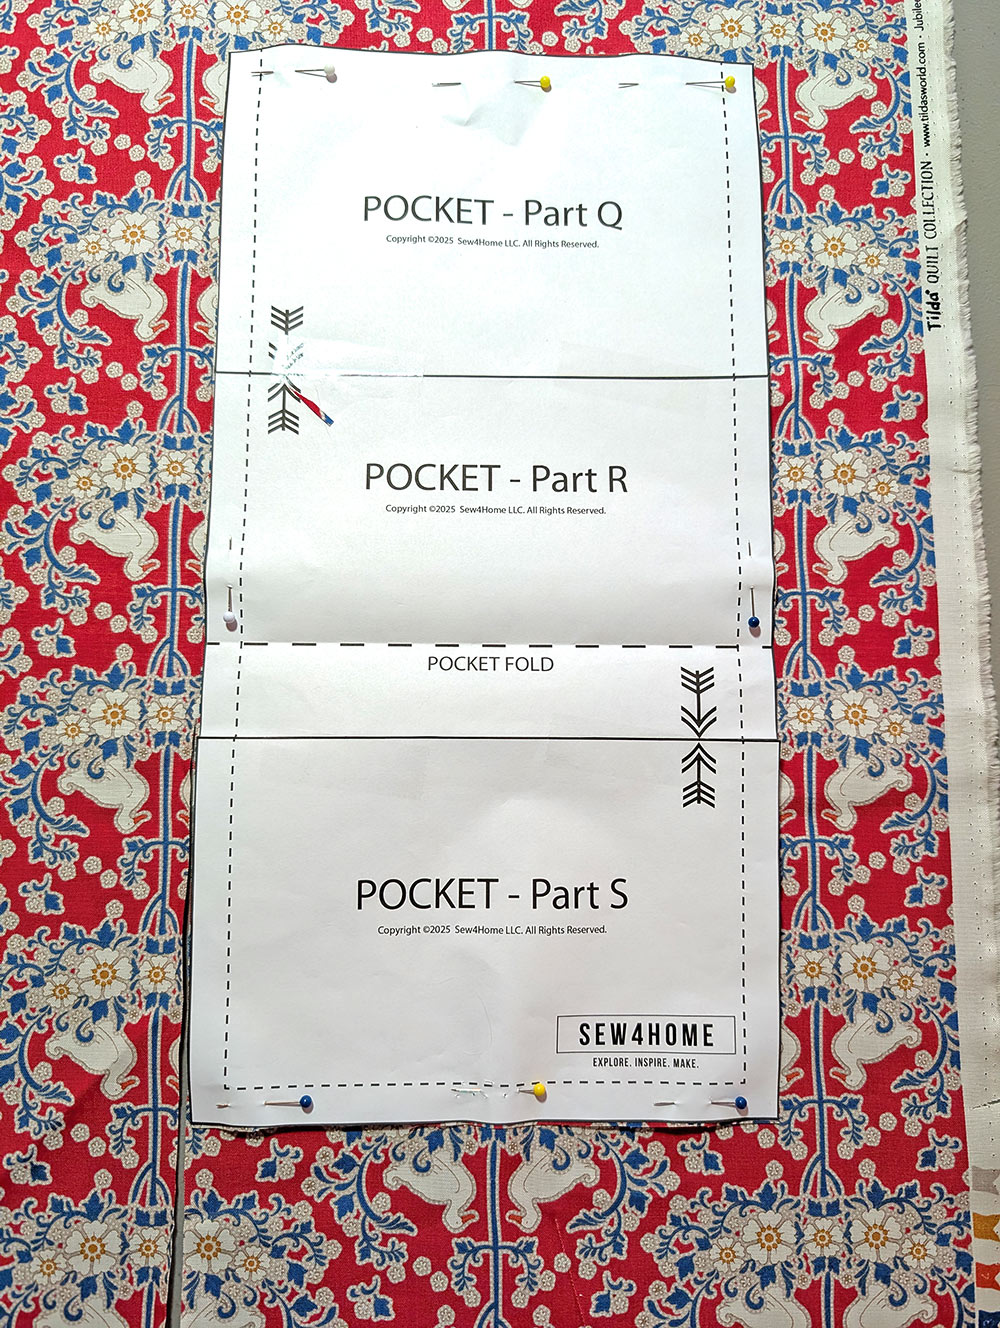
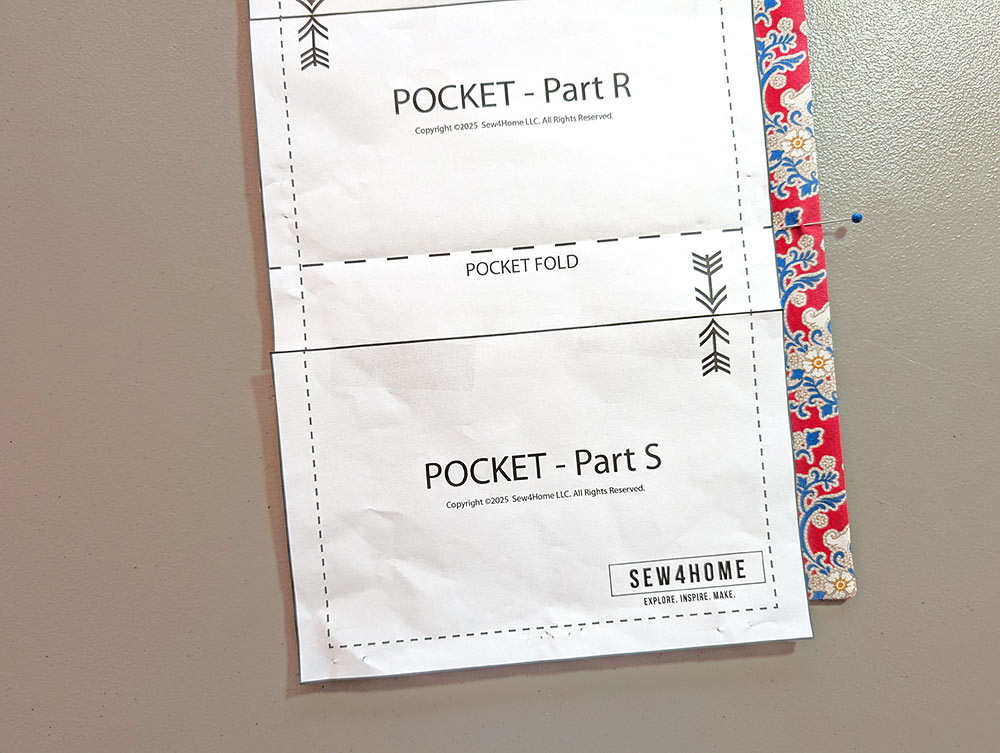
- Following the Pattern Assembly Guide as well as the arrows printed on the individual pieces, assemble parts Q, R, and S into the full Lining Pocket pattern.
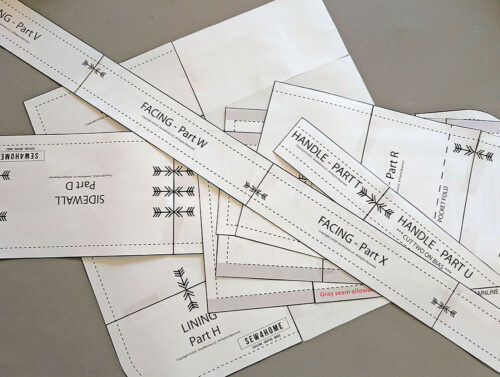
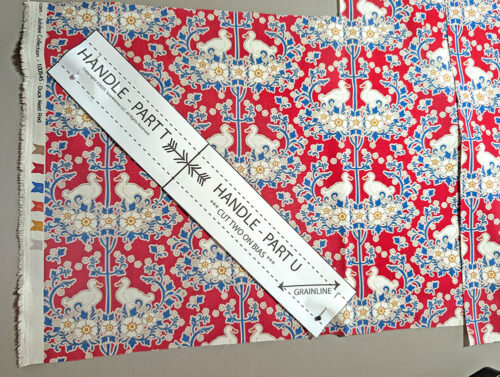
- Following the Pattern Assembly Guide as well as the arrows printed on the individual pieces, assemble parts T and U into the full Handle pattern.
- Following the Pattern Assembly Guide as well as the arrows printed on the individual pieces, assemble parts V, W, X, and Y into the full Facing pattern.
- You should now have a lovely pile o’ patterns.
- In all cases when assembling, butt together the pieces, do not overlap, and tape to create the full pattern piece.

Cutting Out
- As mentioned above in the Supply List, if you are using a fabric with a nap, such as we did with the faux suede, remember to carefully lay out your pattern pieces so the nap is running in the same direction on all the elements. The best way to do this is to lay out the pieces side by side. A simple swipe with your hand will allow you to confirm the nap direction.
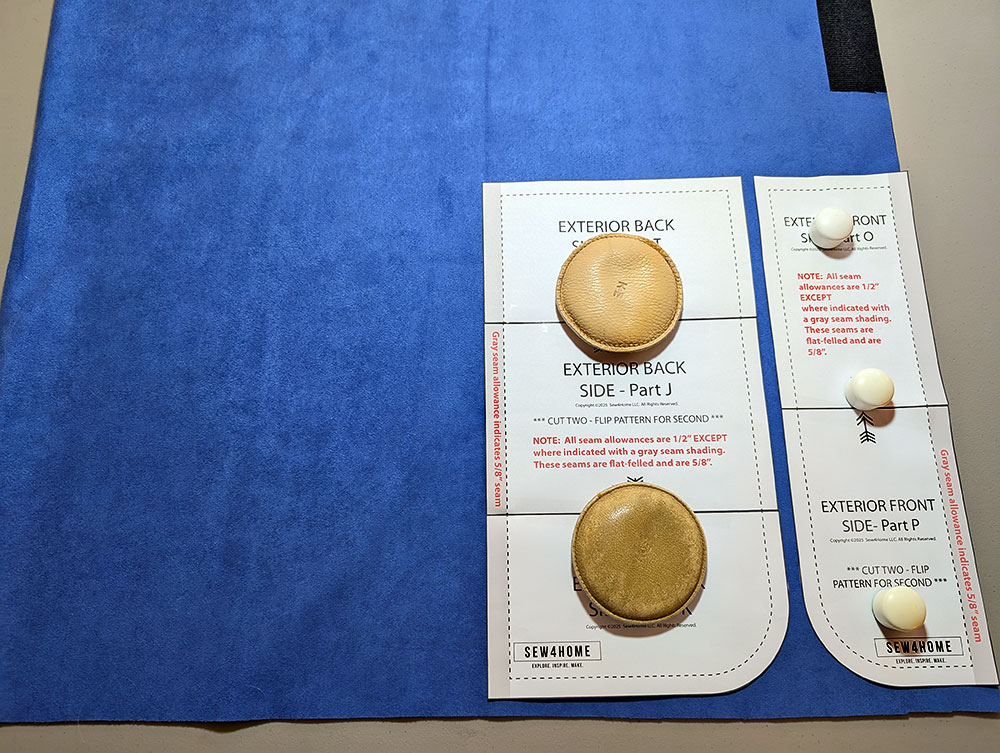
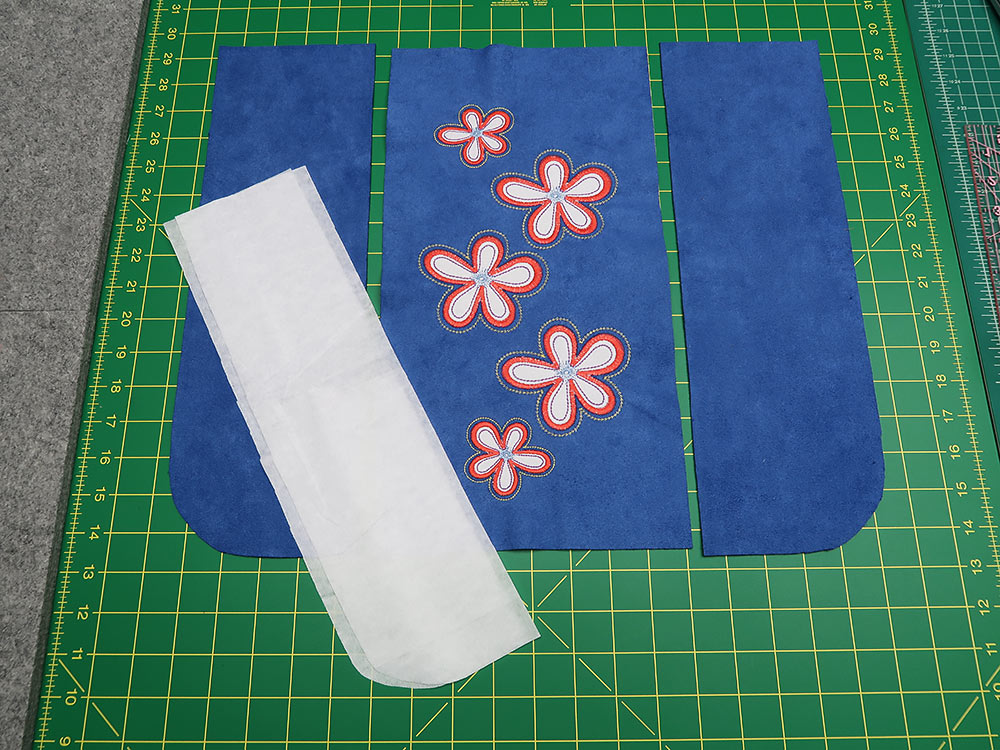
- From the exterior fabric (the blue faux suede in our sample), cut the following:
- Fold the fabric wrong sides together and place the Exterior Back and Exterior Front Side patterns side by side (we are using pattern weights to hold the paper patterns in place as it can sometimes be challenging to pin through thicker substrates).
- Carefully cut out the TWO sets for each pattern piece.
- Open up the fabric right side up and confirm the nap is still running in the same direction as it was when folded. Use this single layer of fabric to cut ONE each for: the Center Front, Sidewall, and Facing.

- From the lining fabric (Duck Nest in our sample), cut the following:
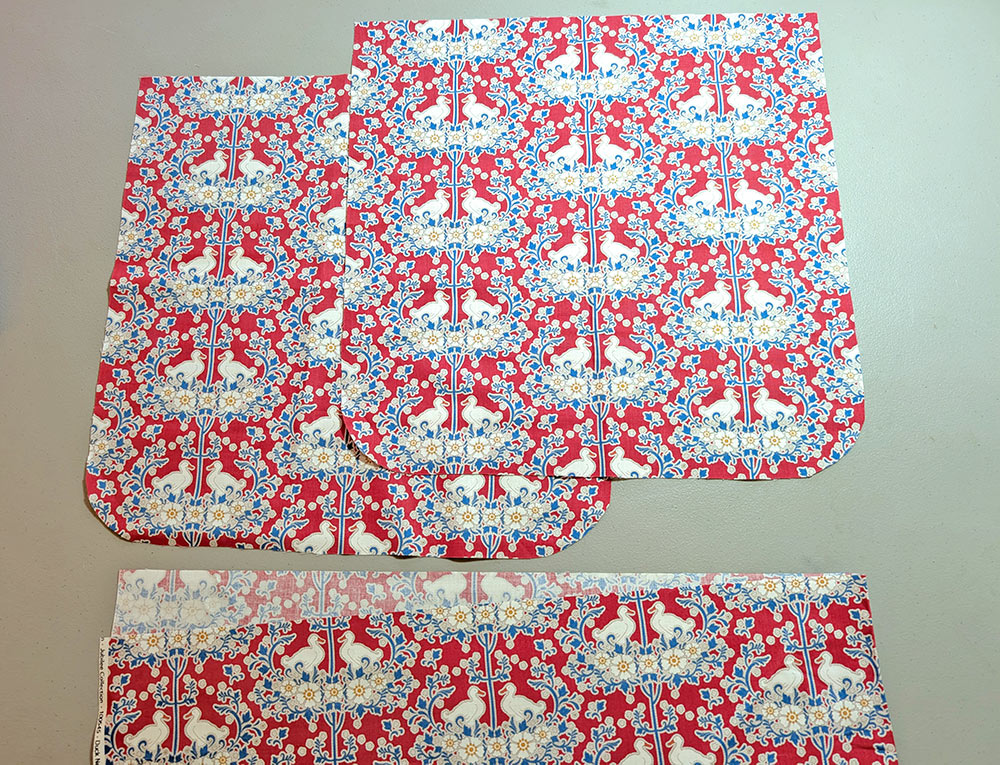
Using the assembled lining pattern, fussy cut TWO.
Using the pocket pattern, fussy cut TWO – one with the motif right side up and the second with the motif upside down**.
Motif right side up:
Motif upside down:
NOTE: Because we loved the beautiful duck motif on our lining fabric, we took the time to pattern match our pocket to the background panel. If you’d like to do the same, we have a full tutorial you can review prior to starting if you are new to the technique. ** Even if you’re not going for a perfect motif match, if you have ANY kind of directional motif, the two panels must be cut with the motif going in opposite directions on each. This is because the panel folds up to form the pocket, which means the back panel will start upside-down, then become right side up when folded into position.
Using the Handle pattern, cut TWO on the bias.
- From the interfacing, first trim all the appropriate assembled pattern pieces, then cut the following:
Similarly to how you cut the exterior fabric, fold the interfacing wrong sides together to cut out the Exterior Back and Exterior Front Side patterns
Open up the interfacing right side up and use this single layer of fabric to cut: the Center Front, Sidewall, and Facing. Again, remember in all cases, you are using the assembled pattern pieces that have been trimmed along their dotted seam allowance lines. - The piping cord will be cut to size within the steps below for the handles.
NOTE: With all your cutting complete, again if using a napped fabric, we recommend clipping together all the elements for each pattern piece – placing the clip at the TOP to indicate the direction of the nap. Nap can be hard to spot sometimes and it’s easy to accidentally attach something incorrectly. It might not be noticeable in the moment, but when the tote is complete, different sections will actually appear to be different colors if the nap is running in the wrong direction. The clip acts like a little “this side up” alert as you move through the construction process.


At Your Sewing Machine & Ironing Board
Embroidered front center panel and EMBROIDERY TEMPLATE DOWNLOAD
The tote’s front panel embroidery designs are, of course, up to you, but we were excited to show off the built-in designs available on the Janome MC1000 so our steps and the provided Placement Template will allow you to get a result exactly like our beautiful tote. In addition, we are highlighting the embroidered appliqué process; even if you’ve done machine embroidery before, you may not have experimented with blending appliqué and embroidery. We think you’ll love it!
Embroidery placement
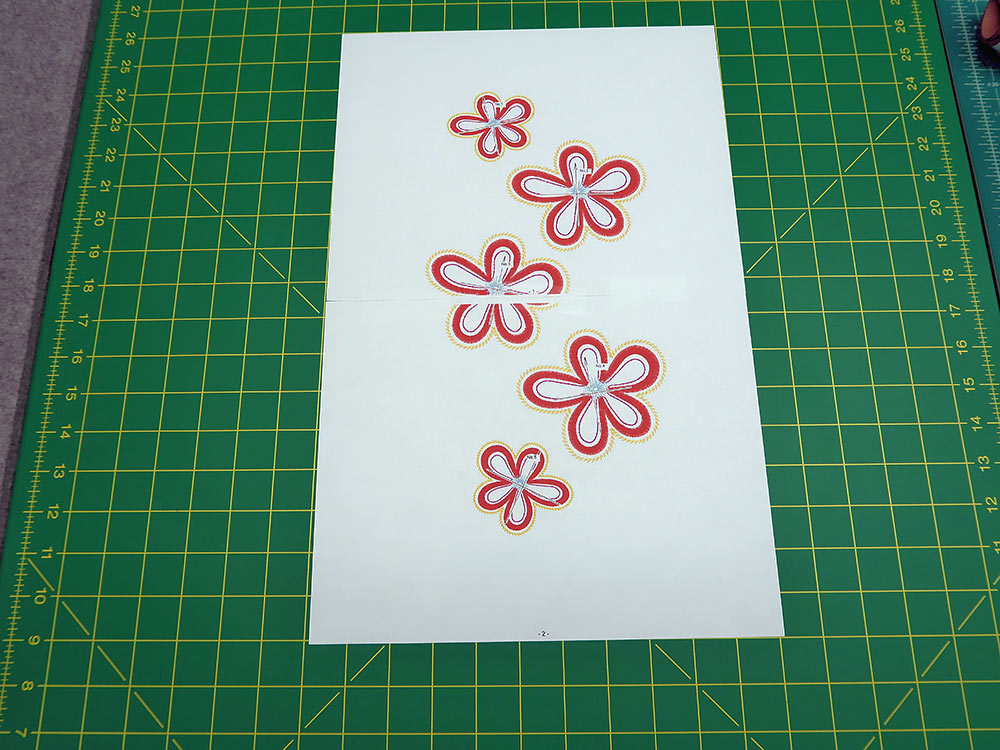
- Download and print the Placement Template.
IMPORTANT: This template download is TWO 8½” x 11″ sheets. You must print the PDF file at 100%. DO NOT SCALE to fit the page. Print horizontally (landscape). If possible print in color although this is not mandatory. - Butt together the two pages along the horizontal center. There will be a slight white “gap” through the center. This is okay; the crosshairs are the most important element. Tape together to create the full template.

- Place the template right side up on your work surface. The designs are numbered, so you can make sure it is right side up with the designs going from 1 at the top to 5 at the bottom.
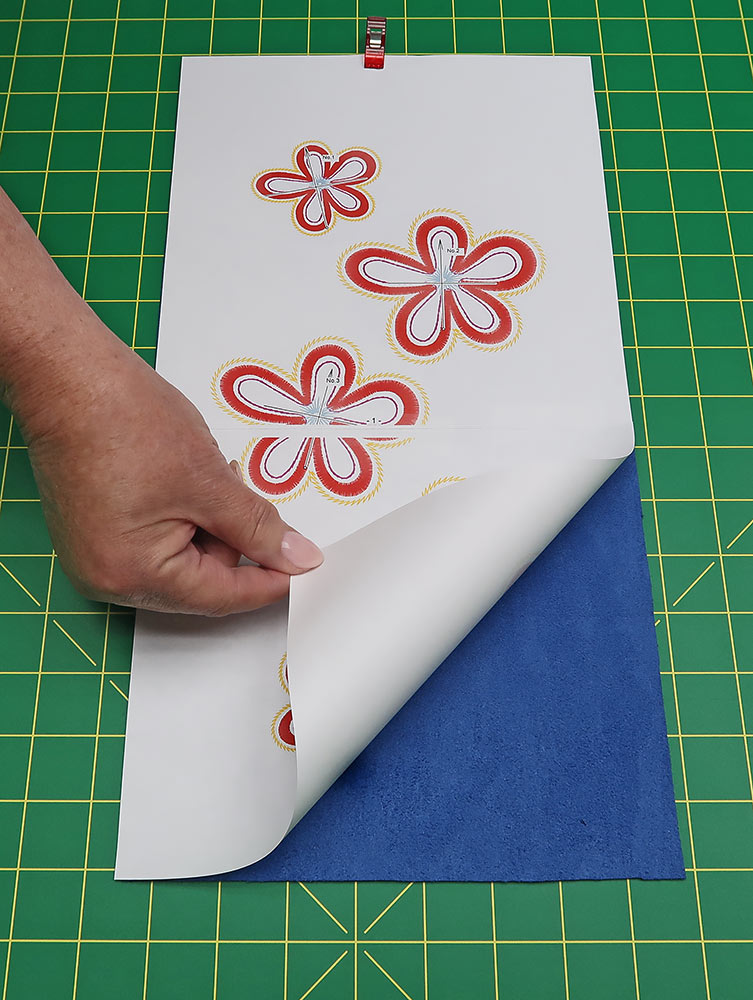
- Find the Exterior Front Center pattern (the full pattern not the trimmed pattern). Place it over the top of the template. The designs should be centered side to side within the paper pattern with the top of the paper pattern flush with the top of the template.
- Depending on the transparency of your paper, it might be easier to see through to the template from the back rather than from the font. Test it both ways. It is important to get the centering correct. Trim the template to match the paper pattern, which means you are trimming both sides and the bottom – the top is flush and so not trimmed.
- Find the Exterior Front Center fabric panel and its interfacing panel. Center the interfacing on the wrong side of the fabric panel. Because this panel uses flat felled seams, which require a wider seam allowance, this means you’ll have ⅝” of fabric showing beyond the interfacing along the sides and ½” top and bottom.
- Following manufacturer’s instructions, fuse in place.

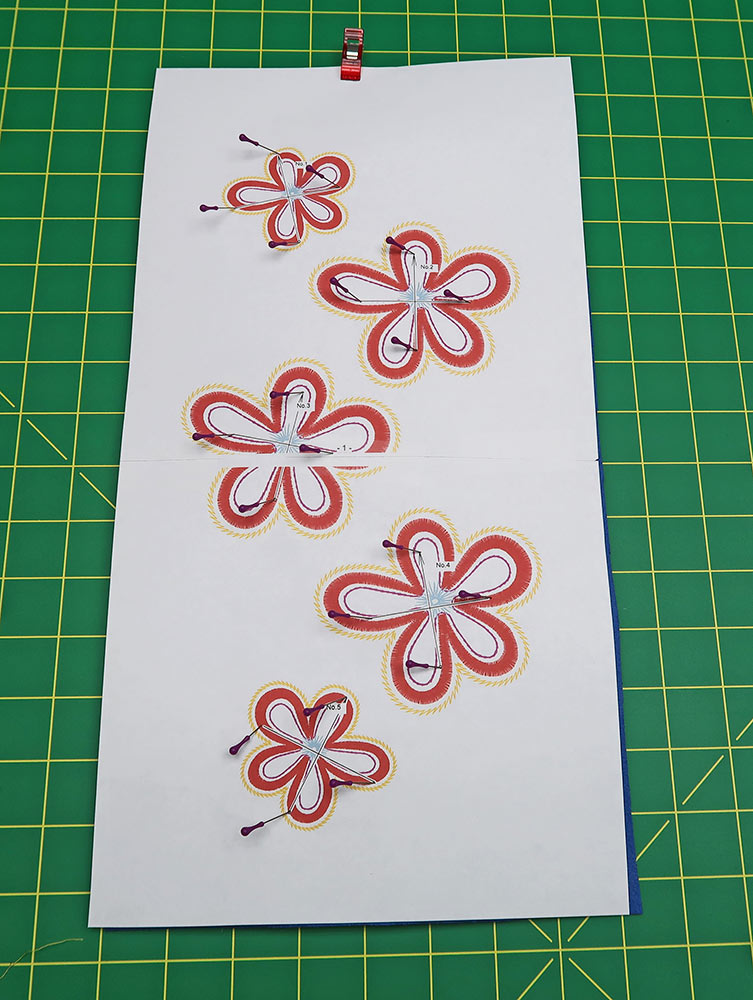
- Place the fabric panel right side up and flat on your work surface. Place the template over the panel. Now is a good time to confirm your nap is running top to bottom and the template is also positioned top to bottom. All edges of both layers should be flush. Clip the template to the fabric panel.

- Place a pin at the end points of the crosshairs of each of the five designs.

- Working from the bottom up to the top, carefully lift up the paper template and use a fabric pen to mark the pin points. Repeat this process to mark all five sets of crosshairs.
NOTE: As always when working on the the right side of the fabric, make sure your marking tool is one that will easily wipe away or will vanish with exposure to the air or the heat of an iron.

- When all the end points have been marked, connect the dots to create full crosshairs for each flower. Then, referring to the placement template, add the appropriate directional arrow to each. The arrows are important to insure the flowers will be embroidered in the correct, slightly skewed positions. This creates the “tumbling flowers” effect on the finished panel.


Appliqué embroidery
- Set up the machine for professional style embroidery. On our Janome MC1000, we inserted the White Dot Bobbin Case. The machine comes with two bobbin cases to deliver the proper tension for embroidery (white dot) and ordinary sewing (yellow dot).
- Attach the Embroidery foot.
- Place a pre-wound bobbin into the bobbin case. If not available, you can wind a standard bobbin with bobbin thread. Thread the top with the first color in the embroidery sequence – in our sample, this is the White.
- The Janome MC1000 is a wonderfully compact machine with a traditional swing-out embroidery arm. Open the arm.
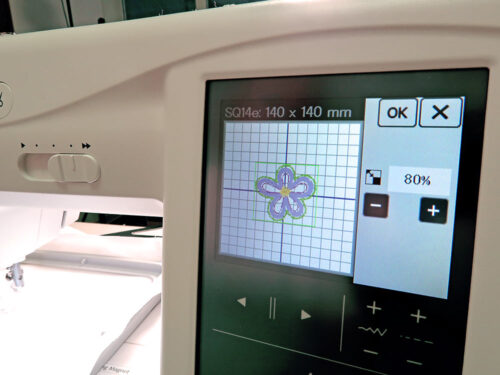
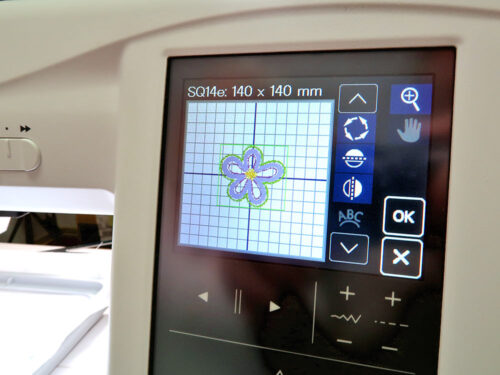
- On the color touch screen of the MC1000, we chose Design #3 within the built-in “Appliqué” section. Bring up this design onto the Edit screen. Our Tumbling Flowers grouping consists of three large flowers in the center with a small flower top and bottom. On the MC1000, you can reduce or enlarge designs on screen by 20%. We are starting with the large flowers and so enlarged our chosen design to its maximum of 120%.
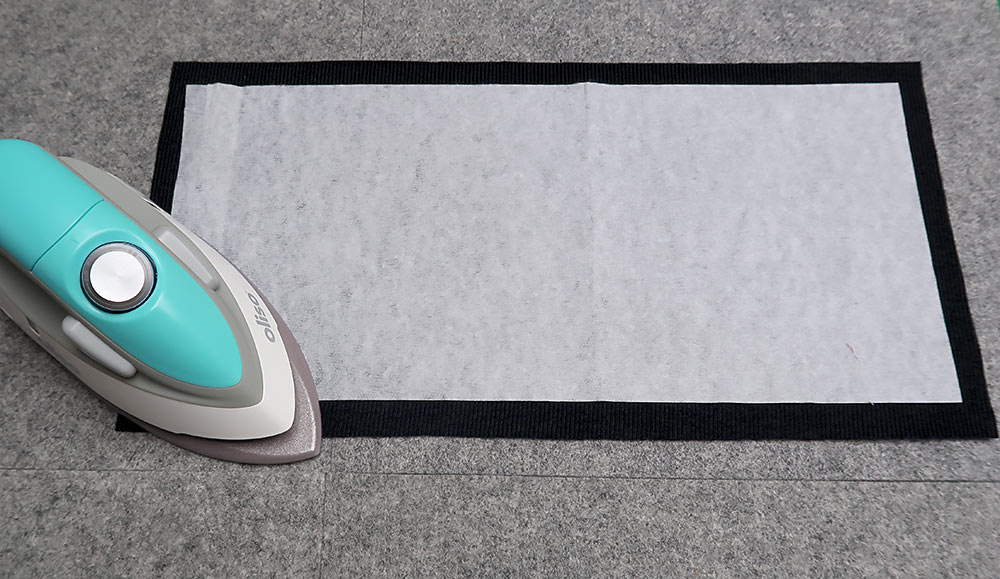
- Hooping napped fabrics is not a great idea as the hoop can leave marks. Instead, hoop two layers of stabilizer in the hoop. The MC1000 comes standard with a 5.5” x 5.5” hoop. Attach the hoop in position on the machine.
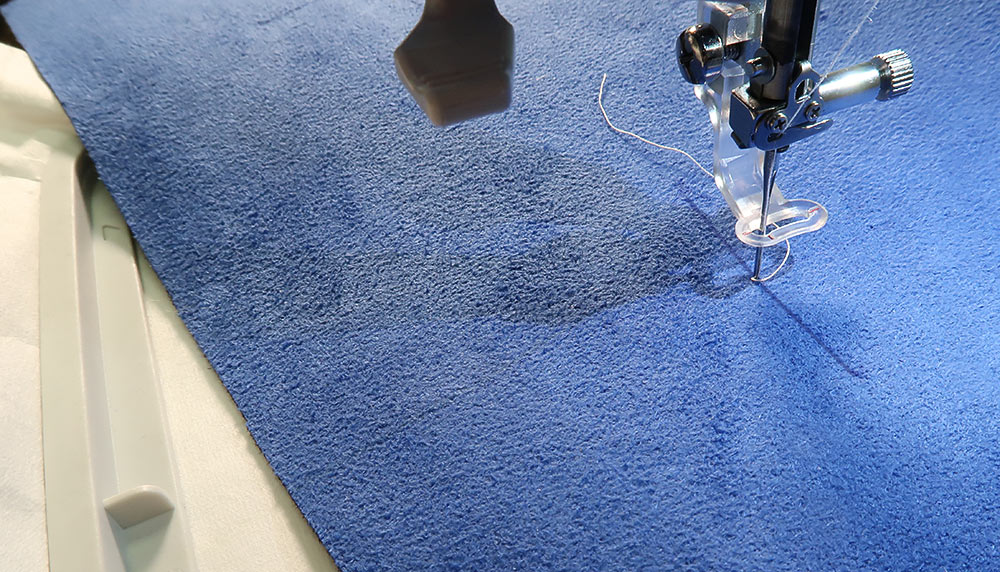
- Lay the marked Front Center panel over the top of the hooped stabilizer, sliding it under the presser foot. We are starting with the center large flower and will embroider all three large flowers before changing the design settings to accommodate the small flowers.
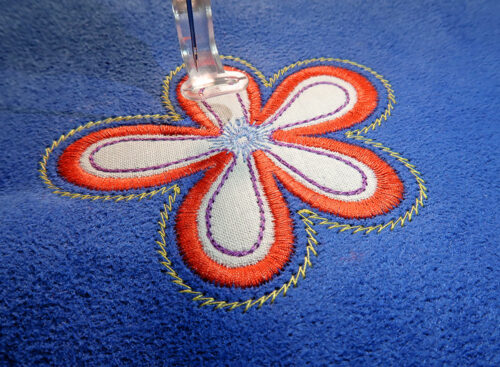
- Adjust the position of the fabric panel so the exact center of the flower’s crosshairs are directly under the point of the needle (in the photo below, we are testing our needle drop – the final drop should exactly at the center point of the crosshairs). The fabric panel will now be laying at a slightly skewed angle. This is correct since we want our flowers to be tumbling down the panel rather than straight up and down. Smooth the panel into position.

- Start the embroidery. The first step in the embroidery sequence will be a placement outline.
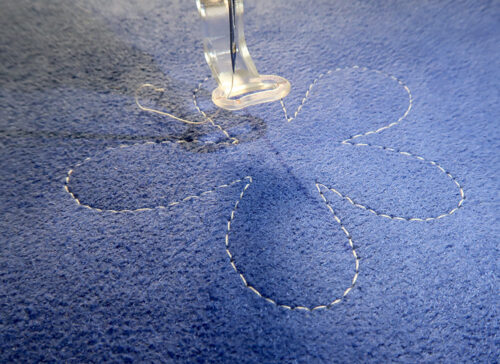
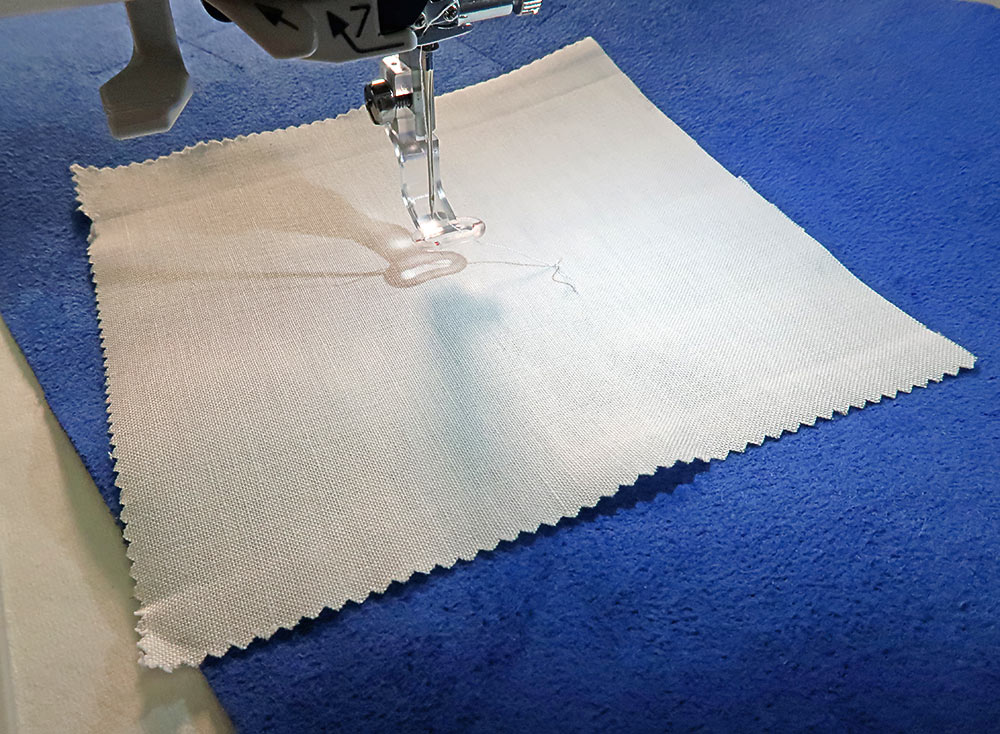
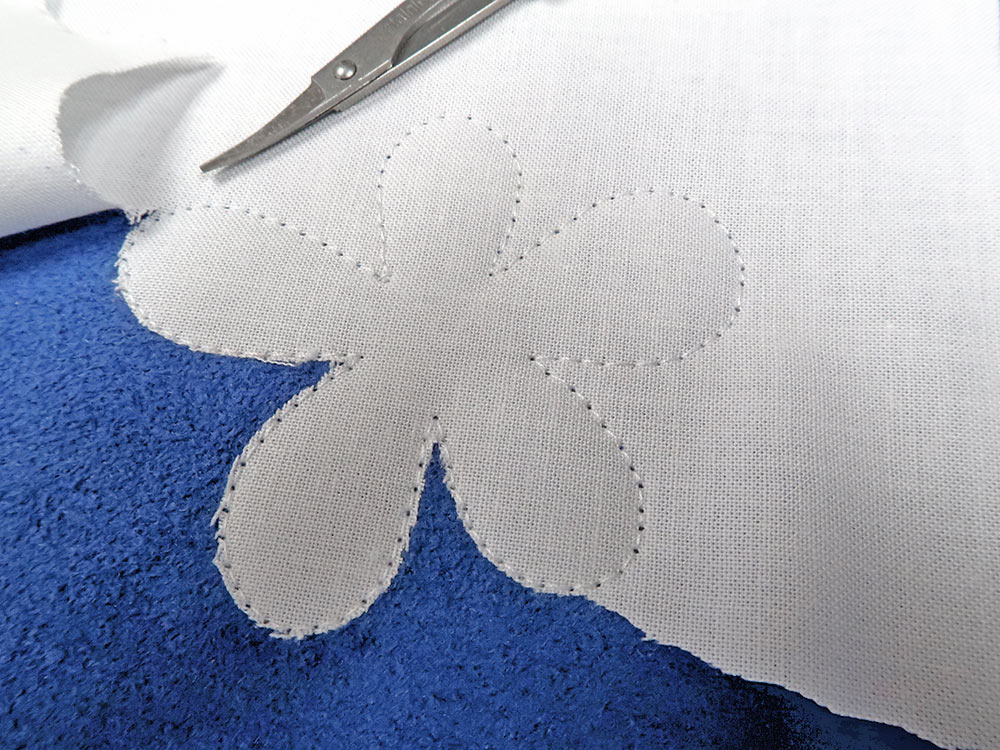
- Find one of the 5” x 5” squares of solid color cotton fabric. Slide the square under the presser foot so it completely covers the placement outline.

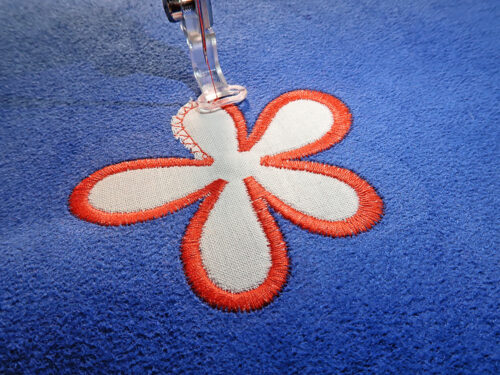
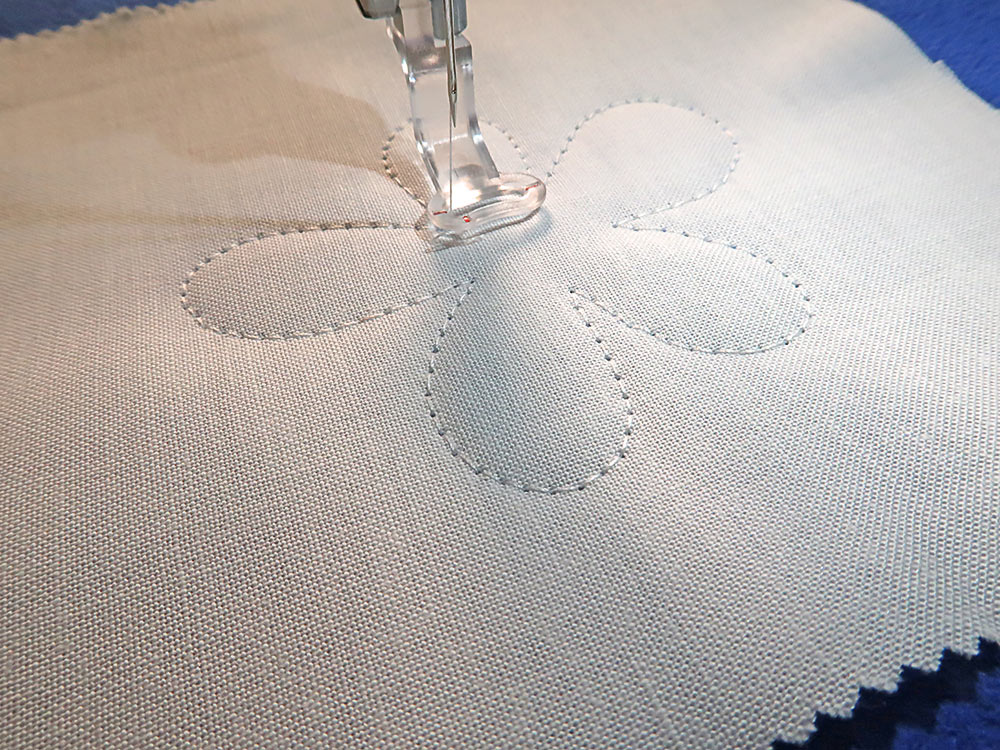
- Re-start the embroidery, which will stitch the second step in the embroidery sequence – also done in White: the tack down.

- When this step is complete, remove the hoop from the machine. Find the tiny, sharp scissors and trim very close to the tack-down stitching. Take your time, you want this trim to be as close as possible to the outline with as few “fluffies” of residual fabric fibers as possible. It’s okay if you nick the stitching slightly as this trimmed edge will be covered with the embroidery.

- When the trimming is done, replace the hoop on the machine. Your set-up positioning is still intact. The hoop and the presser foot will be in their correct position, ready to stitch the next color.

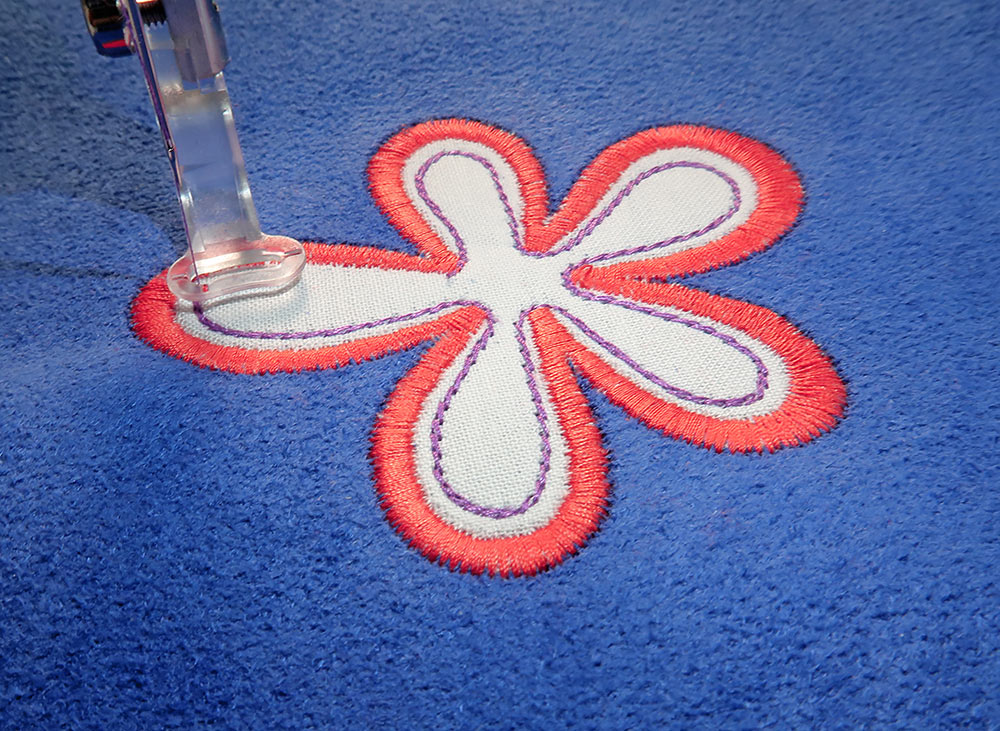
- Re-thread with the second color: Red in our sample. Re-start the embroidery for the third step in the sequence and stitch the full color.
- Re-thread with the third color: Purple in our sample. Re-start the embroidery for the fourth step in the sequence and stitch the full color.

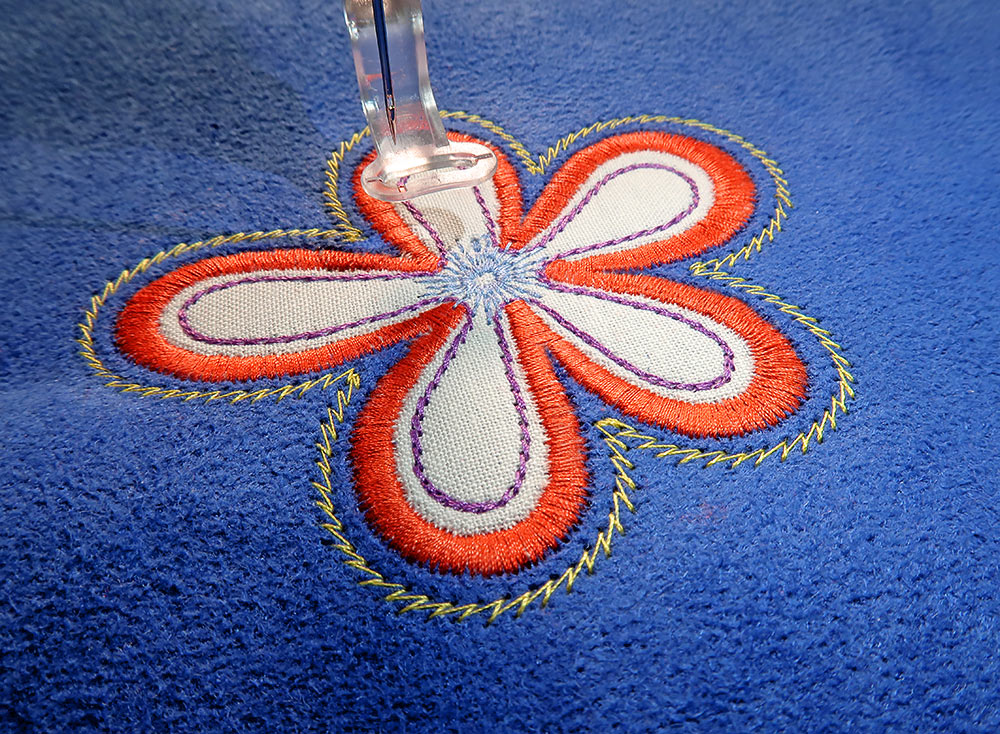
- Re-thread with the fourth color: Light Blue in our sample. Re-start the embroidery for this fifth AND sixth step of the sequence and stitch the full color. This creates the center of the flower; we chose to use the same color for both steps in this sequence. You could certainly use two colors if you’d like.
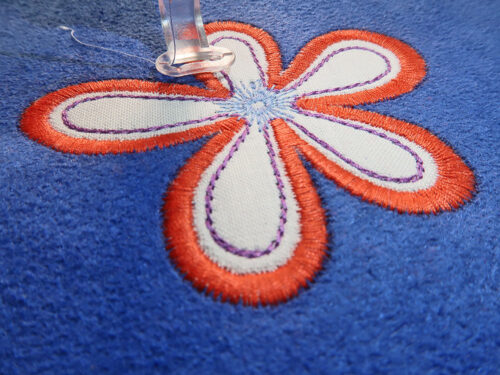
- Finally, re-thread with the fifth color: Yellow in our sample. Re-start the embroidery for the seventh step and stitch the full color.
- Remove the hoop from the machine and gently pull the fabric panel away from the stabilizer. You will need to re-hoop two layers of stabilizer for each of the five flowers.
- Repeat the appliqué embroidery process to create the other two large flowers, positioning with the crosshairs and re-threading in the exact same pattern.
- When the three large flowers are complete, return to the editing screen to set up for the two smaller flowers. The top flower is reduced to 80% (the maximum reduction) and is stitched in the same manner.
- The bottom flower is reduced to 80% AND is flipped… yep – you can flip designs right on the MC1000 edit screen. It’s a powerful little machine!
- Stitch the top and bottom flowers to finish.
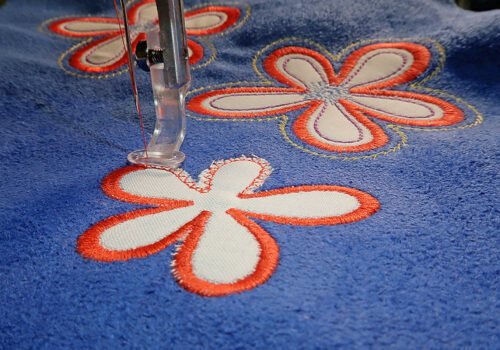
- Your center front panel is done, and you are now addicted to appliqué embroidery.


Complete the BACK panel with its one flat felled seam
- Re-set the machine from professional style embroidery to ordinary sewing. This means switching to the Yellow Dot Bobbin Case and replacing the Standard presser foot. Wind a bobbin with both colors of construction thread for the steps ahead. We used a royal blue and a red. We’re working first with the exterior so thread the machine with thread to best match your fabric in the top and bobbin. Set up for a standard straight stitch.
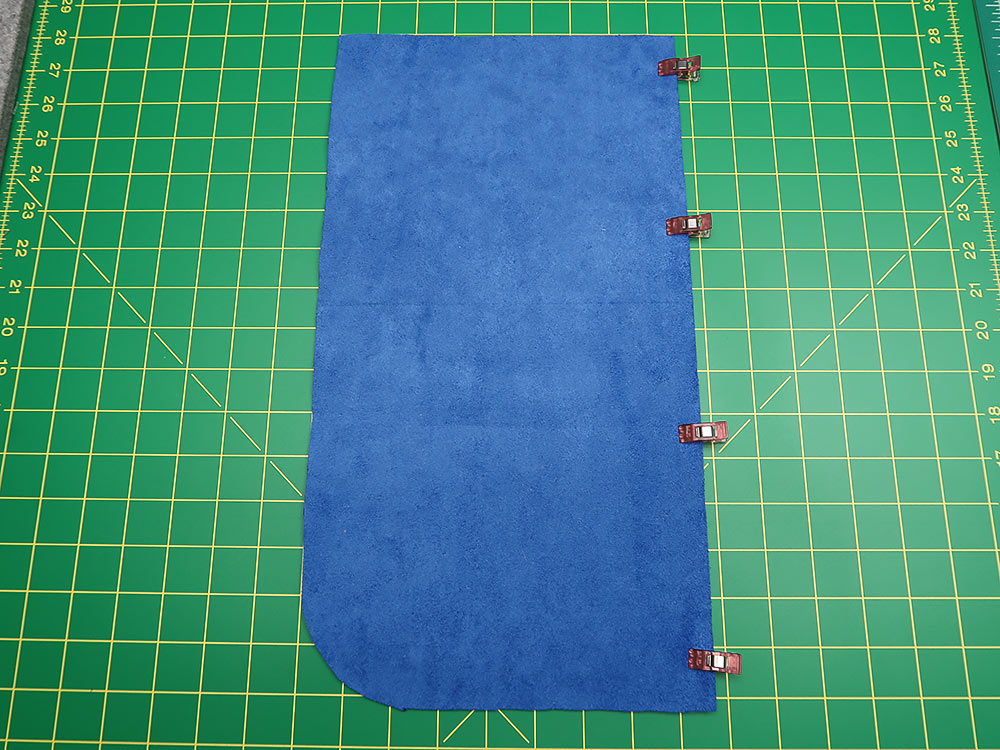
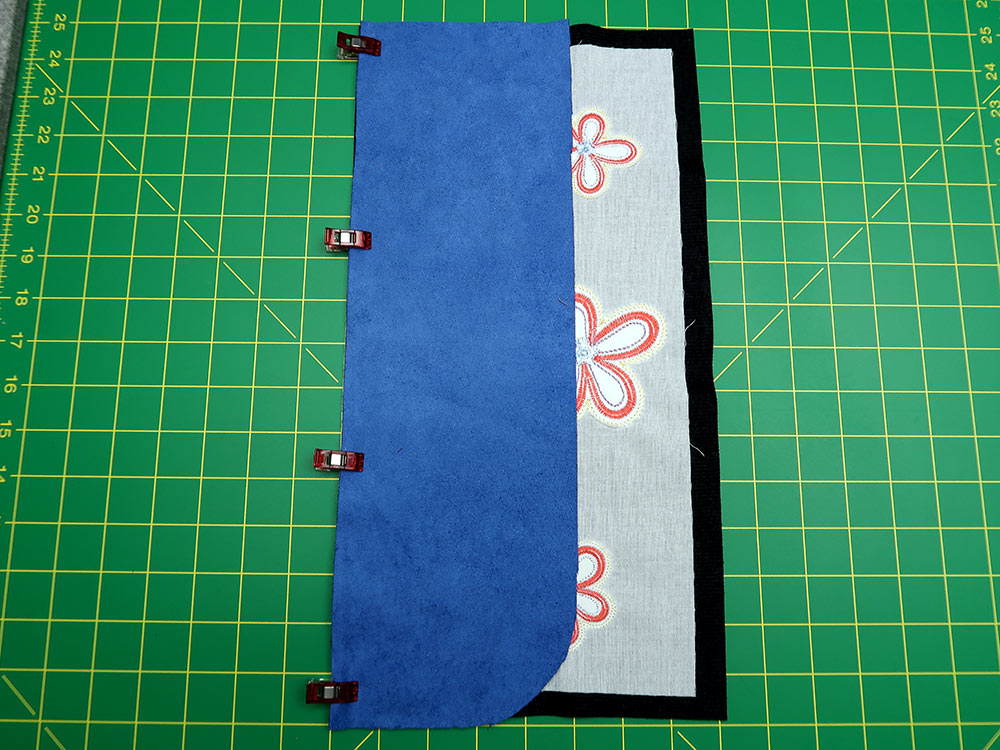
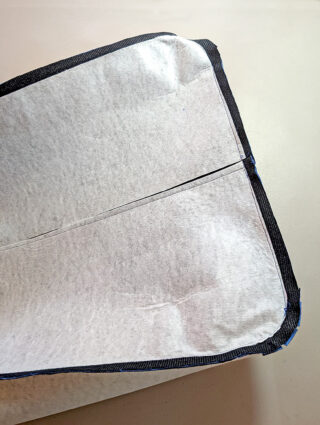
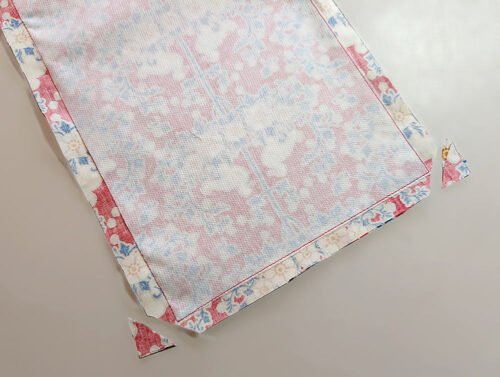
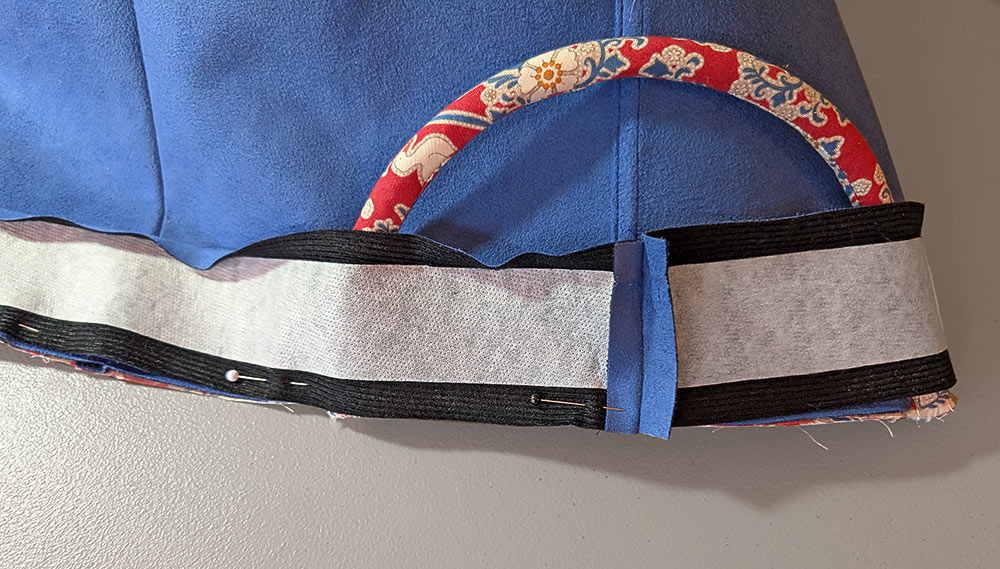
- Find the two Exterior Back fabric panels and interfacing panels. Place the fabric panels wrong side up and flat on your work surface. The curved edges are facing out, the straight edges are facing in. Place an interfacing panel on each fabric panel. The center seam will be a flat felled seam, so along the straight edges there should be ⅝” of fabric showing beyond the interfacing with ½” showing along the outer edge and the top and bottom. Following manufacturers instructions fuse in place.
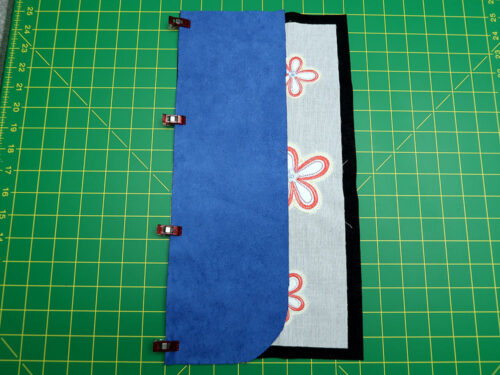
- Place the two panels wrong sides together. Pin or clip together along the straight inner edge. As mentioned above, we prefer clips when working with these thicker layers.
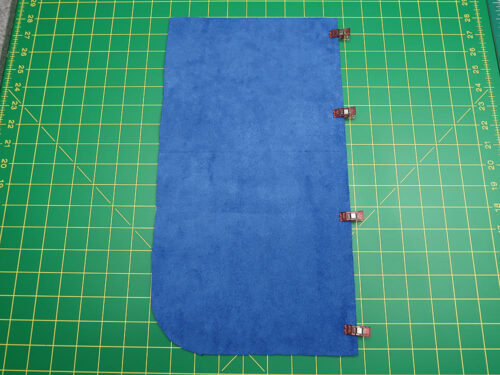
- Using a ⅝” seam allowance, stitch the center seam.
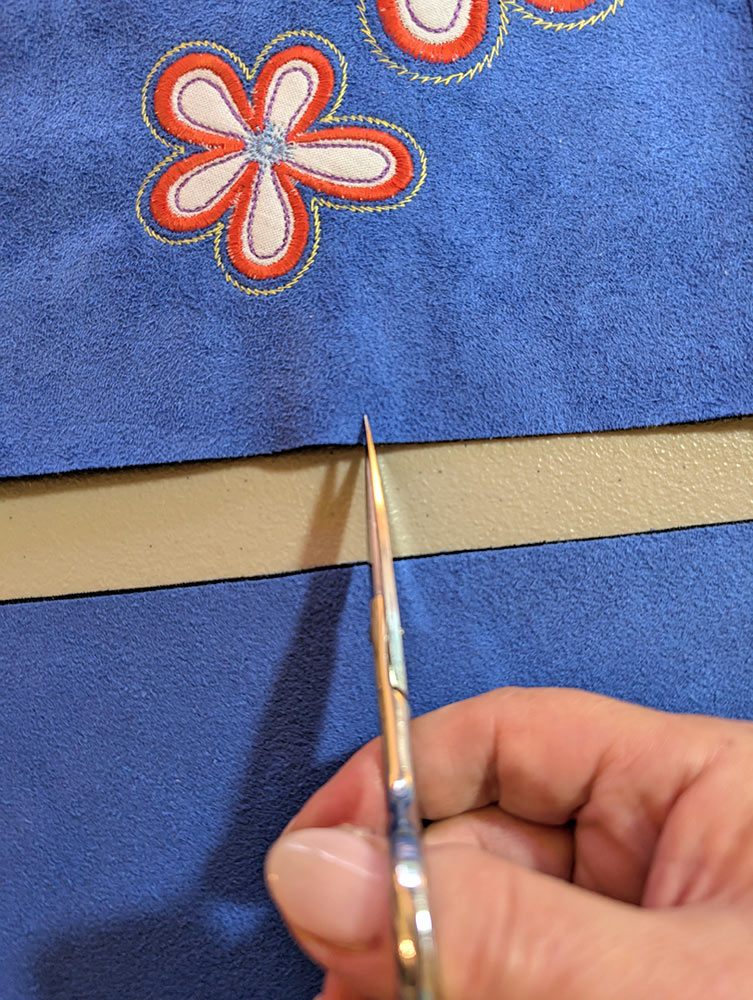
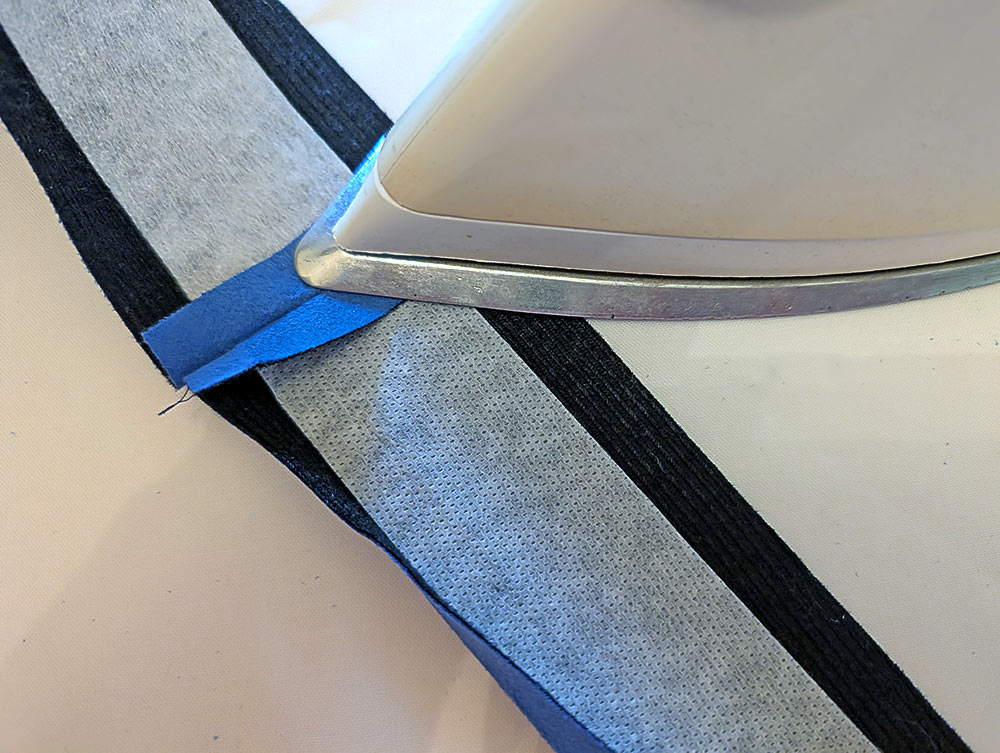
- Return to your ironing surface. Open the panel, right side up so the seam allowance is visible. Using small, sharp scissors, trim the RIGHT side of the seam allowance to ¼”.

- Re-fold the panels wrong sides together so the un-cut side of the seam allowance is on the bottom. Fold in that bottom, un-cut side of the seam allowance ¼” so it meets the cut edge of the seam allowance. Press well.

- Open up the panels once again, still right side up, and fold the un-cut edge once again, concealing all the raw edges of the seam allowance in this final “rolled over fold.” Press well.

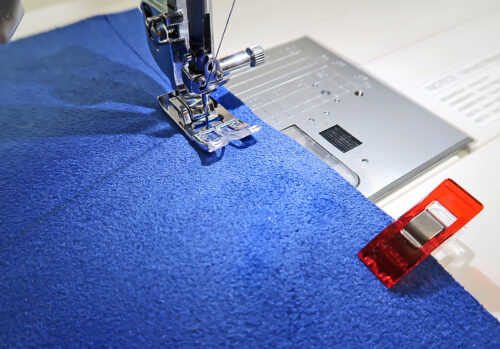
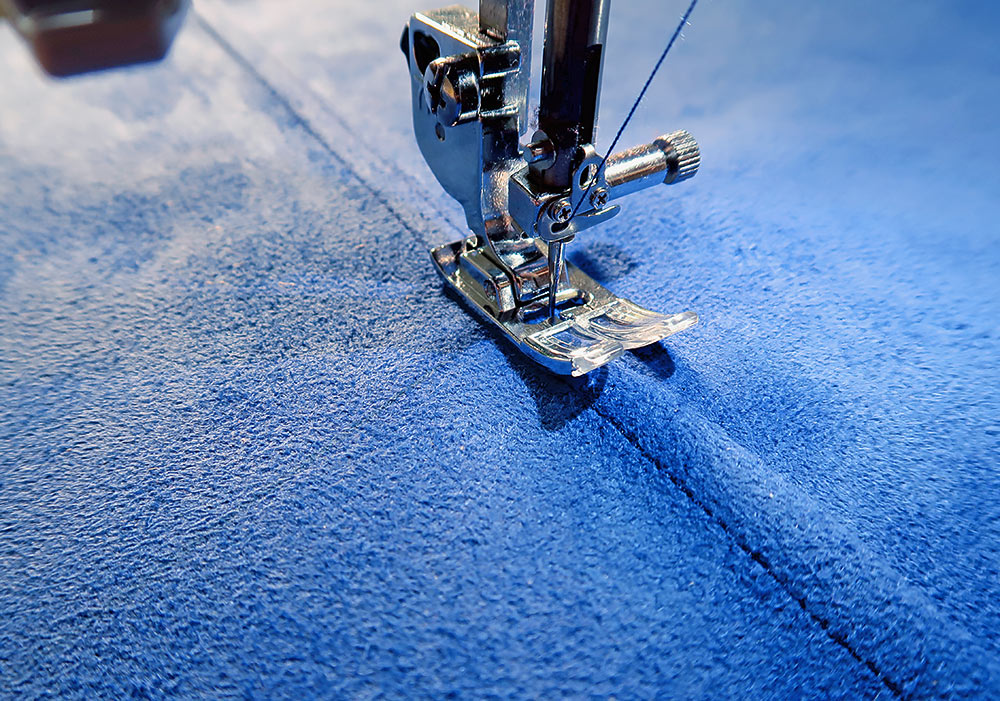
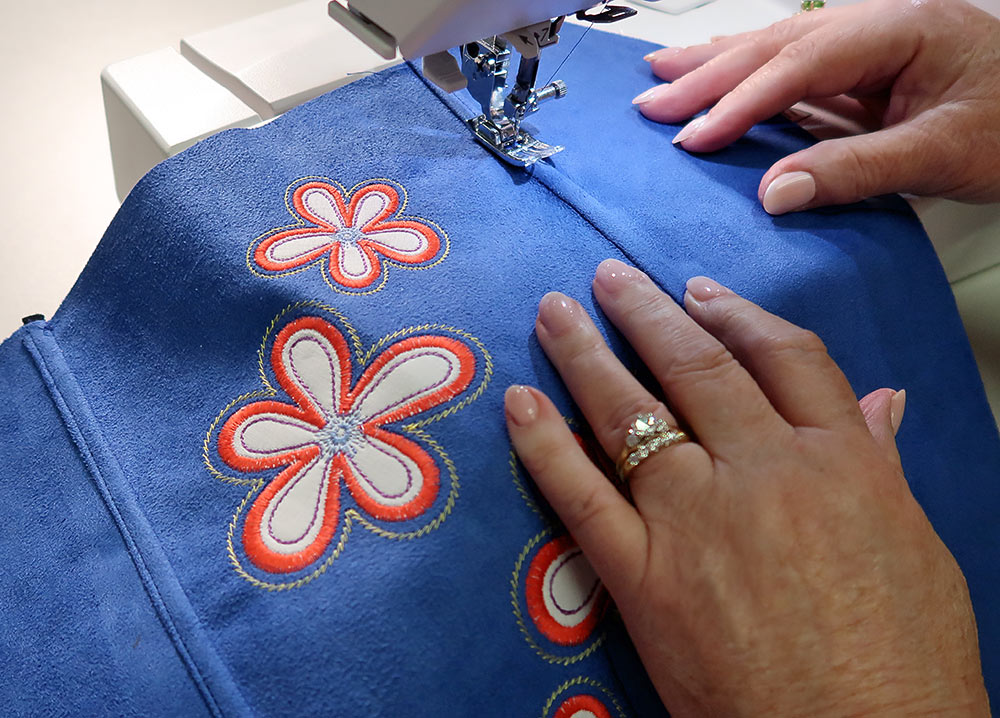
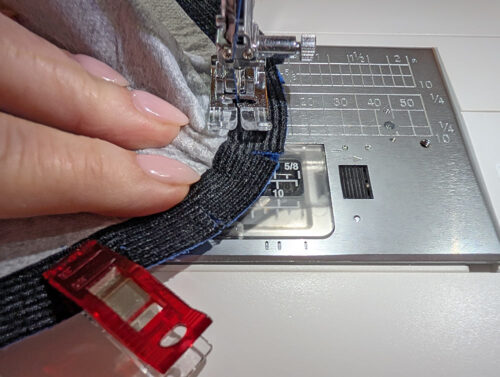
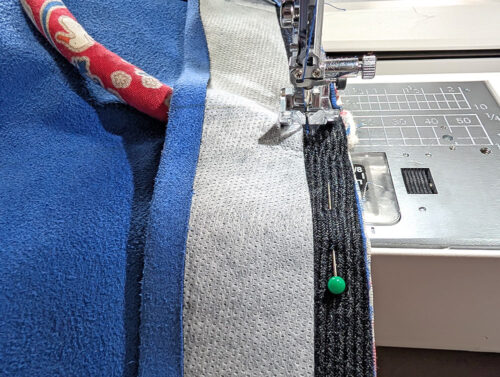
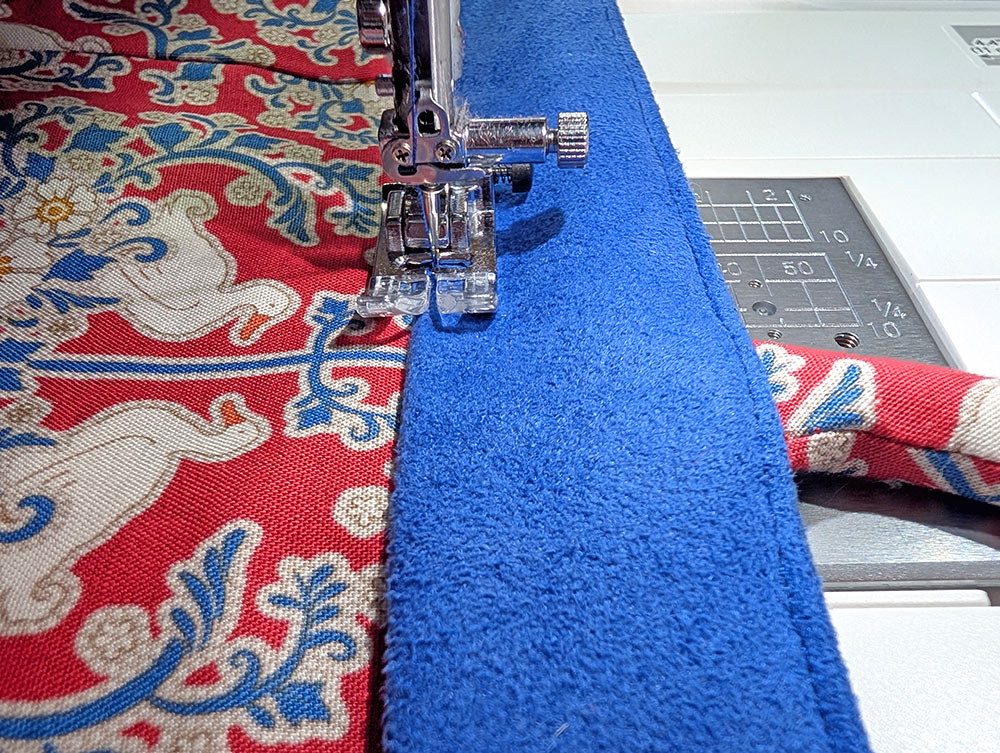
- Return to the machine and topstitch very close to the folded edge. Go slowly and carefully to maintain the fold.

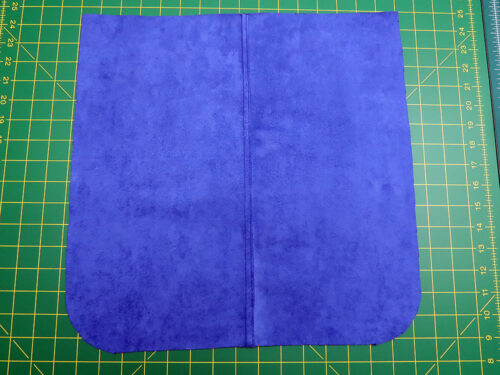
- Your exterior back panel is complete with an outside flat felled seam facing toward the right edge of the panel.
NOTE: The steps here are quite detailed, but if you are brand new to making flat felled seams, we have a full tutorial you can review that details both an outside flat felled seam (what we are doing on this tote) as well as an inside flat felled seam.


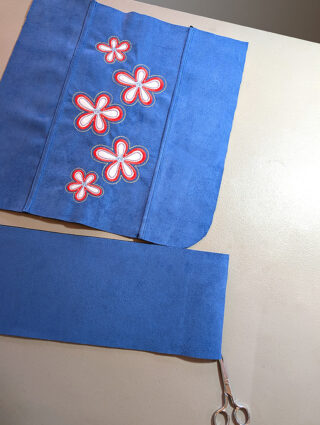
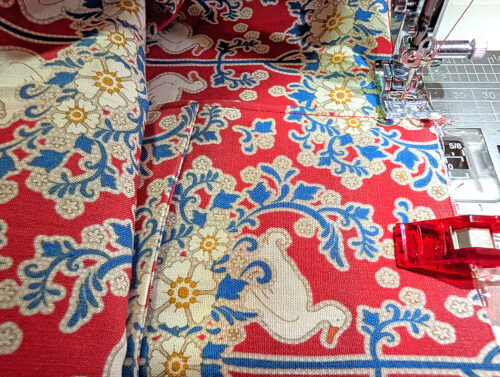
Complete the FRONT panel with its two flat felled seams
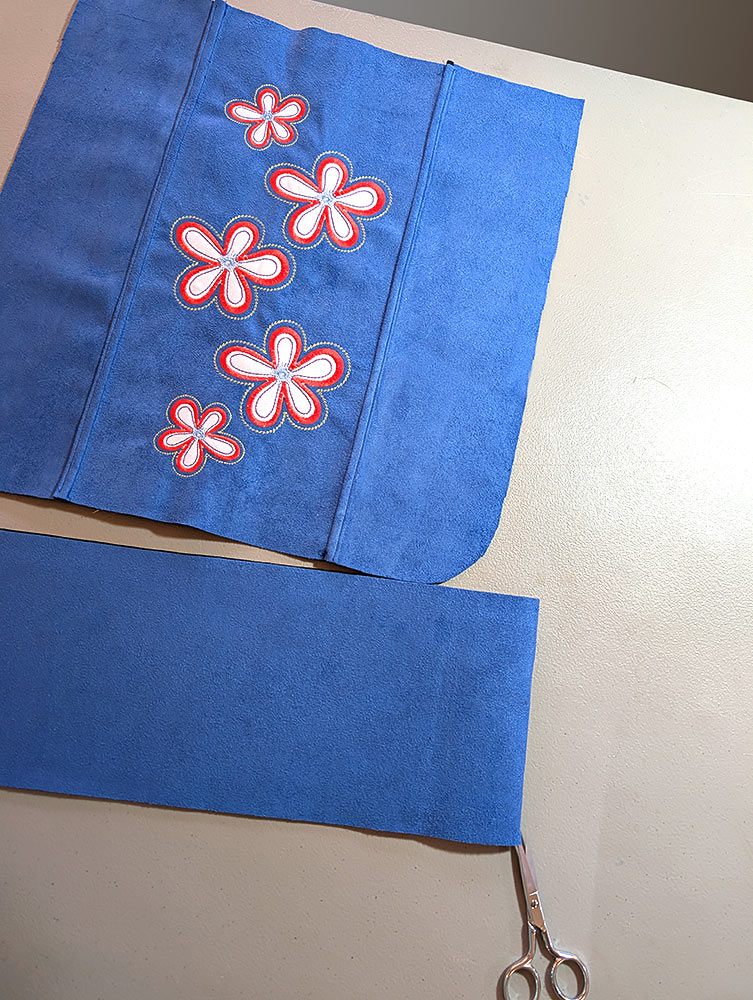
- The front panel is constructed is the same manner, but you have TWO flat felled seams, one to either side of the center panel.
- Gather all the elements and adhere the interfacing in the same manner as above.
- Clip/Pin one side panel to the center panel wrong sides together.
- Follow the same steps as above to complete the flat felled seam. Then, repeat for the second seam. Both seams fold toward their side panel – away from the center panel.

- This means the right side panel follows the exact same steps as the back panel seam for a finish with the folded seam facing the right edge of the completed panel. The left side panel is the exact opposite: cut the left side of the seam allowance, then fold and fold again toward the left side of the completed panel. Again, if need be, check out our full tutorial for more details.
Attach the exterior sidewall
- Find the sidewall fabric panel and interfacing panel. Center the interfacing on the wrong side of the fabric panel so there is ½” of fabric showing beyond the interfacing on all sides. Following manufacturer’s instructions, fuse in place.
- Find the completed front panel. Fold it in half to find the exact center along the bottom and mark this point with a small snip.

- Similarly, fold the sidewall in half to find its exact center point. Mark this center point with a snap on both outer edges of the side panel.
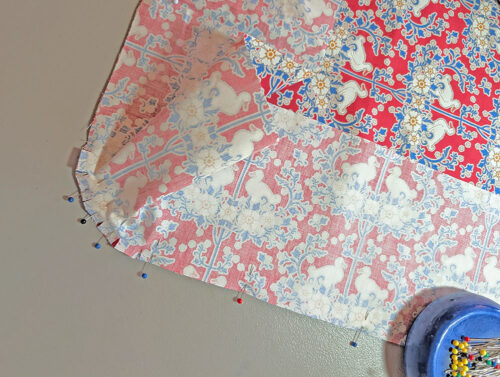
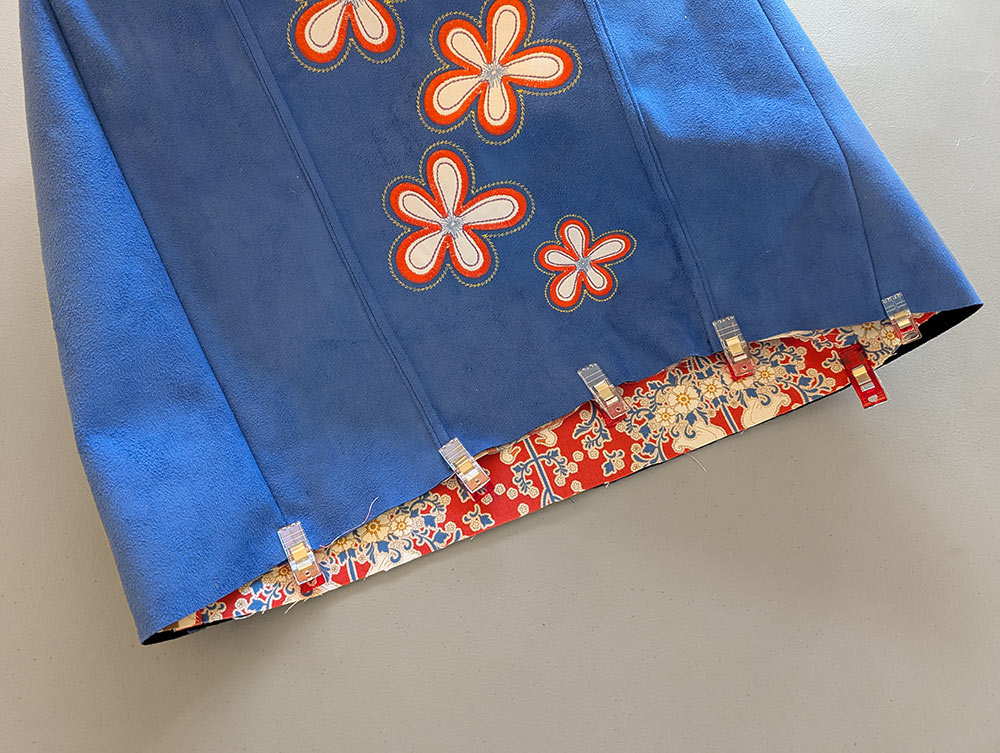
- Using these marked center points as your guide, align one edge of the sidewall to the front panel. Clip/Pin together first at the aligned center points, then continue pinning from the center point out, around the curved corners, and up the sides. Both ends of the sidewall should be flush with the top of the center panel. Around the curved corner, clip into the sidewall to help it curve. Keep those clips within the ½” seam allowance.
NOTE: For more information, check out our tutorial on sewing smoother curves.

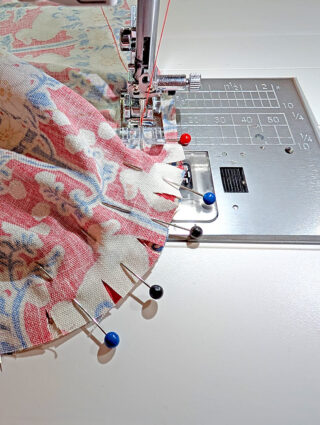
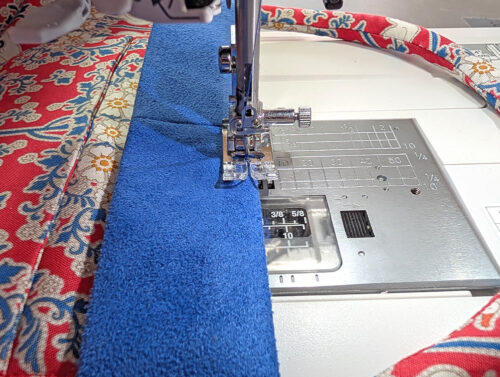
- Using a ½” seam allowance, stitch from one upper corner, down the side, around the first corner, across the bottom, around the second corner, and up the opposite side. As you sew around each corner, ease the sidewall into place, keeping the edges of the fabric flush.
- Repeat all these steps to attach the remaining raw edge of the sidewall to the back panel.
- Press the seam allowances towards the sidewall, turn the completed exterior right side out, and set aside.


Create the lining and combine with the exterior
- Re-thread the machine with thread to best match the lining in the top and bobbin.
- Find the front and back lining panels and the lining sidewall.
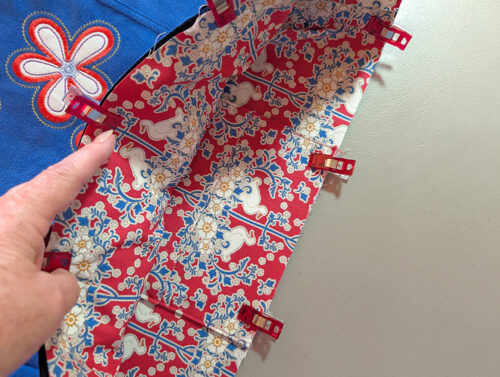
- The lining goes together in essentially the same manner as the exterior but without any interfacing or flat felled seams. Attach the sidewall just as you did above with the exterior.
- When stitching together, you’ll want to use the same small snips into the sidewall to help it ease around the curved corners.
- Find the exterior, which should be right side out. The lining should be wrong side out. Slip the lining inside the exterior so the two are now wrong sides together.

- Push the lining all the way down into the exterior. Align the sidewall seams. The upper edges should be flush. Clip/Pin around the top.


Create and place the lining pocket
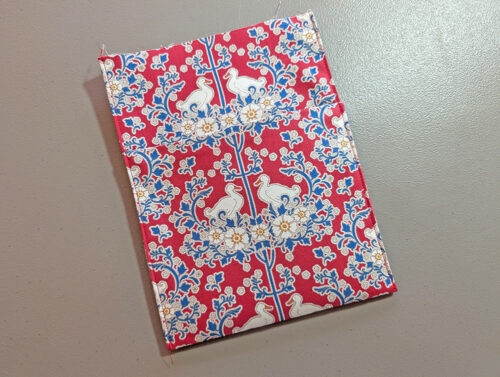
- Find the two pocket panels and the one panel of interfacing. When the pocket fabric was cut, we gave instructions for cutting one panel with the pattern right side up, and the second panel with the pattern upside down. Apply the interfacing to the wrong side of the piece with the pattern upside down. The interfacing should sit flush with the upper edge, and ½” from the remaining three sides.
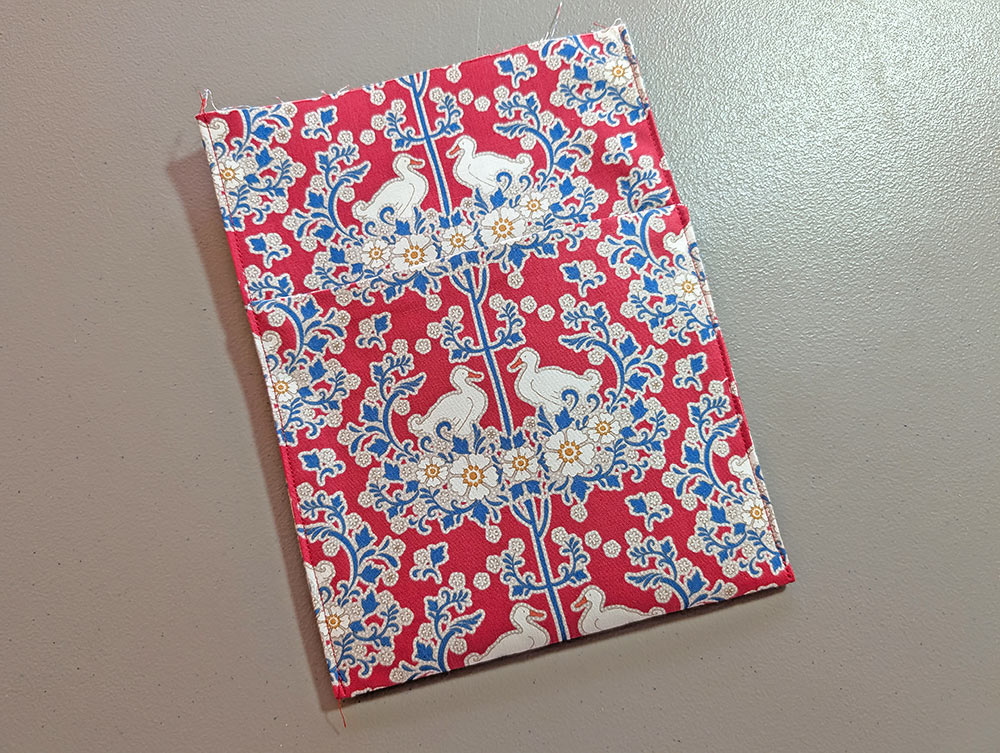
- Place the two pocket panels right sides together with the motifs opposite on one another. The un-interfaced/right side up panel against the interfaced/wrong side up panel. Pin along both sides and across the bottom. The upper edge (where the interfacing is flush) remains unpinned.
- Using a ½” seam allowance, stitch both sides and across the bottom, pivoting sharply at each bottom corner. The top edge remains un-sewn. Clip corners.
- Press open the seam allowance and turn the pocket right side out through the upper raw edge. Use a long, blunt tool to gently push out the bottom corners so they are nice and sharp. A long knitting needle, chopstick or point turner all work well. Press flat.
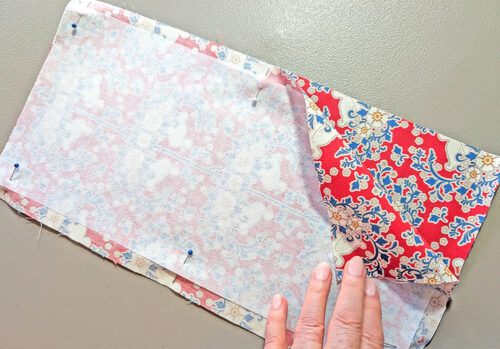
- Place the pocket on your work surface with the right-side-up-motif side showing.
- Find the original pocket pattern and use it to mark the fold line with a pin.
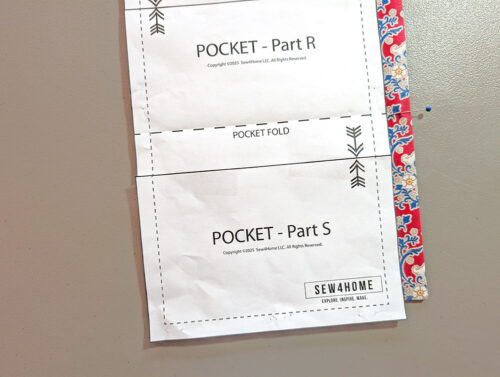
- Fold up along this marked line and pin both sides in place.
- Edgestitch from the top raw edge to the bottom fold along both sides.
- Place the pocket inside the tote, centering it against the back panel. Align the upper edge of the pocket with the upper edge of the tote and clip/pin in place.
- Machine baste through all the layers around the entire perimeter of the upper edge. We used a fully lengthened stitch (5.0 mm) and basted within the seam allowance, using the width of the foot as a guide.
NOTE: As mentioned during the cutting instructions, we spent extra time to fussy cut our pocket panels to create not only a perfect match when the panel folds up into position to form the pocket, but also for the pocket itself to match the background lining panel. If you’d like to learn more, take a look at our main fussy cutting tutorial as well as our tutorial on matching a pocket to a panel.


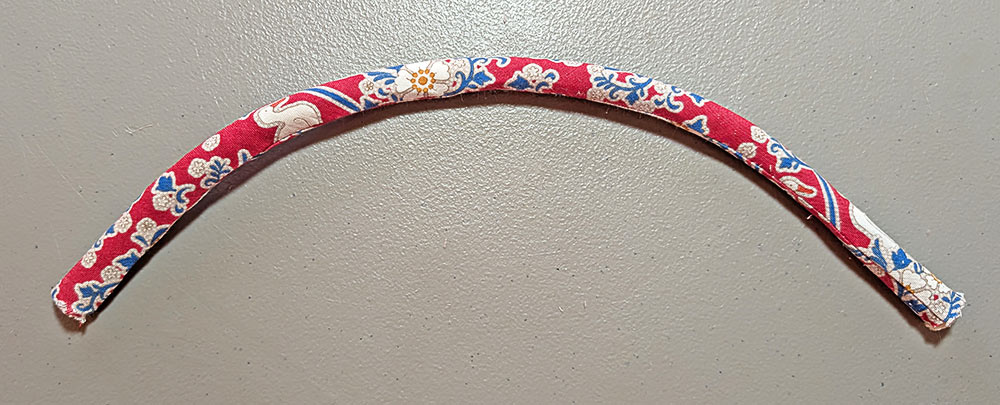
Create and place the handles
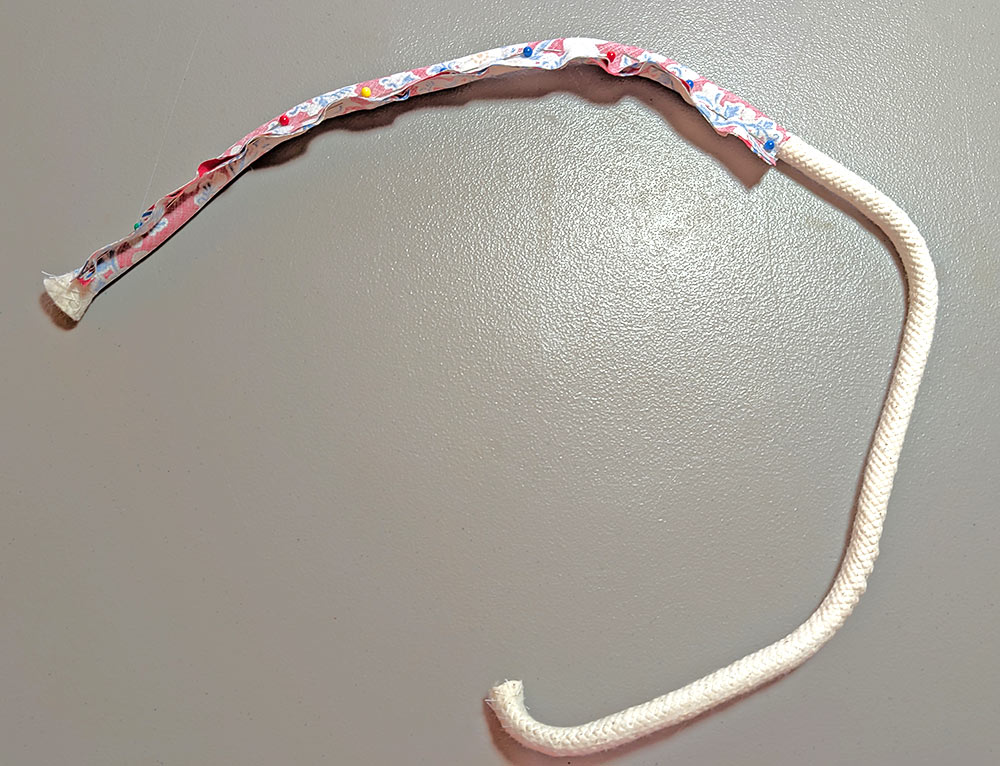
- Our handles are made from cotton cording covered with a bias cut strip. Find the two strips cut from the Handle pattern. Each should measure 13” in length.
- The cording should be cut twice the length of the strip plus 2” for a finished cut length of 28”. Cut two 28” lengths from the cording.
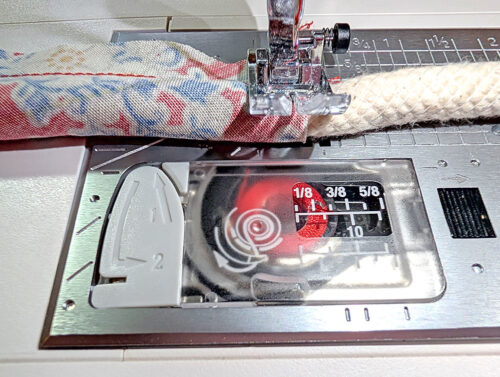
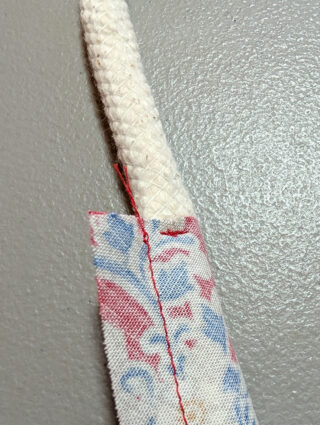
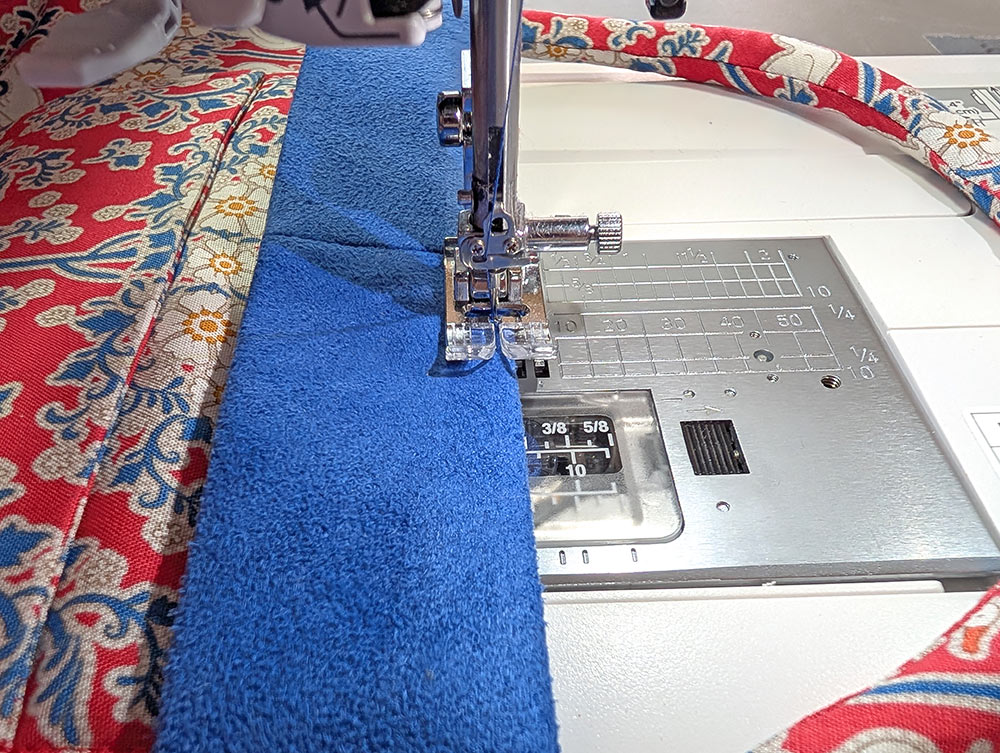
- Wrap one bias strip around one length of cording. The bias strip should be wrong side facing out. Leave ½” cording exposed at one end; the opposite end will be near the middle of the cording. Wrap the bias strip securely around the cording so the raw edges of the bias strip are flush. Pin in place, keeping the pins close to the cording. Notice the seam allowance is on the left as you pin.

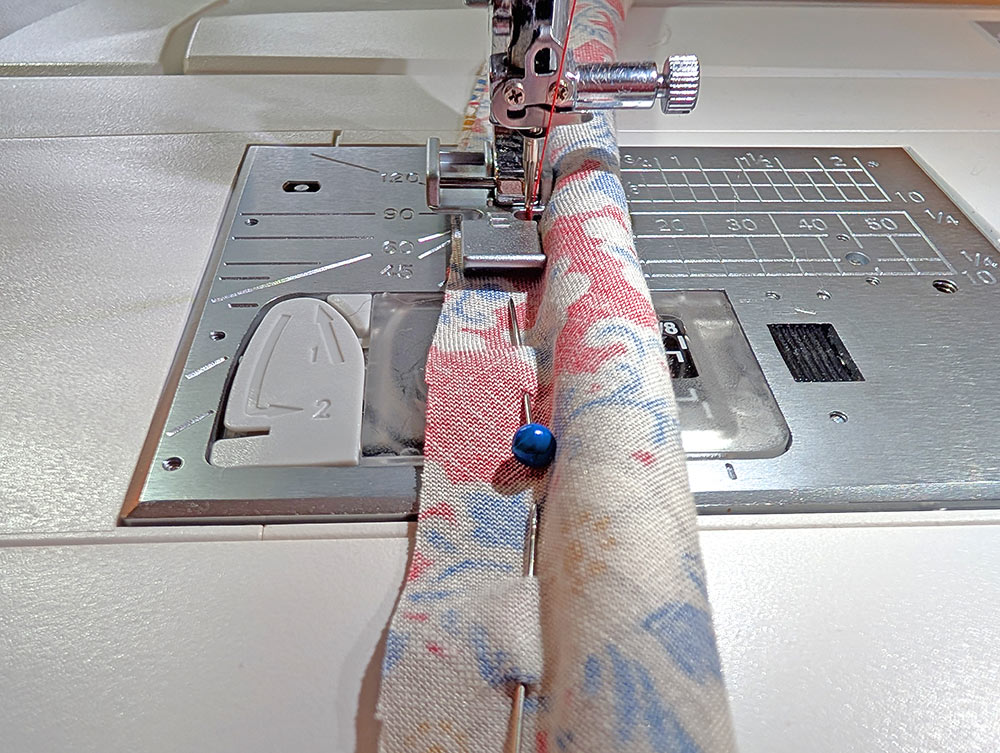
- Switch from the Standard foot to a Zipper foot, attaching the foot to the right attachment bar. Place the wrapped cording under the foot with the seam allowance on the left.
- Stitch closely along the cord, removing pins as you sew.

- When you have completed the seam, stitch across the end of the strip that is at the center of the length of cording.
- You need just a few stitches, placed about ⅛” from the end of the fabric. Back tack to secure.
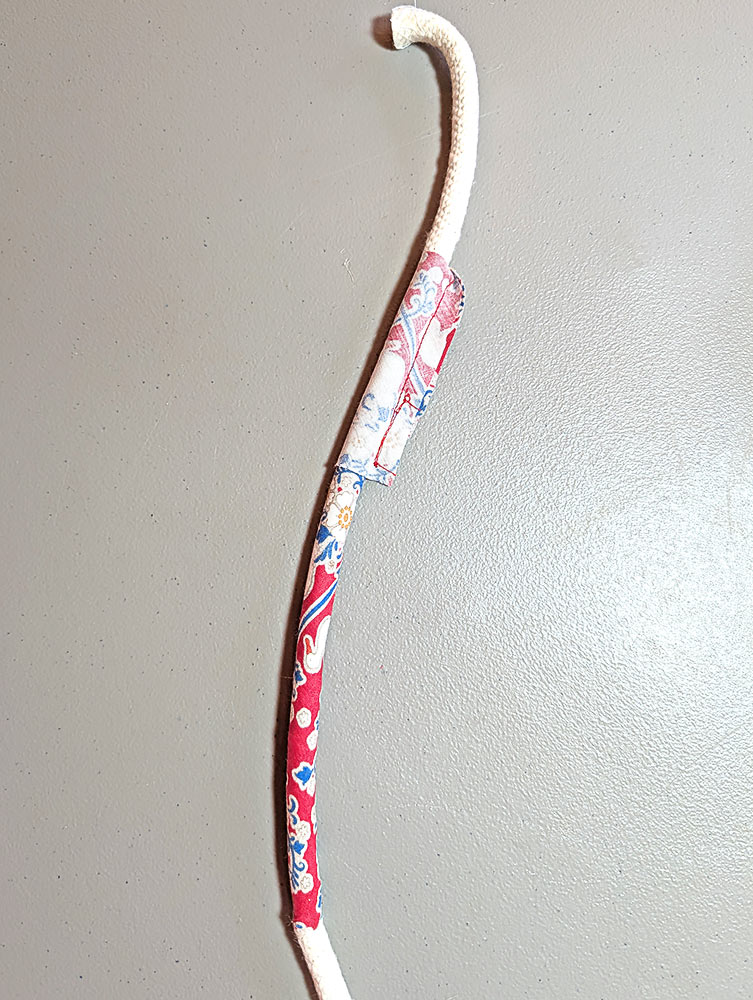
- To turn the bias strip right side out, pull on the short end of the cording, working the bias strip toward the long end of the cording.
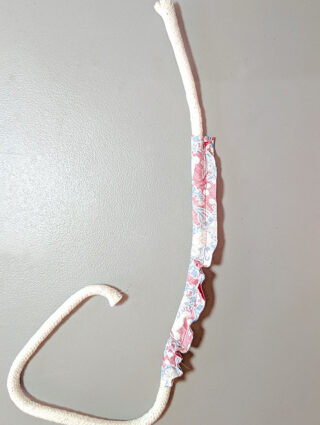
- Gently pull and watch in amazement as it smoothly turns itself right side out.
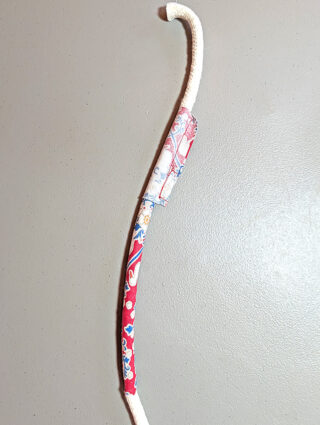
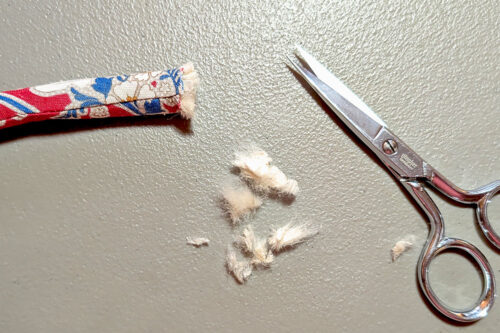
- Once the bias strip completely covers the cord, remove those few stitches that secured the end with your seam ripper. Smooth the bias strip over the cording and trim the cording flush with the fabric at each end.

- Also at each end, push back the fabric about ½” to reveal the cording. Use your scissors to cut away some of the “fluff” from the center of the cording. This will allow the ends of the handle to lay flatter once the facing is in place.
- Repeat to create the second handle.
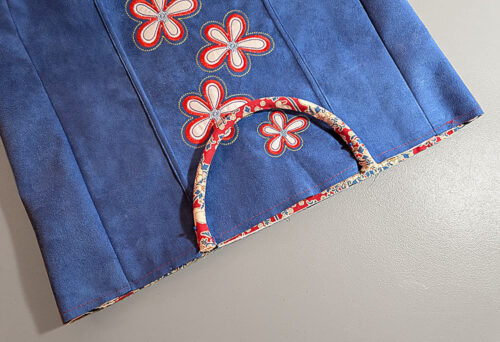
- Place the ends of handle at the upper edge of the tote, centering each handle. Use the flat felled seams on the tote front as a spacing guide, then match that spacing when placing the second handle against the back panel.
- Pin in place, then machine or hand baste the ends for extra security.


Add the facing
- Find the Facing fabric panel and interfacing panel.
- Place the interfacing panel on the wrong side of the fabric panel, centering it so there is ½” of fabric showing beyond the interfacing all around. Following manufacturer’s instructions, fuse in place.
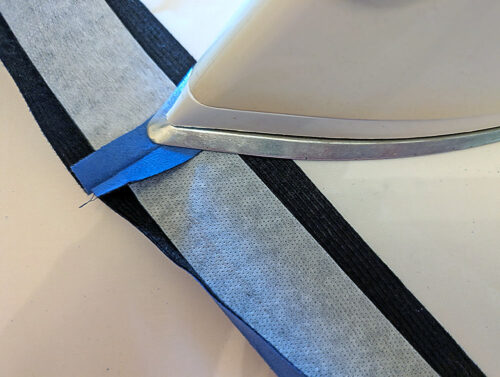
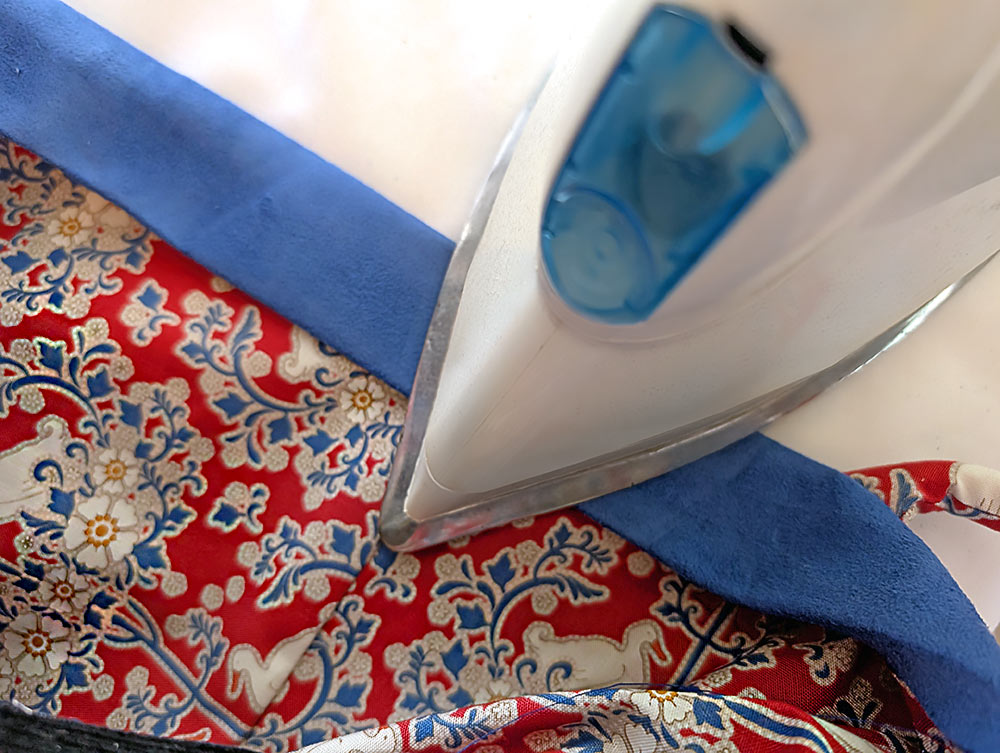
- Press back one long edge of the facing ½”.

- Place the ends of facing right sides together, unfolding the ½” fold so the raw edges are flat top to bottom. Pin in place.
- Using a ½” seam allowance, stitch the ends together, forming the facing into a loop. Press the seam allowance open and flat.
- Re-fold the original ½” all around the loop and press again.
- Find the tote. It should be right side out.
- Slip the facing over the tote so the facing and the tote are right sides together.
- The facing’s seam should be at the exact center back in line with the flat felled seam. The raw edge of the facing should be flush with the top raw edge of the tote. The folded edge of the facing is hanging down. Pin all the way around the top of the tote through all the layers.

- Switch back to a standard presser foot and re-thread with thread to best match the exterior in the top and bobbin.
- Using a ½” seam allowance, stitch all the way around the tote, starting and stopping at the facing’s seam. Go slowly and carefully over the handles. We recommend back stitching across each end of each handle for extra security.
- Fold the facing down toward the lining and press in place. If your fabric is particularly heavy, you may want to consider grading the seam.

- Edgestitch along the upper edge around the entire top of the tote.
- Then stitch around once more along the folded edge of the facing through all layers.


Project Design: Anne Adams
Sample Creation and Construction Direction: Michele Mishler
Pattern & directions are a delight – very clear and straightforward. I’m not a machine embroiderer, so mixed & matched fabrics for interest. Added shoulder straps as well. very happy with this. Thank you sew4home!
sorry I can’t post a photo…
Hi Alinda – Thank you so much. We’re super happy to know you had such success and that you customized it to make it just right for you. If you follow us on social, we’d love to see a pic. We are sew4home on Facebook and Pinterest, and sew4home_diy on Instagram.
What a beautiful, quality tote! It is several notches up from most DIY totes found on-line! Not only does the tote design impress me but also the well marked pattern and the sewing instructions. WOW! Very professional all around!
Thank you so much, Joan! We hope you enjoy making this beautiful bag. Make sure to come back often, and be sure to tell all your friends about our quality techniques and projects 🙂