
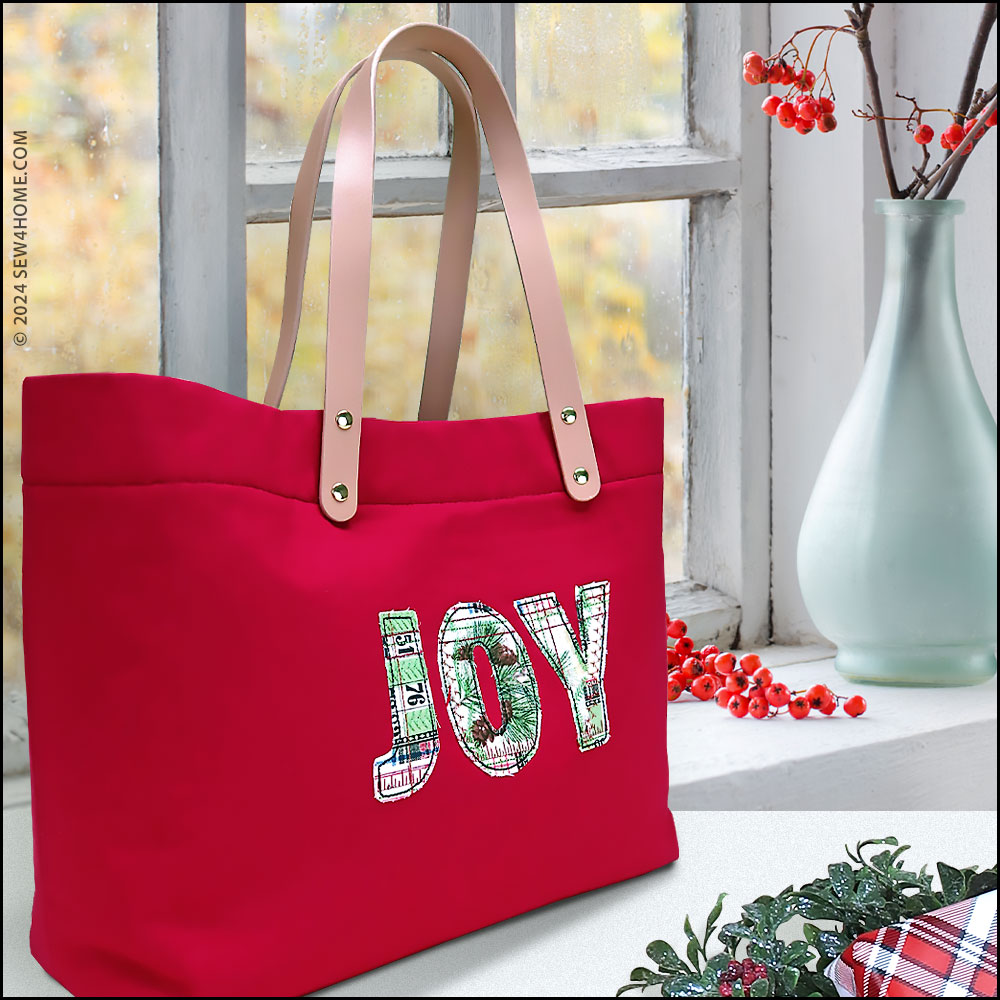
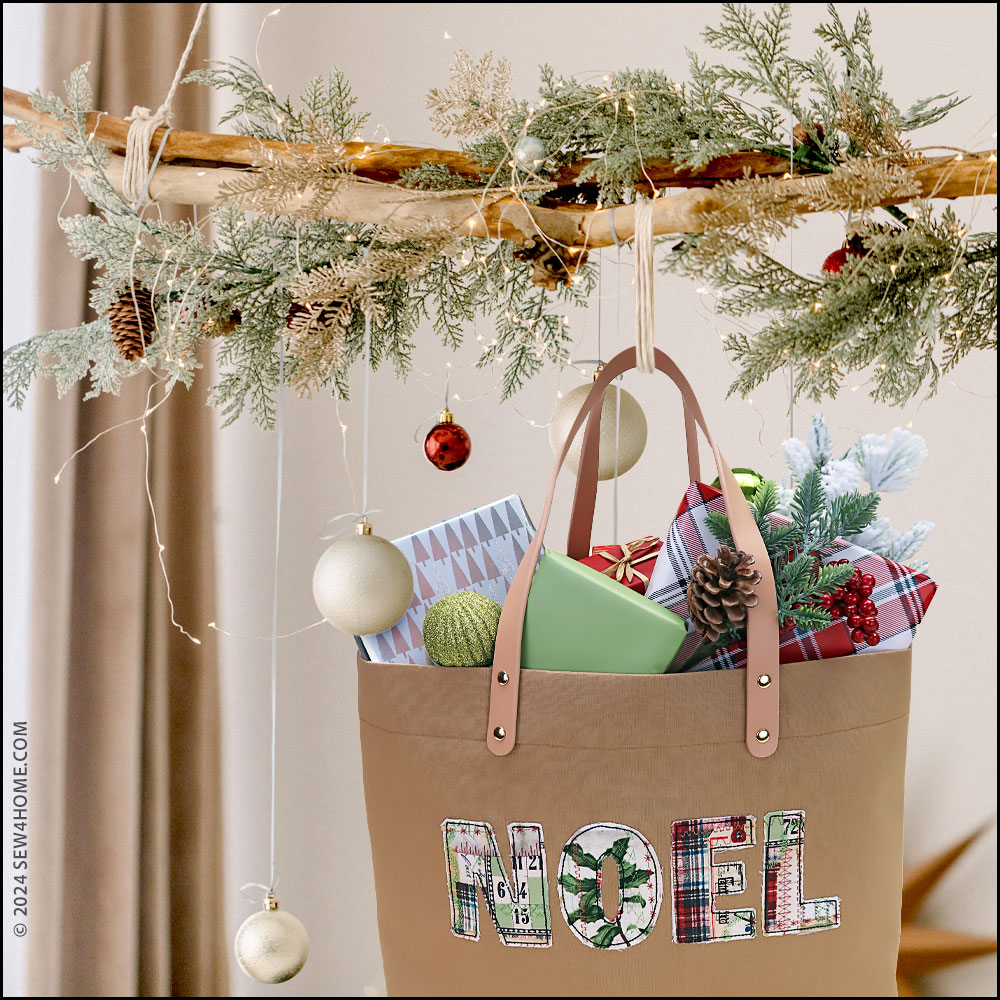
We grabbed the idea, added our S4H spin, and bring you a DIY version that’s easy to make, bright and bold, and features a customizable appliqué to celebrate the season or name the tote’s recipient.
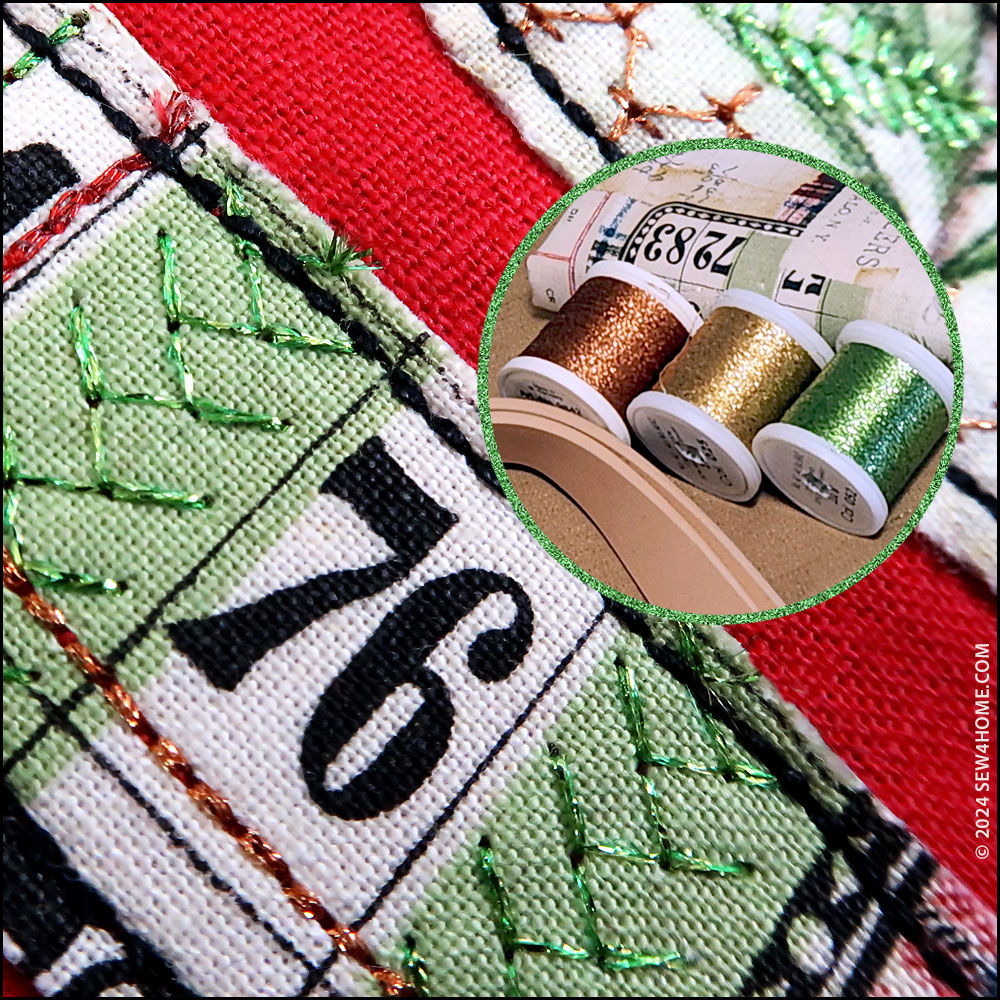
Since we love the variety of decorative stitches on our Janome machines, we wanted to add a bit of machine magic to the appliqué embellishment. Look closely at our samples and you’ll spot the beautiful decorative stitching within each of the letters; we did our stitching in a variety of metallic thread colors.
The Janome machine for this project was the sewing and embroidery Skyline S9. We absolutely love all the Skyline models, but the S9 is a particular favorite because it incorporates popular embroidery features and built-in designs but at a very affordable price and in a compact size that comfortably fits smaller sewing spaces. Small in stature does not mean small in features or power. It has a maximum embroidery size of 6.7″ x 7.9″ and sewing speeds up to 1000 SPM. Plus, for the decorative stitching we wanted on these totes, we had nearly 300 built-in stitches from which to choose!
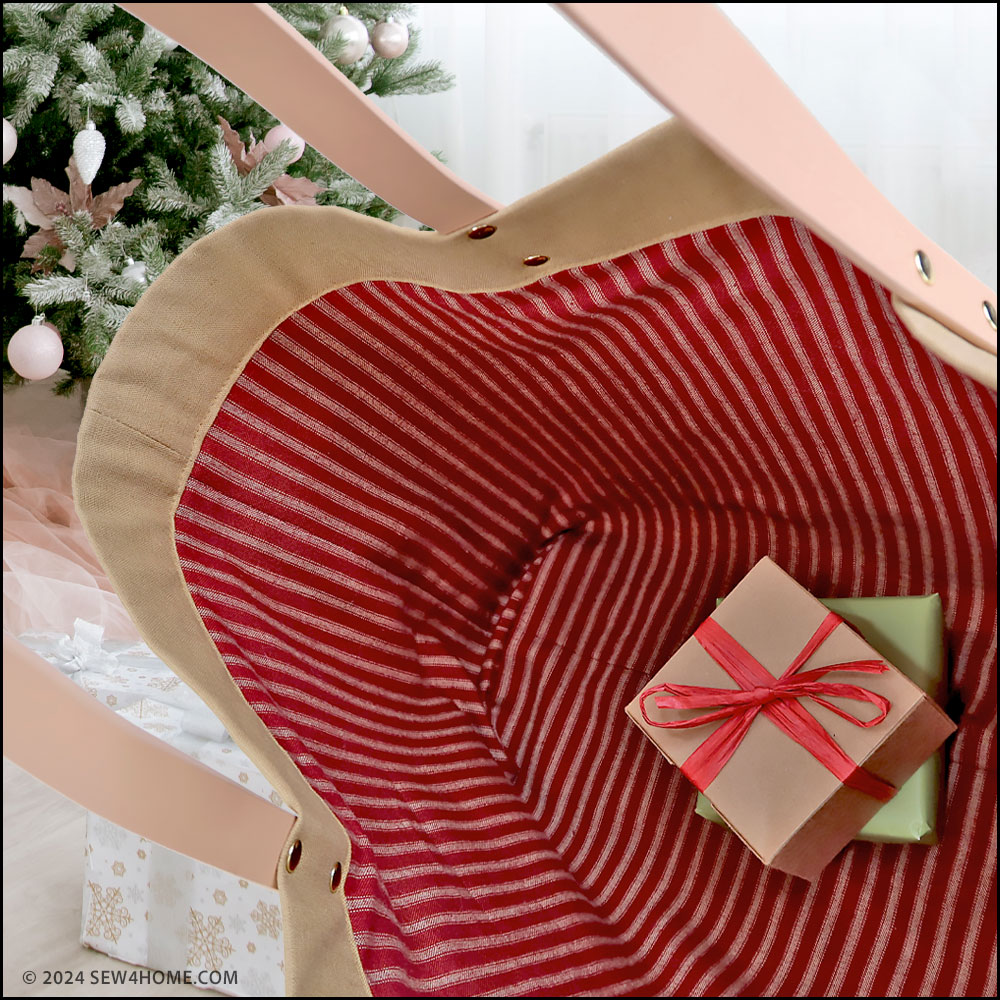
Our samples are made with a linen/cotton blend for the exterior and a quilting cotton for the lining in a homespun stripe that adds a fun pop of color on the inside. There’s just a single layer of fusible fleece to add a bit of structure. The finished totes are soft and flexible so they’re easy for Santa (and Santa’s helpers) to load up with lots of packages. And, they’re lightweight enough to hang — even if you don’t have a chimney.
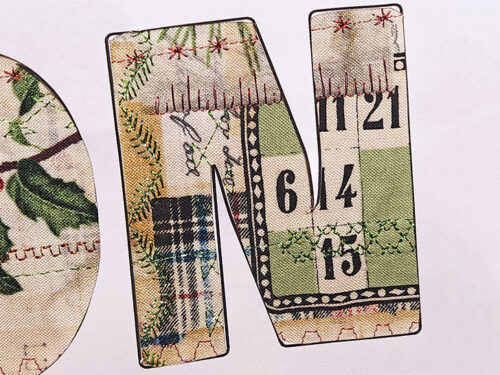
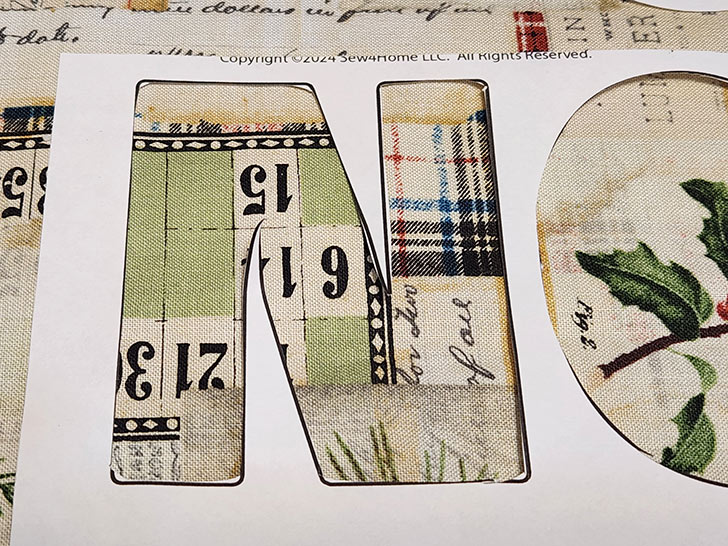
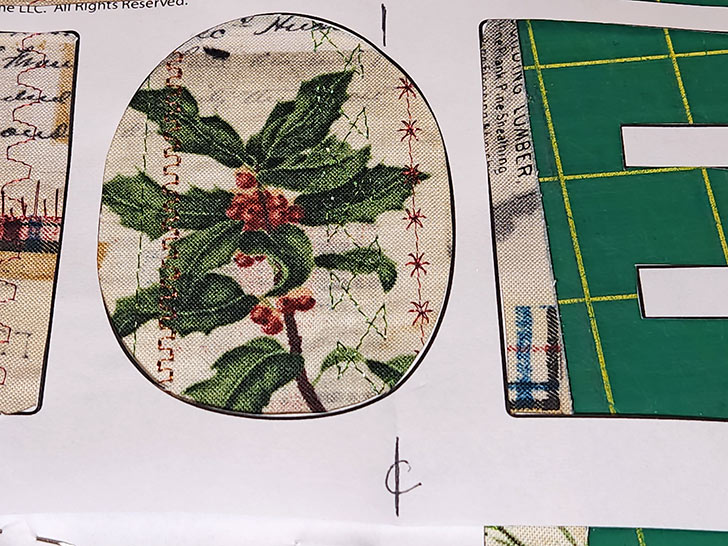
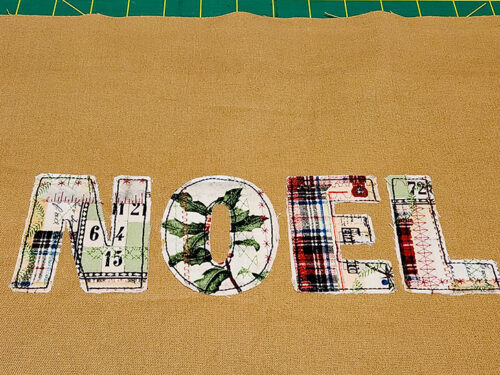
When choosing the fabric for your appliqué, look for a smaller motif with a variety of images and colors. We originally used Woodland Collage from the Holidays Past collection by Tim Holtz for FreeSpirit Fabrics. It checked all the boxes with lots of different areas to highlight in both light and dark tones. You can spot a classic red plaid, deep green holly, and pine tree sprigs peeking out within each of our JOY and NOEL appliqués.
Do you like these seasonal phrases? Scroll down to find a FREE download for both of these templates as well as a full alphabet so you can build your own word or name. Our step-by-step instructions show you how to get perfect placement using an appliqué “frame” technique. Even if you’re just starting out, you can have success with this combination of window frame placement and raw-edge stitching.

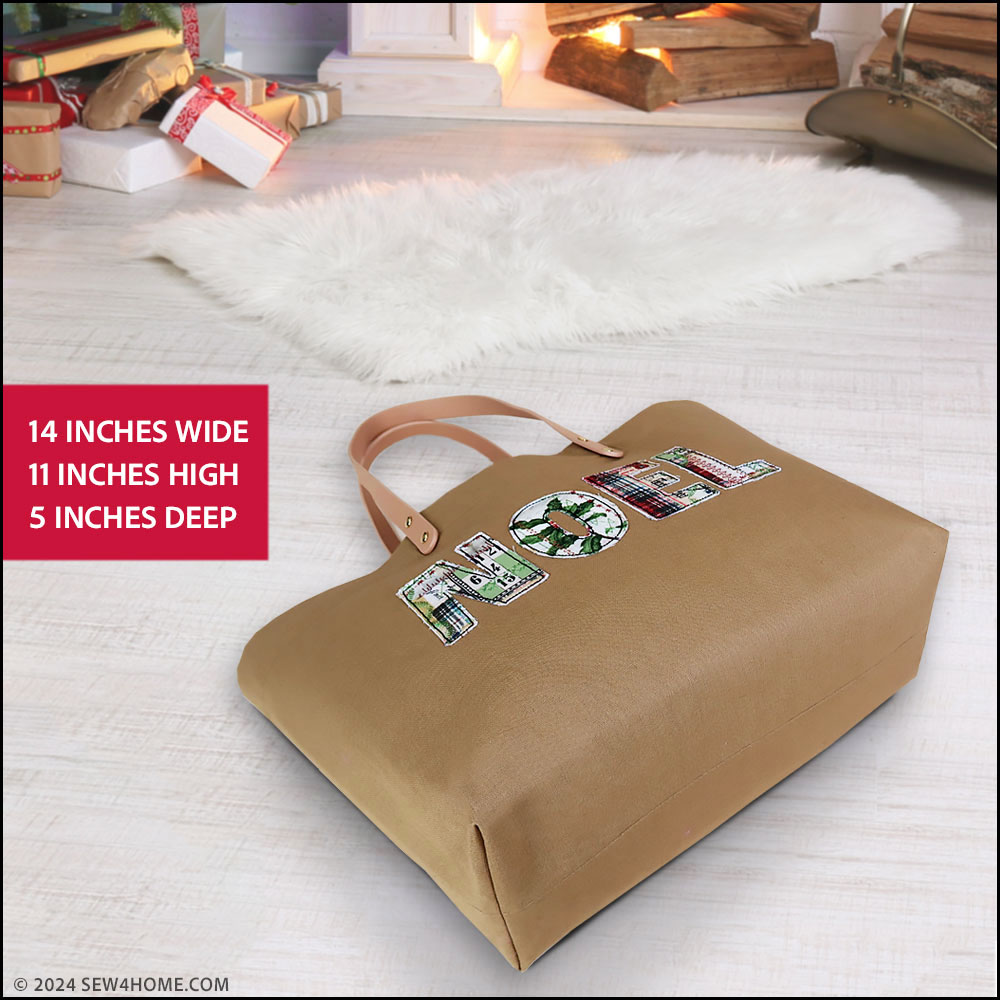
Our Colorful Holiday Tote finishes at approximately 14” wide x 11” high with 5” deep corners and double handles with an 8” drop.
Our thanks again to Janome America for sponsoring the project. Their support is what helps us to be able to continue to offer the majority of our projects free to you! Remember, your sewing machine should be your friend. You shouldn’t have to battle it for control or worry about it skipping, jamming or worse. You deserve frustration free sewing. Because when you are confident in your machine’s performance, worry disappears, and all you need to concentrate on is creativity.
To understand why we are a Janome Exclusive Studio, we invite you to visit a local Janome dealer for an in-person test stitch on the machines we consider to be the best in the industry. To find out more before you go, visit the Janome website and follow them on social media.
Sewing Tools You Need

- Sewing Machine and standard presser foot
- Satin Stitch foot, Open Toe Satin Stitch foot or your favorite clear-view foot for decorative stitching; optional
- Appliqué foot; optional
- Even Feed/Walking foot or engage your machine’s built-in feeding system; such as the Janome AcuFeed™ Flex built-in fabric feeding system, which is what we used. This is optional but is our recommendation to keep the final topstitching straight and precise.
Fabric and Other Supplies
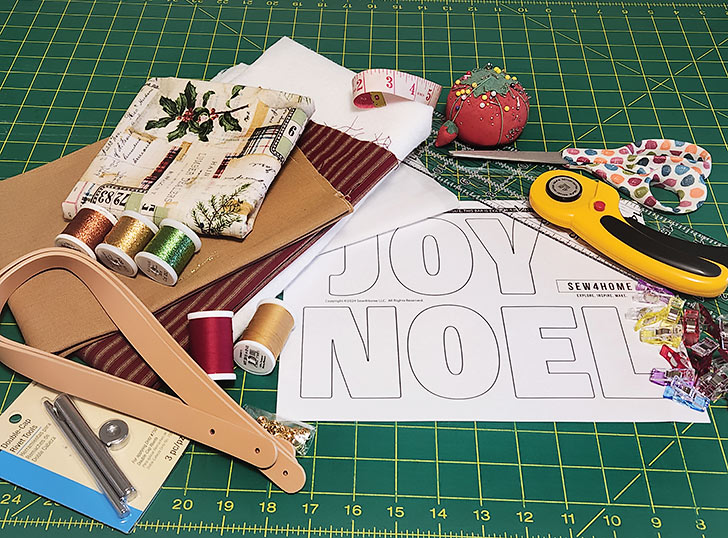
NOTE: The supplies listed are for ONE Holiday Tote.
- ½ yard of 44”+ wide mid-weight linen, linen blend or similar for the exterior of the tote; we originally used Essex Linen (a linen/cotton blend) from Robert Kaufman Fabrics in Crimson and Leather
- ½ yard of 44”+ wide quilting weight cotton in a coordinating print for the lining of the tote; we originally used Homespun Primitive Stripe from Sunny Slope Farms on Etsy in 37 Red & Tan and 36 Red & Tan
- Scrap or approximately ¼ yard of festive fabric for your appliqué; we originally used Woodland Collage from the Holidays Past collection by Tim Holtz for FreeSpirit Fabrics
NOTE: You’ll want to practice, so you may want to purchase ⅓ or ½ yard of your festive fabric to insure you have plenty of motif area from which to choose. And when selecting your fabric, remember you want something with a variety of colors and patterns so there is something interesting within each of the appliqué letters. - ONE pair of leather or faux leather handles; we used a faux leather set, with its own gold tone rivets, measuring apx. 21” end-to-end, resulting in an 8” drop from the top of the curve to the top of the tote.
- Double cap rivets to attach handles; as mentioned above, our handles came with gold tone double cap rivets
NOTE: The type of handles is totally up to you. You could decide to go with shorter or longer handles, opt for bamboo or balsa, or even create your own corded handles. - Rivet tools to match your double cap rivets; we used Dritz Rivet Tools
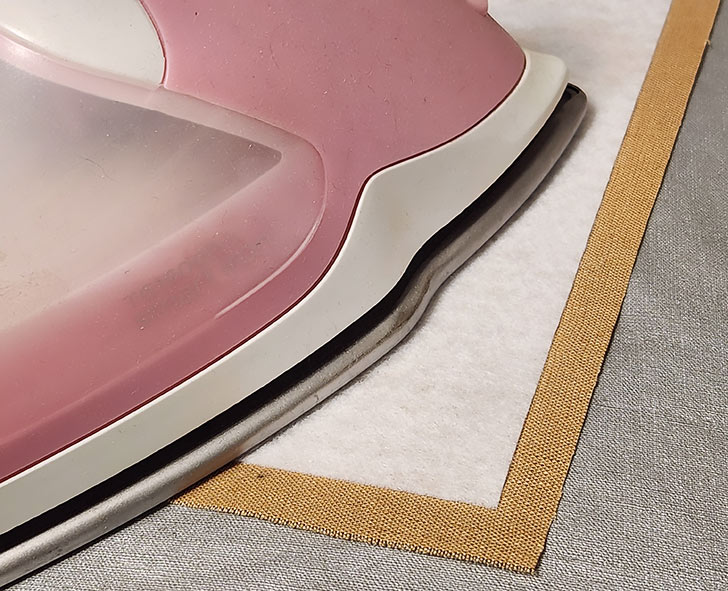
- ½ yard of 45”+ fusible fleece; we used Pellon Thermolam one-sided fusible fleece
- ¼ yard of 17”+ wide fusible/transfer web; we used Pellon Wonder Under
NOTE: If new to appliqué and planning to do several tests, opt for ½ yard or even more – you can always keep the extra for appliqué projects down the road. - ¼ yard of 20” plus lightweight fusible interfacing for the decorative stitching process prior to appliquéing; we used Pellon Shape-Flex
NOTE: As above, feel free to get a bit more so you have plenty with which to practice. - All-purpose thread to match fabric for construction
- All-purpose thread in a slightly contrasting color to your exterior fabric for the final topstitching; we used a slightly lighter red for the Crimson tote and a slightly darker tan for the Leather tote
- Multiple colors of thread for the decorative stitching, we used an assortment of metallic thread in holiday tones (red, green, copper, silver, and gold) plus ONE dark color (we used solid black) for the final appliqué stitch that adheres each letter
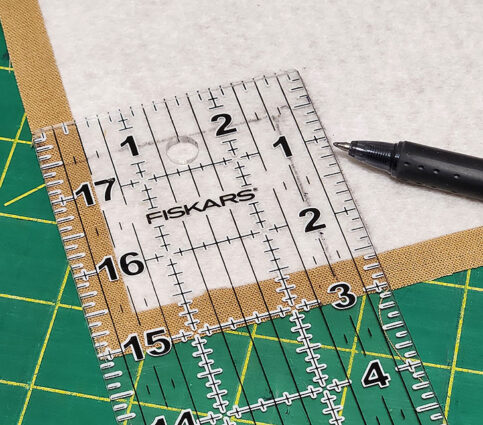
- See-through ruler
- Fabric pen or pencil
- Iron and ironing board
- Scissors
- Rotary cutter and mat
- Seam gauge
- Seam ripper
- Straight pins
- Hand sewing needle
- Small hammer to set rivets; we recommend a ball peen hammer
- Heavy metal, stone or wooden block to use as a cutting and hammering surface; we like to use a small granite block
Getting Started and Appliqué Template Download
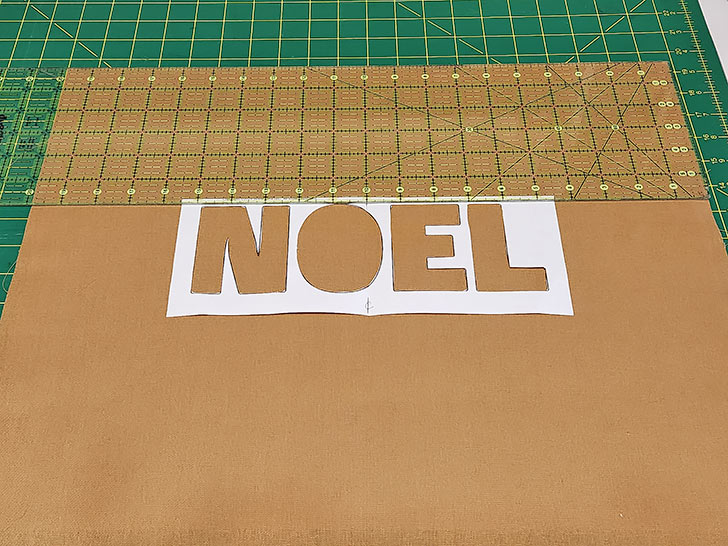
- Download and print the appliqué templates. We offer the two “seasonal words” we used on our samples: NOEL and JOY along with a full alphabet so you can build your own words or names.

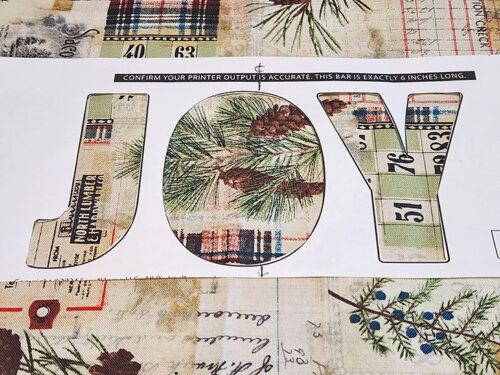
NOTE: This download consists of SIX 8½” x 11″sheets. You must print the PDF file at 100%. DO NOT SCALE to fit the page. There is a guide rule on each sheet to confirm your printout is to scale. Print horizontally (landscape). You can use the“select pages”option in your print browser should you not wish to print all the pages. - From the fabric for the exterior of the tote, cut TWO 20” wide x 16½” high panels.
- From the fabric for the lining of the tote, cut TWO 19¾” wide x 13¾” high panels.
NOTE: The size of these panels is reduced by ¼” from the exterior panels to account for the thickness of the fusible fleece that will be adhered to the exterior panels. - From the fusible fleece, cut TWO 19” wide x 13½” high panels.
- The lightweight fusible, fusible web, and the actual appliqué fabric will be cut based on the amount of practicing you wish to do and the letters you have chosen.
At Your Sewing Machine & Ironing Board
Planning, stitching, and cutting your appliqué letters
- Our steps show how we used the two provided “word templates” – NOEL and JOY. You can do the same or use the complete alphabet to build your own word or name.

- We are using the “window frame” method of creating our letters and recommend you do the same. If building your own word, you’ll still want to create your own “window template.”
- To do this, the two most important things to remember when working with lettering are: 1) give yourself both an upper and lower guide line on which to align each letter, and 2) when nesting the letters (called “kerning” in design), err on the side of what feels almost too close. Most people space lettering too far apart. Your word will look better if letters are more tightly nested. For example, in our word JOY, the top angle of the Y snugs up to the top of the O.
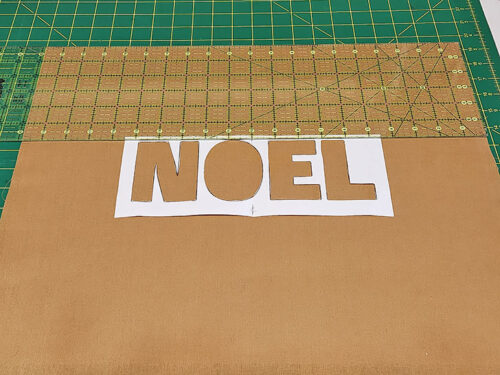
- Align the letters you’ve chosen on your cutting mat first. When you have them kerned to your liking, tape them in place on the mat. Bear in mind that the final width of your word/name should not be wider than about 9½” – 10” (the approximate width of our word NOEL) in order to center nicely on the font of the bag.
- Place a piece of tissue paper over the taped-in-place letters and trace the entire word onto the tissue. You can now use this template in the same manner as we show below.
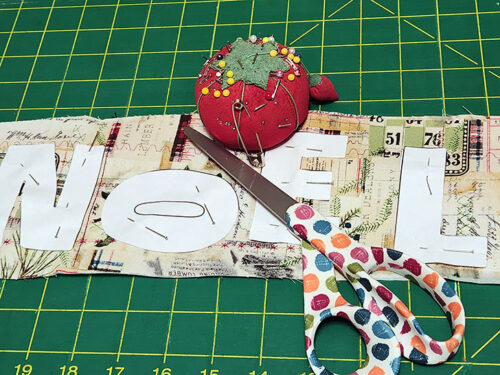
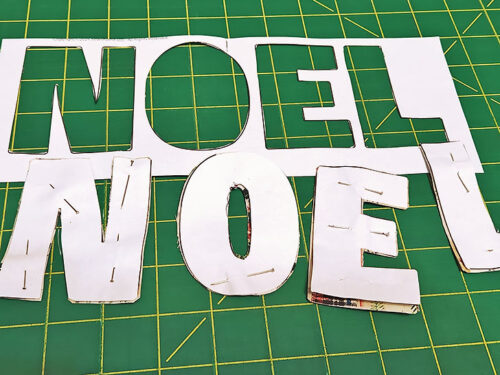
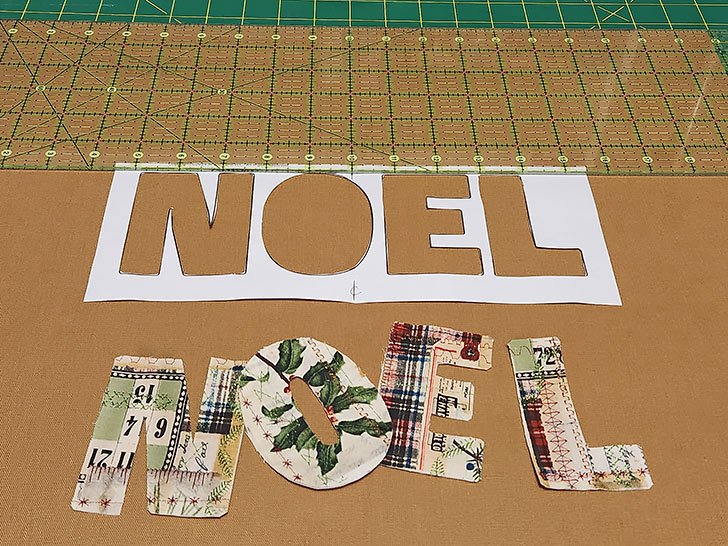
NOTE: If you’d like to see more about how to build your own word, take a look at our WordPlay Messenger Bag, which uses the technique. - Cut out the letters from the template. Save both the individual letters and the window frame.
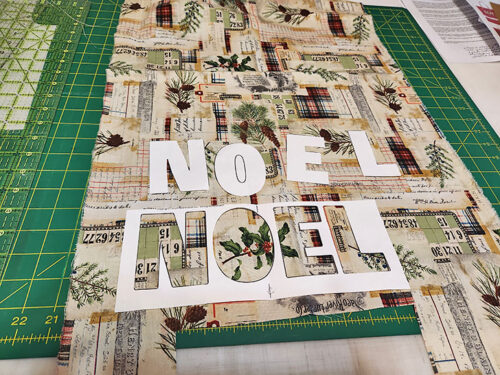
- Find the fabric you’re using for the appliqué letters. Using the window frame, move around the fabric to find the best area for each letter.
- Depending on your word and your fabric, you may be able to find the perfect position for all the letters in one place. This was the case for our JOY window frame.
- In other situations, you may need or want to choose the position for each letter separately. This was the path we chose for our NOEL frame.

- If going letter by letter is your choice, use the window frame to first confirm the position, then pin the actual letter in place through the frame.
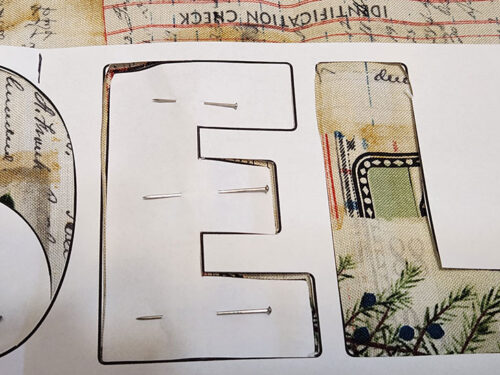
- Remove the frame and cut a generous square around each single letter. This is known as “cutting wild.” In other words, you are not yet cutting out the letter, just a “wild” square around the letter.
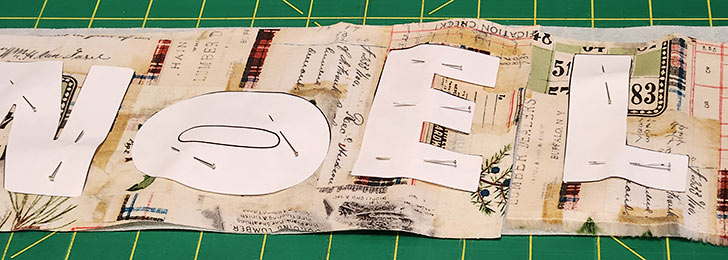
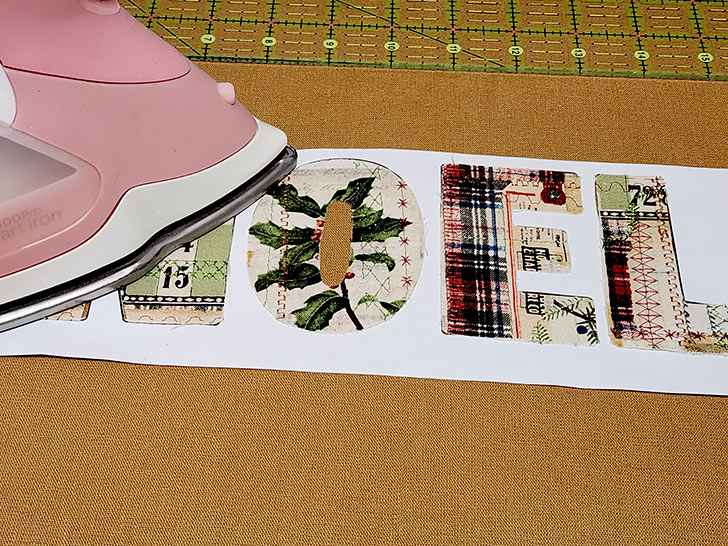
- Once all your “wild letter squares” are cut, position them end-to-end on the lightweight fusible stabilizer. This allows you to add the decorative stitching on a single strip of fabric.

- Even if you have just one wild-cut square/rectangle around your work, as we did with JOY, you still need to adhere the fabric to the lightweight fusible stabilizer. The quilting weight cotton needs the stabilizer to support it during the decorative stitching.

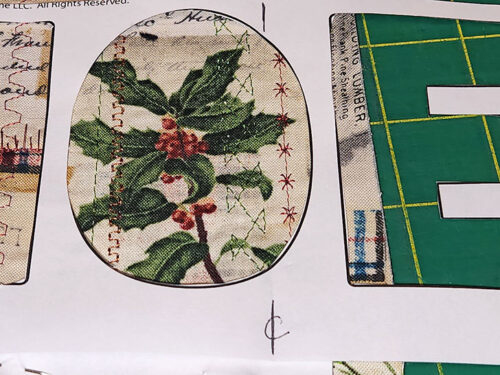
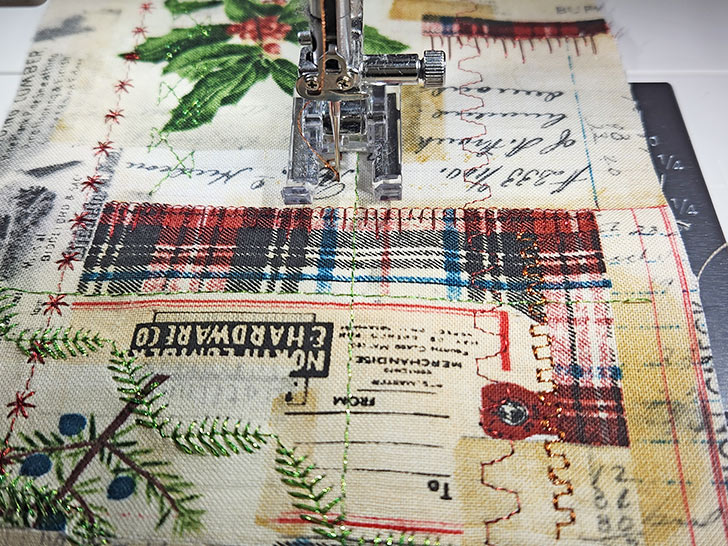
- With your appliqué fabric stabilized, you’re ready to add some random lines of decorative stitching in a variety of colors and stitch patterns. As mentioned above, we used metallic thread in holiday tones of gold, red, green, silver, and copper. The stitches we selected on our Janome Skyline S9 included: Heirloom #8, Quilting Stitches #18, #26, #27, and Long #14.
NOTE: As always with decorative stitching, practice first on scraps to confirm the color as well as the stitch length and width are to your liking prior to starting in on your final fabric.
- For our Woodland Collage fabric, we chose to use our decorative stitching to fill in blank spaces in the motif and to highlight the vibrant plaid within the design.
- The decorative lines of stitching should be random and can even cross over one another. We found it helpful to keep the window frame next to the sewing machine as stitching to periodically check and make sure the stitches will show up well once the letters are cut out.
- Once you’re happy with your embellishments, apply the fusible web to the back of the entire fabric panel. Yes, you are applying it over that lightweight stabilizer. Not only will the fusible web allow for the appliqué placement, it will help keep the stitches from coming out as you cut out the letters.
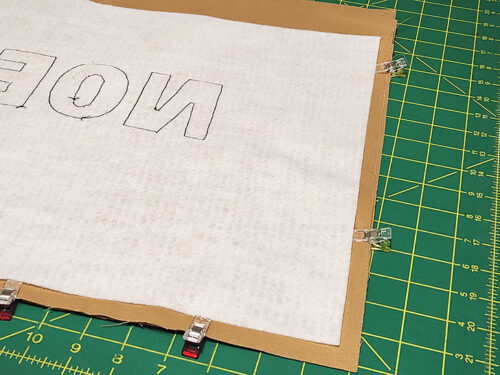
- With the fusible web in place, lay the window frame back over the fabric to find the exact placement for each letter.
- Place each paper letter into place through the frame and pin the letter to the fabric.
- When all your letters are pinned to the fabric, remove the window frame.
NOTE: If going letter-by-letter, your individual letters may not be all in a row as you place them. You may still need to use the frame to place them individually for the best show-through of the decorative stitching. You can see this in the image below where our “O” is laying on its side and the other letters are a bit staggered. This is totally okay! You main goal is to be get a lovely motif and lots of stitching within each letter.
- Cut out the letters and you’re ready for the application phase.
NOTE: If you are brand new to appliqué, the steps here are quite detailed, but if you’d like to read even more about it, take a look at our full tutorial: How to Appliqué Like a Pro.


Preparing the exterior panels and placing the appliqué letters
- Find the two exterior panels and the two panels of fusible fleece.
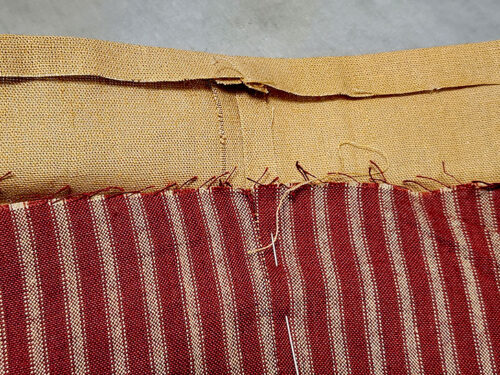
- Place a panel of fleece on the wrong side of each exterior panel, centering it side to side and with ½” of fabric showing beyond the fleece along the bottom and 2½” of fabric showing beyond the fleece along the top. Following manufacturer’s instructions, fuse in place.

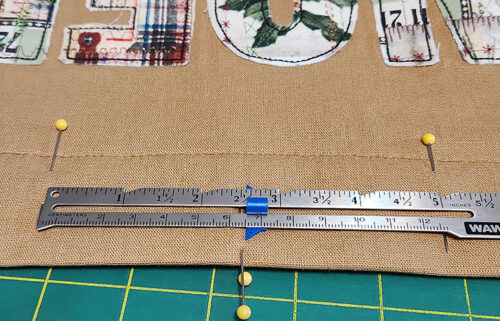
- Collect the window frame once again and measure to find the center of your word. Mark this center point.
- Place the frame on one panel. This will become your front panel. Both of the panels should be identical at this point, but if for any reason you feel one is better than the other, choose it as the front.
- Center the frame side to side so the top of the letters are 6” down from the top raw edge of the panel.
- You may want to lightly pin or tape the frame in place so there’s no shifting. Then collect your letters.

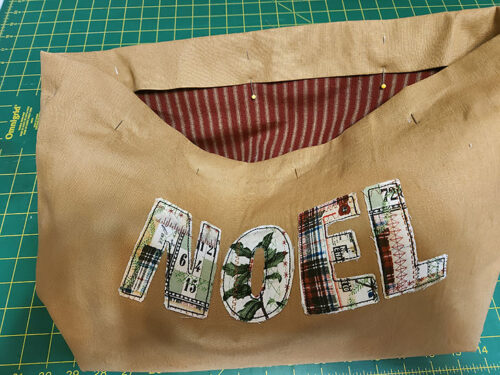
- Peel the backing of the fusible web from the back of each letter, leaving a sticky layer, and place each letter back into its window.

- Press lightly to keep it all in place before you remove the window frame.
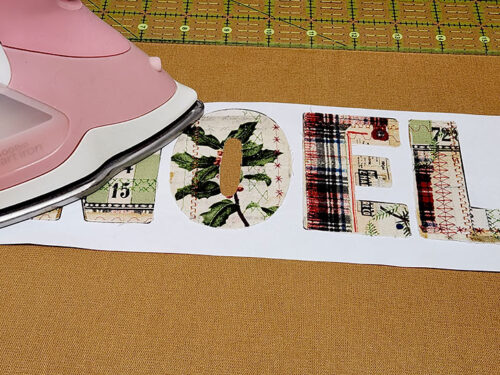
- With the letters lightly adhered, remove the frame, bring the panel to your ironing board, and press the letters firmly into place.
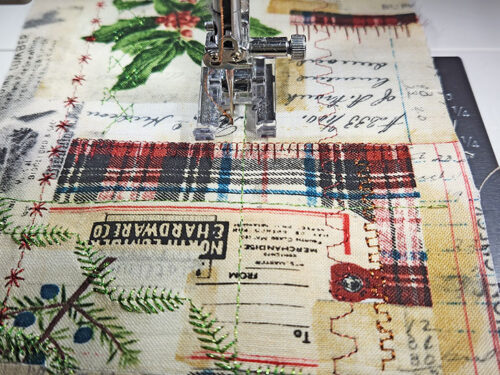
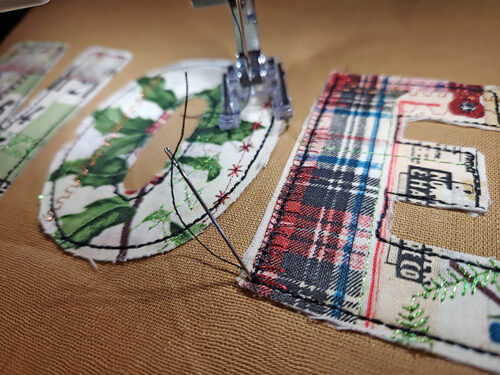
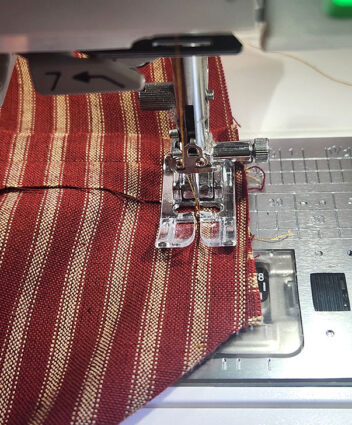
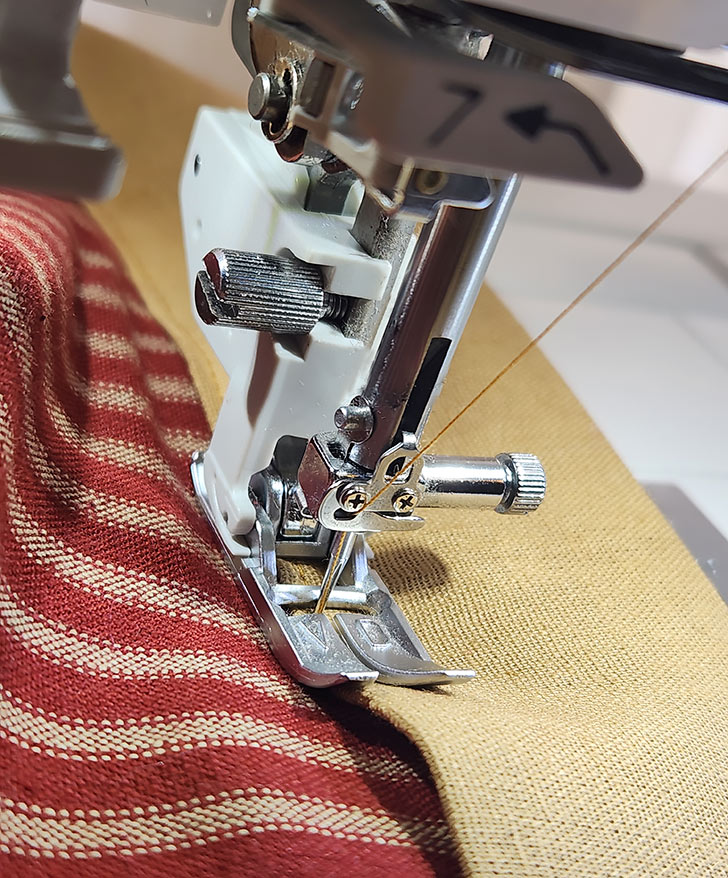
- Re-thread the machine, top and bobbin, with the darker thread you decided on for your appliqué edgestitch – we used a solid black.
- Attach your favorite foot for appliqué; we used the Janome Open Toe Satin Stitch foot.
- Set up for a Triple Stitch (Utility stitch #5 on our Janome S9) or a similar heavy straight stitch,
- Stitch along the raw edges of each letter.
- For appliqué, we recommend not using an auto thread cutter. Instead, start and end with a long tail of thread.
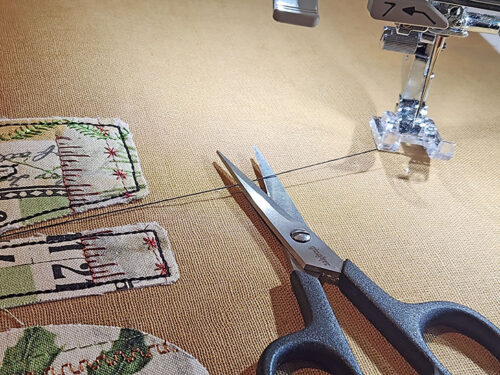
- You can then pull the thread to the back and knot the tails to secure. You might need to use a hand sewing needle to bring the thread to the back. For appliqué, we feel this gives each letter a smoother finish all around.
- Once complete, press firmly once again.


Seam and box the corners of both the exterior and the lining
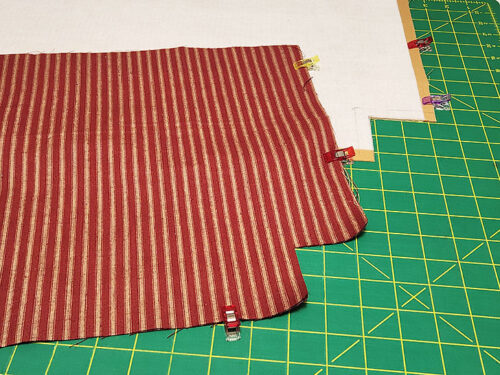
- Find the plain exterior back panel and place it right sides together with the appliquéd front panel. Pin or clip together along both sides and across the bottom.
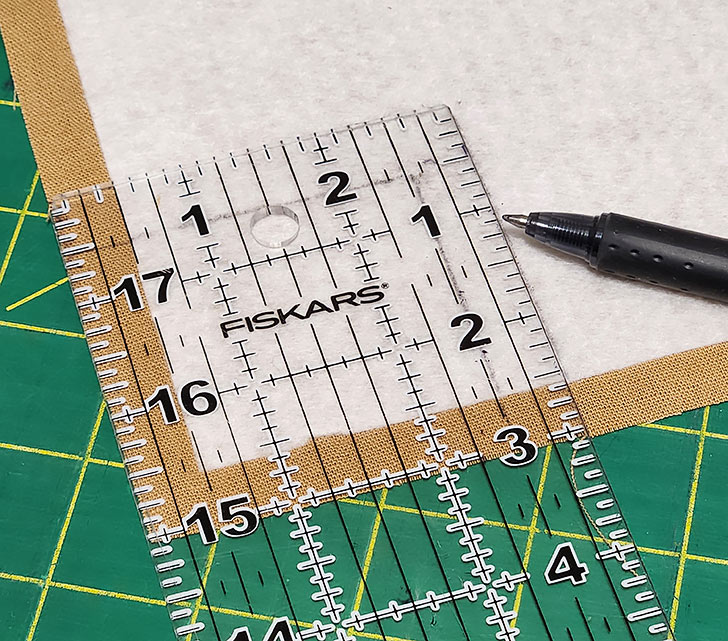
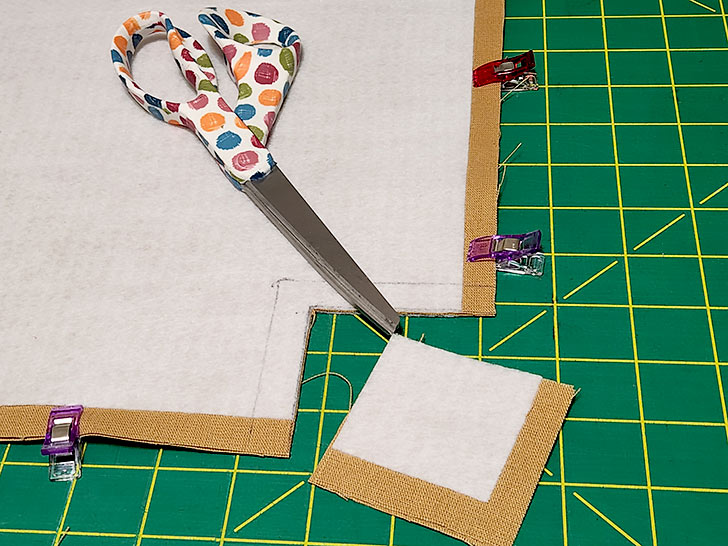
- Measure and mark squares of equal size at each corner. For this tote, we want a 5” finished corner, which means our squares are HALF that or 2½” x 2½”.
- Cut out each corner through both layers.

- Repeat the process with the two lining layers.
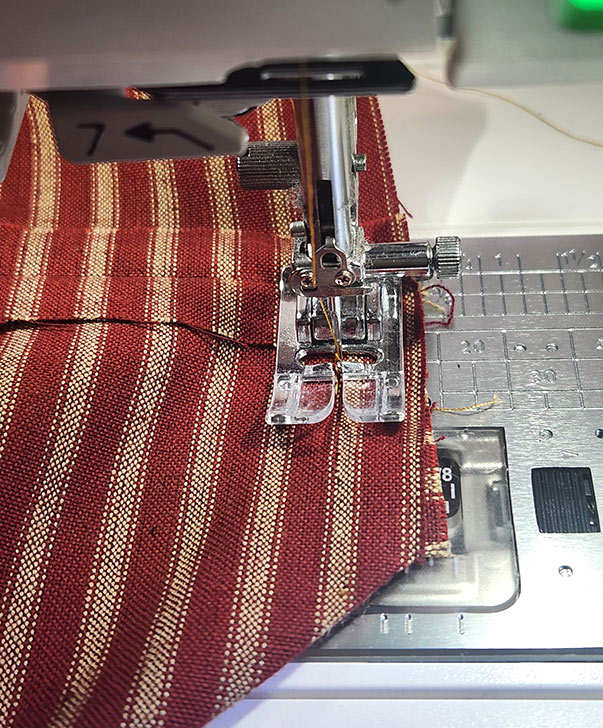
- Re-thread the machine with thread to best match the exterior fabric in the top and bobbin. Re-set for a standard straight stitch and attach a standard presser foot.
- Using a ½” seam allowance, stitch the side and bottom seams separately (because you just cut away the corner where you would have pivoted!).
- Press the seam allowances open and flat.
- Carefully align the side seam with the bottom seam. Pin in place.
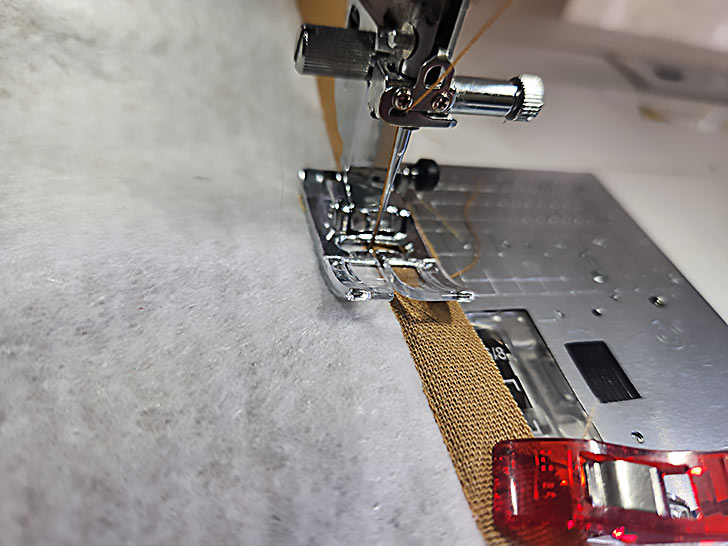
- Using a ½” seam allowance, stitch across the corner. In the photo below, we have our Open Toe Satin Stitch foot in place so you can best see the seam across the corner. For extra toughness in the corner, we recommend stitching across two or three times.
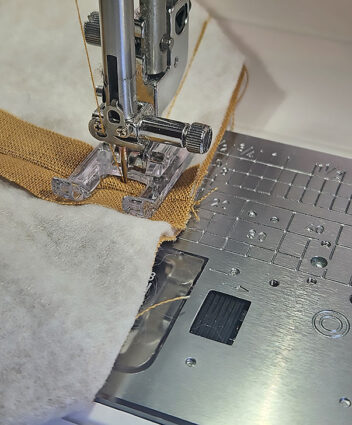
- Follow these same steps to seam the sides and bottom and box the corners of the lining.
NOLTE: If you are brand new to boxed corners, we have a full tutorial you can check out prior to starting the project.


Assemble the exterior and lining and topstitch
- Make sure your seam allowances are pressed flat on both the exterior and the lining.
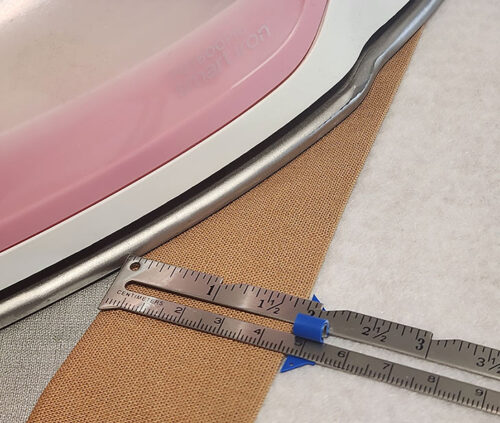
- In addition, to create the facing, on the exterior, you’ll create a double fold hem. To do this, first fold back and press the top raw edge ½”.
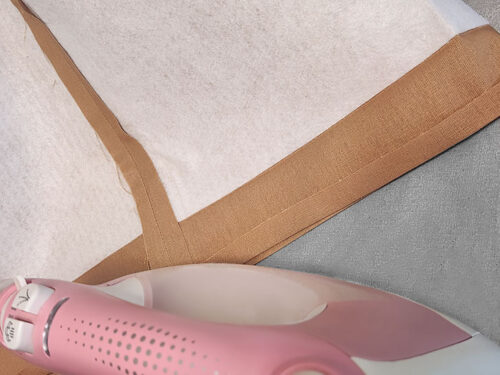
- Then fold down an additional 2” and press again. Make sure your top fold is sharp and even; you will unfold it to drop in the lining and want to be able to easily see and re-fold along the original crease line.
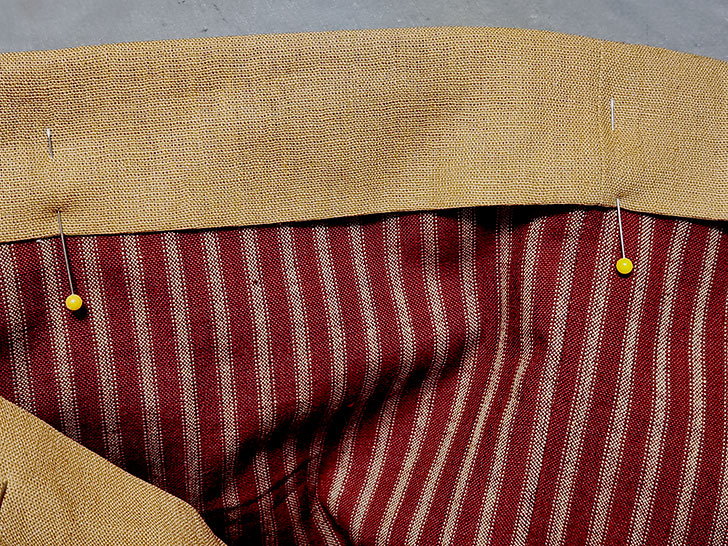
- Make sure the exterior is right side out. Keep the lining wrong side out.
- Slip the lining inside the exterior so the two layers are now wrong sides together.
- Push down the lining so the box corners of the two layers are flush. The side seams of the two layers should also be flush, and the top raw edge of the lining should align with the top of the fusible panel on the exterior. Lightly pin the layers together.
- Fold down the exterior along that original 2” crease line. The upper folded edge (the original ½” fold) should now come down inside the tote, covering the raw edge of the lining.
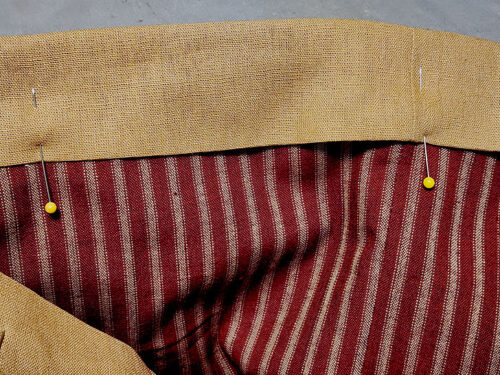
- Pin or clip in place all around the top.
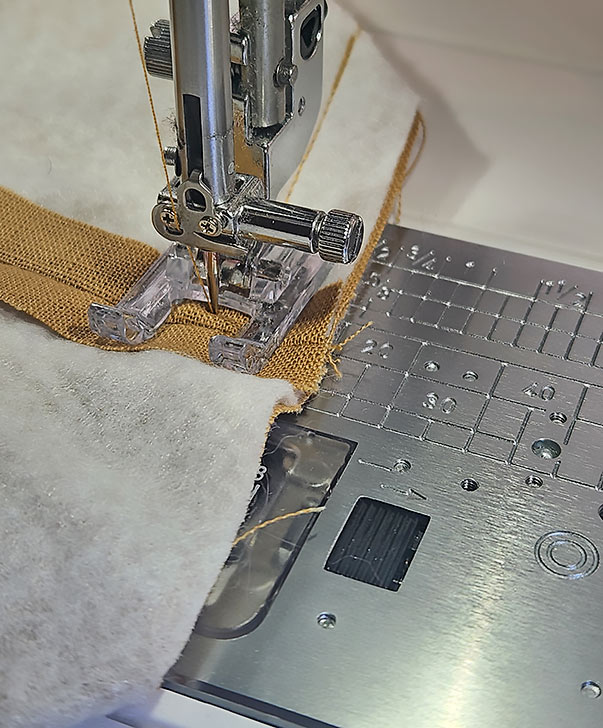
- Re-set the machine for the final topstitching. This stitch line will be very visible so you need to make sure you are set up for precision. We recommend using an Even Feed or Walking foot; or engaging your machine’s built-in fabric feeding system, such as the Janome AcuFeed™ Flex system, which is what we used.
- Re-thread with the slightly contrasting all-purpose thread in the top and bobbin. On our samples, we used a slightly darker tan on the Leather linen and a slightly lighter red on the Crimson linen.
- Set up for a heavy straight stitch. We again opted for the Janome Triple Stitch, slightly lengthening it to 3.0.
- Stitch all the way around, staying very close to the inner fold.


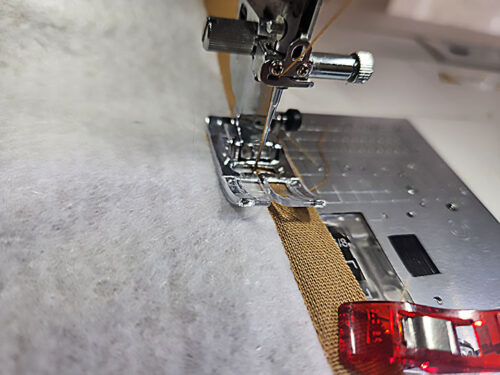
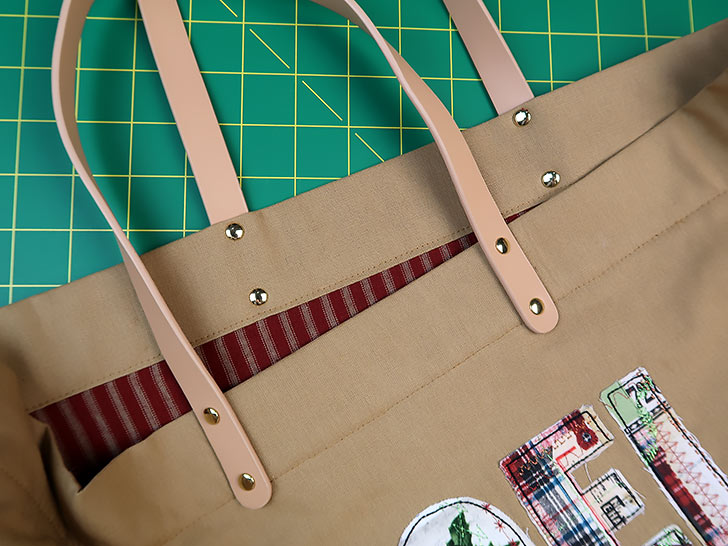
Apply the handles front and back
- Find center of the top edge both front and back.
- The handles should be set to attach with a 5” width on center. Measure 2½” to the left and right of center and mark each point with a pin.
- Place one handle in position so the pre-drilled holes of the handle are against the marking pins. The end of each handle should dip just below the topstitching about ¼”.
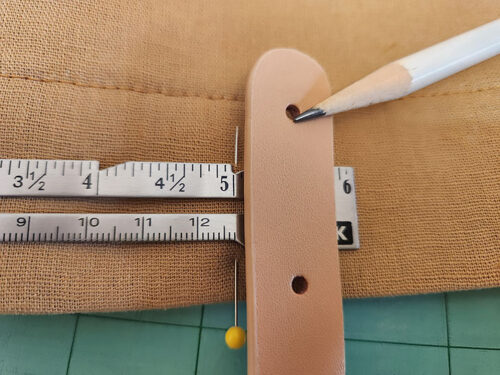
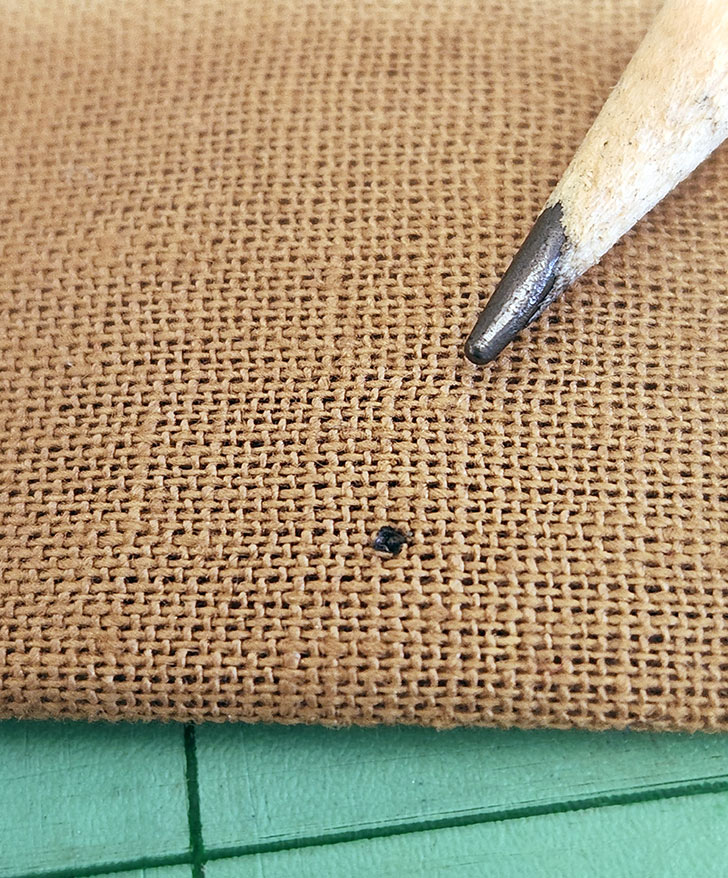
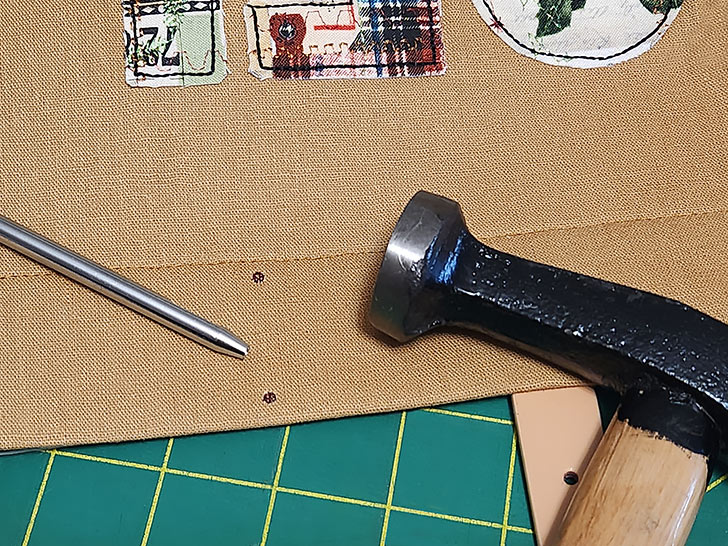
- Insert a marking pen through each hole to create each of the four rivet points. Repeat to mark for the back handle.
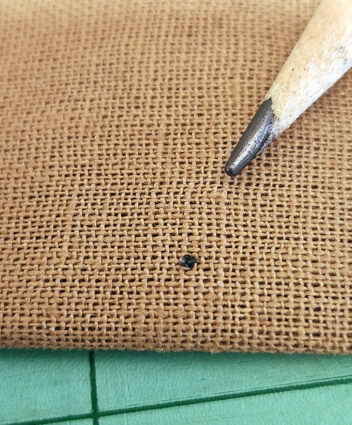
- Use your rivet cutting tool to make a hole at each of your marked points.
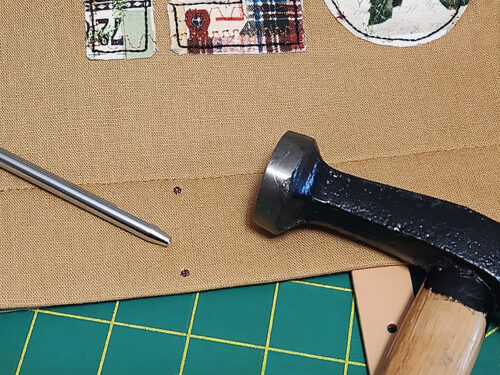
- Insert a rivet post through each hole, snap the rivet cap onto the post at the back, and use the post and anvil rivet tools to gently hammer together.

NOTE: If you are brand new to setting rivets, it’s easier than you might think… and there’s nothing like hitting your project with a hammer as a satisfying finish! Check our our full tutorial for details and a variety of setting tool options.


Project Design: Anne Adams
Sample Creation: Kathy Andrews, What Sew Ever